


Are you looking to transform your dull concrete floor into a stunning centerpiece for your home or business? Staining a concrete floor can be an easy and cost-effective way to add beauty and character to any space.




Imagine walking into a room where the floor isn’t just a surface to stand on but a work of art that reflects your style and taste. The best part? You can achieve this transformation yourself, without the need for expensive contractors or complicated tools.
In this guide, you’ll discover simple, step-by-step techniques to stain your concrete floor, turning it into a masterpiece that will leave your guests in awe. Ready to dive in and unlock the secrets to a gorgeous floor that’s uniquely yours? Let’s get started!
Preparation
Start by collecting all needed items. Concrete stain, a paint roller, and a tray are essential. You will also need cleaning supplies. A bucket, mop, and soap will do. Safety gear is important too. Use gloves and goggles. Ensure you have old clothes to wear. Staining can be messy.
Move all furniture away. The space must be empty. This prevents staining other items. You might need help with heavy things. Ask a friend or family. Make sure the floor is easy to access.
Sweep the floor first. Remove dirt and dust. Use a mop with soap and water. Scrub any tough spots. Wait for it to dry completely. A clean floor helps the stain stick better. This gives a smooth finish.
Choose The Stain
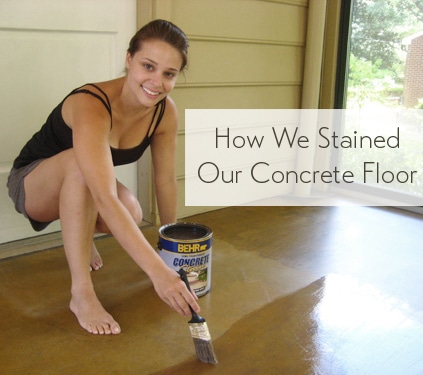
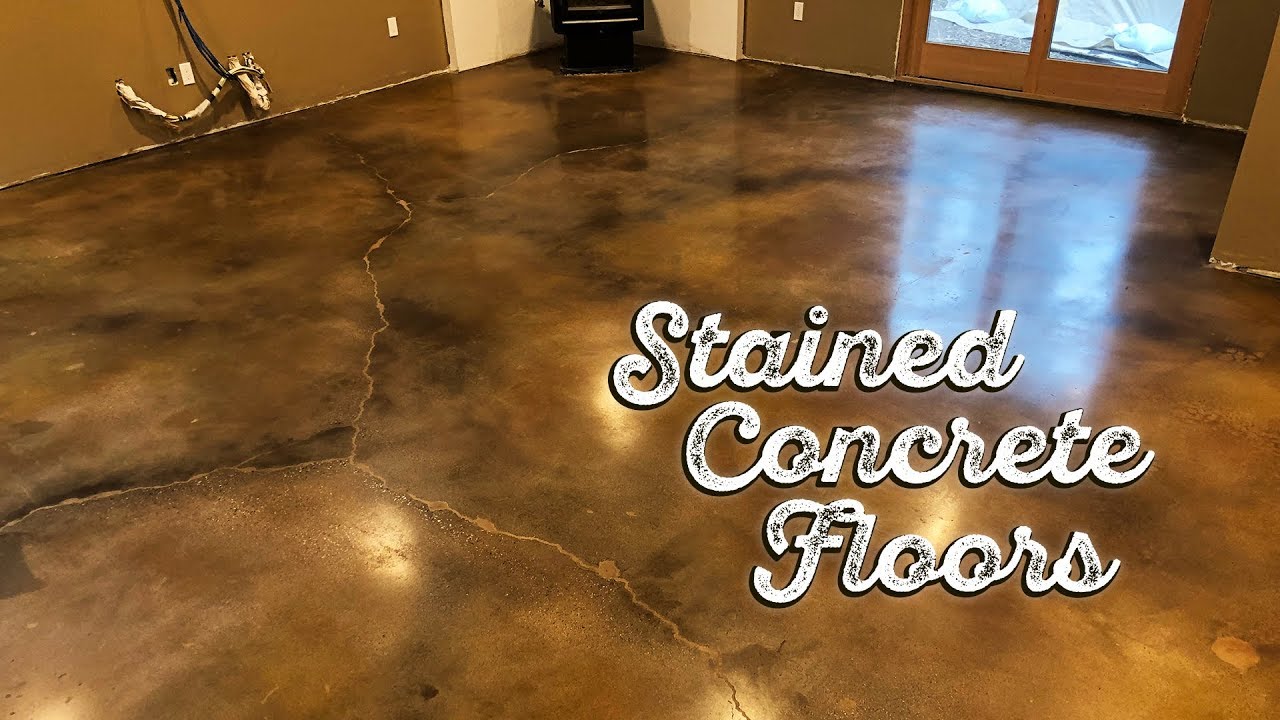
Concrete stains come in two main types. Acid-based stains create rich, deep colors. They react with the concrete’s minerals. This reaction makes each floor unique. Water-based stains offer a wide range of colors. They are easier to apply. They don’t react with the concrete. Instead, they coat the surface.
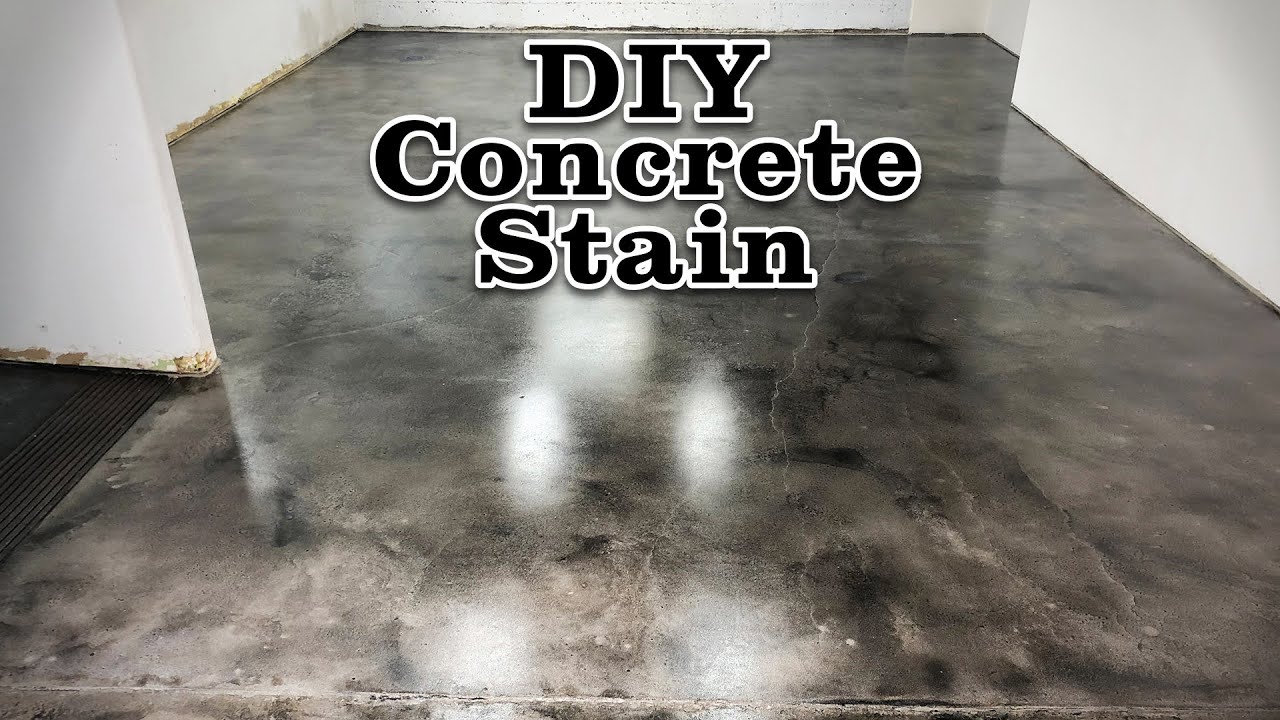
Pick a color that matches your space. Neutral colors are popular. They include browns and grays. Bold colors can make a statement. Consider the room’s light and size. A small room might need lighter colors. Light colors can make it feel bigger. Dark colors add warmth. They can make a large space cozy.
Test The Stain
Choose a small area on the floor for testing. This helps you see the color. Make sure the spot is not too visible. You don’t want mistakes to show. Use a brush or sponge to apply the stain. Wait for it to dry. This shows the true color.
Assess the color after it dries. Is it what you want? If yes, you can stain the whole floor. If not, try another color. Testing saves you from big mistakes. It’s a simple step but very important.
Apply The Stain
Staining a concrete floor can be easy with the right tools. A sprayer or roller works well. These tools help you spread the stain evenly. Uneven stain looks bad. It ruins the floor’s appearance.
Hold the sprayer close to the floor. Spray in a sweeping motion. Move the sprayer in circles. Keep it even. This covers the floor nicely. Check for missed spots. A roller can fix these spots. Rollers are good for small areas.
Dip the roller in the stain. Roll it on the floor. Make sure the stain is even. Press gently. Do not press hard. This will help spread the stain well. Remember, less is more. Too much stain is not good.
Neutralize The Stain
Neutralizing the stain is a crucial step in staining a concrete floor. It ensures a smooth, even finish. After applying the stain, use a neutralizer to halt the chemical reaction, preventing discoloration and enhancing durability.
Prepare Neutralizing Solution
Make a mix using baking soda and water. Use one cup of baking soda for every gallon of water. This will create a safe solution. Stir well until the soda dissolves. This solution will help stop the stain.
Apply And Rinse
Pour the solution on the floor. Use a mop to spread it everywhere. Ensure the solution covers all stained areas. Wait for the solution to sit for a few minutes. Then, rinse the floor with clean water. Use a mop or a hose for rinsing. Dry the floor with a clean towel or mop.
Seal The Floor
Selecting the right sealer is important. There are two main types. Water-based sealers are easy to use. They dry fast. Solvent-based sealers are very strong. They give a shiny look. Choose based on your floor’s need.
First, clean the floor well. Use a mop and water. Let it dry completely. Then, apply the sealer. Use a roller for even coverage. Start at the corner of the room. Work your way out. Apply a thin layer first. Let it dry fully. Apply a second layer if needed.
Maintenance Tips
Transform your space with a stained concrete floor. Begin by cleaning the surface thoroughly. Apply the stain evenly. Use a sprayer or roller for best results. Allow the stain to dry completely. Seal the floor to protect the finish. Enjoy a new look with minimal effort.
Regular Cleaning
Keep your concrete floor clean to make it last longer. Use a soft broom to remove dust and dirt. A gentle mop with water helps too. Avoid strong chemicals. They can hurt the floor. Regular cleaning keeps it looking nice. It also prevents stains. Clean spills right away. This stops them from soaking in. A clean floor is a happy floor!
Reseal As Needed
Concrete floors need a seal. The seal protects the floor. Check the seal every year. If it looks worn, reseal it. This keeps water and stains away. Follow the instructions on the sealant. Apply it evenly. Let it dry well. A good seal makes the floor last longer. It also keeps it shiny and strong.
Frequently Asked Questions
How Do I Prepare A Concrete Floor For Staining?
To prepare a concrete floor, clean it thoroughly to remove dirt, oil, and debris. Repair any cracks or imperfections. Ensure the surface is dry and smooth. Use a concrete cleaner or degreaser for tough stains. Proper preparation ensures even stain application and enhances the floor’s appearance.
Can I Stain Old Concrete Floors?
Yes, you can stain old concrete floors. First, clean the surface thoroughly to remove any residue. Repair any cracks or damage. Ensure the floor is free of moisture. Staining can rejuvenate old concrete, giving it a fresh, attractive look that lasts.
What Type Of Stain Is Best For Concrete?
Acid-based stains are popular for concrete due to their long-lasting finish. They penetrate deeply, creating rich colors and unique patterns. Water-based stains are easier to apply and offer a variety of colors. Choose based on desired look and durability needs.
How Long Does Concrete Stain Last?
Concrete stains can last several years with proper maintenance. Their longevity depends on traffic and usage. Regular cleaning and sealing extend the lifespan. Stains offer durable color, transforming concrete surfaces for years. Periodic resealing helps maintain their vibrancy and protection.
Conclusion
Staining a concrete floor transforms its look effortlessly. With patience and care, you achieve a stunning finish. Follow the steps closely for the best results. Prepare the floor thoroughly. Choose the right stain color. Apply evenly for a uniform look.
Let it dry properly to reveal its true beauty. This process adds character and warmth to any space. Feel proud of your new floor. It’s durable and stylish. Enjoy the change it brings to your home. Happy staining!

[…] tile floors the right way, so you can get cuts, layout, and coverage correct from the start. This step-by-step guide shows exactly how to take room measurements, account for grout lines and tile size, and calculate […]
[…] straightforward if you choose the right transition type and follow a precise install sequence. This step-by-step guide shows exactly how to measure, prep the edges, set the transition, and secure it for a clean, […]
[…] to install new ceramic tile directly over concrete tile floors? This step-by-step guide shows the exact prep, underlayment choices, thinset method, and grout process that determine […]
[…] to install new over tile ceramic tile floors without ripping everything out? This step-by-step guide walks you through the fastest, cleanest path—surface prep, proper underlayment choice, and the […]
[…] to remove paint from marble floors without damaging the stone? This step-by-step guide delivers the safest, most effective method for lifting paint while protecting marble from etching […]
[…] correctly, set the threshold level, and anchor it with the proper adhesive and finish trim. This step-by-step guide tells you exactly how to install marble thresholds so the edges lock in cleanly without rocking, […]
[…] reliably with a method that cuts, fits, and seals to avoid gaps, lippage, and cracked edges. This step-by-step guide shows the exact order to remove or protect cabinet legs, measure clearance, cut marble accurately […]
[…] you can install marble successfully and lastingly with the right underlayment and thinset. This step-by-step guide shows the exact prep, leveling, waterproofing, and setting process to prevent cracks, hollow spots, […]
[…] to know how to install marble floors on stairs without cracked stone or loose edges? This step-by-step guide walks you through the exact process—measuring and preparing the stair surfaces, setting marble […]
[…] to install marble floors without professional help? This step-by-step guide gives you the exact sequence—from subfloor prep and layout to setting and grouting—so your […]
[…] to know how to polish granite floors for a streak-free, mirror finish? This step-by-step guide shows the quickest winning sequence—clean, diamond-grind, densify, then polish—so your results […]
[…] granite floors are fixable, and this step-by-step guide shows the fastest, most reliable way to stop granite floor squeaks. You’ll get clear instructions […]
[…] you identify whether the stone is coming loose from the subfloor or the adhesive has failed. This step-by-step guide walks you through diagnosing the cause, removing the lifted sections, cleaning the substrate, and […]
[…] to calculate the material for granite floors fast and accurately? This step-by-step guide shows you exactly how to determine the right square footage—and the additional slabs and waste […]
[…] able to roll, tape, and fasten correctly without risking height issues or hollow spots. Follow this step-by-step guide to prep the base, set the underlayment, and proceed to granite installation with […]
[…] to install granite floor transitions that look seamless and stay tight? This step-by-step guide shows the exact process—measuring the height change, choosing the right transition type, […]
[…] to install granite over plywood floors? This step-by-step guide tells you exactly how to do it safely—when it works, what prep plywood needs, and how to prevent […]
[…] how to remove stains from terracotta floors? This step-by-step guide gives you the fastest, safest method—so you can lift common spots without damaging the finish. […]
[…] preserving the surface—then move to stronger cleaners only if the paint type demands it. This step-by-step guide tells you the safest way to get the color off and restore a clean, intact terracotta […]
[…] right subfloor prep and a transition profile matched to your tile thickness and floor height. This step-by-step guide shows you exactly how to measure, set, and fasten the transition so it won’t rock, crack grout […]
[…] without cracking or messy gaps—if you follow the right process from layout to fastening. This step-by-step guide walks you through prepping the terracotta, choosing the correct adhesive or fasteners, creating […]
[…] tile terracotta floors without lifting the existing tile or creating a weak, uneven finish? This step-by-step guide tells you exactly when you can tile, laminate, or install new flooring directly on top—and when […]
[…] a classic look—and you can do it successfully with the correct prep, substrate, and layout. This step-by-step guide walks you through every critical stage, from leveling the subfloor and choosing the right thinset […]
[…] to know how to clean mosaic tile floors without damaging the grout or leaving dull residue? This step-by-step guide gives you the winning method for a truly clean, streak-free finish, starting with the right cleaner […]
[…] to repair a mosaic tile floor, and want results you can actually count on? This step-by-step guide shows the exact fixes for cracked tiles, loose sections, and damaged grout—so you can stop the […]
[…] a straightforward repair—if you match the method to the scratch type and tile finish. This step-by-step guide shows the fastest, cleanest way to repair surface scuffs, remove deeper damage, and restore a […]
[…] grout-and-patch repair when the tile surface is intact and the subfloor isn’t crushed. This step-by-step guide shows you how to remove loose grout, reset the affected mosaic tiles, fill the dent with matching […]
[…] mosaic tile floors are repairable, and this step-by-step guide tells you exactly how to fix them so the tiles re-bond and stop lifting. You’ll learn how to […]
[…] the first time—by resetting the loose pieces and reestablishing a proper thinset bed. This step-by-step guide shows exactly how to identify the cause, lift the affected tiles safely, prep the substrate, and […]
[…] to fix discoloration on mosaic tile floors? This step-by-step guide shows the fastest, most reliable repair path based on what’s causing the staining—hard-water […]
[…] leveling, and sealing—so the edge stays straight and the tile doesn’t crack. This step-by-step guide tells you exactly how to measure and fit the threshold, prep the substrate, and secure the […]
[…] to install around stairs mosaic tile floors and want the cleanest, most reliable result? This step-by-step guide shows exactly how to plan the layout, cut and fit tiles to each stair tread and riser, and lock […]
[…] tile over plywood, you need a proven method—not guesses about what will “probably work.” This step-by-step guide shows exactly when plywood is a good subfloor, what prep and underlayment to use, and how to set, […]
[…] method that works whether you’re setting straight runs or finishing corners. This step-by-step guide shows the exact tools, concrete-rated fasteners, and clean sealing approach needed to keep the […]
[…] is usually a straightforward DIY job if you match the repair method to the scratch depth, and this step-by-step guide shows you exactly how to do it. You’ll learn what to clean, how to fill and level the damaged […]
[…] to install flooring over tile concrete floors and get a finish that won’t lift or crack? This step-by-step guide walks you through the prep, leveling, and fastening steps that determine whether your project stays […]
[…] drinks, because they can penetrate and dull the finish. If a stain remains, use a specialized concrete stain remover made for polished surfaces and test in a small, hidden area […]
[…] any damaged sealant or residue, and then refinish it to prevent repeat moisture intrusion. This step-by-step guide tells you exactly what to do first, what to avoid so you don’t worsen staining or etching, and […]
[…] the stain type: rust, oil/grease, and mineral/organic stains each require different concrete stain removers or etching solutions. For light etching from acidic spills, mechanical abrasion and […]
[…] slip-resistant polished concrete floors that actually hold up under real foot traffic? This step-by-step guide shows the exact process to polish concrete while adding the right surface texture, sealers, and […]
[…] to install thresholds for travertine floors correctly? This step-by-step guide walks you through the exact process—from measuring the opening and preparing the subfloor to […]
[…] to install travertine over plywood floors and need a reliable answer? This step-by-step guide shows when plywood is a safe substrate, what prep and underlayment system to use, and how to set […]
[…] to fix cracks in polished concrete floors fast and correctly? This step-by-step guide shows you the exact process—from assessing the crack type to cleaning, patching, grinding, and […]
[…] then repair the surface based on what the water actually did—staining, pitting, or haze. This step-by-step guide tells you exactly what to inspect, what products to use, and how to restore the shine without […]
[…] to know how to install travertine floors on stairs and get it right the first time? This step-by-step guide shows the fastest, safest method—from measuring and prepping stair treads and risers to setting […]