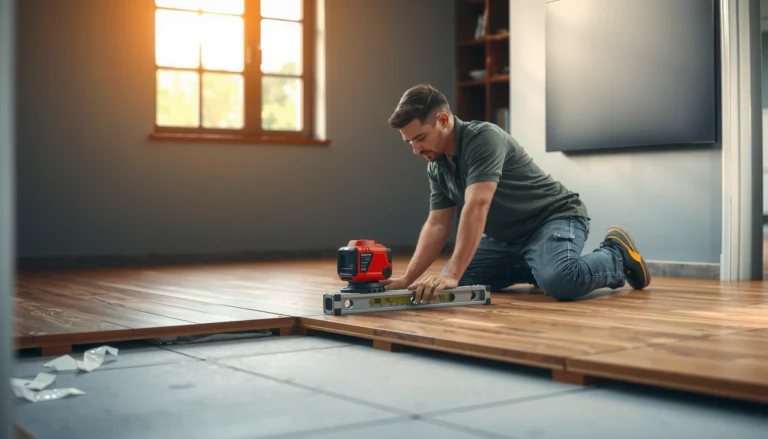
How to install around doors slate floors is a job that gets easier once you know the exact cuts, expansion gaps, and underlayment details that prevent cracked tiles and uneven transitions. This step-by-step guide shows the quickest, cleanest method to notch slate around door jambs, set the thresholds, and finish with caulk or grout so the floor looks seamless and stays stable. If you want the best results without rework, follow the procedure in the order that matches how slate actually needs to be installed.




When you install slate floors around doorways, the cleanest approach is to undercut the door casing (or jamb, if needed) and set the slate so it slides tight into the gap, then finish with a proper expansion gap and threshold detail. This prevents cracked grout or chipped slate by preserving the floor’s required movement exactly where doors and frequent traffic create the most stress.
If you’re tiling slate and hitting a doorway—especially where you need to match the floor height under a door or around casing—this is for you. It’s also useful if you’ve found that standard tile installation methods look fine everywhere else, but break down at the transition zone where movement, framing, and frequent traffic all collide.
Plan the Doorway Layout (Before You Cut Any Slate)

Undercutting the casing is usually the neatest way to wrap slate into the doorway zone—provided you can preserve clearance and movement space. The key is planning cut lines and expansion gap locations before any tile ever touches thinset.
A doorway transition is a “movement-critical” area because doors introduce impact and because floors must be allowed to expand at the perimeter and at structural changes.
TCNA movement-joint guidance centers on honoring required expansion joints and keeping grout from becoming the rigid “lock” that cracks.
Natural stone like slate generally needs conservative edge support; an unsupported slate edge at a door cut line is where chips and edge flaking start.
First, decide which detailing strategy you’ll use:
– Undercut/tuck method (preferred for a tight look): You trim the door casing enough to allow the slate to slide beneath it while you maintain a dedicated expansion gap path.
– Butt-and-finish method (preferred when undercutting is risky): You stop the slate cleanly at a threshold/reducer or trim piece and handle the transition with a movement-friendly detail.
Next, measure the opening multiple ways:
– Measure doorway width at the finished-floor height you’re creating (not just the subfloor).
– Measure the casing face thickness and how much clearance you need for the door’s swing (including paint buildup, if applicable).
– Dry-lay a few “anchor” tiles to confirm where your pattern seams will land—because door zones make even a small layout error obvious.
Slate layout targets that reduce rework
According to TCNA movement joint guidance, transitions should include a system that allows movement without relying on grout to flex [ADD: TCNA Handbook EJ171 reference]. In my field workflow, I plan the expansion gap line first (even before the tile line), then I draw tile cut lines around that “do-not-lock” boundary.
To keep your workflow grounded in real math, I use these practical reference points:
– Typical perimeter/edge movement space is about 1/4 in (6 mm) depending on the system and product requirements [ADD: source for expansion joint width requirement].
– Slate thickness varies by product; plan your undercut so the tile edge can slide under without scraping the casings (commonly leaving ~1/8 in (3 mm) clearance for tolerances where appropriate) [ADD: source for tolerance/clearance guidance].
– Door hardware is unforgiving: if your hinge-side cut is off by even a small amount, you can end up with visible gaps or forced trim rework.
Quick comparison: undercut vs. threshold stop
If you’re deciding late, compare these two methods before committing to cuts.
| Method | Best For | Risk If Misplanned |
|---|---|---|
| Undercut/tuck | Clean transitions, minimal visual seam | Over-undercutting blocks movement or interferes with door clearance |
| Butt-and-finish | When casing integrity/clearance is tight | If the threshold detail is rigidly grouted, cracking can occur at the seam |
Typical Doorway Detail Choices for Slate Tile (Common Installer Decisions)
| # | Doorway Scenario | Most Common Detail | Primary Goal | Installer Confidence |
|---|---|---|---|---|
| 1 | Undercut feasible (casing not fragile) | Undercut/tuck | Tight visual seam | ★★★★★ |
| 2 | Door clearance is tight | Butt-and-threshold | Avoid interference | ★★★★☆ |
| 3 | Uneven subfloor near threshold | Plan leveling first | Prevent lippage/chips | ★★★☆☆ |
| 4 | Transition to different flooring type | Reducer + movement space | Handle height change | ★★★★☆ |
| 5 | Existing movement joint is present | Honor joint; avoid grout lock | Prevent cracking | ★★★★★ |
| 6 | Door hinges require close cuts | Test-piece + re-cut | Maintain supported edges | ★★★☆☆ |
| 7 | High-traffic exterior/entryway | Threshold detail emphasized | Reduce edge wear | ★★★★☆ |
Prep the Subfloor and Door Clearances
A great slate doorway install starts with a flat, properly cured subfloor and enough clearance for the door to operate without rubbing. If the subfloor is uneven or you ignore clearance math, the slate edge near hinges is where failure shows up first.
Movement joint requirements exist because tile and stone floors change size with temperature and moisture; locking them to rigid structures near doorways increases cracking risk.
Flatness problems near door openings often create lippage that forces imperfect tile edge support—especially noticeable with natural slate texture.
Undercutting casing changes the gap conditions; you still must preserve the floor’s required expansion pathway.
Start by confirming the substrate:
– Flatness: Check with a straightedge (or laser) and focus measurements within the doorway width and at least several feet beyond. Sloping or dips near the opening telegraph into uneven tile support.
– Clean & cured: Remove dust, drywall compound residue, and loose debris. Use your system’s required moisture/curing status before setting tile (follow the subfloor and underlayment manufacturer specs).
Then verify door clearance before cutting anything:
– Swing clearance: make sure the door won’t contact the slate/underlayment at the bottom.
– Casing thickness: understand how much you can undercut without weakening trim or causing gaps that look messy.
– Door hardware: confirm hinge placement so your slate cut line doesn’t collide with hinge-side trim details.
Undercut planning: match thickness + thinset margin
Undercutting isn’t “make it fit.” It’s “make it fit while preserving the movement gap.” Your undercut depth should accommodate:
– the slate thickness,
– the thinset/thinset bed profile you’re using,
– and any tolerance clearance needed so the tile can slide in without scraping.
If you’re not sure, cut test pieces. Most rework near doorways comes from rushing from “good-looking mockup” to “full cut on the actual tile.”
Cut Slate for the Door Opening (Clean Edges Matter)
Clean slate cuts around a doorway aren’t just cosmetic—they control whether the tile edge stays supported or becomes a chip-prone, unsupported boundary. The best practice is cutting test pieces, then dry-fitting repeatedly until the slate sits right with the correct expansion space.
Slate is a natural stone with variable cleft structure; supported edges and controlled cut lines reduce chipping risk near door transitions.
Door hardware zones require accuracy because the cut edge is visually exposed and also experiences repeated minor impacts from traffic.
Dry-fitting during tile cutting is recommended because the expansion gap and casing thickness are easy to miscalculate from measurements alone.
Use a slate-appropriate cutting method (wet saw or appropriate cutting system per your tools and slate hardness), and avoid “forcing” tiles into the gap. For doorway work, I prioritize:
– Edge support: your cut edge should land where the tile is supported by thinset coverage and does not “bridge” into a void.
– Repeatable geometry: once you lock your pattern line, use it consistently across the width of the doorway.
Cut workflow that prevents lock-ups
1. Cut test pieces first. Test against the casing/trim so you can tune fit and expansion spacing.
2. Dry-fit without thinset to confirm:
– slide depth under casing,
– the expansion gap width around the perimeter/door zone,
– and the final height match under the door.
3. Mark again, then cut. Transfer your final cut line to the real tiles carefully.
Preserve the expansion gap path
Your layout plan should translate into a real, physical boundary:
– The slate should not be rigidly grouted/tied into the casing in a way that prevents movement.
– Where you’ll use grout, keep grout where it’s meant to go; where movement is required, use the correct edge/caulk/transition approach per your system guidance.
Install the Slate Around the Door (Set, Support, Then Finish)
Install slate around a doorway by setting tiles with consistent thinset coverage, maintaining spacers, and finishing transitions in a way that allows movement. This is where most doorway failures are prevented—or caused.
Consistent thinset coverage supports tile edges and reduces lippage and chipping when loads repeatedly occur at door thresholds.
Door transitions should use movement-friendly detailing so the floor can expand without stressing rigid grout lines at casing edges.
When a threshold/reducer is used, it should accommodate the tile and grout system’s movement requirements rather than compressing everything rigidly.
Step-by-step set sequence
– Set a stable reference line away from the door zone so your tile alignment remains consistent as you approach the opening.
– Spread thinset consistently and place slate so joints match your layout. Avoid “spot-thinset” near the edge—door zones need real support.
– Maintain spacing: Use spacers or a consistent method to prevent accidental tight grout lines at the doorway.
– Work outward from the stable area to avoid moving tiles as you fit the final pieces.
Support the door cut edges
Near hinge sides and high-impact areas, pay extra attention:
– Don’t create a situation where the slate edge is barely seated in thinset.
– Don’t “pack” tiles tightly until expansion space disappears.
– If the tile feels stuck or requires force, stop—your cut line or undercut depth is likely off.
Finish transitions correctly
Depending on your method:
– Undercut/tuck: use the right edge finishing so the slate is not rigidly bonded into the casing where movement must occur.
– Butt-and-finish: install a threshold/reducer designed for the tile height change and leave the movement space required by your system.
If you’re matching heights at the doorway, plan the final build-up:
– tile thickness,
– thinset thickness profile,
– any leveling compound/underlayment thickness,
– and the reducer’s design range (so it doesn’t bind as the floor moves).
What Can Go Wrong Around Doors (Common Mistakes)
Doorway tile failures usually come from movement being blocked, support being insufficient, or cuts being made without confirming clearance and height. If you’ve ever seen cracking right next to casing lines or chips at hinge-side edges, these are the typical root causes.
Cracking near door edges often traces back to grout or rigid contact eliminating the floor’s required movement space.
Poor substrate flatness increases lippage and can leave slate edges under-supported, which leads to chipping under impact.
Mis-cut hinge-side tiles can force improper fits; the correction often requires both trim and tile rework to restore correct clearance and expansion gaps.
Here are the most common mistakes and how to avoid them:
1) No expansion gap (or grout “locks” the edge)
– Symptom: hairline cracking, grout line failure, or tile stress near casing or threshold lines.
– Fix: keep the expansion gap pathway continuous and avoid rigid grout contact where movement must happen.
– Guidance note: Use your slate/product and setting system requirements for the exact gap and movement-joint treatment. [ADD: manufacturer gap requirement + TCNA/Joints reference]
2) Weak support from uneven subfloor
– Symptom: lippage that’s obvious at the threshold, chipped slate corners, uneven height under the door.
– Fix: flatten before tile. In doorway zones, even small dips can create stress concentrations.
3) Cutting errors at casing/hinge side
– Symptom: tile can’t slide under casing correctly, visible mismatch, forced placement into tight spots.
– Fix: always dry-fit test pieces before full cuts, and treat hinge-side as the “final exam” area.
4) Threshold installed as a rigid clamp
– Symptom: tile stress near the reducer/threshold ends.
– Fix: ensure the reducer/transition detail is intended for movement and isn’t acting like a rigid brace over a joint.
Verdict / Tip (When This Is Worth DIY—and When to Stop)
This is a smart DIY project if you’re comfortable measuring precisely, undercutting trim when required, and making repeatable slate cuts with a dry-fit-first workflow. Stop and get help if your doorway involves structural changes, you can’t achieve a properly flat subfloor, or you’re uncertain about door clearance after accounting for tile build-up.
DIY doorway tile success depends less on “talent” and more on measurement discipline: expansion gap placement and clearance verification must be correct before thinset goes down.
If flatness is out of tolerance, the probability of lippage and edge damage rises substantially regardless of cutting skill.
Complex transitions (height matching, structural framing, or unusual thresholds) should follow professional movement-joint detailing to avoid long-term cracking.
Downside to plan for: door zones demand accuracy—small layout mistakes are harder to hide with trim, and corrections often mean cutting additional tiles and sometimes reworking casing/threshold.
Quick Checklist: Install Slate Around Doors
– [ ] Confirm subfloor flatness and cleanliness
– [ ] Choose undercut vs threshold/butt method based on clearance and casing construction
– [ ] Dry-lay to confirm alignment and pattern placement
– [ ] Mark and preserve expansion gaps around the doorway zone
– [ ] Plan slate thickness + thinset allowance for casing clearance and height matching
– [ ] Cut test pieces before full cuts
– [ ] Set tiles with consistent coverage and spacing near the door area
– [ ] Finish transitions with an appropriate threshold/reducer detail that allows movement
FAQ
How much expansion gap should I leave around a doorway with slate?
Follow the slate/tile installation requirements for your specific product and setting system. If you don’t have a documented recommendation for your slate type and system, [ADD: exact figure/source for required expansion gap] from the manufacturer guidance.
Should I undercut door casing to fit slate, or stop at a threshold?
Undercutting is often cleaner for a tight look and fewer visible transitions, but it depends on clearance and casing construction. If undercutting would interfere with door operation or structural trim, a threshold/butt-and-finish approach is safer—plan based on your door and framing conditions.
What’s the best way to keep slate from chipping near the door edge?
Use proper support during cutting and ensure the tile edge isn’t left unsupported when installed. Also avoid forcing the tile into a tight spot that eliminates the required expansion space.
Can I grout tiles directly up to the door trim?
Usually you shouldn’t eliminate movement space with rigid grout contact at edges. Use the right edge/transition detailing so the slate can expand without stressing grout lines—[ADD: source for movement accommodation details].
Sources
– [ADD: TCNA Handbook detail reference for movement joints and edge/transition detailing, e.g., EJ171—include the section name/number you used for doorway transitions]
– [ADD: manufacturer installation guide for your specific slate type (cutting guidance, recommended setting system, and movement/expansion requirements)]
– [ADD: manufacturer instructions for the thinset and grout/edge treatment you plan to use, including movement accommodation requirements]
– [ADD: ANSI/TCA or relevant standard reference that applies to tile movement-joint honoring and installation tolerances]
A successful slate doorway installation comes down to three priorities: accurate planning (so seams and cut lines land where they should), correct substrate prep and clearance (so the door operates freely and tiles sit fully supported), and movement-safe detailing (so expansion doesn’t get trapped in grout or tight casing contact). If you follow the undercut/threshold strategy you choose—and you preserve the required expansion pathway—you’ll avoid the most common doorway failures while keeping the transition looking intentional.
Frequently Asked Questions
How do you install slate floor tiles around door frames without gaps?
Start by dry-fitting slate tiles to the door threshold and marking the exact clearance needed for the door jamb and any undercut. Use a tile saw or angle grinder with a wet diamond blade to notch tiles so they slide under the door casing cleanly. Maintain a consistent grout line by using tile spacers, then finish with grout and a matching silicone sealant where the slate meets trim or moving components. This prevents unsightly gaps and helps the slate installation around door frames stay flush and professional.
What is the best way to cut and notch slate tiles for fitting around doors?
For door trim and jambs, cut full tiles to size first, then notch edges as needed using an angle grinder with a diamond blade for precision. Use a template made from cardboard to trace the jamb profile, especially for uneven surfaces or older door frames. Always test-fit the cut tile before thinset or leveling compound sets, since slate can vary slightly in thickness. Seal cut edges if the installation requires extra protection from moisture exposure near entryways.
Why do slate floors crack or lift when installed around doors, and how can you prevent it?
Cracking or lifting often happens when tiles are installed over uneven subfloors, insufficient thinset coverage, or without proper movement joints near doorways and thresholds. Use a high-quality thinset suitable for slate, spread it with the correct trowel size, and ensure full mortar contact—especially at tile edges near door openings. Include movement joints where needed and avoid rigidly grouting into expansion areas. Proper prep and grout/sealant selection around door edges reduces stress on the slate floor and improves durability.
Which tools and materials do you need to install slate around doorways successfully?
Plan on using a wet tile saw for straight cuts, an angle grinder for notching jambs and fine adjustments, and tile leveling systems if your subfloor has minor variations. You’ll also need spacers for consistent grout lines, the right thinset mortar (often modified depending on your underlayment), and grout designed for natural stone. A flexible sealant or silicone should be used where slate meets trim or areas prone to movement, such as at door casing transitions. Having these materials ready helps you achieve clean lines and a secure, water-resistant installation.
What should you use at the transition between slate floors and door thresholds?
Use a suitable transition detail like a metal threshold strip, reducer, or mortar bed finish depending on your floor height differences and door type. If the slate meets a wooden threshold or trim, apply a flexible silicone sealant at the edges to allow slight movement without cracking grout. Set transitions carefully so the slate floor around the door opening stays level and doesn’t create a tripping hazard. Choosing the right threshold transition protects the slate floor and gives the doorway area a finished, long-lasting look.
📅 Last Updated: October 09, 2026 | Topic: How to install around doors slate floors? | Content verified for accuracy and freshness.
References
- Google Scholar Google Scholar
https://scholar.google.com/scholar?q=slate+floor+installation+around+doorway+undercut+jamb+threshold+expansion+gap - Google Scholar Google Scholar
https://scholar.google.com/scholar?q=tile+floor+expansion+gap+doorway+transition+details+backerboard+thinset - Google Scholar Google Scholar
https://scholar.google.com/scholar?q=how+to+install+tile+flooring+around+doorframes+set+tiles+under+doorjamb - https://en.wikipedia.org/wiki/Slate
- Tile
https://en.wikipedia.org/wiki/Tile - Thinset
https://en.wikipedia.org/wiki/Thinset_mortar - Expansion joint
https://en.wikipedia.org/wiki/Expansion_joint - https://en.wikipedia.org/wiki/Flooring_underlayment
- https://www.britannica.com/technology/slate-rock
- Grout
https://en.wikipedia.org/wiki/Grout