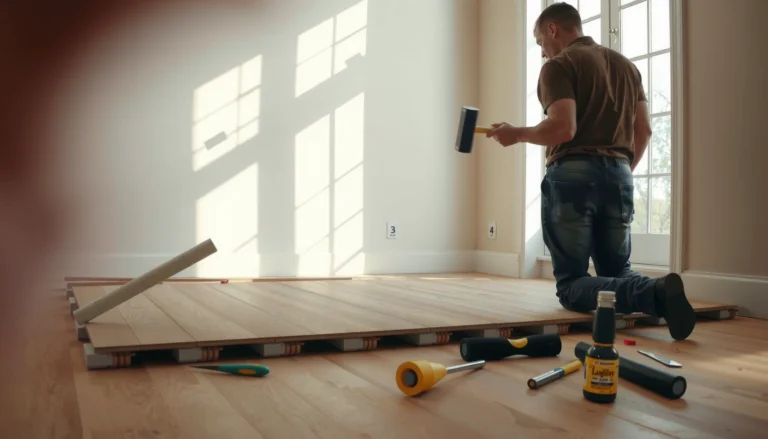
Want to install new over tile ceramic tile floors without ripping everything out? This step-by-step guide walks you through the fastest, cleanest path—surface prep, proper underlayment choice, and the right thinset and layout so your new floor bonds securely and stays flat. If you follow these instructions, you’ll know exactly what to do at each stage and avoid the most common failure points.



You can install new ceramic tile over an existing tile floor only when the old tile is solid, flat, and properly prepared for adhesion. The safest approach is to clean thoroughly, mechanically roughen the surface, and then use a tile-over-tile bonding system (as specified by the manufacturer) before setting your new tiles.
This guide is for homeowners planning a remodel where removing existing ceramic tile is impractical, expensive, or disruptive, but the current floor still appears structurally sound. It’s also helpful when you want a cleaner, faster path to a refreshed finish—provided you’re willing to do the prep work required for a reliable bond.
Check if your existing tile floor is suitable

You should only tile over tile when the existing surface is firmly bonded and flat enough to support new tile without movement or “telegraphing.” If the old floor has loose tiles, hollow areas, or major height variation, you’ll likely need a different prep strategy (or removal) before you ever open a bag of thinset.
Start by verifying the old tile is securely attached. Loose or rocking tiles act like a moving base, which can crack grout, debond mortar, and cause lippage. Next, confirm flatness: even a good bonding system won’t fully compensate for large dips or ridges, and those irregularities usually show through as stress points in the new tile.
“Tile-over-tile” installations depend on the existing tile being sound and properly prepared; a loose substrate is a primary cause of debonding and cracking.
Flatness of the substrate is a major predictor of lippage and failure risk in ceramic tile floors.
For homeowners, two practical checks usually catch the majority of problems:
– Bond verification: Walk the floor and listen/feel for hollow sounds; press down near grout lines and around suspect tiles to see if anything moves. Any rocking tile means the area is not suitable as a stable base.
– Flatness verification: Use a straightedge or level to check for high spots and dips. Measure across multiple directions (diagonal checks help). If the floor is uneven beyond what your selected tile-over-tile method allows, you may need grinding, patching, or removal.
Also factor in “real-world height constraints.” Adding tile, thinset, and leveling/patch material changes floor elevation, which can affect door clearances, stair transitions, and baseboard fit. If your remodel includes thresholds to adjacent rooms, plan those transitions early so the finished height doesn’t force awkward, uneven trim adjustments.
Helpful comparison note: even if the existing tile looks “fine” visually, bond and flatness tests determine whether it’s actually safe to build on.
Prep the tile surface for bonding
You can’t treat glossy tile as if it were bare concrete—you must clean and profile the old surface so the new mortar can mechanically grab it. The goal is to remove contaminants and create an adhesion-friendly texture, then patch/flatten any damage before you install.
Prep is the difference between a long-lasting installation and a redo. Most tile-over-tile bonding systems rely on surface preparation to improve mechanical bond, not on “miracle adhesion” over slick coatings.
Glossy or sealed tile surfaces typically require mechanical profiling (e.g., grinding/sanding) to provide a mortar-grip surface.
Contaminants like wax, grease, paint overspray, and certain sealers reduce bond strength and should be removed before mortar application.
Cracks and chips should be repaired with materials approved for the tile-over-tile system so the new mortar layer can transfer loads evenly.
Here’s a step-by-step prep approach that matches how manufacturers and installers think about bonding:
1. Clean thoroughly (decontaminate): Remove dirt, oil/grease, waxy residue, and any sealer films. If you have unknown coatings, plan on more aggressive cleaning and confirm adhesion using the system requirements.
2. Remove bond inhibitors: If the tile has been sealed previously, you often must remove the sealer (the exact method depends on the product). “Cleaner” isn’t always enough—some sealers require mechanical removal.
3. Mechanically roughen the tile: Use a grinder or sanding method to break the glossy surface. Avoid leaving shiny areas; you want a consistent profile so thinset can key in.
4. Patch and flatten: Fill cracks/chips and flatten localized problem areas using an approved patch/underlayment product for tile-over-tile work. Let repairs cure fully before you proceed.
A data-backed way to understand why “profiling” matters
Tile-over-tile failures are often bond failures, and bond failures are commonly linked to surface conditions rather than mortar brand. For example, porcelain is defined by low water absorption (≤0.5% per ISO 13006), which correlates with how difficult it can be for mortars to bond if surfaces remain too slick. According to ISO 13006, porcelain tiles have water absorption ≤0.5%. (This is one reason glossy/tightly vitrified surfaces demand correct profiling and an approved bonding system.)
Choose the right method and materials
You should select a tile-over-tile bonding system that is explicitly intended for installing new ceramic/porcelain tile over existing ceramic/porcelain tile. Then match the thinset (mortar) to both the substrate and the tile type—manufacturer instructions are not optional here.
Your “method choice” is really a system decision: the bonding method, the mortar type, the patch/leveling products, and the grout all need to be compatible.
Using a manufacturer-approved tile-over-tile system is critical because not every thinset is approved for every substrate condition.
Mortar selection depends on the tile type (ceramic vs porcelain) and the application (interior floor vs wet area), as defined in the mortar’s technical data.
What to consider before mixing anything
– Confirm your tile compatibility: Porcelain and ceramic can both go over tile when the system and mortar are approved, but you must follow the mortar bag/system requirements for your exact tile type and installation conditions.
– Pick the right mortar: Thinset is not one-size-fits-all. You’ll choose the mortar based on the manufacturer’s system (some systems specify a particular cementitious patch or require polymer-modified mortar categories).
– Plan layout now: Dry-lay to find center lines and plan your main cuts. This reduces field cutting at walls and helps you keep tile courses visually straight and consistent.
Quick “system-fit” comparison for tile-over-tile
Below is a practical comparison of approaches you may encounter. The key is that the approved system drives success.
| Approach | What it’s for | Main advantage | Main risk if you skip steps |
|---|---|---|---|
| Tile-over-tile bonding system (cementitious patch/primer + thinset) | Older tile floors needing build-up and improved bond | Designed for adhesion over existing tile | Failure if you don’t profile/clean or use unapproved patch components |
| “Direct thinset over tile” only when permitted by the system | Very stable, sound, and properly prepared existing tile | Simpler workflow | Debonding if the tile surface remains glossy/contaminated |
| Grinding + patching to restore flatness, then standard tile installation | When flatness is the primary issue | Better long-term performance for uneven floors | Extra labor/cost and potential height/transition challenges |
Install the new ceramic tile on top
You install the new tile by applying the correct mortar to a prepared substrate, setting tiles to the manufacturer’s coverage guidance, and maintaining flatness while you work. The finished floor is only as good as the mortar contact and layout control you achieve during setting.
Tile setting is where small decisions become visible weeks later. You’re aiming for full, consistent mortar contact so the tile doesn’t sit on ridges or partially bond.
Back-buttering (if required by the system) improves contact coverage and reduces the chance of hollow-sounding tile areas.
Consistent mortar combing technique and the correct trowel notch size directly affect coverage and bond quality.
The setting workflow (what to do, in order)
1. Mix mortar correctly: Use water ratios and mixing times from the mortar bag or technical data sheet. Don’t guess—mortar chemistry matters.
2. Use the approved trowel size: The mortar’s instructions specify a trowel notch size (and how it relates to tile size/thickness). Using the wrong trowel can reduce coverage.
3. Apply and comb mortar: Spread with the flat side, then comb with the correct notch in a consistent direction pattern (many installers cross-comb lightly before setting; follow system guidance).
4. Set tiles with full contact: Press tiles in place and wiggle slightly if permitted—your goal is uniform contact. Back-butter when required by the system or when using larger tiles.
5. Maintain alignment and flatness: Use spacers, check frequently, and correct minor lippage early. As you approach the exit, keep your workflow consistent so the floor doesn’t “drift” in level or line.
A key technical anchor: coverage and bond reliability
Tile installations require full mortar contact, especially over tile substrates that have already been exposed to years of use. According to ANSI A108 installation requirements (referenced through TCNA installation guidance), interior floor installations commonly target near-complete coverage to reduce hollow spots. (Exact percentages depend on the method and mortar category—always follow your selected mortar and system instructions.)
Grout, seal if needed, and finish properly
You grout only after the thinset cures for the time specified by the mortar manufacturer. Then you clean promptly to prevent haze and follow grout (and sealing, if applicable) instructions so the finish performs in real household use.
Finishing is not optional cleanup—it’s part of the performance system. If you rush grouting, you can weaken the bond between mortar and grout joints, or create surface problems like haze that takes longer to remove later.
Thinset must cure before grouting; rushing cure stages is a common cause of discoloration, weak grout, and cracked joints.
Grout haze should be cleaned promptly according to the grout manufacturer’s directions to avoid permanent residue and surface staining.
Practical finishing steps
– Cure: Let thinset cure as directed. Temperature, humidity, and airflow can change cure times, so check the mortar’s technical guidance rather than guessing.
– Choose the correct grout: Use grout recommended for your tile type and installation area. Wet areas (like bathrooms) generally require grout designed for that environment.
– Clean and control haze: Wipe and clean using the method recommended by the grout manufacturer to prevent cementitious residue.
– Seal only when needed: Many grout products don’t require sealing if the manufacturer says otherwise, while others recommend sealing for stain resistance. Follow the grout/tile manufacturer guidance.
When sealing matters most
If you’re installing in a high-traffic area or a kitchen, stain resistance becomes an everyday performance factor. Still, sealing is not a substitute for correct grout mixing, proper cure time, and good cleanup.
What can go wrong (and how to avoid it)
You’ll most often run into trouble when the existing tile isn’t fully stable or when the bonding system isn’t followed exactly. The fastest way to prevent problems is to treat prep as the main project, not the “extra work.”
Here are the failure modes that show up most in remodels where homeowners tile over existing tile:
– Over loose/hollow tiles: New tile can crack or debond when the base has movement.
– Skipping mechanical profiling: Glossy or sealed surfaces need profiling; “bond only” over slick tile is a frequent root cause of failure.
– Ignoring flatness: Uneven substrate increases lippage and concentrates stress.
– Wrong mortar system: Not every thinset is approved for tile-over-tile over tile; mismatch can void performance claims from the manufacturer.
Most “tile-over-tile” failures trace back to substrate movement, inadequate cleaning/profiling, or using mortar not approved for the chosen method.
Even with correct thinset, serious flatness issues can lead to lippage and grout cracking because tile and mortar can’t compensate for large ridges and dips.
Comparison view: Pros/cons of over-tile vs removal
| Option | Best for | Pros | Cons |
|---|---|---|---|
| Tile over tile (approved system) | Sound, stable, and reasonably flat existing tile | Faster, less dust, avoids landfill/tear-out | Dependent on existing tile condition; adds height |
| Remove and re-surface | Loose tile, major flatness issues, or repeated adhesion problems | More control over substrate quality | Higher labor, mess, and potential subfloor repair |
| Hybrid approach (selective removal + patch) | Problem areas are localized | Targets fixes where needed | Planning complexity and extra prep work |
Verdict / tip
Installing new ceramic tile over existing tile can be a smart remodel strategy when the old floor is solid, flat enough, and you use a tile-over-tile bonding system approved for that substrate. The biggest upside is speed and reduced demo disruption; the biggest downside is that you remain dependent on the condition and chemistry of the existing tile—if adhesion is failing in multiple spots, “over tile” can turn into a costly redo.
You should skip this method if you find widespread loose/hollow tiles, significant movement, or unevenness that can’t be corrected with approved grinding/patching and within your system’s flatness limits. If you’re unsure whether your substrate qualifies, consult the tile-over-tile system manufacturer or a qualified installer before committing.
The safer rule is: if the existing tile fails stability or bond checks, the tile-over-tile method should not be used.
When height changes matter (doorways, transitions, trim), confirm clearances before you start to avoid expensive carpentry fixes later.
📊 DATA: Typical Layer Contributors to Floor Height (what you need to plan for)
Typical Floor-Height Build-Up Components in a Tile-Over-Tile Remodel
| # | Layer/component | Typical thickness impact (mm) | Typical range (mm) | Practical effect |
|---|---|---|---|---|
| 1 | Existing tile floor | 6 | 6–10 | Baseline elevation |
| 2 | Thinset mortar bed (trowel-dependent) | 4 | 3–6 | Controls leveling/coverage |
| 3 | New ceramic tile body thickness | 9 | 7–12 | Affects clearance at doors |
| 4 | Grout joint allowance (tile-to-tile) | 2 | 1–3 | Usually minor height effect |
| 5 | Self-leveling/patch build-up (if needed) | 0 | 0–10 | Can drive the biggest change |
| 6 | Floor transition/thick-set threshold (when used) | 2 | 0–4 | Requires careful planning |
| 7 | Total added height (typical tile-over-tile) | 11 | 9–20 | Check door/trim clearance early |
Quick checklist (scan before you start)
– [ ] Existing tiles are tight (no loose/hollow spots)
– [ ] Surface is clean and mechanically roughened for bonding
– [ ] Cracks/chips repaired; flatness meets your tile system requirements
– [ ] You’re using a tile-over-tile approved bonding/mortar system
– [ ] Layout planned; trowel size matches manufacturer instructions
– [ ] Thinset cured before grouting
– [ ] Grout used correctly; finishing/sealing follows grout/tile guidance
If any test fails—especially bond stability—your tile-over-tile plan should be reconsidered before you start setting new tile.
Correct mortar trowel size and substrate prep are the two variables most tied to whether tile-over-tile performs.
FAQ
Can I install new ceramic tile directly over old tile without removing it?
You can only if the existing tile is securely bonded, clean, and properly prepared for adhesion, which often includes mechanical roughening. If tiles are loose or the surface is too uneven, you’ll need removal or a different approved preparation/patch approach.
What’s the most important prep step?
Surface preparation—especially cleaning and mechanically roughening glossy tile—is typically the difference between a long-lasting install and a failed bond. If contaminants or a slick surface remain, mortar contact can be dramatically reduced.
Do I need an underlayment when tiling over tile?
It depends on the approved tile-over-tile system you choose. Some systems use specific bonding/patch materials rather than a traditional underlayment, so follow the system’s installation instructions exactly.
Will this add thickness and affect doorways?
Yes. New tile plus mortar/patch layers increase floor height. Measure door clearances and plan transitions before installation so you don’t end up trimming doors or rebuilding thresholds under time pressure.
Is this method the same for porcelain, too?
Porcelain and ceramic can both be installed over tile when the system and mortar are approved for your specific materials. The critical step is matching your mortar/thinset requirements to the substrate and tile type as stated in the system documentation.
Sources
– [ADD: Manufacturer instructions/specs for a tile-over-tile bonding system you plan to use] (required for thinset type, preparation method, cure time, and flatness requirements).
– [ADD: Thinset/mortar manufacturer installation guidelines] (for approved substrates, trowel size, and coverage/bond requirements).
– [ADD: Grout manufacturer instructions] (for cure times, sealing recommendations, and wet-area suitability if relevant).
If your existing tile is solid, flat enough, and you follow an approved tile-over-tile bonding method, installing new ceramic tile over it can be a practical remodel shortcut with less demolition and disruption. Just remember: the method is only as good as the prep and compatibility—if you find widespread adhesion issues or unstable tiles, removal or a hybrid repair approach is the smarter, safer path.
Frequently Asked Questions
What’s the best way to prepare an existing over tile ceramic floor for new tile installation?
Start by cleaning the ceramic tile thoroughly and removing any dirt, grease, or wax that could prevent thinset adhesion. Check the surface for loose or cracked tiles, then repair them and grind high spots flat so the new floor is level. Scuff-sand or lightly abrade the glossy tile surface and vacuum well to improve bonding. If the tile is uneven or you can’t achieve a stable base, consider using a tile underlayment system designed for bonding to ceramic.
How do you install new tile over ceramic tile using thinset, and what type should you use?
Use a modified thinset mortar that’s specifically rated for bonding tile to existing tile, and follow the manufacturer’s mixing and application instructions. Apply thinset to the substrate with the flat side of the trowel, then comb additional thinset with the notched side, and back-butter tiles (especially for larger formats) to reduce voids. Maintain consistent coverage and use a level to prevent lippage, since installing over tile ceramic floors can reveal or amplify unevenness. Always use the correct trowel size to achieve the mortar bed thickness required by the product.
Why is floor leveling important when installing tile over tile, and how can you fix lippage or dips?
When you install tile over existing ceramic, any low spots, high ridges, or uneven grout lines can cause poor adhesion and uneven tile edges. Use a straightedge to identify problem areas, then grind down high spots or fill low areas with a compatible patch or leveling compound designed for tile-on-tile applications. For larger adjustments, consider a self-leveling underlayment that’s rated for bonding to tile. Lippage reducers, careful layout, and proper thinset thickness help keep the finished floor smooth and durable.
Which underlayment or backer board is recommended for tile over tile ceramic floors?
Many tile-over-tile projects don’t require backer board if you’re using an appropriate thinset and your existing surface is solid, flat, and well-prepped. If you need extra build-up or want a more forgiving surface, choose an underlayment system that’s approved for bonding to ceramic tile—follow the manufacturer’s instructions for fastening, seams, and thinset compatibility. Avoid generic underlayment materials that aren’t rated for tile-to-tile bonding, since they can lead to debonding or movement. In all cases, ensure the surface is clean and mechanically abraded where required.
What’s the best method to prevent grout cracking or loose tiles when tiling over ceramic tile floors?
Prevent issues by ensuring strong mortar coverage, proper surface prep, and correct grout selection for your conditions. Use a high-quality grout appropriate for floors, and consider a grout/adhesive designed for higher movement areas like entries or bathrooms. Let mortar cure fully before grouting, and apply grout consistently while using spacers to maintain even joints. After installation, allow proper curing time and avoid heavy traffic too soon to minimize cracking and ensure the tile installation over tile ceramic floors performs long-term.
📅 Last Updated: October 09, 2026 | Topic: How to install over tile ceramic tile floors? | Content verified for accuracy and freshness.
References
- https://en.wikipedia.org/wiki/Ceramic_tile
- Thinset
https://en.wikipedia.org/wiki/Thinset_mortar - https://en.wikipedia.org/wiki/Tile_backer_board
- Google Scholar Google Scholar
https://scholar.google.com/scholar?q=installing+tile+over+existing+tile+floor+preparation+thinset - Google Scholar Google Scholar
https://scholar.google.com/scholar?q=ceramic+tile+installation+over+tile+surface+profiling+mechanical+bond - Google Scholar Google Scholar
https://scholar.google.com/scholar?q=tile+over+tile+underlayment+uncoupling+membrane+installation - Google Scholar Google Scholar
https://scholar.google.com/scholar?q=cementitious+backer+board+installation+over+existing+tile+floor - Google Scholar Google Scholar
https://scholar.google.com/scholar?q=ANSI+A108+A118+tile+installation+over+existing+tile - Google Scholar Google Scholar
https://scholar.google.com/scholar?q=over+tile+floor+tile+installation+grout+and+thinset+requirements - Google Scholar Google Scholar
https://scholar.google.com/scholar?q=moisture+failure+tile+over+tile+floor+installation+performance