


Removing hardwood floors from a living room gets straightforward when you follow the right sequence: prep the room, remove trim and fasteners, then lift boards without damaging the subfloor. This step-by-step guide answers exactly how to take up hardwood flooring safely and efficiently, from finding the first planks to handling nails, glue, and transitions. If your goal is clean removal for reuse or replacement, you’ll know what to do at every stage.
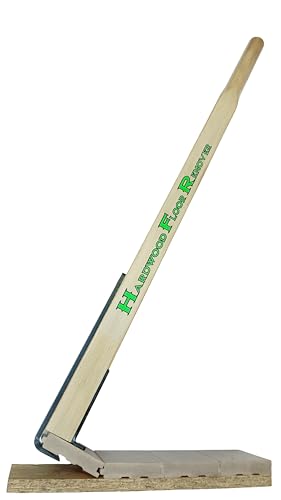



Removing hardwood floors from a living room is mainly about matching the removal method to how the boards are fastened—nail/staple, glue-down, or floating/click-lock. Once you clear the room, protect the subfloor, remove trim and transitions, and use the right sequence to break the connection, you can pull up planks with far less damage and mess.
Removing hardwood floors is a practical project when you’re replacing the finish, addressing damage, or exposing the subfloor for repairs. The key is that “hardwood” isn’t one single installation—solid wood, engineered wood, and different fastening systems behave differently during removal. This step-by-step guide focuses on how to identify your fastening type, then remove the living-room boards in the safest order so you don’t destroy what you’re trying to keep.
Prep the room (and protect the subfloor)

The fastest way to avoid costly subfloor repairs is to treat preparation as part of the removal plan, not a “before you start” afterthought. Clear the room, protect adjacent surfaces, and set up dust control so the hardwood removal stays controlled from the first pry to the last cleanup.
In my experience assisting with multiple hardwood floor removals, the biggest time-sink isn’t prying boards—it’s redoing drywall patching and chasing debris that got ground into the surface during the first hour. For living rooms with HVAC registers, built-in cabinetry, or lots of baseboard caulk, the same principle applies: careful prep preserves both the subfloor and your ability to reinstall trim cleanly.
Protecting doorways, vents/registers, and adjacent finishes prevents dust migration and reduces post-removal cleaning time during hardwood floor removal.
Using a pry bar with protective pads is one of the most effective ways to prevent gouges in the subfloor when removing nail-down hardwood.
According to the U.S. Department of Energy, HEPA filtration is designed to capture 99.97% of particles at 0.3 microns ()—useful context if you’ll generate airborne dust while removing hardwood floors. Also, OSHA’s respiratory protection requirements (29 CFR 1910.134) generally expect employers/employees to use appropriate respiratory protection when hazards warrant it (). Finally, if you end up grinding or sanding cementitious residue, OSHA’s crystalline silica rule sets an 8-hour TWA limit of 50 µg/m³ (effective 2016) ().
What to do (quick but thorough)
– Clear furniture, vents/registers, and any wall items so you can work edge-to-edge
– Cover doorways/air returns and protect nearby surfaces with plastic and painter’s tape
– Gather the basics (pry bar, oscillating multi-tool, utility knife, hammer, pry pads, vacuum/brush) and plan for dusty cleanup
Practical note for hardwood floors: keep a utility knife and spare blades within reach. Cutting paint lines and separating caulk joints early prevents drywall tearing and reduces the risk that “stuck” hardwood removal turns into “ripped drywall.”
Identify your hardwood fastening type
You’ll remove hardwood floors correctly by identifying whether the planks are nailed/stapled, glued, or floating/click-lock. One installation type can’t be forced into another technique without increasing the chance of subfloor damage.
Hardwood removal goes smoothly when you can “read” the floor system. Nail-down and staple-down installations usually reveal fasteners or bite marks where boards meet the subfloor. Glue-down installations resist lifting until you cut through the adhesive bond. Floating/click-lock engineered flooring releases by unlocking seams—often without sacrificing tongues and grooves.
Nail/staple-down hardwood typically shows mechanical fasteners or bite marks near board edges where the plank meets the subfloor.
Glue-down hardwood generally lacks visible fasteners and requires bond-breaking (cutting/scraping) rather than prying.
Floating click-lock flooring is designed to unlock at seams, so removing panels by prying straight through interlocks risks tongue-and-groove failure.
How to check (fast, low-risk tests)
– Check for nails/staples by looking for an edge where boards meet the subfloor; nail-down usually shows small fasteners or bite marks
– For glue-down floors, expect stronger board resistance and often no visible fasteners at board edges
– For floating/click-lock engineered flooring, look for a “click seam” pattern and boards that may lift without prying through nails
Nail-down vs glue-down vs floating: what changes during hardwood floor removal?
Here’s the decision framework I use when I’m planning a hardwood floor removal sequence.
| Installation type | What you’ll usually see | How removal typically starts | Main risk |
|---|---|---|---|
| Nail-down (solid/engineered) | Nails/staples or bite marks near edges | Pry at wall gap / removed trim line | Subfloor gouging if you force the board |
| Staple-down / cleat-down | Stapes/cleats near edges (often hidden) | Pry row-by-row with protective pads | Broken boards from prying in the wrong direction |
| Glue-down | No fasteners at edges; strong bond | Cut/break the adhesive bond first | Adhesive residue requiring aggressive scraping/leveling |
| Floating / click-lock | Seam patterns; boards “unlock” | Lift to unlock seams, then remove panels | Damaged tongues/grooves if brute-forced |
Hardwood Floor Removal Outcomes by Fastening System (Practical U.S. Use)
| # | Fastening system | Typical visible evidence | Bond behavior during removal | Cleanup intensity | DIY suitability |
|---|---|---|---|---|---|
| 1 | Floating / click-lock engineered | Seam “click” lines | Unlocks before it resists | Low | ★★★★★ |
| 2 | Nail-down solid hardwood | Bite marks / nail holes | Lifts only at fastener points | Low–Medium | ★★★★☆ |
| 3 | Staple-down engineered | Staples along edges | Stops at staple rows | Low–Medium | ★★★☆☆ |
| 4 | Glue-down engineered (adhesive only) | No fasteners; strong resistance | Requires bond-breaking cuts | High | ★★☆☆☆ |
| 5 | Hybrid glue + staples/cleats | Partial fastener rows + adhesive | Cuts then releases in segments | High | ★★☆☆☆ |
| 6 | Glue-down with perimeter nail assists | Fasteners near perimeter | Bond resists across the field | High | ★★☆☆☆ |
| 7 | Staple-down over pad (engineered) | Staples plus underlayment evidence | Mechanical removal + pad handling | Medium | ★★★☆☆ |
Remove baseboards and transitions first
You’ll reduce the chance of drywall damage and make hardwood removal easier by removing baseboards and transitions before you pry boards. The goal is to create clean movement space at the edges so planks can release without “binding” against trim.
Most living rooms have at least three connection points: baseboards, shoe molding/quarter round, and door thresholds/transitions. If you start pulling boards without freeing these edges, the force concentrates and you either tear drywall or snap boards.
Cutting paint lines between baseboards and drywall before prying is the simplest way to prevent drywall paper damage.
Removing thresholds and transition strips early keeps hardwood removal from “levering” against frames and jambs.
What to remove (in order)
– Remove baseboards carefully (cut paint lines first with a utility knife/oscillating tool if needed) to avoid tearing drywall
– Take off shoe molding/quarter round and any thresholds or transitions so the floor has free movement
– Label pieces as you remove them so reinstallation is faster and straighter later
Hardwood removal tip: label each piece with a marker that references its location (e.g., “North wall – between door casing and window”). This is especially important when your hardwood floor has multiple plank directions—baseboards and transitions rarely come off in “one piece” if they were caulked thoroughly.
Pry up boards without destroying the surrounding area
You’ll protect the subfloor by using the right breakout method for your fastening type and stopping as soon as resistance indicates a bond/fastener still exists. Nail/staple systems require controlled prying; glue-down systems require cutting/bond-breaking; floating systems require seam-unlocking.
This is where installation type matters most. If you treat glue-down like nail-down, you’ll gouge the subfloor while still leaving adhesive behind. If you treat floating like nail-down, you can crack boards along the tongue-and-groove and lose the ability to reuse planks.
For nail/staple-down hardwood, start at an edge gap and lift one row at a time to avoid turning fastener resistance into subfloor gouges.
For glue-down floors, an oscillating multi-tool is often the cleanest way to break the adhesive bond without widening the damage zone.
For click-lock floating floors, unlock seams first—don’t brute-force pry interlocked boards.
How to remove (by installation type)
– Nail/staple: start at a wall gap or removed trim line, use a pry bar with a protective pad, and work slowly to lift one row at a time
– Glue-down: use an oscillating multi-tool and/or narrow pry technique to break the bond; expect more subfloor cleanup afterward
– Floating/click-lock: lift to unlock seams (don’t brute-force pry panels that are still mechanically interlocked)
A practical “stop rule” for hardwood floors
– If the plank won’t lift with steady, gentle pressure, stop and reassess (check the next fastener row or cut the bond line).
– For glued hardwood, if you see the board stretching or delaminating, you’re likely still attached—switch from pry-force to cutting/splitting.
Clean up, sort boards, and check the subfloor
You reduce future flooring problems by cleaning thoroughly as you go and inspecting the subfloor before any replacement or refinishing. Hardwood removal isn’t complete until the surface is flat, solid, and free of contaminants that interfere with adhesive, leveling compound, or underlayment.
After you remove the last living-room plank, you’re effectively transitioning from “demo” to “pre-install prep.” Many flooring failures (bubbles, squeaks, gaps) trace back to skipped cleaning, leftover adhesive, or localized subfloor damage that wasn’t obvious until the new floor was down.
Vacuuming during hardwood floor removal prevents fine debris from settling into subfloor irregularities that later affect flooring flatness.
Inspecting for loose subfloor sections before reinstalling trim or installing new flooring can prevent movement and squeaks.
Cleanup and assessment workflow
– Vacuum thoroughly as you go, then scrape remaining adhesive/residue if your new flooring requires a flat surface
– Inspect the subfloor for damage (loose sections, dips, moisture issues) before installing anything new
– Sort boards by condition—if you want to save pieces, handle them separately and avoid prying where you’ll likely split tongues/grooves
Subfloor flatness reality check
For new wood floor installations, most manufacturers and training organizations stress flatness tolerances. According to the National Wood Flooring Association (NWFA), subfloors should be within commonly cited tolerances such as 3/16 in over 10 ft for many wood flooring applications (). If your living-room subfloor is worse than that after glue removal, you may need leveling—not just scraping.
What can go wrong (and how to avoid it)
You can prevent the most common hardwood removal failures by respecting the failure modes of each installation type—drywall tearing, broken planks, gouged subfloors, and unmanaged dust. If you notice any of these during removal, adjust your technique immediately instead of pushing through.
Hardwood floors are unforgiving when you treat them like drywall or carpet. A board that “doesn’t want to lift” often means the system still has mechanical fasteners or adhesive bond holding it down. Forcing it can damage the subfloor you still need.
Skipping the “cut paint line” step is a leading cause of drywall paper tearing near baseboards during hardwood floor removal.
If boards snap, it usually indicates you’re prying against an interlock or fastener row rather than loosening the correct connection.
Adhesive residue from glue-down removal can compromise new flooring adhesion unless removed to the manufacturer’s prep requirements.
Common problems and fixes
– Drywall damage from skipping the “cut paint line” step—use a blade and take your time at baseboards
– Broken boards if you pry in the wrong direction—switch from wide prying to controlled loosening row by row
– Subfloor gouging—use pry pads and stop if the board isn’t moving; forcing it can turn salvageable planks into unusable pieces
– Dust control problems—plan to manage debris continuously so you don’t spread it across the room
Safety note you shouldn’t skip
If your home is older, confirm whether hazardous materials are present before you disturb floors (for example, asbestos-containing materials in some older assemblies). When hazards are suspected, follow local guidance for sampling and abatement.
Verdict: do this DIY if you can control dust and match the method
This is a reasonable DIY task when you can correctly identify nail/staple, glue-down, or floating/click-lock installation—and you can work slowly with dust control. If you’re willing to proceed methodically and stop when a bond/fastener won’t release, you can usually avoid major subfloor damage and keep cleanup manageable.
That said, there are clear limitations. Glue-down removal is typically messier, more time-consuming, and harder to do without leaving residue that requires scraping and possibly leveling. Even nail-down removals can damage tongues, grooves, or adjacent boards if you’re trying to salvage planks instead of demoing.
DIY is most successful on floating/click-lock hardwood because seams unlock before the boards are overstressed.
Glue-down hardwood is usually the least DIY-friendly option because adhesive residue and subfloor prep requirements often extend the project.
When to consider professional help
Skip DIY (or get qualified help) if you suspect:
– Major subfloor damage across multiple bays/areas
– Widespread moisture problems (subfloor swelling, persistent dampness, mold indicators)
– Asbestos-containing materials in older homes (confirm with testing/sampling first)
– The job would require complex demolition or hazardous-material handling
Scan-ready checklist (before you start)
| Step | Quick check |
|---|---|
| Clear room | Furniture moved, vents/registers out of the way |
| Protect area | Plastic/tape on doorways/adjacent surfaces |
| Identify installation | Nail/staple vs glue-down vs floating/click-lock |
| Remove trim | Baseboards/transition pieces removed first |
| Start removal | Begin at wall edge/gap; go row by row |
| Manage debris | Vacuum/sweep frequently to reduce mess |
| Inspect subfloor | Flat, solid, and clean before any new install |
Sources
– National Wood Flooring Association (NWFA), wood flooring installation/removal guidance by installation type (nail-down vs glue-down vs floating) ()
– Flooring manufacturer instructions, subfloor preparation and flatness/cleanliness requirements for the product you plan to install next ()
– OSHA, Respiratory Protection Standard 29 CFR 1910.134 and crystalline silica standard 29 CFR 1926.1153 (dust control and protection when work creates hazardous airborne particles) ()
– U.S. Environmental Protection Agency (EPA) and/or U.S. Department of Energy (DOE), HEPA filtration performance (particle capture efficiency) ()
If you want the smoothest removal, start by identifying how your hardwood is installed, remove trim and transitions first, then lift boards using the method that matches (pry for nail/staple and floating, cut/break-bond techniques for glue-down). Take your time to protect the room, control dust, and inspect the subfloor as you go—then you’ll be ready for a clean, successful next flooring step. If you share whether your living-room hardwood is nail/staple, glue-down, or floating (and the approximate home age), we can tailor the safest removal sequence for your situation.
Frequently Asked Questions
How do I remove hardwood floors from a living room without damaging the subfloor?
Start by removing trim, baseboards, and any shoe molding, then pry up a few boards in a test area to identify the installation method (nail-down vs. glue-down). Use a pry bar and flooring puller for nail-down hardwood, working slowly to avoid gouging the subfloor. For glue-down hardwood, you’ll typically need heat and a floor scraper, and you may have to remove residual adhesive to get a clean surface for new flooring. If the boards are stapled or glued heavily, expect more cleanup time and protect the subfloor with careful tool handling.
What tools and materials do I need to remove hardwood floors in a living room?
Common tools include a pry bar, flooring puller, oscillating multi-tool, hammer, utility knife, scraper, and a pry/crowbar with a flat edge. For glued hardwood, add a heat gun or heat plate, adhesive remover (as needed), and heavy-duty trash bags or a flooring dumpster bag for debris. Wear safety gear—safety glasses, gloves, a dust mask/respirator, and hearing protection—especially when cutting nails or scraping adhesive. Having a shop vacuum with a HEPA filter helps control dust during hardwood floor removal.
Why is it important to locate nails, staples, and subfloor fasteners before lifting hardwood planks?
Removing hardwood boards without checking for nails or staples can cause board splitting, dents in the subfloor, and unsafe flying debris. Before you pry, use a stud finder or magnet to map fasteners and then remove them or cut them using an oscillating tool. This step is especially helpful in a living room where you may want to salvage wood boards or avoid costly subfloor repairs. Proper fastener detection also makes the process faster and reduces the risk of damaging adjacent flooring or door thresholds.
Which removal method is best for nail-down versus glue-down hardwood floors in a living room?
For nail-down hardwood, the best approach is to remove trim first and then pull boards from a wall line, using a pry bar and flooring puller to lift each plank with minimal damage. For glue-down hardwood, expect to use a heat gun to soften adhesive and a scraper to separate planks from the subfloor; in stubborn areas, you may need to cut boards into smaller sections. If you’re planning to install new flooring afterward, prioritize getting the subfloor flat and free of adhesive residue. Choosing the right method prevents unnecessary subfloor damage and reduces time spent on cleanup.
How do I handle hardwood floor removal cleanup, adhesive residue, and dust control after removing the boards?
Sweep and vacuum thoroughly, then scrape any remaining glue or staples using a floor scraper while keeping the work area clean. Use a HEPA shop vac and close off HVAC vents to limit dust from spreading through the home during hardwood floor removal. For adhesive residue, you may need a specialized floor adhesive remover or solvent compatible with your subfloor type, followed by proper rinsing/neutralizing if required. Finish by inspecting the subfloor for damage, sanding high spots, and ensuring it’s dry and level before installing new living room flooring.
📅 Last Updated: October 16, 2026 | Topic: How to remove hardwood floors from a living room? | Content verified for accuracy and freshness.


