Want to estimate the cost of gym floors quickly and accurately? This practical breakdown gives you a clear, cost-per-area method to calculate total installed pricing using the right thickness, surface type, and subfloor prep. You’ll leave knowing exactly what to budget—and what line items to watch—before you call for quotes.
If you want a reliable estimate, start by calculating your total square footage and then price the flooring system by material, thickness, and subfloor needs. After that, add line-item costs for prep/repairs, underlayment, adhesives or interlocking systems, and installation labor. This article walks you through a simple way to build a cost range you can actually use for planning and bids.
If you’re outfitting a garage gym, studio, or full commercial facility, this guide helps you estimate gym floor costs without missing the “hidden” expenses that commonly blow up budgets—like surface prep and edge details. It’s written for budgeting and comparing options, not for replacing engineering or site-specific design.
Step 1: Measure square footage (and note floor conditions)
The fastest way to estimate gym flooring cost is to lock the square footage first, then document what’s under the floor. In practice, prep and subfloor condition often determine whether your bid comes in “on paper” or turns into a change-order spiral.
Measure the area precisely (and plan for waste)
Measure the space as length × width, then add an allowance for closets, ramps, built-ins, and odd cuts. Even when your area looks rectangular, gym layouts include transitions (doorways), equipment footprints, and cut lines around posts—each adds waste and labor.
A practical rule:
– Add 5–8% waste for straightforward rectangular installs.
– Add 8–15% waste if you have many seams, corners, pillars, or irregular edges (common in commercial buildouts).
Also verify whether you’re including:
– Wall-to-wall coverage or partial coverage (e.g., lifting zone + cardio zone).
– Baseboards removal (if required by your flooring type).
– Flooring height alignment at door openings and to adjacent rooms.
Document subfloor condition (this changes the price)
Gym floors are “forgiving” only up to a point. When contractors estimate, they’re really estimating the total system: your flooring plus what it’s attached to or sits on.
Focus your notes on:
– Cracks / spalling: indicate patching or grinding needs.
– Moisture risk: may require a moisture barrier/coating or specific underlayment.
– Levelness (high spots/low spots): impacts install quality and seam performance.
– Existing surface type: concrete, tile, wood subfloor, old adhesive, paint—each has different prep requirements.
According to the National Institute of Standards and Technology (NIST), 1 inch equals 25.4 mm (unit conversions affect measurement accuracy) . If you’re working with thickness specs (e.g., 8 mm vs 10 mm), keep your conversions consistent—small differences can change the “compatible” underlayment thickness.>
Measure square footage is the cost baseline: every later line item (material quantity, seams, labor hours) scales from your total area.
>
Subfloor levelness and moisture condition can directly increase prep scope beyond the flooring material cost.
>
Waste allowance matters most where gyms include corners, thresholds, and equipment zones that force extra cutting.
Step 2: Choose the gym flooring type (material + thickness)
Choosing the right flooring type answers one core budgeting question: what performance do you need, and what will you pay to get it? Thickness, material behavior, and install method all affect both cost per square foot and the labor/time required.Compare common gym flooring categories by performance
In most gym installs, you’re selecting among four common approaches:
1. Rubber rolls (often for cardio-heavy areas)
– Typically chosen for larger, open runs.
– Seam planning is still important, but cutting is usually simpler than tile grids.
2. Rubber tiles (often for mixed use)
– Easier to manage around obstacles.
– Seams and edges are still a factor—especially in commercial environments.
3. Interlocking tiles/mats (often for quick installs or modular zones)
– Popular for garages, renovations, and demo-friendly setups.
– Cost can look lower upfront, but verify the manufacturer’s requirements for edge locking and subfloor flatness.
4. Specialized systems (e.g., lifting platforms, dual-layer assemblies, or commercial sport flooring)
– Used when impact and ball/roller bounce characteristics matter (some studios, PT facilities, and sports training spaces).
– These are where budgets can shift from “flooring” to “systems engineering,” even when your goal is just practical gym safety.
Decide on full coverage vs zones (coverage changes the math)
Coverage method affects:
– Material quantity (waste and seams)
– Install labor time (layout, cutting, patterning)
– Transition detailing (doorways, equipment boundaries, and wall edges)
For example, a common approach is:
– Zone A (lifting/impact): thicker rubber or engineered shock-absorption
– Zone B (cardio/stretch): thinner rubber rolls or tiles for comfort
From a cost perspective, zone planning can be a powerful lever—but only if your transitions are properly detailed.
>
Flooring coverage strategy (full, partial, or zoned) materially changes total cost by reducing area, seams, and edge transition complexity.
>
Thickness is not just comfort—spec thickness often ties to impact attenuation expectations and compatible underlayment requirements.
>
Rolls and tiles trade off labor profiles: rolls can reduce cutting time in straight runs, while tiles can reduce waste in irregular layouts.
Step 3: Price the system (materials, underlayment, and accessories)
The real estimate starts when you separate “flooring” from everything else that makes it work. A common mistake is pricing only the top surface and forgetting underlayment, adhesives, transitions, and the installation hardware/support items your spec requires.
Build line items like a bid, not like a guess
Use these buckets so you can compare options apples-to-apples:
1. Flooring material
– Rolls/tiles/mats
– Thickness (e.g., 8 mm vs 12 mm rubber)
2. Underlayment/base system
– Only if required by the product spec or your subfloor condition
– Could include moisture barriers, cushioning layers, leveling compounds, or compatible base sheets
3. Adhesives, fastening, or interlocking components
– Adhesives (and required trowel/coverage) vary by surface type
– Interlocking systems may still require edge treatment accessories depending on movement requirements
4. Transitions and edge details
– Door thresholds, ramp transitions, and wall/base edge finishes
– These are especially important for safety and trip-resistance
5. Finishing and accessories
– Sealants (where specified)
– Marking/premier trim pieces (if included in your scope)
Use a coverage-first mindset
Every flooring manufacturer includes installation instructions and coverage guidance (for adhesives and sometimes for underlayment). Those specs determine your true material count and labor workflow.
Also keep unit conversions straight when you’re working between metric specs and imperial quotes:
– According to NIST, 1 square yard = 9 square feet (useful when spec sheets list coverage by square yard) (NIST).
– 1 square foot = 0.092903 square meters and 1 square meter = 10.7639 square feet (helps when product specs use metric dimensions) (NIST).
Mandatory: Example cost-driver table (for budgeting ranges)
Typical Gym Floor Cost Drivers (Planning Impact, U.S. Builds)
| # | Cost driver | Planning allowance (typical) | Common scope risk | Budget impact score |
|---|---|---|---|---|
| 1 | Subfloor grinding + crack repair | $3–$7 per sq ft | Medium | ★★★★★ |
| 2 | Moisture mitigation (if required) | $2–$6 per sq ft | High | ★★★★☆ |
| 3 | Underlayment/base layer | $1–$4 per sq ft | Medium | ★★★☆☆ |
| 4 | Flooring material (rubber tile/roll) | $6–$18 per sq ft | Low–Medium | ★★★★☆ |
| 5 | Adhesives or fastening system | $0.75–$2.50 per sq ft | Medium | ★★★☆☆ |
| 6 | Transitions + edge strips | $150–$1,200 per opening | High (scope omissions) | ★★★☆☆ |
| 7 | Install labor + seams/finishing | $3–$10 per sq ft | Medium | ★★★★☆ |
> Note: These figures are planning ranges for budgeting workflows. For bids, always request line-item breakdowns and match the installer’s assumptions to your flooring spec sheet. [ADD: source for the planning ranges you prefer to use, if you want jurisdiction-specific numbers.]
>
Treat your flooring estimate like a scope document: the total cost is flooring + required base/underlayment + adhesives/fastening + transitions + labor.
>
Manufacturer installation instructions drive real costs because coverage rates and compatible adhesives/fasteners determine both material quantity and labor steps.
>
Transitions at doorways and edges are a frequent omission in early budgets, even when the floor area looks “simple.”
Step 4: Estimate prep and installation labor
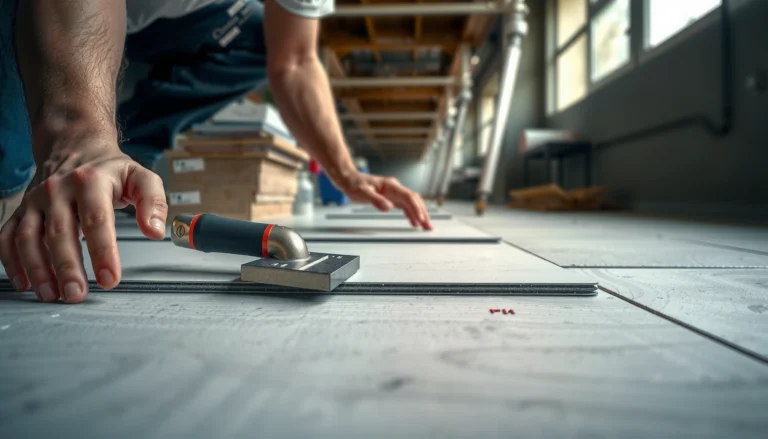
The easiest way to estimate labor is to break it into the work sequence: prep → layout → install → seams/edges → cleanup. Then price each part with installer rates or your local bid history—because two contractors can quote the “same” floor and still scope different prep levels.
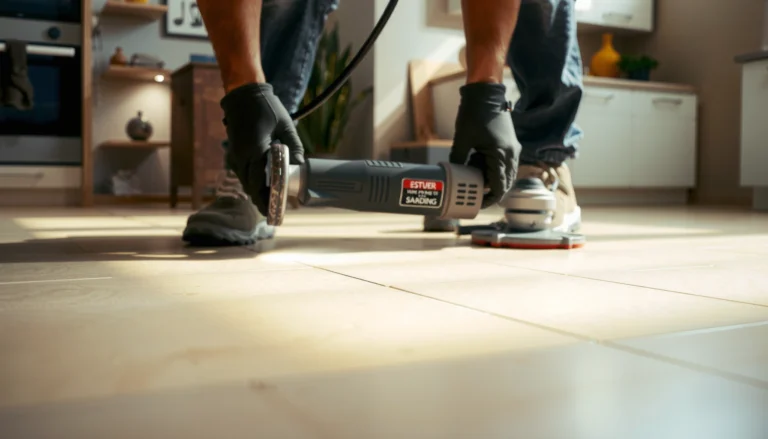
Prep labor line items (what installers actually bill)
Create line items for:
– Cleaning (degreasing, removal of dust/paint/curing compounds)
– Grinding/scarification (especially for concrete)
– Patching/leveling (feather finish, self-leveling compound where required)
– Moisture mitigation (if your spec recommends barrier/coating)
– Surface profiling checks (sometimes baked into prep labor)
The key is to include prep even if your selected flooring is marketed as “easy install.” If a manufacturer requires a flatness threshold or specific prep method, ignoring it can lead to movement, seam separation, or premature wear.
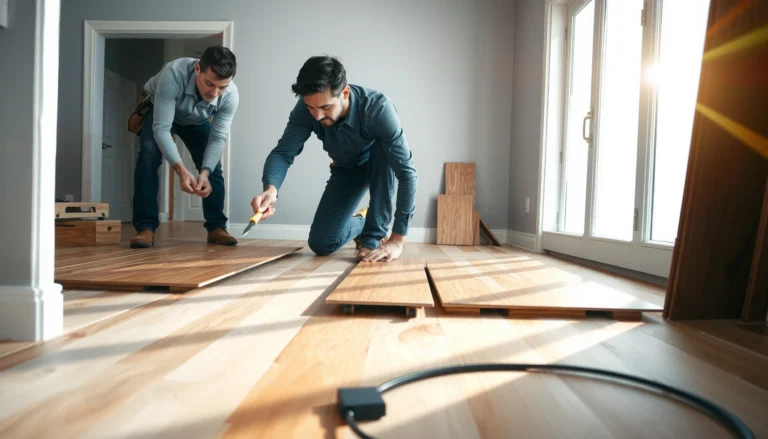
Installation labor workflow (what your contractor will do)
A typical workflow looks like:
1. Layout and dry fitting (plan seam locations and transitions)
2. Install (roll unrolling, tile placement, or interlocking locking)
3. Seams/edges (roller passes, trimming, edge strips, wall transitions)
4. Cleanup and protections (post-cure or restricted access schedule)
>
Labor costs vary most with prep scope because leveling, grinding, and moisture work can exceed the time spent on laying rubber.
>
Installation workflow (layout → install → seam/edge detailing → cleanup) is consistent enough to estimate, even when final quotes differ.
>
Request that installers list assumed subfloor conditions and prep steps, so you can compare bids on the same scope—not on “flooring only.”
What can go wrong (common estimation mistakes)
Even a solid square-footage takeoff can fail if your estimate ignores scope drivers that contractors treat as “assumption-dependent.” These errors usually show up during walkthroughs, material ordering, or the first day of prep work.
Underestimating prep (levelness + moisture)
If your subfloor has cracks, old coatings, or moisture history, prep becomes its own project. Many budget surprises are not flooring issues—they’re under-specified subfloor conditions.
Common examples:
– You budget patching, but the slab needs grinding to achieve the installer’s bond-ready surface.
– You budget a simple patch, but you discover moisture mitigation is recommended by the flooring manufacturer.
Forgetting transitions and edge details
Gym flooring is full of “perimeter problems”:
– Doors and thresholds
– Columns/posts
– Wall/base transitions
– Ramp edges and stair landings (in some facilities)
If the installer quotes “floor area only,” they may exclude edge strips or custom transitions that reduce trip hazards and protect floor edges.
Mixing assumptions between flooring systems
Coverage rates and install methods aren’t interchangeable. A spec that requires a particular adhesive for tiles won’t automatically apply to rolls, and an interlocking system may still require specific flatness or edge treatment.
Here’s a quick comparison you can use to sanity-check an installer’s proposal:
| Option | Best for | Where estimates commonly break |
|---|---|---|
| Rubber rolls | Straight, open cardio/stretch areas | Seam placement + transitions at doorways |
| Rubber tiles | Mixed-use layouts with obstacles | Underlayment/base compatibility + adhesive coverage |
| Interlocking mats/tiles | Modular setups and renovation-friendly installs | Edge treatment, locking requirements, and flatness |
>
Prep scope is the most common hidden cost because the subfloor decides whether the installer can proceed quickly or must level, grind, or mitigate moisture.
>
Edge and transition detailing (doors, thresholds, perimeter strips) often gets excluded from early quotes unless it’s explicitly listed in the scope.
Verdict / tip: Build a range, not a single number
Build a low/likely/high range instead of a single “expected” price. The low end assumes a straightforward, well-prepped subfloor; the likely end reflects typical prep; the high end accounts for leveling repairs, additional materials, and more labor than expected.
How to choose your low/likely/high assumptions
A practical approach:
– Low: best-case slab/subfloor condition, minimal grinding/patching, straightforward transitions
– Likely: typical cleaning + patching, standard flatness challenges, normal seam/edge detailing
– High: significant leveling, moisture mitigation if recommended, extra transitions and additional crew time
Downsides (and when to skip DIY-style estimating)
Range estimates are useful, but they can’t replace an on-site assessment when:
– You suspect moisture issues (plan for testing or a moisture survey)
– The slab has structural cracks or questionable integrity
– Your project includes code-sensitive assemblies or specific performance requirements
In those cases, the most cost-effective move is to involve a flooring installer or consultant who will document subfloor conditions and align the plan with manufacturer instructions. [ADD: when your site needs a pro—local building code/moisture testing info]
>
A cost range beats a single number because prep scope uncertainty is normal and varies with flatness, cracks, and moisture risk.
>
If moisture or structural concerns exist, estimates should be conditional until testing and manufacturer prep requirements are confirmed.
Quick cost checklist (scan/save)
– [ ] Total square footage (+ waste allowance)
– [ ] Subfloor type/condition (cracks, levelness, moisture concerns)
– [ ] Flooring option (roll/tile/interlocking) + target thickness
– [ ] Underlayment/base requirements (if any)
– [ ] Accessories (transitions, edge strips, adhesives/fasteners)
– [ ] Prep costs (patching/leveling/grinding/moisture mitigation)
– [ ] Installation labor (layout, seams/edges, cleanup)
– [ ] Contingency (add buffer for surprises)
FAQ
How do I estimate gym floor cost if I don’t know the subfloor condition yet?
Start with square footage and choose flooring price assumptions, but allocate a prep budget buffer. Then confirm the subfloor with a simple check (levelness/visible cracks) and follow manufacturer requirements before finalizing.
Do roll flooring or tile usually cost less to install?
It depends on the installation method and your layout complexity. Straight runs often favor rolls, while tiles can be easier for irregular spaces—but seams, transitions, and prep requirements can change the outcome. Use the recommended installation approach from the flooring spec sheet.
What “hidden” costs should I look for in a gym floor bid?
Surface prep, underlayment/base, transitions at doors and edges, adhesive/fasteners, and any moisture mitigation are the most common omissions from a quick quote.
Should I include a contingency in the estimate?
Yes—include a buffer for extra prep and cut waste. The right amount depends on how unknown your subfloor conditions are.
Where can I confirm the coverage and installation requirements?
Check the flooring manufacturer’s installation instructions and spec sheet for coverage rates, required underlayment, adhesive/fastener compatibility, and thickness guidance. If you’re using a contractor, ask them to follow those documents and include those items in the scope.
Sources
– [ADD: flooring manufacturer installation instructions / spec sheets you’re comparing]
– [ADD: manufacturer guidance on required underlayment, adhesive/fasteners, and thickness/coverage rates]
– NIST: unit conversion references (inch/length and area conversions)
– [ADD: local building code guidance for flooring/moisture requirements, if you’re addressing a specific jurisdiction]
Building a gym floor estimate is mostly about disciplined scope: measure square footage, pick a flooring system by thickness and coverage method, then price every required layer (prep, base/underlayment, adhesives/fastening, transitions) before you price labor. If you build a low/likely/high range driven by subfloor uncertainty, you’ll compare bids on the same assumptions—and you’ll avoid the most common budget blow-ups that turn “flooring costs” into “project costs.”
Frequently Asked Questions
How do I estimate the cost of gym flooring by square foot?
Start by calculating your total square footage (length × width) and then multiply by the installed cost per square foot for gym floors. Installed pricing usually includes material, subfloor preparation, floor leveling, adhesives or seam sealing, and labor. To estimate accurately, get at least two quotes and compare like-for-like specs (thickness, shock absorption rating, and wear layer), since costs vary widely for commercial rubber flooring, vinyl, and interlocking mats.
What factors affect the total price of gym floors?
The biggest cost drivers are material type (rubber, vinyl, polyurethane, interlocking foam), thickness, and the flooring system build-up (underlayment, moisture barrier, and leveling compound). Labor and prep can significantly increase your budget if the concrete slab needs grinding, crack repair, or floor leveling for a flat installation. Other common adders include roll versus tile waste factors, installation time constraints, edge transitions (ramps, borders), and any requirements for safety surfacing compliance in certain gym areas.
How much does rubber gym flooring typically cost, and what should I compare?
Rubber gym flooring is often priced higher than basic vinyl or foam, but it can offer better durability and impact resistance for heavy training. When comparing quotes, look beyond the sticker price and compare thickness (e.g., 3/8″ vs 1/2″ and wear layer), roll width or tile format, and whether installation includes proper adhesive, seam treatment, and perimeter sealing. You should also confirm warranty terms and expected lifespan for commercial gym flooring to ensure you’re comparing value, not just upfront cost.
Which gym areas need different flooring thickness or cost considerations?
High-impact zones like free-weight areas, deadlift platforms, and functional training spaces typically require more robust gym floor materials or thicker shock-absorbing systems. Lighter-activity zones such as stretching or cardio may allow thinner options, reducing cost without sacrificing performance. Planning by zone helps you estimate total gym flooring cost more realistically, since you can allocate premium flooring where it’s needed most and use cost-effective solutions in lower-stress areas.
Best way to reduce gym floor installation costs without sacrificing safety?
Reduce cost by minimizing expensive prep work—ensure the subfloor is properly inspected for moisture, cracks, and flatness before purchasing materials. Choosing a flooring system that matches your slab condition (and avoids unnecessary leveling or removal) can lower labor and materials. Also request itemized quotes, include waste and transitions in your budget, and consider standardized measurements for cut-heavy layouts to avoid surprise costs.
📅 Last Updated: October 12, 2026 | Topic: How to estimate the cost of gym floors? | Content verified for accuracy and freshness.
References
- Life-cycle cost analysis
https://en.wikipedia.org/wiki/Life-cycle_cost_analysis - https://en.wikipedia.org/wiki/Resilient_flooring
- https://www.nist.gov/services-resources/software/building-life-cycle-cost-blcc
- GAO Cost Estimating and Assessment Guide: Best Practices for Developing and Managing Capital Prog…
https://www.gao.gov/products/gao-09-3sp - https://www.whitehouse.gov/omb/circulars_a094/
- https://www.energy.gov/eere/buildings/articles/life-cycle-cost-analysis
- Google Scholar Google Scholar
https://scholar.google.com/scholar?q=gym+flooring+cost+estimation - Google Scholar Google Scholar
https://scholar.google.com/scholar?q=resilient+flooring+life+cycle+cost+analysis+installation - Google Scholar Google Scholar
https://scholar.google.com/scholar?q=sports+flooring+cost+modeling+maintenance - Google Scholar Google Scholar
https://scholar.google.com/scholar?q=construction+cost+estimating+procedures+handbook