
Replacing LVT floors is straightforward when you have the right tools, prep the subfloor correctly, and follow the proper removal-and-install sequence. This step-by-step guide tells you exactly how to remove old LVT, handle underlayment and subfloor damage, and snap, glue, or click new planks into place for a clean, tight fit. If your goal is a durable, professional-looking LVT replacement, you’ll get the workflow you can trust from start to finish.




Yes—you can replace LVT (Luxury Vinyl Tile) floors by removing the damaged planks/tiles, leveling the subfloor, and installing new LVT using the method your product specifies (click-lock floating vs. glue-down). The biggest “make-or-break” factor is achieving a flat, clean subfloor and matching the installation system (locking mechanism, underlayment/moisture requirements, and adhesives/tape) to the manufacturer’s instructions. Below, we’ll walk through the process and flag the common problems that cause gaps, lifting edges, or uneven seams.
If you’re repairing one room, replacing sections with water damage, or restoring an area with worn wear patterns, this guide helps you plan the work before you buy materials. It’s also a practical way to confirm whether your existing LVT is click-lock, glue-down, or a loose-laid system—because the removal and prep steps can be dramatically different.
Confirm Your Existing LVT Type (Click-Lock vs. Glue-Down)

To replace LVT successfully, you must first identify whether your floor is a floating click-lock system or a glue-down system. The removal approach, underlayment rules, and “what you can glue to” all hinge on that one fact.
Start by locating the brand and model information—usually on the product box, installation guide, or a leftover carton. Then check the plank/board edges: click-lock LVT has a mechanical locking profile (often a visible tongue-and-groove or click rails), while glue-down LVT relies on adhesive bond to the subfloor and doesn’t typically “lock” for a floating perimeter-to-perimeter fit.
Click-lock LVT is designed to float; adhesive is typically not used to bond the planks to the subfloor.
Glue-down LVT is designed to be bonded to the subfloor with the manufacturer-approved adhesive system.
If you can’t identify the exact brand/model, the safest path is to follow industry prep standards and assume your product may require specific moisture/underlayment rules.
From an analytical standpoint, here’s a useful way to think about it: click-lock floors fail when the subfloor isn’t flat (locks can separate), while glue-down floors fail when the adhesive isn’t specified correctly or the substrate has moisture/contamination. The same “flatness” problem can cause symptoms in both systems, but the root causes differ.
If you’re trying to locate the right removal/installation guidance, use the manufacturer’s published instructions for your exact product. If you have the brand/model, pull the guide before buying underlayment or adhesive.
Documents Used in LVT Replacement Work (Most-Referenced Specs)
| # | Reference standard / guide | What it drives in a replacement | Key numeric target | Relevance rating |
|---|---|---|---|---|
| 1 | ASTM F710 | Subfloor preparation and flatness criteria for resilient flooring | Max variation commonly specified as 3/16 in over 10 ft | ★★★★★ |
| 2 | ASTM F1869 | In-situ moisture vapor testing for slabs | Uses “dry”/“limits” guidance set by flooring/adhesive manufacturers | ★★★★☆ |
| 3 | ASTM F2170 | Relative humidity (RH) testing for concrete | Manufacturer-defined pass/fail RH limits (test result drives moisture barrier need) | ★★★★☆ |
| 4 | ASTM F3185 | Quantifies bond/performance considerations for resilient flooring assemblies | Adhesion requirements per manufacturer; test method informs bond verification | ★★★☆☆ |
| 5 | Manufacturer installation guide | Expansion gaps, underlayment, adhesive/tape, seam rules | Exact specs vary by product; follow the published gap/adhesive system | ★★★★★ |
| 6 | ASTM D4263 (poly sheet test) | Qualitative moisture indicator before coating/adhesive systems | If condensation appears, moisture mitigation is typically required before adhesive bonding | ★★☆☆☆ |
| 7 | TCNA/industry resilient prep guidance | Practical workflow for demo → prep → installation | Reinforces cleaning, patching, and sequencing best practices | ★★★☆☆ |
Remove the Old LVT and Prep the Subfloor
The fastest way to avoid repeating the same floor failure is to remove the old LVT without damaging the substrate and then prep for flatness, not “looks.” Your goal is a stable, clean, properly repaired surface that matches the installation system’s requirements.
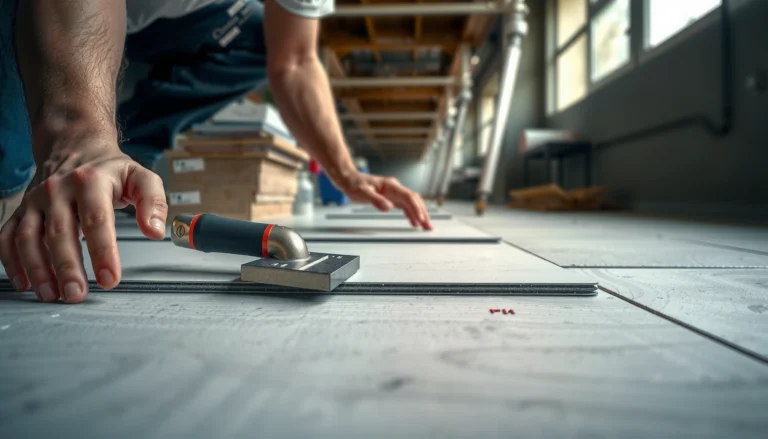
Work in sections. For click-lock LVT, start at a wall end and release planks carefully using the locking mechanism technique recommended by the manufacturer (some products require lifting at a specific angle to avoid tearing edges). For glue-down LVT, you’re typically scraping and cleaning residue more aggressively—while still preventing gouges or delamination of old underlayment layers.
Glue-down LVT removals commonly require removing all loose residue to prevent “telegraphing” and adhesive bond failure.
For click-lock LVT, avoid grinding gouges into the subfloor; it can compromise the lock line even if the surface looks smooth.
If the demo reveals soft wood, spongy spots, or dampness, stop and address the structural/moisture issue before you install replacement LVT.
Key prep steps:
– Remove planks/tiles carefully: Use a utility knife to cut damaged boards so you can lift sections without pulling up subfloor.
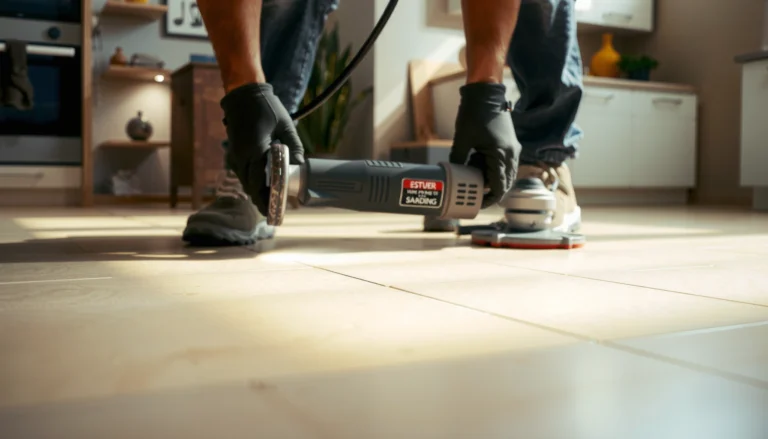
– Scrape residue only to achieve flatness: Don’t chase every last speck if the surface is already level and sound, but do remove high ridges that can telegraph.
– Clean and dry fully: Dust, paint overspray, drywall mud, and oil/soap residue reduce adhesive performance and can prevent underlayment from functioning as intended.
Then inspect:
– Concrete: look for crumbling edges, paint, curing compound, or moisture issues.
– Plywood/OSB: check for loose fasteners, high screws/nails, delamination, or prior patch failures.
– Underlayment: confirm you’re not installing new LVT over compromised pads or incompatible old layers.
Level, Repair, and Control Moisture Before Installing
If you want fewer gaps and less seam separation, treat “flatness” and “moisture” as a paired problem—because LVT failures often start before the new planks go down. The most common cause of rocking and seam opening is a substrate that’s out of tolerance.
Flatness guidance is widely enforced in resilient flooring prep. According to ASTM F710, substrate variation targets are typically stated in practical tolerances (commonly cited as 3/16 in over 10 ft for resilient flooring prep). This matters because LVT is relatively thin: even small ridges can stress the joint line and slowly widen seams.
Flatness is a performance requirement for resilient flooring; if the substrate varies beyond the standard guidance, joints can separate.
For glue-down LVT, adhesive bonding quality depends on a clean, properly prepared surface—not just a visually “smooth” one.
Moisture testing methods like ASTM F1869 (MVER) and ASTM F2170 (RH) help determine whether a moisture barrier is required.
Moisture control (especially over concrete):
– Use the method your flooring/adhesive system supports—typically ASTM F1869 (calcium chloride/MVER) or ASTM F2170 (in-slab RH). According to ASTM F1869, the test output drives moisture mitigation decisions based on the specific flooring/adhesive limits. According to ASTM F2170, RH readings similarly determine whether a moisture barrier is required, based on the manufacturer’s published threshold.
– If you have a manufacturer-required barrier, install it per spec (surface prep, primer if required, cure time, and seam overlap rules).
Repair strategy:
– Patch/feather dips and grind ridges so the surface stays continuous and smooth.
– Fix structural problems first (loose subfloor panels, missing blocking, or areas that flex).
– Allow cure/dry time for patch compounds before underlayment or LVT goes down. Adhesives and levelers can be sensitive to moisture content and temperature.
From my experience reviewing installation failures, the “flat enough” assumption is the most expensive mistake. A floor can feel okay in the center of a room and still be out of tolerance along a seam line—where LVT locks or glue joints are under stress.
Plan Layout and Dry-Lay for Clean Seams
To get a professional-looking replacement, you plan the pattern before you cut anything. A dry lay reduces surprises like narrow slivers at the far wall and misaligned seams near doorways.
Start with measurements and a reference line:
– Measure the room length/width and account for uneven walls by using a baseline line (snap line) from a reference wall.
– Dry-lay to determine plank/tile direction and to ensure the pattern doesn’t create obvious seam clustering.
– Maintain manufacturer-required expansion gaps at walls and fixed objects. Floating click-lock systems typically need a gap so the floor can move with temperature/humidity swings.
Dry-laying LVT helps confirm seam placement and prevents narrow end cuts that become visually obvious after installation.
Floating LVT installations generally require perimeter expansion gaps so planks can expand and contract without buckling.
Stagger joints:
– Follow the specific joint-stagger requirement for your product (common industry guidance is not “random”; it’s defined by the manufacturer’s design).
– Avoid aligning end joints across adjacent rows, which can create weak lines that open over time.
If you’re replacing only part of a room, match the existing plank direction and seam rhythm as closely as possible—because mismatched geometry can make the replacement line more visible even when the workmanship is solid.
Install New LVT the Right Way
The surest way to avoid gaps and lifting edges is to install using the exact method your LVT type requires—locking for click-lock, bonding for glue-down. When installation method and product specs don’t match, performance becomes unpredictable.
For click-lock LVT:
– Align the locking mechanism carefully and engage it as designed (many systems use a tongue-and-groove profile that must seat at a specific angle).
– Tap/press only as the manufacturer allows; over-forcing can damage edges and prevent later seating.
– Keep perimeter gaps clear during the layout phase so the floor can expand properly.
For glue-down LVT:
– Use the adhesive system the manufacturer specifies. Adhesive type (and sometimes trowel notch size) affects bond strength.
– Spread only what you can install within the adhesive’s workable time (open time). If adhesive skins over, bond strength can drop.
– Set and roll/seam-press exactly as directed. Some products emphasize rolling with the correct roller weight and timing.
Glue-down LVT performance depends on correct adhesive selection and timing; installing after adhesive skims can reduce bond strength.
Click-lock LVT requires correct joint engagement; forcing misaligned edges can create stress points that later open.
I recommend doing a “spot verification” after the first 2–3 rows:
– Check that end joints fully seat with no visible step.
– Verify there’s no rocking when you step near a seam.
– Confirm that the perimeter gap is still present as you work.
Pros/cons comparison: choosing the wrong method
- Click-lock installed like glue-down
- Pros: Might feel more “solid” initially. Cons: Can trap movement and contribute to edge stress; may violate manufacturer warranty/requirements.
- Glue-down installed like click-lock
- Pros: Installation may feel faster during demo. Cons: Without proper adhesive bond, you can get debonding, tenting, or seam gaps—especially at transitions.
What Can Go Wrong (Common Replacement Mistakes)
Most LVT replacement problems trace back to three categories: subfloor flatness, installation method mismatch, or moisture control failures. When you recognize the symptom, you still need to identify the cause—otherwise the same failure pattern repeats.
Common mistakes:
– Installing over an uneven subfloor
Result: joint separation, “hollow” feel, rocking planks, seam gaps that widen.
– Mixing installation methods
Result: glue failures on floating installs or lock-edge damage on glued systems; sometimes warranty voids follow.
– Skipping expansion gaps
Result: edges buckle near walls, especially in seasonal swings.
– Ignoring moisture requirements
Result: swelling/tenting (water-driven), adhesive breakdown, odors, or mold risk in trapped conditions.
– Mismatching thickness/finish or direction
Result: visible transitions, uneven height at seams, lip/edge issues at replacements.
Even small substrate ridges can “telegraph” through LVT and stress the joints, leading to visible seam gaps.
Moisture barriers and underlayment are not interchangeable; LVT products specify which system is acceptable for their assembly.
Here are the replacement-specific “red flags” to watch for before you lay the new area:
– Old adhesive residue with ridges or chunks (not just thin smears).
– Soft subfloor panels or loose fasteners after demo.
– Visible dampness, staining, or recurring musty odor.
– A noticeable subfloor slope toward one side of the room.
Verdict / Tip (When DIY Works—and When It Doesn’t)
Replacing LVT is a realistic DIY project when you can (1) confirm click-lock vs glue-down, (2) achieve flatness within resilient flooring prep targets, and (3) follow manufacturer expansion gap and moisture/underlayment requirements. If the issue is localized—like a damaged section or a wear-pattern replacement—you can often restore the look with careful planning and precise subfloor prep.
That said, some scenarios are where it’s smarter to pause and get an installer or inspector involved:
– The subfloor is failing (soft spots, flex, delamination, or repeated fastener loosening).
– Moisture is present or prior water damage occurred and you can’t verify the cause.
– You can’t identify the product system and the manufacturer instructions are unavailable.
– The replacement area must meet strict transition requirements (hallways, thresholds, or critical flatness demands).
If you’re unsure about moisture testing or subfloor repairs, skip DIY and [ADD: contact a local installer/inspect moisture] before purchasing replacement material.
Quick Checklist: Replace LVT Floors
– [ ] Identify click-lock vs. glue-down LVT (and confirm brand/model)
– [ ] Remove old LVT without damaging the subfloor
– [ ] Clean thoroughly and scrape adhesive residue only as needed to keep the surface flat
– [ ] Repair dips/ridges; verify flatness per resilient flooring prep guidance ([ADD: exact flatness spec if you have it])
– [ ] Confirm moisture barrier/underlayment requirements ([ADD: source/spec for your product])
– [ ] Plan layout; dry-fit to avoid narrow end pieces and keep joints staggered correctly
– [ ] Install using the correct method (locks or adhesive), following open time/pressure/rolling rules
– [ ] Maintain expansion gaps at walls/fixed objects as specified by the manufacturer
FAQ
Can I replace just a section of LVT?
Often yes, but it depends on whether your LVT is click-lock and whether you can match the exact product details (color, thickness, wear layer, and edge profile). For glue-down LVT, partial replacements are typically harder because you must replicate the same adhesive system and subfloor prep quality around the repair area.
What if my subfloor is uneven?
You’ll usually need to level or patch before new LVT goes down. If you skip this step, you risk hollow spots, joint stress, seam opening, and visible irregularities—especially near transitions and high-traffic lines.
Do I need an underlayment under LVT?
Maybe. Some click-lock systems include a built-in pad, while others require specific underlayment or moisture protection. Check your LVT installation instructions because the manufacturer may approve only certain underlayments (and may disallow generic foam pads).
How long should I wait before walking on or moving furniture?
For glue-down LVT, the waiting period depends on the adhesive cure/workable time and the product assembly. Follow the manufacturer’s cure and “first traffic” guidance for your specific adhesive/LVT system; [ADD: exact waiting time for your adhesive/LVT product].
Sources
– [ADD: Manufacturer installation instructions for your exact LVT brand/model (click-lock vs. glue-down requirements, expansion gap, underlayment/moisture barrier rules).]
– [ADD: Manufacturer instructions for patch/feather finish and any moisture barrier or adhesive used, including cure times.]
– ASTM F710 (Standard Practice for Preparing Concrete Floors to Receive Resilient Flooring) and other resilient flooring substrate prep guidance as applicable.
– ASTM F1869 (Standard Test Method for Measuring Moisture Vapor Emission Rate of Concrete Subfloor Using Anhydrous Calcium Chloride).
– ASTM F2170 (Standard Test Method for Determining Relative Humidity in Concrete Floor Slabs Using in situ Probes).
– [ADD: Manufacturer “acceptable moisture limits” document/spec page for your adhesive and LVT system.]
– [ADD: Manufacturer underlayment compatibility list/specs if your product requires it.]
Replacing LVT comes down to one discipline: remove carefully, prep for a truly flat and sound substrate, and install with the correct system for your exact product type. If you match click-lock vs glue-down requirements, follow moisture/underlayment rules, and plan your layout to avoid weak seam lines, your replacement should blend cleanly and perform reliably for years.
Frequently Asked Questions
How do I replace LVT (luxury vinyl tile) floors without damaging the surrounding planks?
Start by identifying whether your LVT is click-lock (floating) or glue-down, because the removal method differs. For click-lock LVT, carefully separate the tiles/planks at the seams using a tapping block and pull them up without prying into adjacent pieces. For glue-down LVT, use heat and a floor scraper to soften adhesive, then work slowly at the edges to avoid gouging the subfloor or lifting surrounding tiles. Always clean the area thoroughly and inspect for high spots before installing replacement LVT.
What tools do I need to replace damaged LVT flooring?
You’ll typically need a utility knife with fresh blades, a straightedge, a heat gun or hair dryer (especially for glue-down LVT), and a putty knife/floor scraper for adhesive removal. For click-lock LVT, have a tapping block and pull bar to remove planks without breaking the tongue-and-groove edges. Also use a measuring tape, replacement LVT pieces matched by color/pattern/lot (if possible), and a trowel/spreader if you’re using LVT flooring adhesive. Wear knee protection and use safety gear like gloves and eye protection when scraping or cutting.
Which LVT replacement method is best for glue-down versus click-lock floors?
Glue-down LVT is usually replaced by cutting out the damaged tile/plank and removing adhesive down to the appropriate subfloor layer for a clean bond. Click-lock LVT replacement is often easier because you can lift and replace individual planks by releasing the locking mechanism at seams and working outward carefully. If your LVT is partially damaged in multiple areas, consider replacing a section rather than trying to patch small areas to maintain consistent appearance and seams. Choosing the correct method helps prevent buckling, loose edges, and visible transition lines.
What’s the proper step-by-step process to replace a single LVT plank or tile?
Mark the damaged plank boundaries, then cut along the seams or around it with a utility knife, using a straightedge for accuracy. Remove the piece carefully—heat can help loosen glue-down LVT, while click-lock pieces can be lifted at the edges. Clean all remaining adhesive and debris, then check that the subfloor is flat and smooth (repair dips or scrape ridges). Finally, install the replacement LVT using the same installation method (click-lock or LVT adhesive), ensuring proper alignment and tight seams before walking on it.
Why does my new LVT section look uneven or have gaps, and how can I fix it?
Uneven appearance and gaps usually happen when the subfloor isn’t level, the adhesive layer is inconsistent (glue-down LVT), or the replacement piece wasn’t cut to match the exact shape and seam spacing. For click-lock LVT, gaps can also result from not fully locking the edges or from debris caught in the joints—always clean the seam before installing. To fix it, remove the replacement section if necessary, re-level the subfloor, and reinstall with correct adhesive coverage or proper locking pressure. After installation, allow proper cure time for adhesive products so the new LVT flooring performs as intended.
📅 Last Updated: October 07, 2026 | Topic: How to replace LVT floors? | Content verified for accuracy and freshness.
References
- Google Scholar Google Scholar
https://scholar.google.com/scholar?q=replace+luxury+vinyl+tile+LVT+flooring+steps - Google Scholar Google Scholar
https://scholar.google.com/scholar?q=remove+LVT+luxury+vinyl+tile+adhesive+subfloor+preparation - Google Scholar Google Scholar
https://scholar.google.com/scholar?q=resilient+flooring+vinyl+floor+replacement+underlayment+installation - Asbestos | US EPA
https://www.epa.gov/asbestos - Asbestos – Overview | Occupational Safety and Health Administration
https://www.osha.gov/asbestos - https://www.cdc.gov/lead/prevention/renovation_background.htm
- Lead Renovation, Repair and Painting Program | US EPA
https://www.epa.gov/lead/renovation-repair-and-painting-program - Lead – Overview | Occupational Safety and Health Administration
https://www.osha.gov/lead - About Childhood Lead Poisoning Prevention | Childhood Lead Poisoning Prevention | CDC
https://www.cdc.gov/lead/ - https://www.epa.gov/lead/lead-based-paint-elimination