


You can install marble floors around cabinets cleanly and reliably with a method that cuts, fits, and seals to avoid gaps, lippage, and cracked edges. This step-by-step guide shows the exact order to remove or protect cabinet legs, measure clearance, cut marble accurately for tight transitions, and lock everything in place. Follow it and your perimeter detailing will look finished—even in the hardest corner runs where cabinets meet the floor.




When installing marble floors around cabinets, the key is to plan the cut lines around the toe-kick (or terminate cleanly at the cabinet face), then set the marble with full thin-set support and finish the perimeter with a controlled, movement-aware detail (trim/caulk instead of rigid grouting). If you do those three things—layout, support, and perimeter detailing—you can get a tight look that resists cracking at cabinet edges.
If your cabinets are already installed, or you’re working in a kitchen/bath where you can’t remove them, these steps help you achieve a professional-looking perimeter. If you’re still deciding on tile vs. slab layout, review the measurement and planning part before you cut anything—this is where most costly mistakes start.
Who this is for / when it applies
This guide is for homeowners, remodelers, and flooring installers tackling marble tile (not vinyl or laminate) around fixed base cabinets and toe-kicks. It’s especially relevant when you can’t remove cabinets, the floor must look “built-in,” and you want fewer hollow spots and fewer cracked edges—problems that are common when marble is forced to follow an uneven subfloor or an improvised perimeter.
Plan the layout before you cut
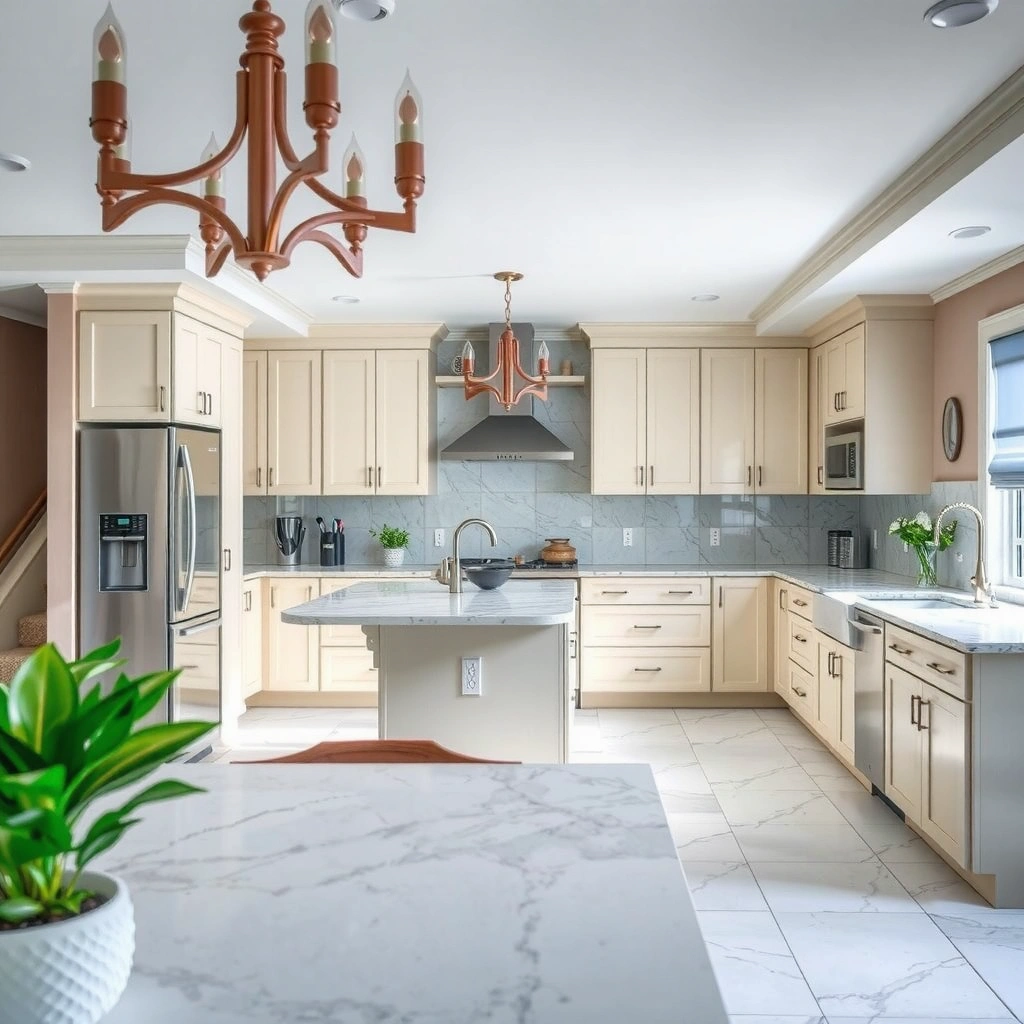
A clean perimeter starts before the saw: decide up front whether you can undercut the cabinet toe-kick or whether you’ll stop tile at a planned “stop line” and finish with trim/caulk. Then dry-lay so seams land where they’ll look intentional instead of creating micro-slivers against cabinet legs or walls.
Dry-laying helps you prevent slivers and misaligned seams because marble’s geometry won’t forgive cutting “by eyeballing” around cabinet toe-kicks.
Marble is a natural stone, so small thickness variations and substrate bumps can telegraph through—layout planning should include a flatness check, not just measurements.
A planned termination method (undercut vs. stop line) determines whether your perimeter joint stays movement-capable or becomes a rigid crack point.
– Measure the cabinet locations, then decide whether you’ll undercut the cabinet toe-kick or terminate tile at the cabinet edge.
Rule of thumb: if there’s clearance to undercut and you can access the toe-kick area safely, undercutting usually creates a tighter, cleaner visual transition than “cut-and-stop” at the face.
– Dry-lay a few tile pieces to see where seams land and to avoid slivers against cabinet legs/walls.
Dry-laying doesn’t need to be the full room—just the “cabinet zone” (typically the toe-kick line plus the first 12–24 inches of tile).
– Check floor flatness in the cabinet area; marble will telegraph bumps, so you may need subfloor repair before installation.
According to the tile industry’s flatness guidance used by TCNA methodologies, subfloor irregularities can lead to cracked or hollow-sounding tile when stone is installed over inadequate support (TCNA Handbook methods and flatness guidance). If you find a dip or hump in the cabinet footprint, fix it before you start setting marble—marble can telegraph those defects more readily than many other finishes.
Quick reality check (numbers to anchor decisions)
– According to TCNA installation methods, floors typically must meet strict flatness tolerances so tile won’t be stressed by unsupported spans (TCNA Handbook).
– According to ANSI A108/A118 setting-system standards, proper mortar selection and installation practices drive bond and reduce debonding risk (ANSI A108/A118 standards).
– According to common cabinet standards, toe-kicks are often in the ~3–4.5 inch range, which affects how much marble you can undercut and still maintain a neat transition ([ADD: cabinet manufacturer or industry standard reference for typical toe-kick height]).
Prep the subfloor and protect cabinet areas
A supported perimeter comes from a stable substrate and a controlled work area. Before you mix thin-set, confirm the subfloor is clean, firm, and within the flatness requirements for stone tile—and then protect the cabinet areas so your perimeter line stays crisp.
For marble tile, a “firm and flat enough” substrate is non-negotiable because thin-set can’t compensate for structural movement or deep flatness issues.
Protecting baseboards/trim and keeping a consistent edge height reduces the chance you’ll end up with uneven grout joints or forced cuts that stress marble.
– Verify the subfloor is clean, firm, and flat enough for marble tile (follow your marble/tile manufacturer requirements for flatness and substrate type).
Marble often has specific requirements related to substrate, installation methods, and compatible underlayments—follow those first.
– Remove or protect baseboards/trim so you can get a consistent grout line and clean perimeter cuts.
If you keep trim, your “stop line” becomes the trim edge—and that changes how you plan caulk width and joint spacing.
– Use shims/levelers temporarily under any low spots or edges that will affect tile height near cabinet corners.
Where you can’t fully correct the subfloor, you still need to eliminate rocking. Rocking is a direct cause of stress at edges and corners, especially around cabinet boundaries.
Pros/cons comparison: undercut vs. stop-line when you can’t remove cabinets
| Approach | Best when… | Biggest risk if done wrong |
|---|---|---|
| Undercut toe-kick (tile tucks under) | You have enough clearance and can cut accurately under the cabinet toe-kick | You cut too deep/too shallow and the tile edge binds or leaves a visible gap |
| Stop tile at cabinet face + finish (trim/controlled caulk) | The toe-kick is inaccessible, or undercut clearance is limited | You rigidly grout into a movement-capable area, causing cracking |
Make precise cuts around cabinet toe-kicks and legs
Precise cuts determine whether the perimeter looks “factory” or looks forced. Your job is to create a consistent gap or undercut reveal that matches marble thickness plus thin-set (if undercutting) and keeps edges supported (not suspended).
If you undercut, tile thickness plus thin-set thickness becomes your “real geometry,” so your cut line must account for both.
If you can’t undercut, a consistent stop gap and a dedicated finish detail (trim/caulk) prevent grout from becoming the rigid crack point.
– If you can undercut: measure tile thickness plus thin-set, then undercut carefully so the marble can slide under for a tight fit.
The undercut depth is usually calculated from: marble tile thickness + required thin-set/setting bed at that edge. Follow your thin-set system’s instructions for the correct coverage and intended thickness.
– If you can’t undercut: plan for an accurate “stop line,” leaving a small, consistent gap for movement and finishing.
The exact joint width depends on your system and finish method, but the principle stays the same: leave room for a flexible seal or trim rather than filling movement-capable space with rigid grout.
– Use the right saw tooling for marble and test-fit a scrap piece first to confirm your cut dimensions.
Marble is abrasive and can chip if your technique isn’t controlled. Test-fit scrap lets you validate the clearance you’ll actually get once the tile is supported on mortar and not just sitting on the floor.
From my experience on installs where cabinets are already in place: the biggest time-saver isn’t cutting faster—it’s doing one careful “test piece” and adjusting your cut depth before you commit to the visible perimeter tiles. That one adjustment often prevents rework on the most noticeable edge rows.
Set marble tile with the right thin-set and support
The goal is simple: full mortar support and correct height transitions. If the perimeter tiles aren’t bedded evenly—especially near cabinet edges—marble can crack at stress points or sound hollow.
Consistent thin-set coverage under tile edges reduces hollow spots and edge stress, which are common precursors to cracking near cabinet boundaries.
Marble installation systems require height control around cabinets so tiles don’t “rock” at corners or change plane abruptly at the perimeter.
– Spread mortar evenly (proper trowel size per the setting material and marble guidance), and keep coverage consistent under tile edges.
Follow your thin-set manufacturer’s technical data sheet for the required trowel notch size and coverage expectations. For stone, coverage requirements matter because marble can be unforgiving when support is inconsistent.
– Maintain correct height transitions around cabinets using shims or careful mortar build-up—marble shouldn’t “rock” at cabinet edges.
If one perimeter tile is slightly high while the adjacent one is low, that mismatch concentrates stress at the cabinet boundary. That’s where edge tiles are most likely to fail first.
– Allow for expansion/movement where required by the tile and thin-set system (don’t grout rigidly into areas that need flexibility).
Movement joints and perimeter joints exist because tile assemblies move with temperature and humidity. Rigidly grouting where movement is expected can create predictable cracking patterns at edges.
Important alignment detail
Around cabinet lines, you’re not just matching tile layout—you’re managing the tile “plane.” That means keeping tile surfaces at the same height across the cabinet zone and ensuring mortar thickness isn’t accidentally reduced at the perimeter edge.
Finish the perimeter: grout, seal, and trim details
A durable, good-looking finish is not just grout—it’s the right stone-compatible grout, correct sealing (when required), and a perimeter joint strategy that anticipates movement. The perimeter should look tight, but it must be built to flex where tile meets cabinets or toe-kick areas.
Marble is more sensitive than many porcelains, so use grout systems explicitly recommended for natural stone and follow stone compatibility guidance.
Where tile meets cabinets or toe-kick areas, trim and/or controlled caulk joints are often more reliable than forcing rigid grout into movement-capable gaps.
– Use grout suitable for marble (and the space conditions); marble is more sensitive than many porcelains, so follow the grout/manufacturer compatibility guidance.
Natural stone can react differently to grout chemistry depending on the grout type. Verify compatibility with your specific marble and grout product.
– Seal marble if your flooring system requires it before or after grouting (follow the stone manufacturer’s instructions—some marbles require sealing, some processes differ).
According to marble stone guidance from the Marble Institute of America (and/or your stone manufacturer), sealing requirements depend on the marble type, finish, and exposure (kitchens and baths generally need extra attention) (Marble Institute of America guidance on marble care/sealing).
– Where tile meets cabinets or toe-kick areas, consider a matching trim piece and/or a controlled caulk joint instead of forcing grout into gaps that can move.
In practice, grout is meant to be stable within an intended grout joint; perimeter gaps often behave differently because the cabinet is a separate structure. Caulk provides flexibility and a cleaner maintenance path.
What can go wrong (and how to avoid it)
Most perimeter failures around marble and cabinets come from three issues: incomplete support, incorrect rigid finishing, and layout/cut mistakes that create stress concentrations at edges. Fixing these root causes is easier than repairing cracked marble later.
Cracks at cabinet edges are commonly linked to poor support or rushing cuts that leave tile edges insufficiently bedded in mortar.
Hollow areas near cabinets usually reflect inconsistent mortar combing or thin mortar coverage at perimeter edges—not “bad luck.”
– Cracking or chipping at cabinet edges: usually comes from rushing cuts, incorrect support, or thin mortar coverage at the perimeter.
Avoid it by dry-fitting, using full coverage at edges, and ensuring the tile edge is supported on mortar (not bridging over voids).
– Hollow spots near cabinets: often happen when the mortar isn’t combed consistently or edges aren’t bedded properly.
Re-check coverage before tiles fully cure. Many installers do this by lifting a tile mid-install to confirm transfer.
– Misaligned seams: typically caused by not dry-laying first or not accounting for tile thickness + thin-set.
Plan seam placement with a dry layout before any final setting—especially the row closest to the cabinets, because that row defines the visual “edge line.”
– Grout where movement is needed: marble/installation systems often require flexible joints at specific transitions.
Follow your mortar/tile system’s movement-joint guidance. When in doubt, use the manufacturer’s recommended perimeter joint method rather than “filling everything with grout.”
Verdict: do this yourself only if you can measure/cut carefully
If you’re comfortable with careful measuring, undercutting (when possible), and using a tile saw with controlled technique, you can install marble floors around cabinets successfully. The limiting factors are precision and substrate readiness: tight perimeter geometry and correct mortar support are what prevent cracking at cabinet edges.
However, if the cabinets are extremely close to the floor (limited undercut or limited blade clearance), your subfloor is out of flatness, or you can’t confidently execute movement-aware joints, it may be smarter to hire a qualified tile installer—marble mistakes are expensive to correct. Skip DIY (or pause and get help) if you’re not confident about maintaining consistent thin-set support, correct joint placement, or safe cutting practices around cabinet toe-kicks.
Quick checklist (scan before you start)
– [ ] Confirm if you can undercut the cabinet toe-kick or must stop tile at the cabinet edge
– [ ] Measure tile thickness + thin-set to get accurate cut lines
– [ ] Dry-lay to avoid slivers and plan seam placement
– [ ] Check/repair subfloor flatness in the cabinet area
– [ ] Cut test pieces first to verify fit
– [ ] Use the correct thin-set and proper trowel spacing/coverage
– [ ] Leave/control expansion/movement joints as required
– [ ] Use compatible grout for marble; seal if required
– [ ] Finish perimeter with trim/caulk where movement or a neat edge is needed
Typical Cabinet-To-Floor Transition Choices for Marble (Install Reality)
| # | Perimeter method | When it’s used | Visual tightness* | Failure risk** | Overall suitability |
|---|---|---|---|---|---|
| 1 | Undercut toe-kick (tile tucks under) | Cabinet toe-kick is accessible | ★★★★★ (5/5) | Medium | Best for tight seams |
| 2 | Stop tile at cabinet face + caulk joint | Undercut clearance is limited | ★★★★☆ (4/5) | Low–Medium | Most forgiving |
| 3 | Stop tile + toe-kick/transition trim | You need a hideable edge detail | ★★★★☆ (4/5) | Medium | Great when trimming fits |
| 4 | Tile “forced tight” + grout at cabinet interface | When installers skip a movement joint | ★★★☆☆ (3/5) | High | Avoid (crack risk) |
| 5 | Border tile scribing around cabinet legs | Cabinet legs/walls create irregular gaps | ★★★★☆ (4/5) | Medium | Good if meticulous |
| 6 | Use leveling underlayment before tile set | Subfloor has dips under cabinets | ★★★★★ (5/5) | Low | Best substrate fix |
| 7 | Leave a serviceable caulk line at perimeter | You want maintenance-friendly edges | ★★★☆☆ (3/5) | Low | Durability focus |
Visual tightness is a practical, installer-facing rating of how “built-in” the seam can look when executed correctly.
Failure risk reflects common field outcomes when the method is paired with typical execution errors (especially support and movement-joint control).
[ADD: source for specific cabinet/tile joint guidance you follow, if you want to cite it in your project notes.]
FAQ
Can I tile around cabinets without removing them?
Yes. In most installs, you either undercut the cabinet toe-kick (if clearance allows) or terminate tile at a planned edge and finish the gap with trim and/or a suitable caulk joint.
Should marble be undercut around cabinet bases?
Often, yes—if you can undercut safely and maintain the intended joint behavior. If undercutting isn’t feasible, a stop-line with a movement-aware finish detail is usually the more controllable approach.
What’s the best way to handle the gap between tile and cabinet?
Use a controlled, consistent gap and finish it using the method recommended for your setup. In many cabinet installations, that means trim and/or caulk rather than forcing grout where movement may occur.
Do I need to seal marble floor after installation?
Many marble floors require sealing, but the exact timing and whether your specific marble needs it depends on the stone finish and manufacturer instructions. [ADD: source for the specific marble type you’re using]
Why does marble crack near edges even when the tile “looks fine”?
Cracking near edges usually comes from stress at unsupported or poorly supported areas, inadequate mortar coverage, rigid grouting into a movement-capable transition, or uneven transitions caused by a subfloor out of flatness.
Sources
– TCNA Handbook (Tile Council of North America) — installation methods and substrate flatness considerations
– ANSI A108 / A118 standards — setting and installation system requirements
– Marble Institute of America (MIA) — marble installation/care guidance and sealing considerations
– [ADD: manufacturer installation guide/specs for your marble tile (thickness, edge details, and sealing requirements)]
– [ADD: manufacturer installation guide for the thin-set mortar you plan to use (trowel size, coverage, substrate requirements)]
– [ADD: manufacturer instructions for grout and whether it’s compatible with natural stone/marble]
– [ADD: official guidance on movement joints/requirements for tile installations from your chosen mortar/tile system’s technical documentation]
Marble floors around cabinets can look seamless, but only if you treat the perimeter as a system—not just a line of cut tile. Plan the cut lines, prep and support the substrate for full thin-set contact, make accurate toe-kick/stop-line cuts, and finish with grout + sealing plus a movement-aware cabinet-edge detail. If any part of that chain is shaky—especially subfloor flatness or joint planning—pause DIY and consider hiring help, because marble repairs are far harder (and more expensive) than doing the perimeter correctly the first time.
Frequently Asked Questions
What’s the best way to install marble flooring around kitchen cabinets?
To install marble floor around cabinets, plan a layout so your marble tiles land cleanly along the cabinet toe-kick area. Dry-fit tiles and mark cut lines before removing any baseboards or existing flooring. Use a wet saw for precise edge cuts, then set the marble with a quality thin-set mortar and grout the gaps only where appropriate. Finish by installing a small trim or using caulk at the cabinet wall seam to cover the expansion space.
How do I cut marble tiles accurately to fit around cabinet legs and toe-kick?
Measure the cabinet’s exact openings and account for the marble thickness plus any underlayment or leveling compound. Use a diamond wet saw for straight cuts and a tile nipper or grinding tool for small notches around cabinet legs and irregular areas. Dry-fit each piece in place, especially where cabinets don’t sit perfectly flush, and keep grout joints consistent. Seal cut edges if your marble is honed/polished and the surface is porous, then install with thin-set for a stable bond.
Why do marble floors need expansion gaps where they meet cabinets and walls?
Marble is a natural stone that can expand or contract with temperature and humidity changes, so it needs movement space even when cabinets are fixed. Leave a small expansion gap along walls and in areas where the floor meets cabinet bases, then cover it with flexible caulk instead of rigid grout. This helps prevent cracking, tenting, or grout failure over time, especially on larger kitchen layouts. If you skip the gap, stresses can concentrate at the tightest areas—often near cabinets and doorways.
Which underlayment and thin-set are best for installing marble floors on or near cabinets?
For marble flooring, use a flat, stable substrate (no dips) and choose a cementitious backer board or the manufacturer-recommended underlayment system for stone. Use a white or natural-stone–rated thin-set mortar (often polymer-modified) to ensure proper adhesion and reduce risk of discoloration. Avoid using drywall mud or unapproved leveling products that can crack or transfer movement. If you’re installing over an uneven floor, level it before laying marble to prevent lippage and weak points near cabinet edges.
How can I avoid lippage and hollow spots when installing marble around cabinets?
Lippage and hollow spots usually come from uneven subfloors and incomplete mortar coverage, so back-butter tiles and keep the floor properly leveled before setting. Use spacers to maintain consistent grout lines, and check tile height frequently as you work toward the cabinet footprint. For tight cabinet areas, set tiles in small sections so you can adjust placement quickly before the thin-set cures. After installation, clean joints thoroughly and seal the marble (if required) to protect against moisture and stains near kitchens.
📅 Last Updated: October 09, 2026 | Topic: How to install around cabinets marble floors? | Content verified for accuracy and freshness.
References
- Google Scholar Google Scholar
https://scholar.google.com/scholar?q=installing+marble+floor+around+cabinet+toe+kicks - Google Scholar Google Scholar
https://scholar.google.com/scholar?q=stone+tile+installation+around+fixed+objects+cabinet+base - Google Scholar Google Scholar
https://scholar.google.com/scholar?q=marble+tile+installation+thinset+grout+subfloor+requirements - Marble
https://en.wikipedia.org/wiki/Marble - Tile
https://en.wikipedia.org/wiki/Tile - https://en.wikipedia.org/wiki/Ceramic_tile
- https://en.wikipedia.org/wiki/Thinset_mortar
- Grout
https://en.wikipedia.org/wiki/Grout - Floor
https://en.wikipedia.org/wiki/Subfloor - https://en.wikipedia.org/wiki/Flooring



[…] Tile chevron floors typically require consistent grout line thickness and careful edge finishing at […]