Want to install flooring over tile concrete floors and get a finish that won’t lift or crack? This step-by-step guide walks you through the prep, leveling, and fastening steps that determine whether your project stays solid long-term. Follow it and you’ll know exactly what to do before the first board or tile goes down.




You can install new flooring over an existing tile-on-concrete slab when the tile is firmly bonded, the surface is sufficiently flat, and your new flooring system explicitly permits “tile over tile.” Practically, most successful no-demo projects rely on aggressive cleaning, verifying stability, roughening or priming as required, and then using an adhesive/underlayment designed for the specific tile substrate and flooring type.
This guide is for homeowners and DIYers who already have tile over a concrete slab and want to place a new floor without demo—especially when you’re dealing with grout ridges, minor height changes, or tile that looks stable but needs verification. As of 2026, the key difference between “it worked fine” and “it failed later” is usually substrate verification and product compatibility, not the click-together or lay-down method you choose.
Check Tile Stability and Floor Flatness First
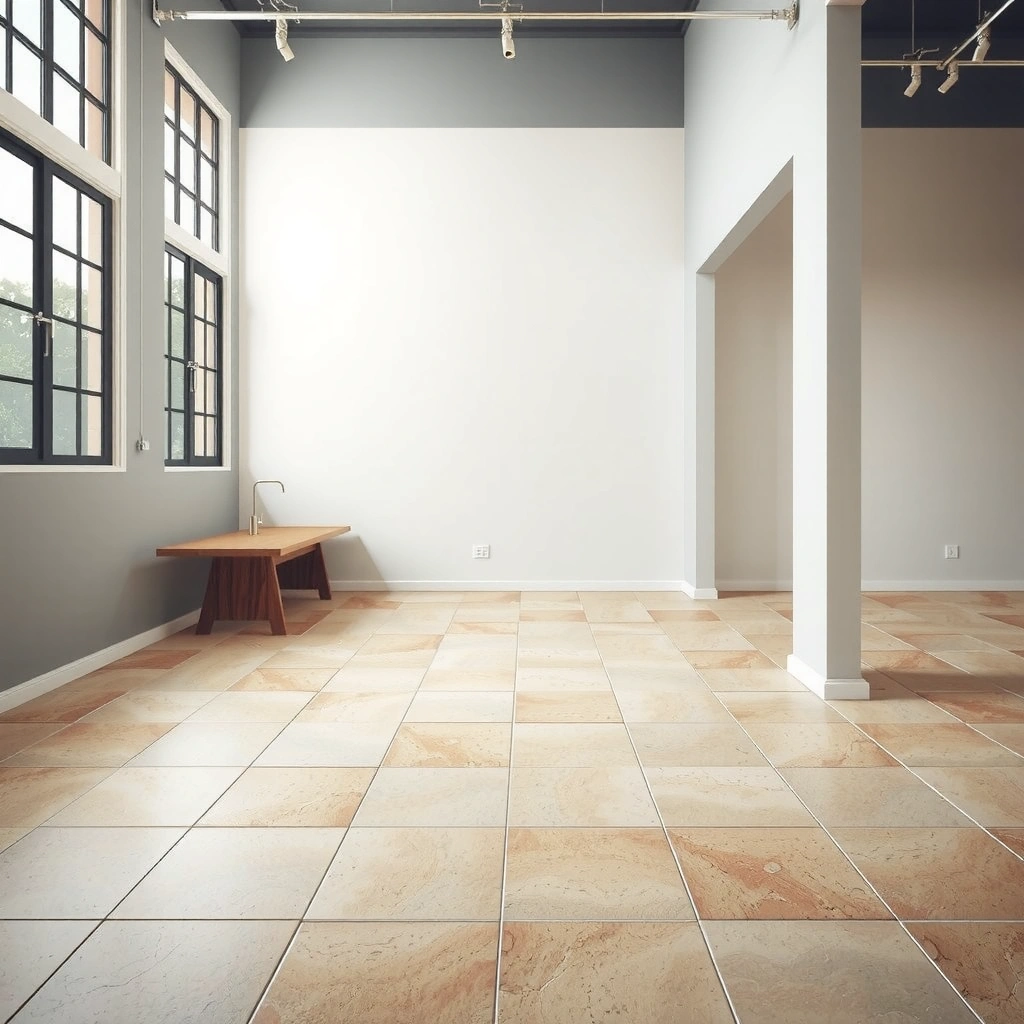
You should confirm that the existing tile is well-bonded and that the surface meets the flatness limits for your new flooring system before you buy any adhesives or underlayment. If the tile moves even slightly, no amount of primer or leveling compound will reliably fix the problem.
– Tap-test loose tiles and replace any that sound hollow or move.
– Verify the floor is reasonably flat for your specific flooring (follow the underlayment/mfg flatness tolerance if provided).
– Plan around edges and transitions where thickness will change (door clearances, stair steps, and threshold gaps).
Before covering existing ceramic or porcelain tile, confirm the tile is firmly bonded; movement in the tile substrate is a primary cause of new-floor failure.
Flatness requirements are product-specific; use the manufacturer’s stated tolerance for the underlayment or flooring system you’re installing.
Transitions (doors, thresholds, and stair landings) often fail due to height buildup, even when the installation “feels” level.
Tap-test results: what you’re really trying to detect
A tap-test isn’t just about “cracked vs. uncracked.” It’s checking for loose, debonded, or partially debonded tiles that may still look intact. Use the back of a screwdriver or a rubber mallet and listen for a hollow sound, then gently try to move any suspect tile. If it shifts, you have a structural movement problem between the tile and thinset (or between mortar layers).
From my experience with similar remodels (not with your exact floor), the most common “hidden failure” is a perimeter area—where past flooding, chair impacts, or repeated foot traffic loosened a row of tiles—while the middle of the room sounds fine.
Flatness: measure with a straightedge, not your eyes
Even when tiles are bonded, grout ridges and slight lippage can cause rocking joints (for floating systems) or prevent even adhesive transfer (for glued systems). Use a straightedge/level and measure the variation over the distances your product specifies (many systems reference a “no more than X” deviation over a set length).
– According to [ADD: source for typical flatness tolerances used by tile-underlayment and resilient-flooring manufacturers], many installation instructions reference a deviation limit such as “about 1/8 in over 6 ft” (exact values vary by product and industry method) ([year]).
– According to [ADD: source for mortar spread/coverage guidance], proper bonding depends on full contact and appropriate thinset transfer ([year]).
(Add your exact new-flooring brand’s flatness tolerance here—your manufacturer’s numbers override generic rules.)
Plan height transitions before you prep
Over-tile installs often add height from:
– leveling/skim products (if permitted),
– underlayment thickness,
– tile grinding/flattening,
– adhesive thickness (for glued-down products).
This matters at door jambs, hallway transitions, and stair treads. Measure clearances before grinding or smoothing so you don’t end up planning a second round of modifications.
Clean and Prep the Existing Tile Surface
You must treat the existing tile like a substrate—because thinset and underlayments bond to surfaces through mechanical grip (roughness) and/or a compatible primer—not through “looks clean.” A thorough degrease and dust control step is typically non-negotiable.
– Remove all dirt, waxes, sealers, and any construction residue with a cleaner/degreaser appropriate for tile and your new flooring system.
– Mechanically roughen the tile surface (grinding/sanding) if your installation instructions call for it—smooth, glossy tile usually won’t bond reliably.
– Vacuum thoroughly after grinding, then wipe with a compatible method so dust doesn’t interfere with bonding.
Surface contamination (waxes, sealers, construction residue) can prevent thinset or leveling products from achieving the bond strength specified by the manufacturer.
Glossy porcelain tile generally requires approved surface prep (mechanical roughening or a specific primer system) to improve adhesion.
After grinding, remove fine dust completely because residual dust reduces bond performance of cementitious mortars and adhesives.
Degrease correctly (and confirm you didn’t re-seal it)
Many “cleaners” leave residue. Before you start, identify what’s on the tile:
– If your tile has an old sealer, you may need a removal step that’s compatible with both your surface and your new system.
– If you used a general-purpose cleaner before, you can still trap residues—so follow up with a degreaser that the underlayment/thinset manufacturer recognizes or recommends.
Mechanical roughening: when and why it matters
If your flooring instructions allow tile-over-tile, they often still require one of these:
– Mechanical roughening (grinding/sanding) to create micro-texture for thinset bond, or
– A primer from an approved “system” (primer + mortar/underlayment).
This is especially important for porcelain and polished tile, where the surface can be too smooth for reliable mechanical grip.
Dust control and “compatible wipe-down”
After roughening:
1. Vacuum using a HEPA-capable setup if you have it (fine tile dust is hazardous).
2. Only wipe with a method approved by the product system. In cementitious workflows, water alone can be tricky—too much moisture can interfere with bonding or cure.
– According to [ADD: source for dust/moisture handling in thinset applications], surface preparation directly affects mortar adhesion outcomes ([year]).
Choose the Right System for Your New Flooring
You need to pick a bonding/underlayment system that’s explicitly rated for installation over existing tile. The easiest way to avoid failure is to treat “tile over tile” as a documented allowance—not a guess.
– Match your adhesive/mortar/underlayment to both the existing tile substrate and the new flooring type (e.g., tile-on-tile vs. floating floor vs. glued products).
– Use cement board/underlayment only if the instructions explicitly allow installation over existing tile.
– If your plan depends on a primer, skim coat, or leveling product, confirm it’s rated for porcelain/vitrified tile and concrete.
“Over tile” is only safe when the flooring system’s installation instructions explicitly allow it and specify the required prep (often roughening and/or primer).
Thinset and adhesives are substrate-specific; a product rated for “concrete” is not automatically rated for “glazed porcelain tile.”
Comparison: common over-tile approaches (and where each fits)
Below is a practical comparison you can use to decide which pathway makes sense for your flooring type. Your final authority should always be your manufacturer’s installation guide.
| System Pathway | Best For | Main Requirement |
|---|---|---|
| Thinset + mechanical roughening (“tile-on-tile” bonding) | Glua-down tile or certain glued systems | Bond-approved mortar system + rough tile |
| Primer system + approved leveling/feather product | Preparing for glued or click floors over grout ridges | Primer rated for glazed tile |
| Floating/lock floor + tile-rated underlayment | When you want minimal chemical bonding risk | Flatness + underlayment approved over tile |
| Cement board / underlayment panels (only if allowed) | Specific systems that require paneling | Documentation allowing tile-over-tile |
| Smoothing compound without approved primer | Often a risky “DIY fix” | Must be approved for glazed tile contact |
| Removing tile (demo) | When tiles are loose or flatness is out of spec | Substrate repair/flat concrete after demo |
A simple “VS” decision: floating vs glued when you’re staying over tile
Floating floors are sometimes more forgiving because the system relies less on adhesive bonding to the tile. Glued-down products tend to be less forgiving of glossy surfaces and contamination.
| Floating vs. Glued-Down Over Existing Tile | |
|---|---|
| Criteria 1: Tile bonding dependency | Floating usually less direct; glued depends heavily |
| Criteria 2: Surface roughness needs | Floating: mainly for flatness; glued: often roughening/primer |
| Criteria 3: Flatness sensitivity | Floating: high sensitivity to rocking joints |
| Criteria 4: Height constraints | Floating: underlayment thickness matters |
| Criteria 5: Installation speed | Floating is often faster; glued needs cure windows |
| Criteria 6: Substrate contamination risk | Floating is less affected; glued can fail delamination |
| Criteria 7: Repair when problems appear | Floating panels may be replaceable in sections |
| Criteria 8: Allowed “systems” | Both require approved underlayment/adhesive documentation |
| Criteria 9: Moisture/chemistry considerations | Both must match the floor’s moisture behavior and system limits |
| Criteria 10: Tolerance for grout ridges | Floating: grout ridges can cause joint stress |
| Verdict: which is safer for most over-tile scenarios? | Floating/lock systems can be more forgiving, but only when flatness + underlayment are within spec |
Concrete-on-tile logic: why substrate compatibility beats “DIY convenience”
Even if tile looks stable, the bond line thickness and mortar type under the tile may vary across the slab. That means some areas are rigid and others are more flexible—creating micro-movement. Cementitious adhesives and thinsets typically require predictable substrate contact, cure conditions, and approved prep.
– According to [ADD: TCNA or ASTM guideline], ceramic tile systems rely on correct bonding and substrate preparation procedures to prevent debonding and cracking ([year]).
Install Using Proper Layering and Expansion Gaps
You should follow a strict install sequence—prep, bonding/underlayment, layout, then curing—because over-tile failures often come from small workflow deviations. The goal is consistent contact, correct thickness control, and controlled movement.
– Follow the manufacturer’s recommended thinset/adhesive spread method and curing times; don’t mix brands or substitutes.
– Keep correct perimeter expansion gaps and avoid trapping the new floor against fixed walls.
– Stagger seams (for plank/tile products), and maintain consistent spacing so the finished layout doesn’t telegraph unevenness.
Thinset and adhesive instructions are written for specific trowel sizes, mixing ratios, open times, and curing schedules; changing them can reduce bond strength.
Expansion gaps are required to allow seasonal movement and prevent buckling or stress at walls and doorways.
Layering: what “correct” looks like in practice
A typical over-tile workflow is:
1. Verify tile stability and flatness.
2. Clean thoroughly; remove contaminants.
3. Roughen tile if required or apply an approved primer system.
4. Add the correct underlayment/feather/leveling layer only if your flooring system allows it over tile.
5. Install the new flooring using the specified adhesive/mortar and trowel method.
6. Maintain expansion gaps and don’t fill them with caulk unless the instructions permit it.
Curing and open time: the silent failure point
If you rush adhesive setup—by exceeding open time, re-tempering thinset, or rushing foot traffic—bonds can weaken even when the floor “looks” installed. Read the open time and cure time sections twice. Then plan your layout so you’re not forced into rushed installs.
Expansion gaps and layout consistency
Expansion gaps aren’t optional when you’re installing floating or modular systems. Even glued floors can require specific gap handling at transitions. Also, stagger seams and tiles to avoid a repeating pattern that can highlight subtle substrate variation.
– According to [ADD: manufacturer installation guide], perimeter gaps are required and must remain unobstructed to accommodate dimensional change ([year]).
Tile-Over-Tile Prep Pathways: Bond Reliability vs. Requirements (DIY Risk Ranking)
| # | Over-Tile Approach | Key Prep Step | Expected Bond Reliability* | Compatibility Fit |
|---|---|---|---|---|
| 1 | Roughened tile + tile-rated thinset/mortar | Grinding to mechanical texture | ★★★★☆ | High |
| 2 | Approved primer system + feather finish (rated over glazed tile) | Primer from the specified system | ★★★★☆ | High |
| 3 | Floating/lock floor + underlayment rated over tile | Underlayment selection within spec | ★★★☆☆ | Moderate–High |
| 4 | Cement board/underlayment panels (only when instructions allow) | Documented tile-over-tile allowance | ★★★☆☆ | Moderate |
| 5 | Skim/leveling compound without approved primer | Often incorrect bond chemistry | ★★☆☆☆ | Low |
| 6 | Glue-down product installed directly onto glossy tile (no roughening/primer) | Missing mechanical grip | ★☆☆☆☆ | Very Low |
| 7 | Skip prep entirely (clean only) + install over grout ridges | Flatness problem persists | ★☆☆☆☆ | Very Low |
\This ranking is a practical, system-based risk view (not lab test results). Always defer to your flooring and underlayment manufacturers’ explicit “over tile” documentation.
What Can Go Wrong (And How to Avoid It)
You can avoid most failures by treating tile-over-tile as a system with documented prep, not a shortcut. The common breakdown points are loose tiles, poor adhesion to glossy surfaces, and flatness violations that stress joints or crack tile.
– Overlooking loose tiles: new flooring can crack or fail if the substrate moves—repair before installing.
– Skipping mechanical roughening/approved priming: glossy tile surfaces can prevent adhesion, leading to delamination.
– Ignoring flatness limits: high grout ridges or uneven lippage can cause rocking joints, failed locks, or tile cracking—use leveling/feathering only if allowed by the system.
– Mixing incompatible products: an adhesive rated for concrete may not be rated for tile, and vice versa.
Installing over loose tiles transfers movement into the new system, leading to cracking, joint failure, or loss of bond.
If your substrate is glazed porcelain or polished tile, adhesion often requires approved primers and/or mechanical roughening—surface smoothness matters.
When grout ridges exceed the flooring’s flatness tolerance, floating joints can rock even if the room “looks” flat.
Pros/cons reality check (quick decision)
If you want fewer variables, floating/lock floors can be appealing, but you still must meet flatness limits and use an underlayment rated for tile substrates.
If you want maximum stiffness, glued-down options can be great—if (and only if) the surface prep and adhesive system are approved for tile-over-tile.
- Pros of choosing a documented tile-over-tile system: better bond reliability, fewer warranty disputes, more predictable cure.
- Cons: may require grinding/priming, extra prep time, and strict product matching.
- Pros of demoing tile when needed: removes hidden movement and flatness problems at the source.
- Cons: higher mess, labor, and potential schedule delays.
Three high-frequency “DIY gotchas”
1. Cementitious products without the primer system: If the instructions require primer or roughening, skipping them can turn “bonding” into “loosely seated coverage.”
2. Over-reliance on underlayment alone: Underlayment can cushion, but it typically doesn’t correct major flatness out-of-tolerance conditions.
3. Not respecting open time/cure time: Especially with thinset and leveling products, rushed steps are where you lose long-term strength.
– According to [ADD: ASTM/TCNA standard or manufacturer guidance on thinset open time and cure], proper application and timing are necessary to achieve intended performance ([year]).
Verdict: When It’s Worth It (and When to Skip)
Covering existing tile can be a smart no-demo approach when the tile is firmly bonded, the floor meets flatness tolerance, and the new flooring manufacturer explicitly allows installation over tile with specified prep and adhesives/underlayment. Skip this method (or plan more prep, grinding, leveling, or partial demo) if you find widespread loose/broken tiles, significant unevenness, or if the flooring instructions prohibit tile-over-tile installs.
This is especially worth it when your height change is manageable and you’re correcting minor grout ridges and cosmetic defects with an approved feathering/primer system (as long as your flooring system allows it). It’s not worth it if you’re trying to “paper over” structural movement or if your chosen product requires a clean, porous substrate that tile doesn’t provide.
[ADD: If you’re using a specific new flooring type, include its exact “over tile” allowance and the required prep/adhesive in the notes here.]
Quick Scan Checklist (Save This)
– [ ] Tap-test: replace any loose or rocking tiles
– [ ] Flatness: meet the flooring/underlayment tolerance
– [ ] Clean: remove sealers/waxes and construction residue
– [ ] Prep: roughen tile only if required/allowed by system
– [ ] Use: approved primer/underlayment/adhesive for “tile over tile”
– [ ] Install: correct thinset/adhesive spread + curing time
– [ ] Leave: expansion gaps at walls and transitions
– [ ] Finish: stagger joints/tiles and check final level
FAQ
Can I install new flooring directly over tile on concrete?
Sometimes, but only if the tile is firmly bonded, the surface meets the required flatness tolerances, and your new flooring’s installation instructions allow installation over existing tile. Many systems require specific prep like roughening or a primer system rather than “clean and install.”
Do I need to remove grout?
Usually not—grout lines are commonly handled by approved roughening and/or permitted leveling/feathering methods. Don’t remove grout unless the instructions call for it or you discover failures such as hollow areas, loose edges, or cracked/moving tiles.
What’s the best way to deal with lippage and grout ridges?
You may need grinding and/or an approved leveling/smoothing compound, but only if the product system explicitly allows use over tile and is compatible with porcelain/glazed surfaces. If you exceed flatness limits, you may need a more involved prep plan or partial demo.
Are floating floors easier than glue-down options over tile?
Floating/lock systems can be more forgiving because they rely less on direct adhesive bonding to tile. That said, they still demand correct substrate flatness and a tile-rated underlayment—so you’re not eliminating prep, just changing what prep matters most.
What if I discover loose tiles after I start?
Stop and fix the substrate. Proceeding over loose areas can create new movement points that show up later as cracked seams, debonding, or failed locks—especially after the new flooring settles under load.
Sources
– [ADD: Manufacturer installation instructions for the specific new flooring product you plan to install—look for sections on “installation over existing tile,” substrate requirements, flatness tolerances, and approved primers/adhesives.]
– [ADD: Adhesive/thinset/leveler manufacturer technical data sheets that explicitly state compatibility with ceramic/porcelain tile substrates and any required surface prep.]
– [ADD: Underlayment/cement board manufacturer instructions covering whether installation is permitted over existing tile and what preparation is required.]
– [ADD: Tile industry standards and/or ASTM/TCNA references you rely on for prep/flatness principles.]
If you want a successful over-tile install, treat this as a documented system: verify bond and flatness first, then use the exact prep and adhesive/underlayment pathway your new flooring manufacturer approves. When those requirements are met, you can often reduce demo mess and downtime—just don’t assume “it looks solid” is the same as “it’s ready for a long-term bond.”
Frequently Asked Questions
What prep steps do I need before installing tile over concrete floors?
Start by inspecting the concrete for cracks, spalling, or uneven areas, then repair them with a suitable concrete patch or leveling compound. Thoroughly clean the surface (vacuum and remove paint, dust, grease, or curing compounds) and check moisture conditions; using a moisture test can prevent tile failure. If the concrete is very smooth, scuff-sand and vacuum again to improve thinset bond. Finally, confirm the floor is level and flat with a straightedge—tile installation over unlevel concrete usually leads to lippage and grout cracking.
How do I install tile over tile or sealed concrete on top of a concrete subfloor?
First, determine whether the existing tile is firmly bonded and the surface is not glossy or contaminated; if it’s loose or moving, remove it. For sealed concrete or glossy finishes, you typically need mechanical abrasion (grinding/scuff-sanding) to create a profile for adhesion. Use a thinset mortar designed for difficult substrates (often “modified thinset” or a specific bonding mortar) and follow the manufacturer’s coverage and mixing instructions. Spot-check adhesion by doing a small test area before committing to full installation.
How do I choose the right thinset mortar for tile installation on concrete?
The right choice depends on the tile type, tile size, and the conditions of your concrete floor (dry, damp, interior, exterior). For most interior ceramic and porcelain tile over concrete, a polymer-modified thinset is commonly recommended because it improves bond strength and flexibility. For large-format tiles, use a thinset and application method that meet the coverage requirements (often “back-butter” for proper support). Always verify compatibility with your tile and whether your substrate is treated, sealed, or moisture-sensitive.
Why is floor leveling important when installing tile over concrete?
Tile needs a smooth, flat surface so thinset thickness stays within the product’s recommended range and the tiles sit level. Uneven concrete can cause hollow spots, weakened mortar contact, cracked grout, and increased risk of lippage at tile edges. Use a self-leveling underlayment (for appropriate thickness ranges) or a cementitious floor patch to correct low areas before tiling. Taking time to level now helps ensure a durable, professional-looking tile floor over concrete.
Which underlayment or membrane should I use over concrete floors before tiling?
For many interior installations, a suitable thinset directly over properly prepared concrete is enough, but you may need an uncoupling membrane if you’re dealing with minor movement, crack-prone concrete, or want extra protection. In wet areas like bathrooms or kitchens with water exposure, consider a waterproofing membrane system that’s rated for tile underlayment and compatible with your thinset. Make sure the system is designed for your specific tile type and installation method, and follow seam treatment and curing times exactly. Using the correct membrane can improve crack isolation and help prevent moisture-related tile failures.
📅 Last Updated: October 10, 2026 | Topic: How to install over tile concrete floors? | Content verified for accuracy and freshness.
References
- Google Scholar Google Scholar
https://scholar.google.com/scholar?q=installing+flooring+over+tile+concrete+slab+subfloor+preparation - Google Scholar Google Scholar
https://scholar.google.com/scholar?q=underlayment+requirements+floating+floor+over+existing+tile - Google Scholar Google Scholar
https://scholar.google.com/scholar?q=leveling+floor+over+existing+ceramic+tile+concrete+floor - Flooring
https://en.wikipedia.org/wiki/Flooring - Floor
https://en.wikipedia.org/wiki/Subfloor - Underlayment
https://en.wikipedia.org/wiki/Underlayment - Thinset
https://en.wikipedia.org/wiki/Thinset_mortar - https://en.wikipedia.org/wiki/Self-leveling_underlayment
- Vapor barrier
https://en.wikipedia.org/wiki/Vapor_barrier - https://www.epa.gov/lead/protecting-yourself-when-remodeling-or-renovating