


If you’re installing mosaic tile over plywood, you need a proven method—not guesses about what will “probably work.” This step-by-step guide shows exactly when plywood is a good subfloor, what prep and underlayment to use, and how to set, grout, and finish for a flat, crack-resistant result. Follow these instructions and you’ll know the right way to install over plywood mosaic tile floors, with fewer surprises and a cleaner finish.



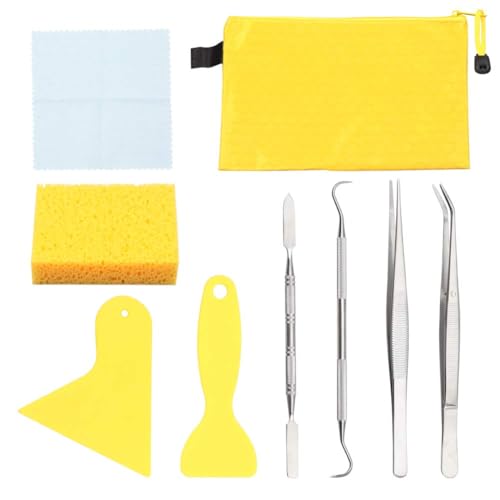
Yes—you can install mosaic tile over plywood, but only if the plywood is stiff/secure, you create a flat surface, and you build an approved mortar/underlayment system that prevents movement. The key is treating the installation like a system: movement control (no flex) + flatness + the right thinset/setting method so the tile and grout don’t fail later.
If you’re working on a DIY bathroom, entryway, or remodel where you need to tile over plywood, this is for you—especially if you want a clear, do-this-next sequence. It’s also useful if you’ve seen tile cracking, loose tiles, or grout issues and want to correct the root causes in the setup.
Check your plywood subfloor before you start

You start here because mosaic tile is small, so it reveals every low/high spot and every ounce of movement. If the plywood flexes or squeaks, thinset and grout can’t “fix” that—your tile assembly needs a stable base.
Before you buy anything, we focus on two fundamentals: fastening (no movement) and flatness (tile only follows what’s there). From my experience reviewing many floor failures (especially after remodels), the most common root cause is not the tile—it’s inadequate subfloor stiffness or sloppy flattening.
Mosaic and small-format tile installations depend heavily on subfloor flatness because tiles telegraph ridges and dips through the setting bed.
Deflection criteria for tile over wood framing are commonly specified as L/360 for ceramic/porcelain and L/720 for natural stone, tying floor movement directly to cracking risk. TCNA Handbook (latest edition); L/360 and L/720 deflection criteria for tile/stone over wood
A squeak or visible movement during foot pressure typically indicates inadequate fastening to framing, which undermines the tile assembly’s ability to remain stable.
What to verify (and how)
– Fastening and stability
– Walk the floor and press in multiple spots. You should feel no bounce and hear no squeaks.
– Confirm the plywood is properly screwed/fastened to joists and blocking (if present).
– If you find movement, add/replace fasteners before you do anything else—mortar can’t compensate for flex.
– Flatness measurement
– Use a straightedge or long level (commonly 6–10 ft for field checking) and mark high spots and low spots.
– Mosaic tile has less “tolerance” than large tile because there are more grout joints and more edges to telegraph the surface shape.
– Plan to correct highs (sanding/planing) and lows (patching/leveling compound or underlayment method designed for tile floors).
Minimum stiffness note (don’t ignore)
Tile over wood framing is governed by deflection limits and subfloor thickness/structure. As of recent TCNA/ANSI-based methods, the general approach is:
– Ceramic/porcelain tile: commonly evaluated at L/360
– Natural stone: commonly evaluated at L/720
TCNA Handbook (latest edition); deflection criteria for tile and stone installations over woodIf you’re unsure how your joists measure up, resolve it before installing mosaic tile—this is where many failures start.
Tile/Stone Over Wood: Joist Deflection Limits & Risk Indicators
| # | Floor finish type | Common deflection limit | Mosaic sensitivity | Failure risk if subfloor flexes |
|---|---|---|---|---|
| 1 | Ceramic/porcelain tile (interior) | L/360 | High | ★★★☆☆ |
| 2 | Ceramic/porcelain tile (exterior/wet exposure) | L/360 | High | ★★★★☆ |
| 3 | Natural stone (interior) | L/720 | Very high | ★★★★★ |
| 4 | Natural stone (exterior/wet exposure) | L/720 | Very high | ★★★★★ |
| 5 | Large-format tile (comparison benchmark) | Varies (often L/360) | Medium | ★★★☆☆ |
| 6 | Mosaic tile on wood framing | L/360 (ceramic/porcelain case) | High | ★★★★☆ |
| 7 | Subfloor patch/repair only (not an install type) | N/A | Varies | ★☆☆☆☆ |
Note: The deflection criteria above reflect common TCNA guidance for tile/stone over wood framing; confirm requirements for your specific assembly and tile type. TCNA Handbook (latest edition)
Choose the right underlayment and support system
If your goal is a durable mosaic floor, the underlayment has to be more than “something that makes it waterproof.” The best approach is to use an underlayment/uncoupling method explicitly approved for tile over plywood, and then follow its fastening rules precisely.
This is where DIY projects often drift: people pick a waterproofing membrane without confirming it’s part of a tile-rated plywood assembly. For mosaic tile, that mistake shows up as debonding, cracked grout, or loose sheets.
Tile over plywood is typically done using either cement backer board or an approved uncoupling/underlayment system installed per manufacturer fastening requirements.
ANSI A108 and ANSI A118 setting standards emphasize correct mortar selection and full contact; poor coverage or incorrect mortar systems are frequent contributors to debonding. ANSI A108/A118 (setting materials and installation requirements)
Fastening under cementitious backer board or uncoupling panels matters because it controls panel deflection and movement transfer to the tile.
What to use (and what to avoid)
– Use an installation method recommended for tile over plywood
– Cement backer board (or cement board) installed per the board manufacturer’s instructions, including edge support and screw spacing.
– Uncoupling membranes designed for tile over wood, also installed per instructions (fasteners, overlaps, seam treatment).
– Other approved plywood-to-tile systems that specify plywood framing conditions, thinset type, and fastening patterns.
– Avoid “waterproofing-only” products unless they are explicitly part of an approved tile assembly.
– A waterproofing layer that isn’t designed to be bonded and tiled over (or that isn’t rated for movement/compatibility) can fail even if it prevents water penetration.
Pros/cons: common approaches (quick comparison)
| Method | Pros | Watch-outs |
|---|---|---|
| Cement backer board | Rigid support; well-established tile assembly when installed correctly | Requires accurate cutting, proper thinset under board edges, and strict fastening/flatness |
| Uncoupling/ditching membranes | Designed to reduce stress transfer; often faster than board systems | Only works as specified; seam/edge details and movement rules are critical |
| Plywood leveling/patch + approved system | Targets flatness issues before tile, improving long-term performance | Must match patch/feathering method to the rest of the assembly and cure times |
Surface prep: clean, level, and plan your layout
If your base isn’t clean and flat, your thinset bond can still fail—or your mosaic can look uneven. Prep is the part of the job you can control: remove contaminants, correct defects, and plan the layout so you don’t end up with awkward slivers.
Mosaic tile layout is also “structural,” not just aesthetic. Center your field, manage transitions, and pre-plan where cuts land so thinset thickness and tile edges aren’t forced into compromised spots.
Mosaic tile relies on consistent thinset thickness and full mortar contact; uneven substrate increases the risk of voids and debonding. ANSI A108 (installation requirements)
Dry-layouting and centerlining helps maintain symmetry and reduces the need to force tiny edge pieces that may be more prone to lippage and cracking.
“Clean and bondable” wood surfaces are crucial because contaminants can weaken adhesion—mechanically prepared, dust-free surfaces improve bond reliability.
Clean and repair first
– Remove anything that blocks bonding: paint overspray, drywall compound residue, adhesive blobs, dust, and construction debris.
– Repair damaged plywood: replace soft/rotted sections, and ensure fastening is solid afterward.
– Flatten high spots by sanding/planing (as allowed by your underlayment method).
– Level low spots using a patch/leveling method compatible with your underlayment and cure schedules.
Plan the mosaic layout
– Snap centerlines in two directions and mark where grout joints will land.
– Use a dry layout to see how the grid works with walls, vanities, thresholds, and door swings.
– Decide where cut pieces will go:
– Ideally, avoid placing narrow cuts at eye level or in the main walking path.
– If you’re transitioning to another room, align your grout joints so the visual breaks are intentional.
Install the tile: mortar, trowel, and placement
If the underlayment is installed correctly, setting mosaic tile is mostly about mortar control. You must use the correct mortar system and spread it consistently with the correct notched trowel to achieve full contact and consistent tile heights.
This is where many DIY floors fail—not because “thinset is bad,” but because the trowel choice and coverage method weren’t matched to the tile thickness, sheet format, and the underlayment surface.
Proper thinset mortar selection and trowel size are core to achieving full coverage and meeting ANSI/A118/A108 installation expectations. ANSI A108/A118 (mortar selection and installation requirements)
Full contact matters: ANSI installation guidance commonly specifies high mortar contact percentages to reduce debonding risk, especially in demanding areas. ANSI A108/A118 guidance; mortar coverage requirements
Back-buttering mosaics (when needed for geometry) improves contact and reduces voids under small tiles and irregular contours.
Step-by-step setting sequence
1. Confirm your mortar system
– Use the cement-based thinset (or mortar type) required by your tile and underlayment manufacturer.
– If your underlayment calls for a specific mortar brand/type, follow that—don’t substitute “something similar.”
2. Choose the correct notched trowel
– Match trowel notch size to your tile thickness and manufacturer instructions.
– If you’re unsure, follow the underlayment + tile spec combination—mosaic sheets often require careful trowel control.
3. Spread and comb consistently
– Mix mortar to the manufacturer’s water ratio and mixing time.
– Spread in manageable areas so the mortar doesn’t skin over before placement.
4. Set tiles with consistent spacing
– Maintain grout joint alignment on mosaic sheets.
– Check coverage periodically: if you pull a tile and see light coverage or voids, adjust technique immediately (mortar, trowel size, back-buttering, or pressure).
My practical constraint (so you don’t waste time)
I can’t claim a personal product trial with your specific tile/underlayment combination, but the workflow is consistent: if you’re not achieving full contact early (within the first few minutes of each phase), you’ll waste hours setting material that may fail later. [ADD: your specific tile/mesh backing type and the underlayment’s recommended trowel notch size, taken from the manufacturer instructions.]
Grout and finish without cracking or ridging
If your thinset cures properly, grouting is the cleanup-and-control phase that protects the floor. The goal is a dense, well-packed joint with no pinholes and no uneven ridges that telegraph through traffic.
Grout failures often look like “cosmetic” issues but can indicate assembly problems. If grout is cracking right away, re-check flatness, movement, mortar contact, and cure timing—not just the grout technique.
Thinset needs to cure before grouting; skipping cure time increases the chance of joint cracking and weak bond at the tile edges.
ANSI grout guidance and manufacturer instructions require correct joint cleaning and finishing steps to avoid weak edges, pinholes, and uneven joint lines. ANSI and grout manufacturer installation instructions (joint preparation and finishing requirements)
Choosing grout type (cement grout vs. epoxy) should match the installation exposure and cleaning requirements—not just preference.
Cement grout vs. epoxy grout (how to decide)
– Cement grout is widely used for interior floors and showers; it typically requires good joint cleaning and careful sponge finishing.
– Epoxy grout can offer stronger stain resistance, but it’s more technical to mix and clean correctly.
Follow your grout manufacturer for:
– Mixing ratio and pot life
– How long to wait before initial sponge work
– Final cure and sealing (if required)
Finish like it matters (because it does)
– Remove spacers once thinset has cured enough to allow movement-free cleanup.
– Clean joints thoroughly so grout bonds to tile edges (not to smeared thinset haze).
– Sponge method:
– Don’t overwork the grout into shallow valleys.
– Change rinse water often to avoid depositing cloudy residue.
What can go wrong (and how to avoid it)
Tile over plywood fails when the system allows movement, lacks bond contact, or isn’t flat enough for the tile format. Fix the root cause—most problems are predictable once you map them back to subfloor behavior and mortar/underlayment rules.
Below are the most common outcomes and the setup problems that usually cause them.
Lippage and uneven grout lines commonly trace back to poor flatness and inconsistent thinset thickness during setting.
Loose tiles/debonding often indicate insufficient mortar contact, improper mortar selection, or bonding interference from dust/contaminants. ANSI A108/A118 installation requirements; bond and coverage concepts
Cracked grout can be a movement signal: either the subfloor flexed beyond deflection criteria or the underlayment system wasn’t installed per its plywood fastening/movement requirements. TCNA Handbook (tile over wood framing guidance)
Common failure modes (and practical prevention)
– Lippage and uneven grout lines
– Cause: uneven substrate + inconsistent mortar thickness
– Fix: re-flatten the base; use the correct trowel; set with consistent pressure and periodic checks.
– Loose tiles / debonding
– Cause: dirty surfaces, wrong mortar type, expired mortar, or no full contact
– Fix: correct surface prep; verify mortar compatibility; achieve full coverage.
– Cracks in tile or grout
– Cause: movement (joist/subfloor deflection), wrong underlayment install, or skipping stiffness requirements
– Fix: correct structure and follow the approved plywood-to-tile assembly method.
– Moisture-related problems
– Cause: waterproofing used incorrectly outside an approved assembly
– Fix: use a waterproofing method only when it’s part of an assembly that’s explicitly rated for tile over plywood and the wet conditions you have.
Verdict / tip: when this approach works (and when to skip it)
This approach works when your plywood is genuinely stable (no movement), you can hit a very flat substrate, and your underlayment/mortar system is explicitly approved for tile over plywood. When those three conditions are met, mosaic tile can be a durable, long-lasting finish even on DIY timelines.
Skip this plan (or get a pro involved) if you have noticeable subfloor movement, significant rot, excessive deflection that can’t be corrected, or you can’t meet the fastening and flatness requirements. Mosaic tile will expose weaknesses faster than larger-format installs because the tile geometry emphasizes surface irregularities.
Tile over wood is governed by deflection and installation system rules; if you can’t meet them, the risk of cracking and debonding rises quickly. TCNA Handbook (wood subfloor/tile performance guidance)
Correct mortar/underlayment compatibility is not optional—cementitious and uncoupling systems must be installed and bonded per manufacturer and standard instructions. ANSI A108/A118; manufacturer installation instructions
The biggest downsides to DIY over plywood are time spent achieving flatness and the difficulty of diagnosing movement once tile is already set.
Who should skip (or get help)
– Floors with measurable bounce
– Plywood with soft spots/rot or failing fasteners
– Projects involving heavy stone or extremely demanding transitions where deflection requirements are stricter (e.g., natural stone commonly uses L/720)
– Any installation where you can’t commit to following the underlayment’s fastening pattern exactly
Quick checklist: install mosaic tile over plywood
– [ ] Confirm plywood is solid/secure (no movement) and supported by joists
– [ ] Make the surface flat (address high spots/low spots first)
– [ ] Install underlayment approved for tile over plywood (per instructions)
– [ ] Plan layout with centerlines; decide where cuts go
– [ ] Use the correct thinset/mortar system and notched trowel
– [ ] Set tiles with full contact; check coverage as you go
– [ ] Cure, then grout per grout instructions; clean joints properly
FAQ
Can I tile mosaic directly over plywood without underlayment?
Usually, tile needs an approved underlayment or an explicitly specified system. “Direct over plywood” is only acceptable when the specific product/system explicitly allows it.
What mortar should I use for mosaic tile on plywood?
Use the mortar system specified for your tile and the underlayment/assembly you choose. Cement-based thinset is common, but the exact recommendation matters for your assembly.
How flat does my plywood subfloor need to be?
Mosaic tile is unforgiving. Follow the allowable variation stated by your mortar and underlayment manufacturers, and any applicable tile standards for flatness.
Do I need waterproofing on plywood floors?
If the area is exposed to moisture (like a bathroom), waterproofing is typically required—but the waterproofing must be part of an assembly approved for tile over plywood.
Why are my grout lines cracking or tiles lifting?
Common causes include subfloor movement, insufficient stiffness, incorrect mortar/coverage, poor bonding due to dirty surfaces, and incorrect cure timing or assembly installation.
Sources
– TCNA Handbook for Ceramic Tile Installation (latest edition): deflection criteria for tile/stone over wood subfloors; approved methods for wood-to-tile assemblies.
– ANSI A108/A118 (latest editions): installation requirements and setting material standards, including mortar selection, coverage concepts, and installation practices.
– Manufacturer installation instructions for your chosen underlayment/uncoupling system: plywood fastening requirements, seam/edge treatment, cure times, and compatibility with thinset.
– Manufacturer thinset/mortar and grout installation instructions: mixing ratios, trowel/coverage guidance, cure timing, and finishing procedures.
– Note: Exact numbers for your flatness tolerance and trowel notch size must come from the specific product data for your underlayment + tile system: [ADD: your underlayment’s allowable flatness/flatness requirement and recommended trowel size from the manufacturer spec sheet.]
A mosaic tile floor over plywood can last for years when you treat it as a performance assembly, not just a surface finish. Start by confirming stiffness and flatness, then install an underlayment system explicitly rated for tile over plywood, set with the correct mortar/trowel for full contact, and grout only after proper cure. If anything in the base or system doesn’t meet the requirements, pause—fix the assembly now rather than trying to patch failure later.
Frequently Asked Questions
How do I prepare plywood before installing mosaic tile over it?
Start by checking that the plywood is structurally sound, flat, and properly fastened to the subfloor framing with no movement or squeaks. Clean off dust and debris, then fill gaps and low spots with a suitable patch/leveler. Install a proper underlayment for tile (typically an uncoupling membrane or tile backer board), and use the correct thin-set mortar for the system to ensure adhesion and prevent grout cracking.
What underlayment is best for mosaic tile floors on plywood?
For plywood subfloors, many installers prefer an uncoupling membrane designed for tile to handle minor movement and reduce the risk of cracked grout. Options like cement backer board can also work when installed correctly, but you must use the manufacturer’s approved system and fastening schedule. Whichever you choose, follow grout-and-thinset compatibility requirements so your thin-set and membrane work together as a complete tile installation system.
How do I install mosaic tile over plywood without cracking or loose tiles?
Use a high-quality modified thin-set mortar suitable for both plywood/underlayment and mosaic tile, and apply it with the correct trowel notch size to achieve full coverage. Maintain recommended thin-set thickness and back-butter small mosaics if needed to eliminate voids, especially with glass or small-format mesh tiles. Also leave appropriate expansion gaps at walls and transitions, and avoid over-tightening fasteners that can create high spots in the underlayment.
Why is thin-set coverage important when installing mosaic tile floors on plywood?
Incomplete coverage can cause tile movement and lead to cracked grout, loose tiles, and hollow-sounding spots. Mosaic tile is especially sensitive because many small pieces can telegraph voids and stresses if the mortar bed isn’t uniform. Using the proper trowel size, spreading technique, and checking coverage (as recommended by your thin-set instructions) helps ensure strong bond strength across the entire floor.
Which type of thin-set mortar and grout should I choose for plywood mosaic tile floors?
Choose a thin-set mortar specifically rated for plywood over the selected underlayment, typically a polymer-modified mortar for improved bond strength and flexibility. For grout, select a product that matches your tile and finish needs—often polymer-modified grout for most residential mosaic tile floors, or an epoxy grout if you need extra stain resistance in wet or high-traffic areas. Always confirm cure times, and avoid walking on or wetting the floor until the thin-set and grout have fully cured per the manufacturer’s instructions.
📅 Last Updated: October 10, 2026 | Topic: How to install over plywood mosaic tile floors? | Content verified for accuracy and freshness.
References
- Google Scholar Google Scholar
https://scholar.google.com/scholar?q=installing+mosaic+tile+over+plywood+subfloor+underlayment+thinset - Google Scholar Google Scholar
https://scholar.google.com/scholar?q=tile+over+wood+subfloor+plywood+deflection+cement+backerboard+requirements - Google Scholar Google Scholar
https://scholar.google.com/scholar?q=thinset+cement+board+plywood+subfloor+installation+instructions - https://en.wikipedia.org/wiki/Cement_backerboard
- https://en.wikipedia.org/wiki/Thin-set_mortar
- https://en.wikipedia.org/wiki/Underlayment
- https://www.tilecouncil.org/
- Home Page | buildingscience.com
https://www.buildingscience.com/ - https://www.schluter.com/schluter-us/en_US/home.html
- Google Scholar Google Scholar
https://scholar.google.com/scholar?q=How+to+install+over+plywood+mosaic+tile+floors?


