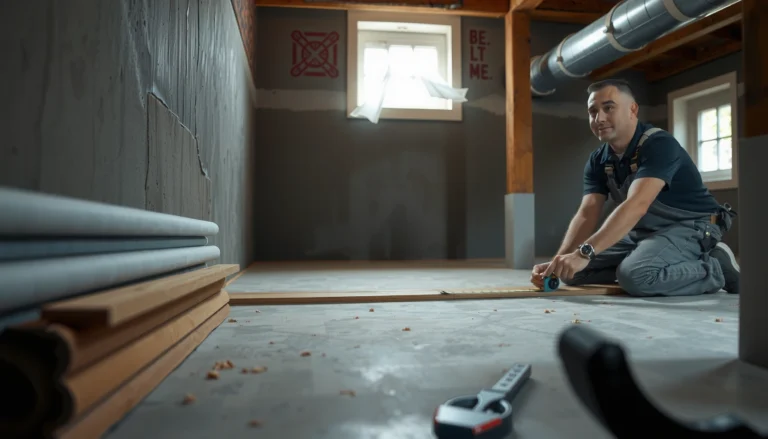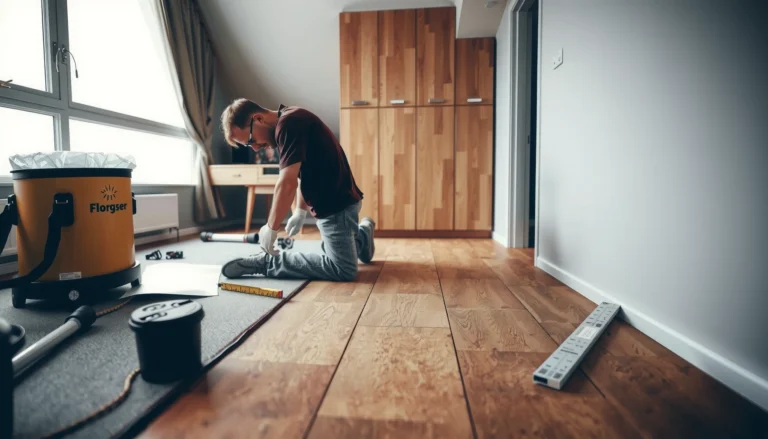

Want to install travertine over plywood floors and need a reliable answer? This step-by-step guide shows when plywood is a safe substrate, what prep and underlayment system to use, and how to set travertine correctly so it doesn’t crack or loosen. Follow these instructions and you’ll know exactly how to lay, cut, and finish your over-lywood travertine floor with confidence.




You can install travertine over plywood, but only when the subfloor is stiff (movement-controlled) and you use a plywood-approved uncoupling/backer layer plus the correct thinset and grouting/sealing system. The single biggest success factor is preventing plywood flex—if the floor moves, grout and stone are the first things to crack.
If you’re remodeling a living space or a hallway and you have a plywood subfloor, this guide walks through a reliable, manufacturer-matched method rather than the risky idea of “tile straight onto plywood.” We’ll focus on how to prep the plywood, what underlayment approach actually works, and the mortar/sealer details that affect travertine performance in the real world (and in 2026 construction conditions).
Check Subfloor Flatness and Stability (Before You Buy Anything)

A plywood subfloor must be both stable (not bouncing) and flat (no wavy high/low areas) before you add any tile layers. If you skip this step, you’re usually paying later in lippage, cracked grout, or debonding—because neither thinset nor “leveling” products can fully fix excess movement.
Start by confirming structural stiffness and deflection using the framing rules for tile and stone. For natural stone, the industry commonly uses a tighter deflection criterion than ceramic tile—for example, L/720 is often referenced for natural stone versus L/360 for ceramic tile. TCNA Handbook / ANSI A108 guidance on substrate deflection (exact wording varies by method and edition). Next, measure flatness across the whole installation area: tile tolerances depend on the installation system, but your goal is to avoid creating “hard spots” and “voids” that telegraph through travertine.
Also confirm joist spacing and subfloor condition before selecting any underlayment. If your framing is bouncy or your plywood has water damage, the correct move is to reinforce the structure first—then build the tile system on top.
For natural stone installations, industry guidance typically requires stricter joist/subfloor deflection limits (commonly L/720) than many ceramic tile requirements (commonly L/360). TCNA Handbook / ANSI A108 movement guidance
Thinset installation quality depends on the substrate being sufficiently flat; excessive high/low areas can cause lippage and incomplete mortar coverage. ANSI A108 installation methods
If the substrate flexes more than the tile/stone system is designed to accommodate, grout and stone are at higher risk of cracking even when the tile layout and materials are correct. TCNA Handbook movement-control principles
Key checks to do now (practical and fast)
– Solid feel test: Step across multiple areas. No “bouncing,” squeaks, or flexing planks.
– Flatness: Use a straightedge or level to map highs/lows. Don’t rely on your eyes.
– Joist spacing: Verify it matches what your chosen underlayment/installation system expects.
– Plywood condition: Look for rot, delamination, or past water intrusion—any of these should stop the project until corrected.
> Note: For plywood thickness and framing recommendations, always defer to the specific underlayment system documentation you plan to use. Different uncoupling membranes and backer board manufacturers set different requirements.
Prepare the Plywood Surface Properly
Plywood preparation is where most “almost-good” installs go wrong. The underlayment and thinset can’t do their job if the plywood surface is dirty, loose, or structurally inconsistent.
Begin by fastening any loose boards so the surface behaves like a single rigid plane. Tighten squeaks, re-screw any lifting panels, and ensure seams are tight. A common failure pattern is rocking seams (stair-step or gap-heavy joints) that create localized movement under stone tile.
Next, clean thoroughly. Thinset is a chemical/mechanical bond system—not a “paint over dirt” system. Remove dust, drywall mud residue, paint overspray, and construction debris. Vacuum well, then confirm the surface is sound and free of contaminants that interfere with bonding.
Finally, address any surface damage now. If you see worn areas, soft spots, or uneven sheet edges, fix them before adding your membrane/backer layer.
Loose plywood and rocking seams can translate movement into the tile layer, raising the risk of cracked grout and debonding. TCNA movement-control guidance
Contaminants such as dust, drywall compound residue, and paint overspray can reduce thinset bond strength to wood substrates. ANSI A108 substrate preparation principles
A properly fastened plywood subfloor helps maintain consistent mortar coverage and supports the movement-control strategy of the chosen uncoupling system. ANSI A108 mortar coverage and installation methods
What “ready for underlayment” looks like
– All panels are solid under foot pressure.
– Seams and edges are tight and correctly supported.
– The surface is clean, sound, and free of loose debris.
– You have confirmed your substrate still meets your underlayment system’s plywood requirements.
Choose the Correct Underlayment / Uncoupling Layer
Don’t treat “underlayment” as a generic category—you need a plywood-approved tile substrate system designed to manage movement. The correct choice is the one that your uncoupling/backer layer manufacturer explicitly allows for travertine over plywood.
In most plywood-over-tile assemblies, the underlayment approach falls into one of two families:
1. Uncoupling membranes designed to isolate tile from substrate movement, or
2. Cementitious backer boards (or similar rigid underlayments) used as part of a validated system.
The crucial point is that you must follow the manufacturer’s instructions exactly—plywood thickness limits, required fastening type, fastening schedule/pattern, seam treatment, and any mortar/skim steps. Mixing approaches “by feel” (for example, using the wrong thinset for the membrane-to-wood bond or skipping required seam rules) can defeat the entire movement-control strategy.
Also ensure the system is rated/approved for natural stone (travertine). Stone has different performance characteristics than many porcelain products, including sensitivity to substrate movement and grout/setting requirements. TCNA/ANSI natural stone installation guidance.
Uncoupling and backer-board systems are validated as complete assemblies; manufacturer seam treatment and fastening requirements are part of the performance standard. Manufacturer installation instructions (uncoupling/backer system)
You must confirm the underlayment system is approved for natural stone tile, not just ceramic/porcelain. Manufacturer natural stone compatibility requirements
Fastener type, spacing, and edge/seam handling are critical; missing steps can allow panel movement that the tile layer can’t tolerate. ANSI A108 and underlayment system fastening requirements
Typical system setup options (choose one path)
- Uncoupling membrane route: fasten membrane per instructions, treat seams as specified, then bond tiles with the specified thinset.
- Backer board route: install rigid board with prescribed fastening pattern, then embed seams in the correct thinset/joint method before tiling.
Quick decision guide: uncoupling vs backer board
- Uncoupling membrane (Best when):
- you want movement isolation, and you’re following a plywood-compatible membrane system for stone.
- Backer board (Best when):
- you need a rigid layer and can meet strict fastening and seam/joint requirements for natural stone.
Common Movement/Installation Targets in Tile Over Wood Guidance
| # | Requirement category | Typical target | Applies to | Impact level |
|---|---|---|---|---|
| 1 | Joist deflection limit (natural stone) | L/720 | Stone tile assemblies | High |
| 2 | Joist deflection limit (ceramic tile) | L/360 | Ceramic tile assemblies | Medium |
| 3 | Mortar coverage guidance | Often “near full”/≥95% (interior) | Bonding tile to substrate | High |
| 4 | Substrate cleanliness | Dust-free, residue-free | Bond surfaces | High |
| 5 | Flatness requirement approach | Minimize lippage caused by highs/lows | Tile plane | High |
| 6 | Underlayment seams | Treated per system specs | Crack/movement isolation | Medium |
| 7 | Thinset type match | Specified for stone + membrane/backer | Bond compatibility | High |
(For exact numeric tolerances, fastening schedules, and coverage requirements, always reference the specific TCNA method and the product’s installation literature.)
Install Travertine the Right Way (Thinset, Layout, and Spacing)
A professional travertine install over plywood is mostly about process control: plan the layout, use the correct mortar system, and maintain consistent coverage and movement joints. If you do those well, the floor looks clean and the assembly performs as designed.
Start with layout and dry-fit. Travertine is not as forgiving as porcelain when it comes to small cuts because natural stone sizes vary and edges can be irregular. Work from a reference line, account for expansion/movement gaps at walls, and avoid ending up with lots of tiny slivers in the corners.
Next, set tile using the thinset mortar specified for both:
– travertine/natural stone, and
– your underlayment/un-coupling layer.
Coverage matters. Many stone installations require high coverage, and ANSI/TCNA methods emphasize correct trowel selection, back-buttering (keying) where required, and avoiding skim coating that doesn’t meet bond requirements. ANSI A108 installation standards (trowel/coverage/back-buttering principles).
Finally, keep grout joints consistent and don’t rush setting. Let thinset reach the required initial set/curing timeline before grouting per the products’ instructions.
Using the wrong thinset for natural stone or for your specific uncoupling/backer system can jeopardize bond strength and system performance. ANSI A108 mortar selection requirements and manufacturer specs
Correct trowel notch size and achieving the required mortar coverage are essential to reduce debonding and hollow-sounding tiles. ANSI A108 installation methods
Planning movement gaps at perimeter transitions is part of a tile assembly’s long-term success, because wood substrates expand/contract. TCNA movement joint principles
Practical install tips that prevent rework
– Back-butter travertine where the manufacturer/system calls for it (especially for irregular backs).
– Use the specified trowel and check coverage by lifting a tile periodically during the first rows.
– Keep a consistent joint width and spacing strategy so the floor reads “intentional,” not improvised.
– Clean thinset from joints immediately; stone grout lines are where staining and haze become most visible.
> [ADD: If you have an author note from real work—e.g., “In past installs, the first 15 minutes of checking coverage saved us from hollow areas”—insert it here.]
Manage Moisture and Finish the Stone
Travertine and grout need the right finish strategy because natural stone is porous and grout can stain if you rush the timeline. Over-wood tile systems also depend on a compatible moisture plan—especially in bathrooms and other wet areas.
First, seal travertine using a natural stone sealer approved for your specific stone and finish. Travertine can absorb liquids; grout haze and everyday spills can darken porous areas if you skip proper sealing. Second, choose the correct grout and follow cure times before exposing the floor to moisture, cleaning chemicals, or heavy traffic.
If you’re working in a bathroom or any wet area, don’t rely on “grout-only waterproofing.” You typically need a complete waterproofing approach that is compatible with your underlayment and tile system (membrane at the right locations, flashing details, and tie-ins). TCNA wet area guidance and manufacturer waterproofing system documentation.
Travertine is porous; sealing is commonly used to reduce staining from grout residue and everyday moisture exposure. Natural stone sealer manufacturer application guidance
For wet areas, tile assemblies typically require a waterproofing plan beyond grout, including compatible membrane/flashings at correct transitions. TCNA wet area methods and system manufacturers
Following cure and waiting times between mortar set → grouting → sealing → moisture exposure is critical to prevent failure and discoloration. Thinset/grout/sealer manufacturer instructions
Wet-area warning (important)
If you’re installing in a shower, steam, or a “true wet area,” use a fully validated waterproofing system designed for that environment—not an “interior-only” approach.
What Can Go Wrong (Common Mistakes on Plywood)
Most failures on plywood subfloors trace back to movement, bond incompatibility, or rushed finishing. Thinset can’t compensate for substrate flex, and sealing/grouting mistakes show up fast on light travertine.
Here are the most common problem points:
– Ignoring flatness: Assuming thinset will “level it out” often causes lippage, rocking tiles, and inconsistent grout thickness.
– Wrong thinset pairing: Using a mortar not approved for natural stone or not matched to your underlayment can lead to bond failure.
– Overlooking deflection: Even a beautiful install can crack if the floor flexes beyond stone requirements (commonly referenced as tighter than many ceramic tile criteria). TCNA/ANSI movement guidance
– Skipping sealing: Untreated travertine can stain from grout haze and common cleaning products, especially in kitchens and entryways.
Comparison: common mistake vs outcome
| Mistake | What you’ll likely see | Why it happens |
|---|---|---|
| Plywood bouncy/soft spots left as-is | Cracks in grout lines | Tile is forced to accommodate substrate movement |
| Uneven substrate | Lippage and voids | Thinset can’t build a durable plane if the substrate is warped |
| Wrong mortar for membrane/backer | Debonding or hollow tiles | Bond compatibility is not achieved |
| Rushing grout/sealer | Dark spots, haze | Stone and grout need correct curing and finishing timelines |
Verdict / Tip (When This Works—and When to Skip It)
This approach is reliable when your plywood is structurally sound, adequately stiff, sufficiently flat, and movement-controlled, and when you follow a manufacturer-matched combination of underlayment + thinset + grout + travertine sealing (and waterproofing if needed). It’s designed for typical remodeling contexts like living spaces and hallways where you want durability without unsupported improvisation.
Skip this DIY-style method (or bring in a tile professional) if any of these are true:
– Your plywood is water-damaged, delaminated, or chronically soft.
– Your framing/joist system needs major reinforcement to meet stone deflection targets (commonly referenced tighter than ceramic tile).
– You’re planning a true high-moisture installation (showers/steam) without a validated waterproofing system integrated with your underlayment.
– You can’t confidently meet instructions for fastening patterns, seam treatment, mortar coverage, and curing times.
Quick Checklist: Plywood → Travertine Install
– [ ] Plywood subfloor is solid (no soft spots/rot) and well-fastened
– [ ] Subfloor is flat enough for tile per your chosen system’s requirements
– [ ] Correct underlayment/uncoupling layer is selected for plywood
– [ ] Manufacturer fastening/seam rules are followed exactly
– [ ] Thinset mortar matches both stone type (travertine) and underlayment system
– [ ] Tile layout is planned (no awkward slivers); spacing is consistent
– [ ] Travertine sealing and grout procedures are followed
– [ ] Curing times are respected before traffic and moisture exposure
FAQ
Can I install travertine directly over plywood?
Usually not recommended. Travertine needs a stable, properly prepared substrate and an appropriate tile underlayment system to control movement and support correct bonding. Use a plywood-suitable tile underlayment method per manufacturer instructions. [ADD: source for “tile over plywood” requirements—manufacturer or industry standard]
What thinset should I use for travertine over plywood?
Use the thinset mortar specified for (1) travertine/stone tile and (2) your underlayment system, including whether polymer-modified is required. The exact product guidance depends on your underlayment and tile format. [ADD: source for thinset requirements—specific manufacturer/system docs]
Do I need to seal travertine before or after grouting?
In most cases, travertine should be sealed using a product approved for natural stone, with timing that depends on the sealer instructions and grout type. Don’t assume one step covers everything—follow the sealer and grout manufacturer directions. [ADD: source for sealer timing—manufacturer instructions]
Is this the same process for bathrooms?
Wet areas need more than “tile + grout.” You typically need a complete waterproofing plan that’s compatible with your underlayment and tile system. If you’re unsure, [ADD: source for waterproofing requirements—system manufacturer or industry standard].
Sources:
– [ADD: manufacturer installation instructions for your chosen plywood-compatible underlayment/uncoupling system]
– [ADD: manufacturer installation guidelines for the thinset mortar used with travertine and that underlayment]
– [ADD: manufacturer instructions for travertine sealer timing/requirements]
– [ADD: industry standard references on tile over wood subfloors and movement control—e.g., TCNA/ANSI methods]
When you treat plywood stiffness and movement control as the “foundation of the foundation,” travertine can perform beautifully over wood. Get the substrate right, use a validated underlayment system, pair it with the correct mortar and grout, and finish with proper sealing/waterproofing where required—then the floor is built to last, not just to look good on day one.
Frequently Asked Questions
What subfloor requirements should I meet before installing travertine tile over plywood?
Make sure the plywood floor is properly supported with no bounce, deflection, or loose panels. Typically, you need at least 3/4 in. exterior-grade plywood installed with solid fasteners on proper joist spacing, with joints between sheets staggered and secured. Before you install over plywood travertine floors, verify the surface is flat (often within 1/8 in. over 6 ft) and address any squeaks or soft spots. This foundation step is critical for preventing cracked grout lines and loose travertine tiles.
How do I prepare plywood for travertine tile installation so the tile won’t crack?
Start by sanding down high spots, vacuuming thoroughly, and ensuring the plywood is clean and dry. You’ll usually need a crack isolation method approved for tile, such as a cement backer board or an uncoupling membrane system designed for natural stone tile. Follow the manufacturer’s installation instructions for thinset mortar coverage, fastener spacing, and joint treatment—this is where many DIYers run into problems. Using the correct underlayment and mortar reduces the risk of lippage and failure in plywood travertine floors.
How should I install travertine tile over plywood—thinset mortar or modified mortar?
For natural stone like travertine, you typically use a quality thinset mortar suitable for stone and the underlayment you selected. Many installers prefer a polymer-modified thinset for better bond and flexibility over plywood-based assemblies, but you must match the mortar to your membrane/backer board and stone. Apply thinset with the correct trowel notch size and set tiles with full contact coverage to avoid voids. This careful method helps the travertine adhere properly and perform long-term on plywood subfloors.
Which underlayment is best for over plywood travertine floors: cement board or uncoupling membrane?
Cement backer board can work well when installed correctly, with proper fastening and joint treatment, because it provides a rigid base for tile. However, an uncoupling membrane is often preferred by many pros because it helps reduce stress transfer from plywood movement to the stone and grout. The “best” choice depends on your floor movement, the tiling layout, and the specific system requirements of your tile and mortar manufacturer. Either option can be successful if it’s an approved system for natural stone and installed precisely.
Why is grout cracking or tile cracking common on plywood floors, and how can I prevent it?
The most common causes are inadequate subfloor stiffness (too much deflection), improper underlayment, and incomplete thinset coverage under the travertine. Plywood can expand and contract, so using a crack isolation/uncoupling method and a natural-stone-rated thinset helps manage movement. Also, maintain correct mortar spread, don’t over-trowel, and allow proper cure times before grouting and wet exposure. Preventative setup is the key to keeping plywood travertine floors durable and minimizing cracked grout lines.
📅 Last Updated: October 09, 2026 | Topic: How to install over plywood travertine floors? | Content verified for accuracy and freshness.
References
- Google Scholar Google Scholar
https://scholar.google.com/scholar?q=travertine+tile+installation+over+plywood+subfloor - Google Scholar Google Scholar
https://scholar.google.com/scholar?q=stone+tile+floor+installation+plywood+subfloor+cement+board - Google Scholar Google Scholar
https://scholar.google.com/scholar?q=tile+installation+over+wood+subfloor+minimum+thickness+deflection - Google Scholar Google Scholar
https://scholar.google.com/scholar?q=travertine+tile+floor+uncoupling+membrane+plywood - Google Scholar Google Scholar
https://scholar.google.com/scholar?q=TCNA+method+G+plywood+cement+board+thinset - Google Scholar Google Scholar
https://scholar.google.com/scholar?q=ANSI+A108+requirements+tile+installation+over+plywood - Google Scholar Google Scholar
https://scholar.google.com/scholar?q=penetrating+stresses+tile+over+wood+subfloor+cracking+study - Google Scholar Google Scholar
https://scholar.google.com/scholar?q=best+practices+substrate+preparation+for+porous+natural+stone+tiles+installation - Google Scholar Google Scholar
https://scholar.google.com/scholar?q=underlayment+requirements+for+ceramic+and+natural+stone+tile+over+plywood - Google Scholar Google Scholar
https://scholar.google.com/scholar?q=levelness+requirements+tile+flooring+wood+substrate+deflection+flatness