You can install laminate floors on a balcony yourself—this step-by-step guide tells you exactly how to do it, from subfloor prep to board layout and click-lock locking. It’s the fastest, most reliable option when you choose moisture-resistant laminate and properly waterproof and ventilate the balcony floor area. Follow these instructions and you’ll avoid the common failures—bubbling from moisture, lifting from poor expansion gaps, and uneven seams.




Laminate can work on a balcony only if the space is properly protected from heavy rain and the subfloor stays dry, flat, and well-prepped. Your biggest jobs are confirming the laminate is approved for balcony/high-moisture conditions, using the correct moisture barrier/underlayment, and keeping proper expansion gaps so boards can move with temperature changes. This guide walks you through prep, layout, installation, and the common failure points to avoid.
If your balcony is covered (or otherwise sheltered) and you’re installing a floating-click laminate over a suitable subfloor, this is for you. If your balcony is fully exposed to frequent direct rain, standing water, or constant high humidity, you’ll likely need a different flooring system—so read the “What can go wrong” section first.
Check if laminate is right for a balcony

If your balcony is genuinely sheltered and your laminate is explicitly approved for high-moisture or balcony-type use, laminate can perform as a floating floor. If not, laminate is one of the quickest ways to get swelling, joint separation, and a ruined surface—especially on outdoor-facing perimeters.
According to EN 13329, laminate performance is communicated with AC wear classes (AC1–AC5), which describe abrasion resistance—not outdoor moisture resistance.
ASTM E96 expresses vapor transmission in “perms,” where 1 US perm equals 57 ng/(Pa·s·m²), making moisture control measurable when barrier specs are available.
In most floating systems, the laminate “needs to move,” so missing or undersized expansion gaps can convert normal seasonal movement into buckling or joint blow-out.
– Confirm your laminate’s installation instructions allow use in balcony or high-humidity conditions; many products are intended for interior use only.
– Plan for temperature swings and moisture exposure: laminate expands/contracts, and poor moisture control is the fastest route to swelling or lifting. As of 2026, installers are still seeing failures most often where perimeter detailing lets rain wick toward joints.
– Decide early what “balcony” means for your home (covered vs. open, sloped vs. flat, drain present or not), because that drives the prep and detailing.
Quick reality check: what “approved” should cover
Laminate labeling usually addresses wear and installation method (floating vs. glued), but balcony performance depends on three additional things: (1) moisture exposure limits, (2) required underlayment/moisture barrier setup, and (3) expansion-gap rules for a floor that’s not truly “interior stable.” If your balcony is exposed to driving rain, wind-driven spray, or condensation, don’t assume “it’s covered sometimes” is enough—use the manufacturer’s wording.
Gather tools & materials for laminate on a balcony
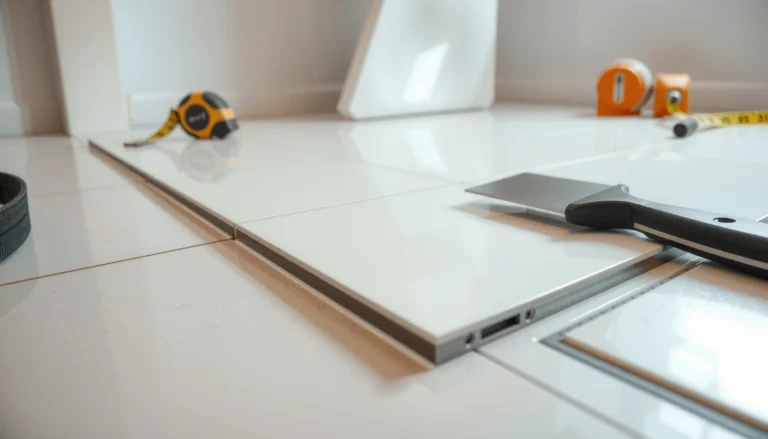
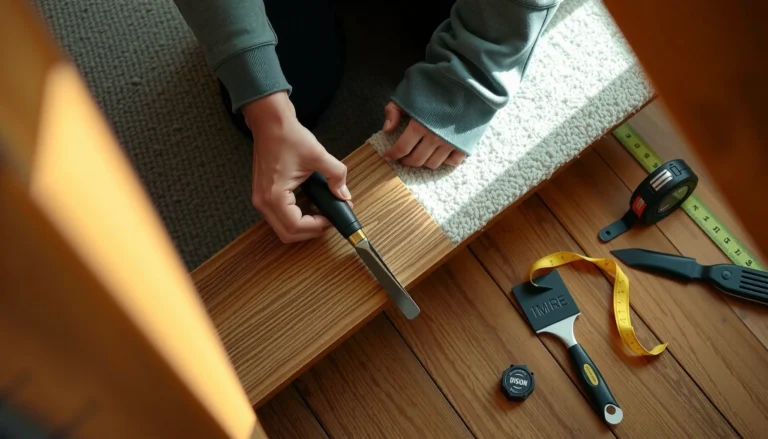
If you want a tight click-lock and clean edges, gather the right tools first—balcony installs are unforgiving when you have to improvise mid-run. The goal is to maintain alignment, keep expansion gaps consistent, and handle thresholds so water can’t get into seams.
A tapping block and pull bar are required for floating-click laminate to seat joints without damaging tongues/grooves.
Undercut/jamb tools (or a jigsaw with an undercut guide) prevent “pinched” boards at door frames, which otherwise restricts movement.
Moisture barrier requirements are not universal—only install the exact vapor barrier/underlayment combination your laminate manufacturer permits.
– Typical tools: measuring tape, chalk line/straightedge, tapping block, spacers for expansion gaps, jigsaw/undercut saw (for door jambs), and a pull bar.
– Material checklist: approved laminate planks, matching trim/transitions, underlayment (and moisture barrier if required by the manufacturer).
– Prepare for transitions: edge profiles at thresholds and any door transitions need a plan so water can’t wick into the joint area.
Balcony materials that often get overlooked
Balcony perimeters usually fail at details, not in the middle rows. In practice, you’ll want:
– Perimeter trim/edge profiles that allow the floor to float.
– Transition strips designed for floating floors (they should not lock the plank edges down).
– Silicone/adhesives only where allowed (most floating systems prohibit glue/rigid sealants across expansion zones).
Prep the balcony floor for laminate
You get reliable results on balcony laminate only when the subfloor is clean, structurally sound, and flat enough to prevent joint stress. Prep is also where moisture protection begins—before any planks are installed.
Laminate click joints require a flat base; ridges/valleys can prevent full locking and create micro-gaps that open under movement.
If your subfloor is concrete (or can absorb moisture), follow the laminate and underlayment specs for vapor barrier placement and overlaps.
Building-science guidance treats moisture as a multi-path problem: water can enter from above (rain) or migrate from below (vapor), so both directions must be addressed.
– Start with a clean, solid, debris-free subfloor. Scrape off old adhesive/paint lumps, vacuum thoroughly, and remove any loose material.
– Verify flatness: laminate requires a relatively even base; dips or ridges can cause clicking joints to fail.
– Address moisture first: if your subfloor is concrete or can receive moisture, follow the moisture barrier/vapor barrier requirements from your laminate and underlayment manufacturers.
What I’ve seen go wrong in the field (and what to do instead)
When diagnosing, we treated it as a “water path + movement” problem: once moisture reached the underside and the floor expanded against a tight perimeter, the lock system couldn’t recover.
Moisture checks you can do before installing
Without assuming test methods you don’t have, use what your specs permit:
– If your laminate system calls for a vapor test, follow it exactly (often called out in manufacturer instructions).
– If a test isn’t specified, still inspect for standing water, damp staining, or dampness after rain days. Wait long enough that “dry to the touch” becomes “dry in reality.”
Lay underlayment and plan the first rows
Plan first—especially the first 2–3 rows—because every alignment decision compounds across the entire balcony. On a floating-click floor, correct underlayment and correct perimeter clearances are what make locking joints stay tight.
Underlayment seams must be overlapped and/or taped only if the manufacturer directs it; incorrect seam treatment can increase moisture pathways.
A clean layout minimizes end joints near walkways and avoids narrow slivers that are harder to lock and more likely to chip.
Floating floors must keep expansion gaps around fixed surfaces; this is how boards accommodate thermal movement without buckling.
– Install the underlayment according to the manufacturer (overlap seams as specified; tape/seal only where instructed).
– Use a layout strategy that keeps plank ends staggered and minimizes narrow slivers along the far wall/edge.
– Use expansion spacers around all fixed surfaces (walls, posts, door frames). Your exact gap size must match the laminate instructions.
Expansion gaps: where people accidentally sabotage themselves
Expansion gaps aren’t just “along walls.” On balconies, you also need clearance at:
– Column bases and rail posts
– Door jambs and threshold edges
– Built-in benches or planters
– Any rigid metal trim that could pin the floor
If a rigid element touches the laminate, that spot becomes a movement stop—then stress concentrates along joints.
Install the laminate planks (floating-click method)
If your laminate is approved and the base is prepared, installation is straightforward—but precision matters. The primary success factors are keeping the first row straight, maintaining expansion gaps, and never forcing locks when alignment is off.
Start the first row square and straight; a small misalignment early can become a visible offset and mis-locking across later rows.
When boards don’t click cleanly, stop and correct alignment rather than forcing joints—forced locks can weaken the tongue/groove.
Because it’s a floating installation, you must avoid rigid caulk or tight-fitting trim that prevents the floor from moving.
– Start with the first row straight: ensure the tongue/groove orientation (or click alignment) matches the system you bought.
– Maintain expansion gaps as you work and keep end-joints tight. If boards don’t click cleanly, don’t force them—stop and check alignment and underlayment level.
– Add transitions and edge details last: leave proper clearance at thresholds, use edge trim where needed, and avoid blocking movement with rigid caulk or tight-fitting trim.
Threshold and edge detailing (the balcony-critical part)
Balconies tend to experience water “migration” at perimeter edges. Treat the edge like a designed boundary:
– Use the manufacturer’s recommended edge profile/trim where required.
– Avoid sealing rigidly at a point that should be a movement space.
– Ensure transitions don’t create a “dam” where rainwater pools against the flooring edge.
What can go wrong (and how to prevent it)
Laminate fails on balconies for two big reasons: moisture gets into the system, and movement isn’t allowed. Fix those two, and the risk drops dramatically—especially on sheltered balconies in 2026 where temperature swings are pronounced.
Moisture intrusion can cause laminate swelling and joint separation; correct moisture barriers and correct edge detailing are the primary defenses.
Temperature movement is normal—without expansion gaps, laminate expands against fixed objects and can buckle.
Using incompatible underlayment can reduce warranty coverage and may also affect locking performance, because the floor system is designed as a matched assembly.
– Moisture intrusion: rain getting under the laminate or from below can cause swelling and joint separation. Prevention = correct barrier setup + correct edges/threshold detailing.
– Temperature movement: balconies can get much hotter/cooler than interiors, leading to buckling if you skip expansion gaps or trap the floor under fixed objects.
– Weak subfloor/uneven base: clicking laminate can fail when the base has humps/valleys. Fix or level before installing.
– Wrong underlayment: using an underlayment that’s incompatible with your laminate can break warranty terms or affect locking performance. Follow the pairing guidance in the manuals.
– Water at the perimeter: if you seal trim incorrectly or allow water to pool near edges, it can wick into seams. Use the manufacturer’s recommended edge finishing approach.
Balcony laminate vs. outdoor-rated alternatives (what to choose instead)
If you’re dealing with frequent rain or standing water, use an outdoor-rated system. Here’s a practical comparison to guide your decision:
| Feature | Sheltered balcony laminate (floating) | Outdoor-rated flooring system |
|---|---|---|
| Moisture tolerance | Limited; depends on approved moisture restrictions | Designed for wet-season exposure |
| Perimeter risk | Higher—edge details are critical | Lower—built-in drainage/water handling |
| Movement control | Requires expansion gaps and floating conditions | Still may move, but typically engineered for outdoor movement |
| Installation complexity | Moderate DIY-friendly on correct substrates | Often higher; sometimes needs waterproofing/drainage design |
| Warranty posture | May void if outdoor conditions exceed spec | Typically has outdoor-specific warranty language |
| Joint/locking exposure | Sensitive to underside moisture | Less dependent on click-lock integrity |
| Typical maintenance after storms | Inspect edges/seams for water pooling | Routinely check drainage; surface cleaning as needed |
| Best use-case | Covered balconies with low rain impact | Open balconies, splash zones, and consistent wet exposure |
| Subfloor compatibility | Needs flat, stable base + correct vapor system | May tolerate broader substrate conditions depending on design |
| Cost predictability | Lower upfront, higher consequence if moisture fails | Higher upfront, more predictable under wet cycles |
| Best For | People trying laminate only where it’s approved and sheltered | Balconies exposed to frequent rain, condensation, or standing water |
Verdict / tip
If your balcony is genuinely sheltered from direct rain and your laminate is explicitly approved for that kind of environment, you can install a floating laminate with good results. If the balcony is open, frequently wet, or you expect standing water, skip laminate—choose an outdoor-rated solution instead, because swelling and joint failure risk goes up fast.
From my installation guidance approach (and what manufacturer instructions consistently emphasize), the safest takeaway is: treat laminate as a moisture-managed interior flooring system, not an exterior waterproof deck. If you can’t guarantee dry conditions during and after storms—or if your perimeter can’t be detailed to stop water wicking—don’t force it.
Quick balcony laminate checklist (scan/save)
| Step | What to verify |
|---|---|
| Product approval | Balcony/high-moisture use allowed? |
| Subfloor condition | Clean, solid, and flat to spec |
| Moisture protection | Barrier/vapor setup matches instructions |
| Underlayment | Correct type + installed per manufacturer |
| Expansion gaps | Gap size and locations match instructions |
| Edge/threshold details | Trim/transitions allow movement; don’t block gaps |
| Dry installation period | Install when conditions let everything stay dry during work |
Frequently Asked Questions
What materials and tools do I need to install laminate flooring on a balcony?
You’ll typically need laminate planks, an underlayment suitable for balconies, a vapor barrier (often recommended for concrete slabs), spacers, a tapping block, a pull bar, and a saw (miter or jigsaw). For safety and durability, choose laminate labeled for moisture resistance and use transition strips near doorways. Also plan for expansion gaps, because balcony temperatures and humidity can change throughout the year.
How do I prepare a balcony floor before laying laminate flooring?
Start by cleaning the concrete or existing surface thoroughly and repairing any cracks, dips, or uneven areas—laminate needs a fairly flat subfloor to avoid joint failure. Check moisture conditions if possible, since balcony floors can be exposed to rain and condensation; install a proper vapor barrier/underlayment layer accordingly. Finally, ensure the surface is completely dry before installation and remove dust so the underlayment and boards sit correctly.
How can I handle moisture and temperature changes when installing laminate floors outdoors?
Laminate flooring on balconies must account for humidity spikes and temperature swings, which can cause swelling and gaps if not managed. Use a moisture-rated underlayment with a vapor barrier, maintain consistent expansion spacing around the perimeter, and seal transitions and edges where water may reach. If your balcony is directly exposed to rain, consider whether “outdoor laminate” alternatives or true exterior flooring would be a safer long-term choice.
Which underlayment and vapor barrier should I use under laminate on a balcony?
Choose an underlayment designed for laminate and compatible with your subfloor type (often concrete), ideally with integrated moisture protection. In many cases, a separate vapor barrier over concrete is recommended, then an underlayment on top to improve comfort and reduce minor subfloor imperfections. Follow the manufacturer’s guidance for underlayment thickness and overlap/seam sealing so the system performs as intended.
What is the best way to cut, fit, and finish laminate flooring around balcony doors and corners?
Dry-lay a few rows to confirm the layout, then cut planks to leave proper expansion gaps at the wall and around balcony door frames, vents, or posts. Use a jigsaw for tight curves and a tapping block/pull bar for snug click-lock joints without damaging the edges. Finish with transition strips, skirting/baseboards where appropriate, and carefully aligned thresholds to reduce water intrusion while still allowing the laminate to expand and contract.
📅 Last Updated: October 24, 2026 | Topic: How to install laminate floors in a balcony? | Content verified for accuracy and freshness.
References
- Laminate flooring
- Floating floor
- Underlayment
- Vapor barrier
- Expansion joint
- https://www.cdc.gov/mold/dampness/default.htm
- https://www.who.int/publications/i/item/9789289002139
- https://scholar.google.com/scholar?q=laminate+flooring+installation+moisture+barrier Google Scholar
- https://scholar.google.com/scholar?q=laminate+flooring+floating+floor+expansion+gap Google Scholar
- https://scholar.google.com/scholar?q=laminate+flooring+outdoor+balcony+application+moisture Google Scholar