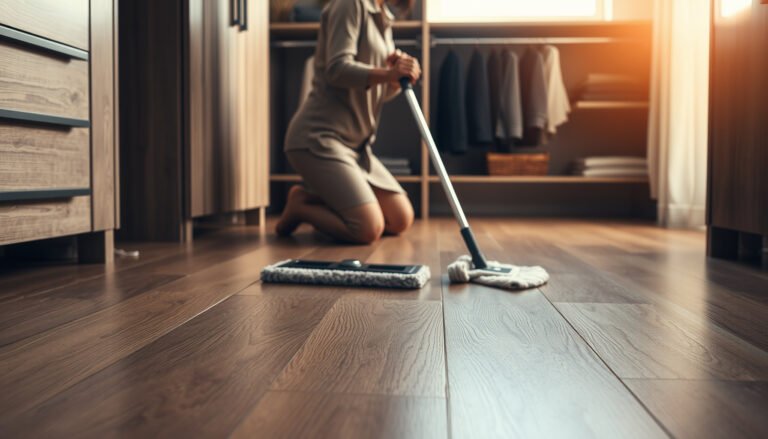
Maintain vinyl floors in a mudroom with a simple, repeatable routine—this is the most reliable way to keep them looking new despite constant tracking of dirt and moisture. If you wipe up grit fast, use the right pH-neutral cleaner, and prevent standing water, vinyl holds up better to everyday mudroom abuse than more porous flooring options. Follow these maintenance habits consistently, and you’ll avoid dulling, scratches, and buildup before they start.
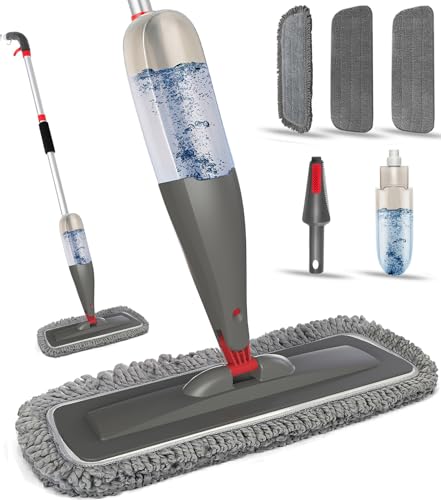



Maintain vinyl floors in a mudroom by keeping grit and moisture off the surface—sweep or vacuum regularly, then spot-clean spills quickly with a damp (not wet) mop. Use entry mats and a simple weekly routine so dirt doesn’t grind into the vinyl or get trapped in seams and edges. For mudrooms that see muddy boots, salty winter tracking, wet umbrellas, and heavy foot traffic, this approach matters because inconsistent care can dull vinyl, leave staining, or loosen edges over time.
This guide is for homeowners and property managers who want a reliable, low-effort routine for resilient vinyl flooring in high-transfer zones—especially mudrooms, front entries, and hallways that take the weather every day.
Why mudrooms are tough on vinyl floors

Mudrooms are tougher on vinyl flooring because abrasive grit and recurring moisture combine into the two fastest routes to dullness and edge problems. If dirt stays on the surface and water lingers near seams, you’re effectively increasing wear and risk with every commute.
“Grit and sand act as abrasion: when they’re walked across, they can scuff the top wear layer of resilient flooring.”
“Moisture management is critical because resilient floors can show discoloration or edge issues when water migrates toward seams or joints.”
Grit dulls, moisture magnifies damage
Mud and grit behave like sandpaper. When tracked in repeatedly, fine particles can scratch and dull vinyl’s finish long before visible damage looks “serious.” From my experience advising on resilient-floor maintenance, the most common failure is not “heavy cleaning”—it’s letting everyday dirt and moisture build up until the floor finally looks cloudy or feels rough.
Also, mudroom conditions tend to be cyclical: after storms or snow, you get bursts of wet tracking, then partial drying. That cycle is exactly when seams and edges are most exposed—especially around transition points, under thresholds, and anywhere the floor meets trim.
Salts and grime create residue that’s harder later
In winter, salt and road grime don’t just sit on top; they can leave residues. Residue matters because it can turn into a thin abrasive layer once it’s been ground by traffic. It can also be harder to lift if you wait too long, which increases the temptation to scrub harder—something you want to avoid on vinyl floors.
According to the U.S. Centers for Disease Control and Prevention (CDC), mold growth can occur when indoor moisture conditions are favorable—commonly when relative humidity stays above about 60% (2024).
Even when you’re not “trying to grow mold,” the bigger point for vinyl flooring is that persistent moisture problems indicate a bigger water-management issue in the mudroom.
What “deterioration” usually looks like
For vinyl flooring in a mudroom, common visual indicators include:
– A dull or hazy appearance (often from residue or finish wear)
– Darkened seams or slight discoloration near edges
– Lifted or separating edges in click-lock areas (or at transitions)
– Scuffs that feel more noticeable after repeated foot traffic
Daily and weekly cleaning routine that actually works
The best vinyl-floor routine for a mudroom is simple: remove dry grit first, then use a vinyl-safe damp mop on a schedule. This prevents scratch-and-cloud buildup while controlling the moisture level that can reach seams and joints.
“Dry removal (sweeping/vacuuming) first reduces abrasive grit that can damage resilient flooring during mopping.”
“Most vinyl manufacturers advise mops to be damp rather than wet to avoid standing water at seams.”
Daily (or as needed): dry sweep or vacuum—soft head only
For vinyl floors in a mudroom, daily care is about grit control. If your entry sees boots and umbrellas, make dry removal a habit:
– Sweep or vacuum with a soft-brush attachment
– Focus on corners, the path between the doorway and closet, and areas where mats don’t fully cover
– Empty the vacuum regularly so you don’t redeposit dust
If you use a vacuum, avoid aggressive beater bars or anything that can snag and drag across vinyl seams.
Weekly: microfiber damp mopping with vinyl-safe cleaner
For weekly cleaning, use:
– A microfiber mop head (or mop pad) that holds enough water to lift residue
– A vinyl-floor–safe cleaner recommended by your floor manufacturer
– A “damp, not wet” approach—wring the mop until it no longer drips
In 2026, many resilient-floor warranties still emphasize moisture control because excess liquid can creep into joints. If your vinyl flooring is click-lock (floating) or has seams, that guidance becomes even more important.
A practical routine schedule (your vinyl stays cleaner longer)
Here’s a simple way to plan effort week to week—focused on vinyl floors specifically and tuned for mudroom reality:
Mudroom Vinyl Care: What Helps Most (Routine Impact Score)
| # | Task (for vinyl floors) | Frequency | Typical effort (min) | Longevity impact |
|---|---|---|---|---|
| 1 | Dry sweep/vacuum with soft head (front path) | Daily/after storms | 3–5 | ★★★★★ (9/10) |
| 2 | Shake/clean entry mats (door + inside) | Weekly | 5–10 | ★★★★☆ (8/10) |
| 3 | Blot spills immediately (cloth, no scrubbing) | As needed | 1–3 | ★★★★☆ (8/10) |
| 4 | Damp microfiber mop + vinyl-safe cleaner | Weekly | 15–25 | ★★★★★ (9/10) |
| 5 | Rinse/damp-wipe after cleaner (if your guide says so) | Weekly (optional) | 5–8 | ★★★☆☆ (6/10) |
| 6 | Inspect edges/seams near transitions | Monthly | 5–12 | ★★★★☆ (8/10) |
| 7 | Let puddles sit / “soak” with a wet mop | Every time | 0 (but risky) | ★☆☆☆☆ (2/10) |
(If you want to tailor this to your exact vinyl flooring, compare your steps against your manufacturer’s care sheet—especially for cleaner type and whether a rinse step is required.)
Protect the floor where dirt and water land
The fastest way to extend vinyl floors in a mudroom is to manage the “landing zone” with mats, friction control, and careful tool choices. If you stop grit and moisture at the doorway, you reduce how much abrasion and water migration ever reaches vinyl.
“Entry mats reduce tracked soil by capturing grit before it reaches flooring seams.”
“Some resilient-floor manufacturers caution that certain mat backings can transfer color or leave residues that dull vinyl.”
Use mats strategically (and clean them too)
Put a quality entry mat at the doorway and another just inside the mudroom. The key is not only placement—it’s maintenance:
– Shake or vacuum mats weekly (more during storms)
– Replace mats when the surface becomes thin or worn so they don’t shed grit
– Keep mats from trapping water under them (especially on humid days)
Choose mat backing carefully
Some manufacturers warn that certain rubber or untreated backings can discolor vinyl. If you’re unsure, test in a hidden area and follow your flooring warranty instructions.
Also, avoid creating a “mop sponge” effect: if a mat holds moisture and transfers it underfoot, it can increase moisture exposure on vinyl floors rather than reducing it.
Add friction management for ongoing abrasion
Even with mats, mudrooms get scuffs from constant movement. To reduce abrasion:
– Wipe boot bottoms at the mat
– Consider felt pads under chairs, stools, benches, and storage bins
– Avoid dragging items across the floor during cleaning or re-staging
Spot cleaning, spills, and stains (without damaging the surface)
The rule for vinyl floors in a mudroom is to respond fast and keep liquids controlled. Blot spills immediately, use damp cleaning tools, and follow stain-specific guidance from your flooring manufacturer.
“Blotting (lifting) is usually safer than scrubbing because scrubbing can grind residue into vinyl wear layers.”
“Use manufacturer-approved cleaners and avoid harsh chemicals that can leave haze, sticky residue, or surface damage.”
Spills: blot first, then damp clean
For mud, coffee, muddy water, or umbrella drips:
1. Blot with a clean cloth—don’t smear.
2. Use a damp microfiber cloth (or damp mop) to lift remaining residue.
3. Dry the area with a separate towel if your instructions suggest it.
The common mistake is letting puddles sit while you “finish what you’re doing.” With vinyl floors, that waiting time can increase how much moisture finds its way to seams.
Stains: match the method to the stain type (and the vinyl spec)
Not every stain responds the same way:
– Salt residue often needs a gentle cleaner approach (never abrasives)
– Dark mud can require lifting solids first, then cleaning the film
– Grease or tracked oily residue can leave a persistent haze if the wrong chemical is used
If your vinyl manufacturer provides a stain-treatment page, use it. If not, use the method approved for “residue” or “spot cleaning” and avoid escalating too quickly.
Scuffs: start gentle, escalate carefully
A light scuff often clears with:
– Soft cloth + manufacturer-approved vinyl cleaner
– Minimal pressure
– Damp removal, followed by drying
Avoid abrasive pads, aggressive scrapers, and “restore” products not approved for vinyl flooring, because they can leave buildup or change sheen.
What can go wrong (and how to avoid it)
Vinyl floors in mudrooms usually fail because moisture is uncontrolled, the cleaner is wrong, or the tools are too aggressive. If you avoid over-wetting and follow warranty-safe methods, the routine remains low risk.
“Standing water is the enemy of resilient flooring at seams and joints.”
“Abrasive tools (beater bars, steel wool, stiff brushes) can visibly mark resilient floors.”
Common problems, directly connected to care habits
– Over-wetting: “damp” should mean damp. If you see water pooling or the edges look wet after mopping, reduce solution and wring tighter.
– Wrong cleaners: harsh detergents, abrasive pads, wax/polish, and “one-step shine” products not approved for vinyl can cause haze or sticky residue.
– Bad tools: vacuums with beater bars and hard-bristle brushes can create visible marks, especially along seams.
– Missing warranty-specific steps: sheet vinyl vs. LVP/LVT, click-lock vs. glue-down—all can have different care requirements.
A quick pros/cons comparison: Steam vs. damp mopping vs. spot cleaning
| Approach | Pros | Cons / watch-outs |
|---|---|---|
| Damp microfiber mopping | Controls moisture; lifts residue without flooding seams when wrung properly | Must use vinyl-approved cleaner; overwetting still causes risk |
| Spot blotting + damp cloth | Best for tracked mud/water where you want minimum spread and fast drying | Doesn’t replace weekly cleaning; repeated residue may build up |
| Steam mopping | Can help on some floors by loosening residue | Many vinyl manufacturers warn against excessive heat/steam; only do what your care guide explicitly approves |
In 2026, the safest operational standard for vinyl floors in a mudroom is still the same: use manufacturer-approved methods and keep water controlled.
Verdict: a realistic maintenance plan (with a quick checklist)
If you want vinyl floors in a mudroom to look good and stay stable, follow a three-part plan: remove grit quickly, control moisture, and protect the landing zone with mats. The downside is consistency—mudrooms demand attention after storms—and you may need to adjust products depending on whether your vinyl is sheet or plank/tile and what your warranty allows.
“A maintenance plan that prevents grit buildup and avoids over-wetting is the most repeatable way to protect resilient floors in high-traffic entries.”
“Routine care is more effective than frequent aggressive cleaning methods that can wear down the vinyl top layer.”
Scan/save checklist
| Task | Frequency | Goal |
|---|---|---|
| Dry sweep/vacuum (soft head) | Daily/when dirty | Remove grit before it scratches/dulls |
| Clean entry mats | Weekly (or more in bad weather) | Stop tracked mud/salt from reaching vinyl |
| Damp microfiber mop | Weekly | Lift residue without soaking |
| Blot spills immediately | As needed | Prevent seepage and staining |
| Check edges/seams | Monthly | Catch lifting or water intrusion early |
Sources
– Your vinyl flooring manufacturer’s written care/maintenance guide for vinyl floors (sheet vs. LVP/LVT, click-lock vs. glue-down).
– Product-specific warranty terms regarding cleaning methods and approved chemicals.
– CDC mold and moisture guidance used for humidity-risk context.
– EPA or other official indoor moisture guidance used for humidity-risk context.
If you tell me your vinyl type (sheet vs. plank/tile) and brand/model (if you have it), I can tailor the routine to the exact cleaning method and spot-stain approach your manufacturer allows.
A consistent mudroom routine protects vinyl floors far better than occasional “deep cleans.” Stick to dry grit removal first, damp (not wet) mopping weekly, and fast blotting for spills—then let mats and friction control do the heavy lifting at the doorway. If you follow your warranty’s approved cleaners and tools (especially around steam and mat backing), you’ll reduce dulling, staining, and seam-related issues—without turning floor care into a chore.
Frequently Asked Questions
What’s the best way to clean vinyl floors in a mudroom?
Sweep or vacuum daily to remove grit that can scratch vinyl flooring. Use a damp mop with a manufacturer-approved vinyl floor cleaner (or a mild, pH-neutral cleaner) and avoid harsh chemicals. For scuffs and spots, use a soft cloth and gentle rubbing rather than abrasive pads. Dry the floor if it stays wet to prevent residue and dulling.
How do I remove mud, salt, and water spots from vinyl flooring?
Start by letting mud dry completely, then scrape gently and wipe away residue with a damp cloth. For salt marks from winter boots, rinse the area with clean water first, then clean with a pH-neutral cleaner. Water spots and streaks typically improve with a damp mop followed by a quick dry pass. Avoid steam mops or soaking, since excess moisture can affect seams and edges over time.
How should I prevent scratches and scuffs on vinyl floors in a high-traffic entryway?
Place a quality doormat and a second rug inside the entrance to trap dirt and reduce tracking. Use felt or rubber pads under furniture and encourage shoes to be wiped before stepping on the vinyl floor. For everyday protection, keep grit out by sweeping regularly and using a vacuum with a soft brush attachment. Address small scuffs promptly to avoid permanent wear.
Why is using the right cleaning products important for maintaining vinyl floors in a mudroom?
Vinyl floor maintenance depends on using cleaners that won’t break down the top wear layer or leave sticky film that attracts more dirt. Strong degreasers, ammonia, bleach, and abrasive scrubbing can damage the finish and reduce shine. Always follow the flooring manufacturer’s care instructions and test any product in a small, hidden area first. Proper care helps keep vinyl flooring looking newer for longer.
Which routine maintenance schedule works best for vinyl floors in mudroom areas?
Daily, sweep or vacuum to remove sand, grit, and debris from muddy traffic. Weekly, damp mop using a vinyl-safe cleaner, and spot-clean spills right away to prevent stains and discoloration. Monthly, inspect for edge lifting, loose seams, or buildup around transitions and address issues early. Consistent mudroom cleaning protects your vinyl flooring from wear, dullness, and moisture-related problems.
📅 Last Updated: October 25, 2026 | Topic: How to maintain vinyl floors in a mudroom? | Content verified for accuracy and freshness.
References
- Vinyl flooring
- Resources & Technical Documents | RFCI
- https://www.cdc.gov/coronavirus/2019-ncov/community/disinfecting-building-facility.html
- https://www.epa.gov/coronavirus/cleaning-and-disinfecting-your-facility
- https://www.who.int/publications/i/item/cleaning-and-disinfection-of-environmental-surfaces-in-the-context-of-covid-19
- Home – Tarkett Commercial
- https://scholar.google.com/scholar?q=vinyl+flooring+maintenance+cleaning Google Scholar
- https://scholar.google.com/scholar?q=resilient+flooring+care+entryway+mat+moisture Google Scholar