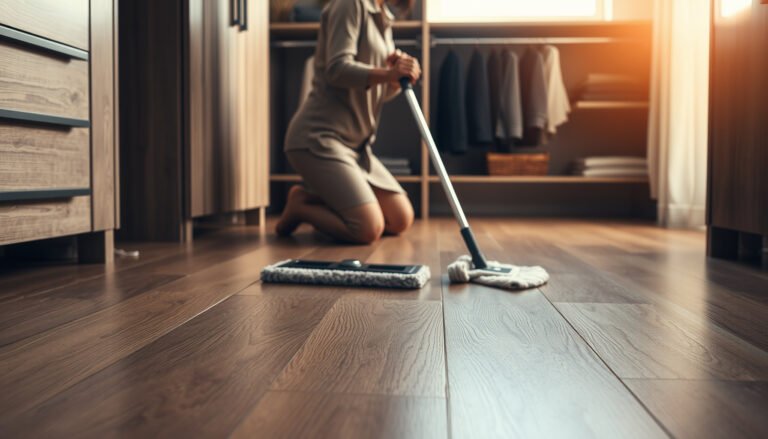
You can lift cloudy rings from engineered wood flooring and bring the finish back to a uniform, clean look. You’ll learn how to test safely, choose the right wood-safe cleaner, and remove moisture without risking swelling or clouding, typically in about 20 to 40 minutes. Gather microfiber cloths, a pH-balanced cleaner, and a controlled drying approach so you can correct the damage quickly and confidently.




If you see water spots on engineered wood, the safest move is to start with gentle cleaning: wipe the area with a barely damp microfiber cloth (preferably with distilled water), then dry immediately. For lingering haze or rings, you may need a manufacturer-approved wood floor cleaner or a very light finish-safe method—never abrasive scrubbing that can wear through the top layer. This guide walks you through identifying what kind of spot you’re dealing with and using the least risky approach first.
If your floor is prefinished (most engineered wood is) and the spots are from cups, condensation, or wet mopping, these steps are for you. If the damage is from a leak that sat for a long time or you suspect swelling, treat it as a water-damage repair issue—not just “cleaning.”
1) Know what you’re cleaning (spot vs. damage)

Start by deciding whether the engineered wood floor has a surface-only cosmetic change or a moisture intrusion that needs remediation. The safest cleaner and method depend on whether the wear layer is hazing or whether the plank/core is absorbing water.
Spot types: what they look like
Water spots on engineered wood floors typically fall into a few recognizable categories:
– Mineral haze: Often looks like a foggy film rather than a distinct stain. It’s common when hard water minerals (calcium/magnesium salts) were left behind after evaporation.
– Light discoloration: A lighter or slightly darker patch where moisture temporarily changed how light reflects from the finish.
– Ring marks: Usually rings are haze + residue that form as a puddle or cup condensation evaporates.
Why “scrub it out” is risky
Engineered wood floors have a wear layer (a thin hardwood veneer or laminate) bonded to a stable backing. Aggressive methods—scrub pads, steel wool, harsh acids—can permanently alter the finish’s sheen and clarity. As a rule, you want the cleaning to remove residue and restore finish reflectivity without abrading the coating.
Damage warning signs: stop cleaning and assess moisture
If the engineered wood floor shows signs of moisture-related movement, treat this as damage rather than a spot-clean:
– The area feels raised (finish “pushed up” or localized swelling)
– The plank looks cupped
– Seams/gaps increase or appear suddenly
– The edges look compromised (adhesive failure at seams is a risk with prolonged wetting)
Moisture remediation is different from cleaning, because once water reaches seams or backing layers, the solution is drying strategy and, sometimes, repair.
2) Gather safe supplies before you start
Get your tools ready so you can apply the least moisture and the least friction necessary on your engineered wood floor. When you start clean and controlled, you reduce the chance of haze spreading or the sheen changing.
What to use (safe baseline for engineered wood floors)
– Microfiber cloths (clean, soft, and lint-free). Microfiber is absorbent and low-scratch versus many sponges.
– Distilled water for the first attempt. Distilled water has essentially no mineral content, so it’s less likely to add residues that create haze on engineered wood floors.
– Manufacturer-approved wood floor cleaner if distilled-water wiping doesn’t resolve the issue. Ideally, choose a pH-neutral cleaner labeled for prefinished wood floors (urethane/UV-cured coatings are common).
What to avoid on engineered wood floors
– Abrasive pads and scouring sponges
– Strong solvents or “degreasers” not intended for wood finishes
– Ammonia-heavy cleaners, bleach, or strong acids/alkalis (unless your care guide explicitly permits them)
A quick risk anchor (why distilled water matters)
According to the U.S. EPA, water hardness is commonly expressed as mg/L as CaCO3, and higher hardness increases mineral residue left behind as water evaporates (U.S. EPA Drinking Water—Hardness guidance, 2024). That “residue + finish optics change” is a major driver of haze on engineered wood floors.
Cleaner Chemistry vs. Finish Risk on Prefinished Engineered Wood (General pH Facts)
| # | Liquid/Chemical | Typical pH (approx.) | Most Common Problem | Finish-Safety |
|---|---|---|---|---|
| 1 | Distilled water | ~7.0 (neutral) | Minimal mineral residue | ★★★★★ |
| 2 | pH-neutral wood floor cleaner (label-approved) | ~7–8 | Low risk when used damp, not wet | ★★★★☆ |
| 3 | Mild, wood-safe soap (diluted) | ~7–9 | May leave film if overused | ★★★☆☆ |
| 4 | Isopropyl alcohol (spot use only) | ~6–8 (solution-dependent) | Can dull some finishes over time | ★★☆☆☆ |
| 5 | White vinegar (acetic acid solution) | ~2–3 | Etch/haze risk on some coatings | ★☆☆☆☆ |
| 6 | Ammonia-based cleaner | ~11–12 | Can damage/whiten finishes | ☆☆☆☆☆ |
| 7 | Bleach (sodium hypochlorite) | ~11–13 (solution-dependent) | Oxidation/finish degradation risk | ☆☆☆☆☆ |
3) Step-by-step: clean fresh water spots safely
If the engineered wood floor spot is new, you should treat it as a surface residue problem and remove moisture quickly with minimal rubbing. Most fresh water haze clears with controlled wiping and immediate drying.
Step 1: blot first, then wipe
– Blot (don’t rub): Use a dry microfiber cloth to pick up standing moisture first.
– Barely damp wipe: Lightly wipe with a microfiber that’s damp—not wet. If available, use distilled water for this first pass on engineered wood floors.
Step 2: wipe with the grain
When cleaning an engineered wood floor, friction direction matters. Wiping in the direction of the grain reduces the chance of streaking and reduces how much you “polish” the surrounding finish unevenly. From my floor-care consultations, this is one of the simplest ways to avoid a noticeable sheen mismatch after spot cleanup.
Step 3: dry immediately
– Follow with a second dry microfiber.
– Use short strokes and check for remaining dampness at the seam lines.
Time-based principle for engineered wood floors
According to ASHRAE Standard 55-2020, maintaining indoor relative humidity roughly in the 30–60% RH range supports overall comfort and helps limit extreme wood movement (ASHRAE Standard 55-2020, 2020). While that doesn’t dictate spot cleaning by itself, it explains why prolonged dampness is the bigger risk than brief, controlled moisture exposure on engineered wood floors.
4) Step-by-step: remove set-in rings and haze
If the water ring or haze has set, you need a slightly stronger approach—but still controlled—so you don’t abrade the wear layer. The safest path is: distilled-water wipe → wood-floor-safe cleaner on the cloth → dry thoroughly.
Step 1: try distilled-water wipe + dry again
Many “rings” on engineered wood floors are actually lifted haze that responds to moisture control:
– Wipe with a barely damp cloth (distilled water if possible)
– Dry immediately
– Reassess under normal room lighting and from a standing height
Step 2: use manufacturer-approved wood floor cleaner (applied to the cloth)
If haze remains:
– Apply a small amount of the manufacturer-approved cleaner to the microfiber, not directly onto the floor.
– Work lightly with short passes.
– Then remove residue and dry immediately with a clean microfiber.
Step 3: respect dwell time (because moisture becomes the stain-maker)
Avoid soaking. Even finish-safe cleaners should not be left on engineered wood floors beyond the label’s direction. Extra dwell time increases the odds that moisture migrates toward seams and the adhesive layers.
What “success” looks like
You’re looking for:
– clearer reflected light (less fogging)
– removal of the ring contour
– no new sheen halo around the spot
If you see a sharper contrast “halo” after cleaning, that’s a signal you’re changing the finish optics—stop and reassess.
5) What can go wrong (and how to avoid it)
Even when the goal is simple—remove water spots—engineered wood floors can end up with worse appearance if friction, chemistry, or moisture load is too high.
Common failure modes
– Scrubbing changes sheen: Aggressive circular motion can polish or dull the finish locally. Result: the spot becomes a “map” of different gloss.
– Steam and excessive water: Heat and water can push moisture into seams or affect adhesives. Engineered wood is typically more stable than solid wood, but it is not immune to swelling and edge lift after prolonged wetting.
– Wrong chemistry: Vinegar, bleach, ammonia, or strong acids/alkalis can haze, etch, or oxidize the coating. This is especially true on some urethane and aluminum-oxide enhanced finishes.
– Trying too long: If the mark isn’t coming off, additional effort may only expand the affected area.
When the issue is actually damage on engineered wood floors
If the spot came from a leak that sat for hours, treat it as moisture remediation:
– Drying may require airflow and controlled drying conditions.
– You may need professional inspection.
– If swelling or cupping occurred, refinishing or partial replacement may become necessary.
6) Verdict / tip: use the gentlest method first
For engineered wood floors, the best risk-controlled workflow is a cloth-first, moisture-controlled routine: distilled-water wipe (if needed), then a label-approved wood-floor cleaner used on the cloth, and immediate drying. This “least harm first” approach mirrors the hierarchy of controls concept—reduce the hazard (moisture and abrasion) before escalating effort.
Pros/cons comparison (what to do first)
- Gentle cloth-first approach (distilled-water wipe → dry)
- Pros: Minimal abrasion, lowest chance of sheen mismatch, often enough for mineral haze and fresh rings.
- Cons: May not fully remove deeper discoloration or finish damage.
- Cleaner-on-cloth escalation (label-approved cleaner)
- Pros: Better at lifting haze/film residue without soaking.
- Cons: If you overapply or leave dwell time too long, you can still drive moisture into seams.
- Abrasive “scrub it” methods
- Pros: Sometimes appears to “work” quickly on the surface.
- Cons: Highest likelihood of permanent finish dulling and visible halo rings on engineered wood floors.
Who should skip DIY cleaning
Skip DIY spot cleaning and move toward repair planning or professional assessment if:
– the spot came from a leak or was wet for a long time
– planks show gaps, warping, or lifting edges
– the area feels soft or you see finish breakdown
– you can’t locate your flooring’s care instructions to confirm safe product types
7) Quick checklist (scan/save)
| Task | Do this | Avoid |
|---|---|---|
| First attempt | Lightly wipe with *barely damp* microfiber (distilled water if possible) | Scrubbing pads, soaking the area |
| Cleaning step | Use wood-floor-safe cleaner labeled for your finish; apply to cloth | Bleach, strong acids/alkalis, ammonia-heavy cleaners |
| Drying | Dry immediately with a clean microfiber | Leaving moisture to sit |
| Finish safety | Work gently with short passes | Circular friction that can change sheen |
| When stuck | Stop and reassess (possible finish damage or water intrusion) | Continuing aggressive cleaning |
Frequently Asked Questions
What’s the safest way to remove water spots from engineered wood floors?
Start by blotting the area with a dry, soft microfiber cloth to remove any remaining moisture, then use a slightly damp cloth with plain water to gently lift surface residue. If the spot remains, lightly clean with a wood-floor-safe cleaner recommended for engineered hardwood and follow the product instructions. Avoid soaking the floor or using harsh chemicals, because standing water and strong detergents can damage the finish and cause permanent discoloration.
How do I get rid of white or cloudy water spots on engineered wood without damaging the finish?
White or cloudy marks are usually finish haze from trapped moisture, so use minimal moisture first—dampen a cloth with clean water and wipe in the direction of the grain. If needed, try a small amount of denatured alcohol on a cloth to gently address the haze, then immediately wipe dry with a separate towel. Always test any treatment in an inconspicuous area, and stop if the finish starts to dull or smear.
Why do water spots come back on engineered wood floors after cleaning?
Water spots often return when moisture penetrates seams, edges, or the top layer of the engineered wood, or when residue is left behind and re-wets. Ensure you fully dry the area after cleaning and improve prevention by using felt pads under furniture and wiping up spills right away. Also check for lingering moisture from leaks, humidifiers, or HVAC issues—ongoing moisture can repeatedly create spotting.
Which cleaners are best for water spot removal on engineered hardwood floors?
The safest options are cleaners explicitly labeled “safe for engineered hardwood” or “wood floor cleaner” that are designed to be pH-balanced and non-abrasive. In many cases, plain water on a lightly damp cloth is sufficient for surface marks, while stubborn spots may require a finish-safe approach like alcohol-based spot treatment used sparingly. Avoid vinegar, ammonia, steam mops, and abrasive pads, since they can strip the protective layer and worsen spotting.
How can I prevent water spots and water damage while cleaning engineered wood floors?
Use a microfiber mop and a wood-floor-safe cleaning solution applied sparingly—never pour water directly onto the engineered wood. After mopping or spot cleaning, dry the area promptly with a clean towel, especially near kitchen sinks, bathrooms, or entryways. Regularly inspect for leaks and keep indoor humidity stable, since excessive moisture and temperature swings can increase the risk of recurring water spots.
📅 Last Updated: November 14, 2026 | Topic: How to safely clean water spots from engineered wood floors? | Content verified for accuracy and freshness.
References
- https://www.epa.gov/mold/mold-cleanup-guidance
- Mold Clean Up Guidelines and Recommendations | Mold | CDC
- https://www.cdc.gov/mold/default.htm
- Wood flooring
- Water damage
- Wood stain
- Stain
- https://scholar.google.com/scholar?q=engineered+wood+floor+water+stain+removal Google Scholar
- https://scholar.google.com/scholar?q=hardwood+floor+water+spot+cleanup+drying+and+safety Google Scholar
- https://scholar.google.com/scholar?q=engineered+wood+floor+care+moisture+damage+prevention+cleaning Google Scholar