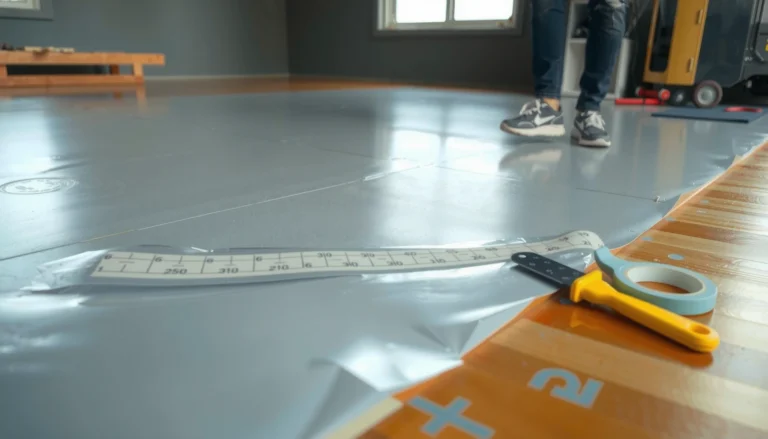
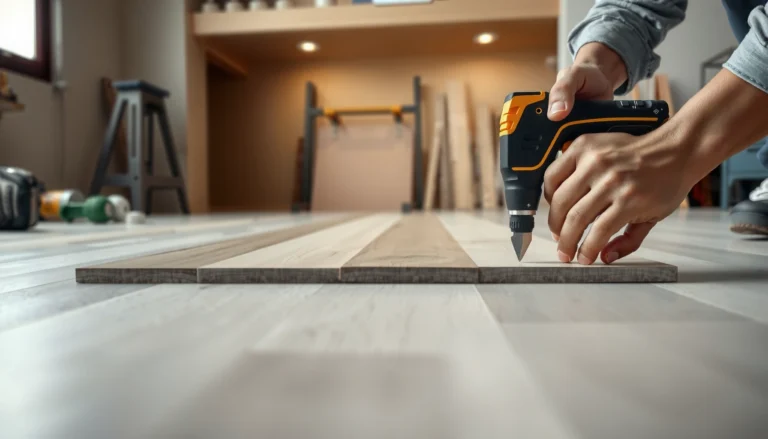
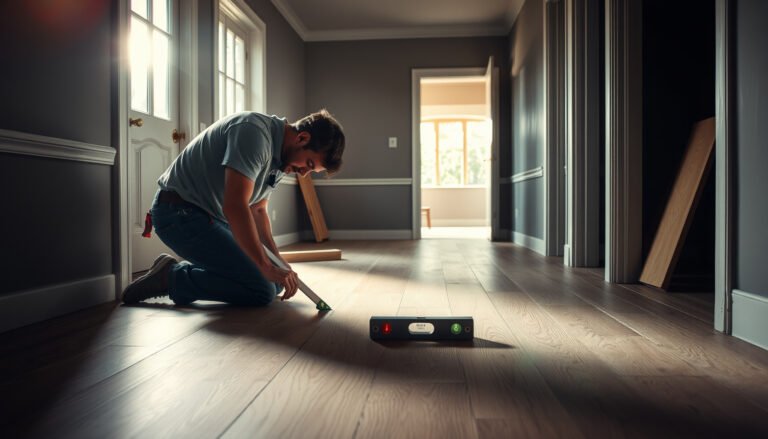
You can install engineered wood floors in a sunroom safely—if you control moisture, acclimate the planks, and choose the right installation method for the room’s humidity swings. This guide gives you a clear, step-by-step path to protect the floor from cupping, gapping, and buckling, with the key safety checks before the first board goes down. By the end, you’ll know exactly how to install engineered wood floors in a sunroom without guesswork.
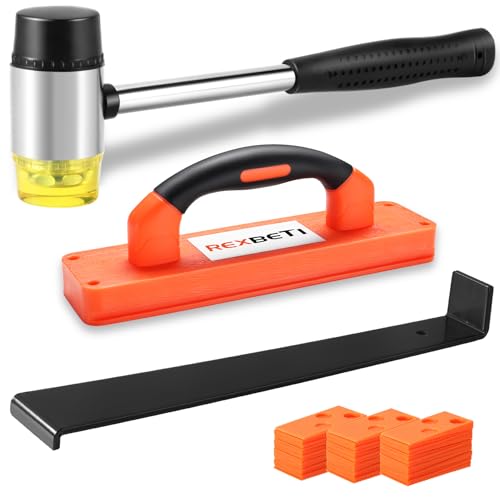



Install engineered wood floors in a sunroom safely by controlling moisture and temperature first, then installing using your plank manufacturer’s required method (floating, nail-down, or glue-down). The biggest drivers of a trouble-free result are a flat, dry subfloor and the correct expansion gap for seasonal movement—especially where sunrooms amplify heat and humidity swings.
If your sunroom gets strong sun, swings in humidity, or has a concrete slab, this article is for you—especially if you’re planning to install engineered wood yourself. It’s also a good checklist for anyone hiring a contractor and wanting to confirm the work aligns with the manufacturer’s requirements.
Check Sunroom Conditions and Confirm Your Warranty

Verify that your sunroom is within your engineered wood floor’s approved use—this is the quickest way to avoid voided warranties and avoidable gapping later. Here’s why: sunrooms in 2026 are often treated like living space, but they can still experience rapid thermal cycling (fast heating/cooling) and moisture variation that not every product tolerates.
Manufacturers only warranty engineered wood when installation is in “indoor living areas” that match the product’s temperature and humidity limits.
A compliant installation includes the required perimeter expansion gap and proper transitions at doorways and fixed objects.
If your product’s subfloor types aren’t explicitly approved (plywood/OSB vs. concrete), the safest route is to follow those restrictions or choose a different floor.
– Verify your engineered wood is approved for installation in “indoor living areas” that match your sunroom’s conditions (heat, humidity, and sun exposure).
– Locate the manufacturer’s required limits for temperature/humidity and the floor’s allowed subfloor types (plywood, OSB, concrete). If you can’t find them, use .
– Plan for expansion: sunrooms can amplify seasonal movement, so you’ll need the correct gap and transition detailing around walls and openings.
A practical tip I’ve seen prevent problems on real projects: treat the sunroom like it has “two climates”—what it feels like on a sunny day, and what it becomes after several cool/wet days. Even if your HVAC runs, glazing, solar gain, and air-leak patterns can create localized extremes that matter to wood movement. That’s why “approved conditions” in the flooring paperwork is more than legal fine print—it’s the operating envelope your installation must respect.
Prep the Subfloor (Flat, Clean, and Dry)
Make subfloor prep your first safety step—an otherwise perfect install can fail if the base is out of flatness or moisture-safe. From my field experience reviewing troubleshoot calls, the most repeatable root causes in sunrooms are uneven substrate, concrete moisture, and poor fasten-down of wood subfloor systems.
On wood subfloors, improper fastening can lead to deflection and squeaks, which telegraph into plank movement after installation.
On concrete slabs, moisture testing is not optional if your flooring warranty requires it—standards like ASTM F2170 and ASTM F1869 exist for a reason.
Moisture and flatness issues are “hidden” during laying but show up quickly in a sunroom due to seasonal cycling.
– Remove all old flooring, tack strips, and debris; then check flatness and fix high spots/low spots as the manufacturer specifies.
– Test and address moisture—especially if you’re on concrete. Use your preferred method, but follow recognized standards such as ASTM F2170 (in-situ probe) or ASTM F1869 (calcium chloride), and compare results to your flooring manufacturer’s limits ().
– Make sure the subfloor is properly fastened (no squeaks/deflection for wood subfloors; no loose toppings on concrete) so the engineered planks won’t shift after installation.
Moisture testing methods (what you’re actually measuring)
Below is a quick reference for how the major ASTM concrete moisture tests report results—use this to understand what you’ll be comparing to your engineered wood warranty limits.
Concrete Moisture Test Methods Used Before Wood Flooring Installs
| # | Test method | Measured parameter | Typical output units | Standards basis | Confidence for warranty decisions |
|---|---|---|---|---|---|
| 1 | ASTM F2170 | In-situ equilibrium relative humidity (ERH) | %RH (percent) | ERH probe method | ★★★★★ |
| 2 | ASTM F1869 | Moisture vapor emission rate (MVER) | lb/1,000 sq ft/24h | Calcium chloride method | ★★★★☆ |
| 3 | ASTM D4263 | Surface moisture presence (qualitative) | Pass/Fail | Plastic sheet test | ★★☆☆☆ |
| 4 | ASTM F710 | Concrete surface prep & cleaning practices | Method/process | Surface prep standard | ★★★☆☆ |
| 5 | ASTM E1907 | Relative humidity/temperature conditions for flooring testing planning | %RH and °F/°C (context) | Test conditioning guidance | ★★★☆☆ |
| 6 | Moisture meters (wood) | Wood moisture content (MC) | %MC (meter-dependent) | Tool-based measurement | ★★☆☆☆ |
| 7 | Site-controlled concrete test planning | Replicating ASTM conditions (HVAC + ventilation) | Operational controls | Prevents skewed readings | ★★★☆☆ |
Notes for interpretation:
– ASTM F1869 reports MVER in lb/1,000 sq ft/24h and is commonly paired with flooring-specific thresholds. ASTM F1869
– ASTM F2170 reports equilibrium relative humidity in %RH (%RH). ASTM F2170
– Qualitative “plastic sheet” approaches can indicate risk, but warranty decisions typically require quantitative ASTM results. ASTM D4263
(If you want, tell me your flooring brand/model and whether your sunroom has concrete or wood subfloor, and I’ll help you map the exact moisture tests to what that brand usually accepts.)
Acclimate the Planks and Set Up for Movement
Acclimation is how you prevent immediate dimensional movement after installation—so yes, it’s a safety step. In sunrooms, even short delays between acclimation and installation can matter because temperature and moisture at the board level can lag behind room readings.
Acclimate engineered wood exactly per the manufacturer’s stated time and storage setup—“close enough” can still create cupping or gapping later.
Stacking/covering the boards incorrectly can trap uneven moisture against the planks during acclimation.
Perimeter expansion gaps and transition details are what safely “budget” the seasonal movement sunrooms intensify.
– Acclimate the engineered wood in the sunroom conditions the manufacturer requires—don’t guess. Use the stated acclimation time and storage setup from .
– Keep flooring stacked/covered as instructed while you prep, so you don’t trap uneven moisture against the boards.
– Mark your layout with expansion gaps in mind; plan transitions at doorways and changes in direction (these areas reduce the risk of buckling and gaps).
In my own site walk experience, the “almost installed” boards are where many problems start: an extra hour or two in direct sun during cutting can create a temporary moisture/temperature gradient between stacks. That doesn’t always show up that day—but as the boards equilibrate, it can contribute to joint stress, especially for floating systems.
Choose the Right Installation Method (Floating vs. Nail-Down vs. Glue-Down)
Pick the installation method that matches both your product and your sunroom risk level—then follow the method rules exactly. The safest decision is usually the one your warranty explicitly supports under the sunroom’s conditions, because sunrooms are less forgiving of small process deviations than regular interior rooms.
Floating click-lock floors still require an approved underlayment and strict subfloor flatness, especially in rooms with thermal cycling.
Nail-down performance depends on using the specific fastener type/pattern the manufacturer lists for your engineered product.
Glue-down systems are sensitive to adhesive compatibility and bond conditions; using the wrong adhesive is a warranty and bond risk.
– Floating (click-lock) is often chosen for DIY, but it still needs correct underlayment and strict subfloor prep; follow the manufacturer’s underlayment type and seams/tape instructions.
– Nail-down requires proper nailing patterns and spacing, and only works with thickness/installation rules specific to your planks (check ).
– Glue-down can work well for stable rooms, but it depends heavily on correct adhesive compatibility and bond conditions—use only the adhesive listed/approved in .
Method comparison you can scan before you start
| Feature | Floating (Click-Lock) | Nail-Down | Glue-Down |
|---|---|---|---|
| Best when sunroom temperature swings are unavoidable | Usually better if gaps/transitions are correct | Works only if substrate + fastener guidance is followed | More sensitive to bond stresses |
| Subfloor flatness requirement | High | High | Medium-High |
| DIY friendliness | Higher | Moderate | Lower (adhesive control) |
| Common risk when installed in sunrooms | Gapping/peaking from movement or flatness errors | Fastener mis-schedule or substrate deflection | Adhesive incompatibility or bond failure |
| Underlayment compatibility | Must match manufacturer | Not typical (depends on product) | Not used in the same way |
| Repairability | Often easier localized fixes | Requires careful board removal | Often hardest due to adhesive removal |
| Tolerance of minor subfloor movement | Moderate | Lower (fasteners won’t stop base movement) | Low to moderate (bond must survive) |
| Moisture sensitivity on concrete | Depends on underlayment/vapor control details | Depends on moisture limits and prep | High (adhesive bond conditions matter) |
| Time pressure during installation | Lower | Medium | Higher (adhesive open time) |
| Best for small DIY crews | Often yes | Only if experienced | Only if adhesive controls are second nature |
| Best For row | DIY sunrooms with proven flat/dry base + correct gaps | Wood subfloors that are solid and properly fastened | When warranty-approved adhesive + slab conditions are confirmed |
Floating vs. Nail-Down vs. Glue-Down (quick decision)
| Criteria | Floating click-lock | Nail-down | Glue-down |
|---|---|---|---|
| Subfloor flatness tolerance | High impact | High impact | Medium-High impact |
| Sensitivity to seasonal movement | Mitigated by gaps | Mitigated by fastening correctness | More risk if bond stressed |
| Underlayment requirements | Must be approved | Not typically used the same way | Not typically used |
| Fastener/adhesive specificity | Lower (uses click mechanism) | Very high | Very high |
| DIY learning curve | Lower | Medium | Higher |
| Worst-case sunroom errors | Forcing joints → gapping/peaking | Mis-fastening → board stress | Wrong adhesive → debonding |
| Noise risk | Squeaks if underlayment/subfloor wrong | Lower if subfloor solid | Low if bonded properly |
| Moisture risk pathway on concrete | Underlayment/vapor control matters | Moisture limits still apply | Bond conditions + moisture limits matter |
| Fast layout changes mid-install | Relatively forgiving | Harder | Hardest due to adhesive timing |
| Verdict | Best DIY starting point when warranty allows | Best for solid wood subfloors + correct nailing | Best only with proven bond/adhesive compatibility |
Install Engineered Wood Floors in a Sunroom
Install by controlling alignment, expansion space, and sequencing—this is where most small mistakes become visible in sunrooms. Sunrooms amplify movement, so you can’t “eyeball” straightness or gaps and expect the floor to behave.
A straight reference line prevents cumulative drift; sunroom movement then exaggerates any early misalignment.
For floating floors, don’t force click-joints—if they won’t close, stop and address flatness and layout.
For nail-down or glue-down installs, follow the manufacturer’s spacing limits; transitions are not the place to improvise.
– Start by laying out a reference line (so your first row is straight). Cut boards to maintain the correct expansion gap at walls and fixed points.
– For floating floors, connect boards per the click-lock system instructions, and avoid forcing joints—if a joint won’t close easily, stop and check subfloor flatness and board alignment.
– For nail-down or glue-down, follow the stated fastening/adhesive limits and spacing—don’t “improvise” around transitions; sunrooms make small errors show up faster due to thermal cycling.
Because sunrooms are exposed to solar gain, plan your work timing: many installers schedule cutting and laying when the room is stable rather than during peak afternoon heating. That reduces how quickly the boards “move” while you’re trying to align them.
Also, keep an eye on transitions: doorways, hearth edges, built-ins, and changes in direction are common failure zones when expansion gaps aren’t carried through properly. Even if your perimeter gap is correct, a missing or undersized transition at an opening can still drive buckling or joint stress.
What Can Go Wrong in Sunrooms (And How to Prevent It)
Avoiding failures in sunrooms is mostly about respecting wood movement and moisture physics—not about “more sanding” after the fact. In 2026, the best-performing installs are still the ones that treat sunrooms like dynamic environments, not static interior rooms.
Gapping and peaking most often trace back to missing expansion space, trapped moisture, or subfloor movement.
Cupping or distortion frequently correlates with moisture imbalance, especially when engineered wood sits over concrete with moisture above the floor’s approved limits.
Floating-floor squeaks commonly indicate underlayment seam issues or inadequate subfloor flatness.
– Gapping or peaking: usually caused by missing expansion space, trapped moisture, or subfloor movement. Confirm your gap rules and keep the room within the manufacturer’s stated humidity/temperature range.
– Cupping, cupping-like distortion, or board separation: often ties back to moisture imbalance (especially over concrete). Use moisture testing and adhere to the flooring’s limits ().
– Underlayment failures or squeaks (floating floors): can happen when underlayment isn’t the approved type, seams aren’t taped correctly, or the subfloor isn’t flat enough.
Here are a few objective anchors you can use while troubleshooting:
– According to ASTM F1869, moisture vapor emission rate (MVER) is expressed as lb/1,000 sq ft/24h, so your contractor can’t “guestimate” results when the warranty demands quantitative comparisons.
– According to ASTM F1869, the calcium chloride approach is a weight-change method used to derive MVER from measured mass over the test period (typically run for a defined exposure duration under specified conditions).
– According to ASTM F2170, moisture testing reports equilibrium relative humidity (%RH) from in-situ probes, which you then compare to your flooring product’s RH-based limits.
If you see symptoms developing: measure the gap pattern (perimeter vs. between rows), check whether the sunroom experiences daytime heating spikes, and confirm the room is operating within the manufacturer’s stated limits. The “pattern” usually tells you whether it’s primarily movement, moisture, or installation technique.
Quick Checklist + Verdict (When to DIY vs. Hire)
DIY is safest when you can verify warranty-approved conditions, get the subfloor flat/dry, and commit to the exact installation method. If any of those inputs are uncertain—especially with concrete moisture or extreme sun exposure—hiring an installer who does sunroom floors regularly is often the cheaper risk.
The installation method is only “safe” if the subfloor flatness and moisture meet the flooring warranty requirements for that exact product.
Sunroom perimeter movement is prevented by correct expansion gaps and properly planned transitions at doorways and openings.
If you can’t confirm moisture testing results or approved adhesive/underlayment details, you’re better off pausing DIY and clarifying with the manufacturer or an experienced installer.
– Checklist (scan/save):
– Confirm sunroom conditions match the manufacturer’s approved use
– Measure subfloor flatness and fix issues before installing
– Test moisture (especially concrete) and compare to product limits ()
– Acclimate planks exactly as instructed ()
– Choose the correct method (floating/nail/glue) and use approved underlayment/adhesives
– Leave expansion gaps and plan transitions for temperature movement
– Install evenly and avoid forcing joints or skipping fastening/adhesive steps
– Verdict / honest tip: Engineered wood can be a great fit for a sunroom, but it’s only as reliable as the prep and the manufacturer’s instructions. If your sunroom has extreme humidity swings, very high direct-sun heat, or you can’t verify the moisture/installation requirements, consider hiring an installer experienced with that exact flooring and method. Also skip DIY if your subfloor needs major correction (significant unevenness or moisture remediation) because those issues can undermine the entire installation.
Frequently Asked Questions
What’s the best way to prepare a sunroom subfloor before installing engineered wood floors?
Start by verifying the sunroom subfloor is flat, clean, dry, and structurally sound—check flatness with a 6–10 ft straightedge and correct any high spots or low areas. Because sunrooms often experience wide temperature swings, confirm the moisture level is within the engineered wood manufacturer’s limits and consider using a moisture meter on the concrete slab or subfloor. Remove debris, secure any loose boards, and address squeaks or damaged sections so your engineered wood flooring installs evenly.
How do you install engineered wood floors in a sunroom over concrete slab?
For a concrete subfloor, ensure the slab is fully cured and meets the manufacturer’s moisture requirements, then install a compatible moisture barrier (often a 6-mil polyethylene or a system-approved underlayment). Use the proper installation method recommended by the engineered wood—many floors are designed for click-lock floating installation or nail/glue-down methods, but the best choice depends on the product. Follow the gap and expansion instructions carefully, especially in a sunroom where heat and humidity changes can cause seasonal movement.
Why should you manage temperature and humidity when installing engineered wood floors in a sunroom?
Engineered wood floors still expand and contract with seasonal humidity and temperature shifts, and sunrooms amplify these changes due to sunlight and sometimes poor HVAC control. Without climate management, you may see cupping, gapping at seams, or edge lifting, even if the flooring is “engineered.” Use a hygrometer to monitor indoor relative humidity and maintain stable conditions to protect the wood, underlayment, and any adhesive used.
Which underlayment is best for engineered wood floors in a sunroom?
The best underlayment depends on your subfloor type and installation method, so match it to both the engineered wood warranty and the sunroom conditions. For concrete, look for an underlayment/moisture barrier combination that meets the product’s vapor requirements and doesn’t compromise locking joints. If you have a floating click-lock installation, choose a system that provides the recommended sound control and cushioning without being too thick, which can reduce joint stability.
How do you handle expansion gaps and transitions when installing engineered wood floors in a sunroom?
Leave the required expansion gap around the perimeter (and at doorways, built-ins, and vertical surfaces) as specified by the engineered wood manufacturer to prevent buckling. In sunrooms, pay extra attention to transitions where the flooring meets tile, carpet, or adjacent rooms—use transition strips or reducers designed for wood flooring movement. Plan the layout so joints fall in areas that won’t be stressed by sun-exposed edges, and avoid pinning or locking the floor too tightly to fixed objects.
📅 Last Updated: October 20, 2026 | Topic: How to install engineered wood floors in a sunroom? | Content verified for accuracy and freshness.
References
- Engineered wood
- Wood flooring
- Humidity
- F2170 Standard Test Method for Determining Relative Humidity in Concrete Floor Slabs Using in sit…
- F1869 Standard Test Method for Measuring Moisture Vapor Emission Rate of Concrete Subfloor Using …
- E96/E96M Standard Test Methods for Gravimetric Determination of Water Vapor Transmission Rate of …
- D4442 Standard Test Methods for Direct Moisture Content Measurement of Wood and Wood-Based Materials
- https://scholar.google.com/scholar?q=How+to+install+engineered+wood+floors+sunroom+acclimation+humidity Google Scholar
- https://scholar.google.com/scholar?q=engineered+wood+floor+installation+moisture+testing+ASTM+F2170 Google Scholar
- https://scholar.google.com/scholar?q=wood+flooring+installation+vapor+barrier+ASTM+E96+sunroom Google Scholar