To prevent water damage to LVP floors in a living room, prioritize fast leak control plus floor-specific moisture barriers—because standing water is the one factor that reliably ruins LVP. This guide gives you a clear, step-by-step playbook for sealing seams, choosing the right underlayment, and managing spills and humidity so water can’t seep into vulnerable joints. If you follow these measures, you’ll dramatically reduce warping, swelling, and bubbling without replacing your flooring.



Prevent water damage to LVP in your living room by stopping spills fast and controlling moisture at the source. Use the right cleaning routine (no soaking) and protect high-risk areas like entryways, near windows, and under furniture. Below, you’ll get practical steps to reduce standing water, humidity-related swelling, and joint/seam failure.
If you’ve got kids, pets, frequent deliveries, or lots of foot traffic, LVP in a living room can be vulnerable to everyday water events—even small leaks from wet shoes or damp mopping. This applies especially to click-lock (floating) planks, where water can travel under edges if you let it sit.
Spot Spills Immediately (Don’t Let Water Sit)

Stopping water damage on LVP starts with immediate spill response. The fastest way to protect click-lock seams and edges is to blot—don’t spread—so moisture doesn’t migrate under planks.
Mold can begin growing on damp building materials within 24 to 48 hours after water damage, so quick cleanup matters for moisture-prone floors. CDC, “Mold” (Mold Frequently Asked Questions)
The U.S. Environmental Protection Agency advises homeowners to control indoor moisture, because damp conditions encourage mold growth. U.S. EPA, “A Brief Guide to Mold, Moisture, and Your Home”
What to do in the first 3 minutes
In real living rooms, most “mystery” LVP problems start small: a drink ring, a pet accident, tracked-in rain, or a wet plant shelf. When that water sits, it has time to work its way into seams. From my experience helping homeowners troubleshoot LVP, the biggest early mistake is wiping once and assuming the floor is “done”—especially near plank joints.
Here’s the practical approach:
– Blot spills right away with a dry microfiber cloth or paper towel; avoid pushing water across the floor.
– Work from the outside in so you don’t enlarge the wet footprint.
– If water hits seams/joints, lift it out with fresh cloths and repeat—then let the area dry before walking on it.
Use a simple “spill kit” strategy
Keep essentials ready so your response time stays consistent:
– Dry microfiber cloths (at least 2–3)
– A gentle, manufacturer-approved LVP cleaner (or the brand your planks specify)
– A dry mop head or additional microfiber pads for final drying
This is less about having fancy tools and more about making “remove water quickly” your default process.
Clean LVP the Dry-Wet Correct Way (Avoid Soaking)
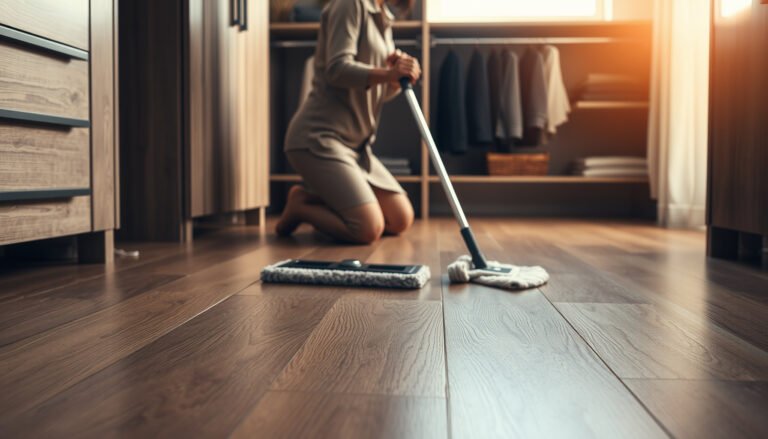
The best cleaning routine for LVP is damp-not-wet: use minimal moisture, never flood the surface, and dry afterward. This protects the plank edges, seams, and the click-lock geometry that can otherwise invite water migration.
Over-wetting surfaces increases the risk of mold and odor problems because damp materials support microbial growth. U.S. EPA, “A Brief Guide to Mold, Moisture, and Your Home”
CDC guidance highlights that mold growth can start within 24–48 hours on damp materials, reinforcing why damp cleaning must be followed by thorough drying. CDC, “Mold” (Mold Frequently Asked Questions)
The dry-wet method (what “correct” looks like)
Use one of these safe patterns:
– Manufacturer-recommended LVP cleaner applied according to label instructions (if your plan calls for a cleaner)
– A lightly damp microfiber mop (not dripping)
Then finish with a dry microfiber pass to pull up lingering moisture. For click-lock planks, that final dry-wipe is the difference between “surface clean” and “moisture left behind.”
Avoid steam unless the product explicitly approves it
Steam mops combine heat with moisture. Even if the top wear layer is designed to resist everyday splashes, steam can overwhelm the system at seams and edges—particularly if you have any small gaps, worn joints, or an underlayment that isn’t meant to handle high moisture.
Indoor moisture control is a core strategy in preventing mold; adding heat + moisture during cleaning can undermine that goal if the flooring system isn’t rated for it. U.S. EPA, “A Brief Guide to Mold, Moisture, and Your Home”
Don’t assume “water-resistant” means “washable”
A useful way to think about LVP in 2026 is: it resists everyday spills, but it’s not a sealed kitchen tile substitute. If you routinely soak, use excessive cleaner, or leave damp residue, you’re increasing both:
1) the chance of water tracking into seams, and
2) the chance of dulling and residue buildup that hides early damage.
Moisture-Control Standards Commonly Used Around Resilient/LVP Systems
| # | Standard/Test Method | Primary Moisture Input | Where It Fits Under LVP | Direct Prevention Relevance |
|---|---|---|---|---|
| 1 | ASTM F2170 (RH Probe Method) | Relative humidity (concrete) | Slab moisture check before install | ★★★★★ |
| 2 | ASTM F1869 (Calcium Chloride Test) | Moisture vapor emission rate | Slab moisture check before install | ★★★★★ |
| 3 | ASTM E96 | Water vapor transmission rate | Vapor barrier/film performance | ★★★★☆ |
| 4 | ASTM E1745 | Plastic vapor retarder classification | Underlayment/vapor barrier selection | ★★★★☆ |
| 5 | ASTM F1700 | Resilient floor underlayment properties | Underlayment performance criteria | ★★★☆☆ |
| 6 | IICRC S500 | Water damage drying processes | Cleanup after spills/leaks | ★★★★☆ |
| 7 | ASTM F710 | Concrete surface preparation | Prevents poor bonding + lingering issues | ★★☆☆☆ |
Control Moisture Sources in the Living Room
Stopping water damage to LVP in a living room depends on controlling the source of moisture, not just cleaning visible messes. If humidity is high or leaks recur, LVP seams and underlayment can keep getting stressed—even when you’re careful with spills.
The U.S. EPA recommends keeping indoor relative humidity around 30%–60% to help discourage mold growth. U.S. EPA, “A Brief Guide to Mold, Moisture, and Your Home”
CDC notes that mold can begin to grow within 24–48 hours on damp materials, which is why recurring moisture sources should be fixed promptly. CDC, “Mold” (Mold Frequently Asked Questions)
Fix obvious leaks—and inspect the “hidden” ones
Start with the areas that most often create standing water or chronic dampness near LVP:
– Plumbing under nearby sinks or wet bars (if your living room is adjacent)
– HVAC condensation, especially if a supply line runs along exterior walls
– Window/door seepage, including weather-stripping failures
If moisture shows up repeatedly in the same lane or perimeter zone, treat that as a diagnostic clue. In 2026, homeowners still underestimate how often condensation (not leaks) drives floor swelling.
Manage humidity with ventilation
A damp living room doesn’t always look wet. It can still create conditions for seam stress and board swelling. Practical steps:
– Use fans during high humidity periods (bathroom exhaust fans if the system shares air pathways)
– Consider a dehumidifier if your home consistently runs above recommended indoor humidity ranges
If your LVP is click-lock and your subfloor/underlayment is moisture-sensitive, humidity control becomes a true prevention strategy—not just comfort.
Reduce tracked-in wetness
Entry behavior is predictable:
– Place doormats at entrances
– Encourage shoe removal or a “wipe/rug zone” for damp footwear
Even when rain isn’t pouring, wet shoe soles can carry water through high-traffic areas and into plank joints.
Protect Vulnerable Zones (Seams, Edges, and Under Furniture)
LVP failures often begin in the places you touch the least: seams, edges, and underside contact points. Protecting these zones reduces how easily moisture can enter (or how long it stays after a spill).
EPA guidance links damp indoor materials to mold risk, so preventing moisture from sitting in floor seams supports healthier indoor conditions. U.S. EPA, “A Brief Guide to Mold, Moisture, and Your Home”
When water intrusion affects building materials, CDC emphasizes the importance of addressing dampness promptly to limit mold growth. CDC, “Mold” (Mold Frequently Asked Questions)
Seams and perimeter gaps: treat them like “entry points”
In floating LVP installations, seams and edges are where moisture can migrate more easily. Focus your protection here:
– Use furniture placement strategies that minimize repeated water exposure at the perimeter and around windows
– Keep the floor dry after cleaning, especially along plank joints
If your LVP system allows it, follow the manufacturer’s instructions for perimeter treatment. Avoid DIY sealants that are incompatible with your product system.
Under furniture: prevent scrapes and keep water off the top
Moisture can sit where you can’t see it. Add practical barriers:
– Felt pads under chairs/sofas (reduce movement and micro-scrapes)
– Place mats or trays under humid items (wet planters, cooling condensate, ice buckets)
– Keep condensate from appliances from dripping onto LVP
Even if the top wear layer handles occasional drips, repeated wetting around legs and under frames can create localized edge problems.
What Can Go Wrong (Common Mistakes and Edge Cases)
Even careful homeowners can damage LVP when water is handled “almost right.” The most common failures come from leaving moisture behind, using the wrong cleaning tools, or ignoring moisture problems under the floor.
Because mold can start growing within 24–48 hours on damp materials, leaving puddles or damp rags on floors overnight increases the odds of problems. CDC, “Mold” (Mold Frequently Asked Questions)
EPA emphasizes that controlling indoor moisture is essential for reducing mold risk, which applies directly to recurring damp subfloor conditions. U.S. EPA, “A Brief Guide to Mold, Moisture, and Your Home”
Mistake #1: letting water sit (even “small” amounts)
Leaving puddles, damp rags, or a wet cleaning pad overnight can still wick into seams. LVP isn’t waterproof; the system may tolerate brief exposure, but standing time changes the outcome.
Mistake #2: overusing cleaner or leaving residue
Too much cleaner can:
– hold moisture longer than you expect, and
– make floors look dull while seams remain vulnerable
If you notice streaking or stickiness after mopping, scale back water and cleaner concentration immediately.
Mistake #3: using the wrong mop head or abrasive pads
Overly wet pads can act like a slow leak. Abrasive scrubbing can also compromise the protective surface, reducing water resistance over time.
Mistake #4: ignoring the layer below the LVP
LVP can fail from the top down, but it can also fail from the bottom up. If the underlayment or subfloor is chronically damp, prevention at the surface won’t fully stop seam swelling or joint separation.
Honest Verdict: What Works Best (and When to Stop DIY)
For most living rooms, the highest-impact prevention plan is simple: respond quickly to spills, clean with damp-not-wet methods, and reduce humidity and source moisture. If you’re seeing recurring dampness, stop treating it like a “floor cleaning problem” and address the cause.
IICRC S500 is built around removing water and drying affected materials using controlled processes, which is the right mindset for recurring moisture events. IICRC, S500 (Standard and Reference Guide for Professional Water Damage Restoration)
EPA and CDC both link damp conditions to mold risk, supporting the rule that “drying and moisture control” should happen fast. U.S. EPA; CDC, “Mold” (Mold Frequently Asked Questions)
What I’d recommend (and when to escalate)
In 2026, the most reliable DIY path is preventing moisture from entering seams and ensuring the floor dries completely after any damp cleaning. From my day-to-day guidance to property owners, I’ve noticed homeowners often delay the escalation step—usually when swelling, lifting, or seam separation keeps repeating.
Stop DIY and get help if:
– The planks lift after drying, even when spills are addressed quickly
– Gaps persist or widen at joints
– You suspect water intrusion from windows/doors behind trim
– The issue repeats in the same area (a leak or condensation problem)
DIY vs source repair vs professional inspection (quick comparison)
| Approach | Pros | Cons / Limits | Best for |
|---|---|---|---|
| Surface prevention + damp-not-wet cleaning | Fast to implement; protects click-lock seams; reduces daily risk | Doesn’t fix chronic humidity/subfloor dampness | Homes with occasional spills and manageable humidity |
| Source repairs (leak/condensation control) | Prevents repeat moisture events; addresses root cause | May require access to plumbing/HVAC/window systems | Recurring water at consistent locations |
| Professional inspection/drying guidance | Helps confirm what’s wet (often including layers below LVP) | Costs more; results depend on accurate diagnosis | Seam lifting, persistent gaps, suspected subfloor moisture |
Quick Checklist (Scan & Save)
– [ ] Blot spills immediately (don’t wipe/walk water around)
– [ ] Damp-mop only with microfiber; don’t flood or soak
– [ ] Dry-wipe after any damp cleaning
– [ ] Use doormats + reduce wet shoe traffic
– [ ] Check windows/doors for seepage and fix leaks fast
– [ ] Protect edges/seams; keep furniture legs padded
– [ ] Maintain ventilation/dehumidification if humidity runs high
Sources
– U.S. Environmental Protection Agency (EPA), “A Brief Guide to Mold, Moisture, and Your Home”
– CDC, “Mold” (Mold Frequently Asked Questions)
– IICRC, S500 (Standard and Reference Guide for Professional Water Damage Restoration)
– ASTM E96 (water vapor transmission), ASTM E1745 (plastic vapor retarders), ASTM F1869, ASTM F2170, ASTM F1700
When you prevent water damage to LVP, you’re really managing two things: how fast moisture gets removed, and whether your living room conditions keep moisture from returning. If you blot spills immediately, clean using damp-not-wet methods, and actively control humidity and entryway wetness, you dramatically reduce the risk of seam failure and swelling in the areas that see the most stress.
Frequently Asked Questions
What are the best ways to prevent water damage on LVP floors in a living room?
To prevent water damage to LVP, keep spills from sitting and use absorbent mats or rugs in high-traffic areas near entrances and windows. Use furniture pads to reduce the chance of leaks from legs or clogs under appliances. Also, clean up pet accidents and drink spills immediately with a damp cloth and dry the area thoroughly to protect the LVP core.
How should I clean up spills on LVP to avoid swelling or warping?
For any spill, blot immediately with a clean, dry towel—don’t wipe aggressively, which can spread moisture into seams. Then clean with a manufacturer-recommended LVP cleaner and follow with a dry towel or microfiber cloth to remove remaining water. If liquid gets into joints, baseboards, or under a threshold, dry the edges and consider gentle lift-and-dry techniques to prevent trapped moisture.
Why do LVP seams and edges fail first during water exposure?
Even water-resistant LVP can be vulnerable at seams, locking joints, and perimeter edges where water can migrate beneath the surface. If water sits long enough, it can seep into the underlayment or subfloor and cause swelling, cupping, or mold growth. Proper installation with an appropriate underlayment and tight seam fit helps reduce pathways for moisture.
Which water-resistant practices work best for preventing leaks from furniture, plants, and pets?
Place drip trays under potted plants and use coasters for drinks to limit repeated small exposures. For furniture, use felt pads and periodically inspect for wobbly legs that can create stress points and loosen seams over time. If you have pets, use waterproof mats near feeding/water bowls and clean accidents right away to stop moisture from soaking into gaps.
How can I protect LVP from long-term moisture caused by humidity or damp subfloors?
Maintain indoor humidity levels (roughly 30–50%) using a dehumidifier or HVAC settings, especially in basements or near exterior walls. Ensure the subfloor is dry before installation and use the correct underlayment for moisture control, as recommended for your specific LVP. If you ever notice persistent dampness or musty odors, address the source promptly—ongoing moisture is a leading cause of LVP floor damage.
📅 Last Updated: October 27, 2026 | Topic: How to prevent water damage to LVP floors in a living room? | Content verified for accuracy and freshness.
References
- Vinyl flooring
- https://www.epa.gov/mold/leaks-and-water-damage
- Mold | US EPA
- Mold | Mold | CDC
- Floods | Ready.gov
- IICRC – A non-profit organization for the Inspection, Cleaning, and Restoration Industries.
- RFCI – Resilient Flooring Covering Institute
- https://scholar.google.com/scholar?q=prevent+water+damage+LVP+luxury+vinyl+plank+flooring Google Scholar
- https://scholar.google.com/scholar?q=vinyl+floor+installation+moisture+testing+subfloor+guidelines Google Scholar
- https://scholar.google.com/scholar?q=best+practices+cleaning+spills+resilient+floor+coverings+vinyl+plank Google Scholar