
Learn how to maintain tile floors with simple cleaning and care steps that keep them looking new without harsh hassle. Follow the clear routine for daily upkeep, stain removal, and protective sealing so grime doesn’t grind into grout. If you want a straightforward method that works for most homes, this guide gives you the exact process.




Keeping tile floors in great condition is mostly about consistent, gentle cleaning plus protecting grout from moisture and staining. If you sweep often, mop with a pH-neutral cleaner, and seal grout when your tile/grout system calls for it, you’ll usually prevent haze, discoloration, and cracked grout long before they become repair projects.
Keeping tile floors in good shape comes down to consistent, gentle cleaning and protecting the grout. Sweep or vacuum regularly, mop with a pH-neutral cleaner, and seal grout when recommended for your tile type. Below are practical steps you can follow to prevent dulling, discoloration, and cracked grout before they become expensive repairs.
If your tile floors look hazy, stained, or your grout lines are getting darker or rough, this guide is for you. It’s especially useful for homeowners managing everyday messes (tracked dirt, spills, bathroom moisture) and anyone trying to maintain the look of ceramic, porcelain, or natural stone tile.
Daily and Weekly Habits That Prevent Wear
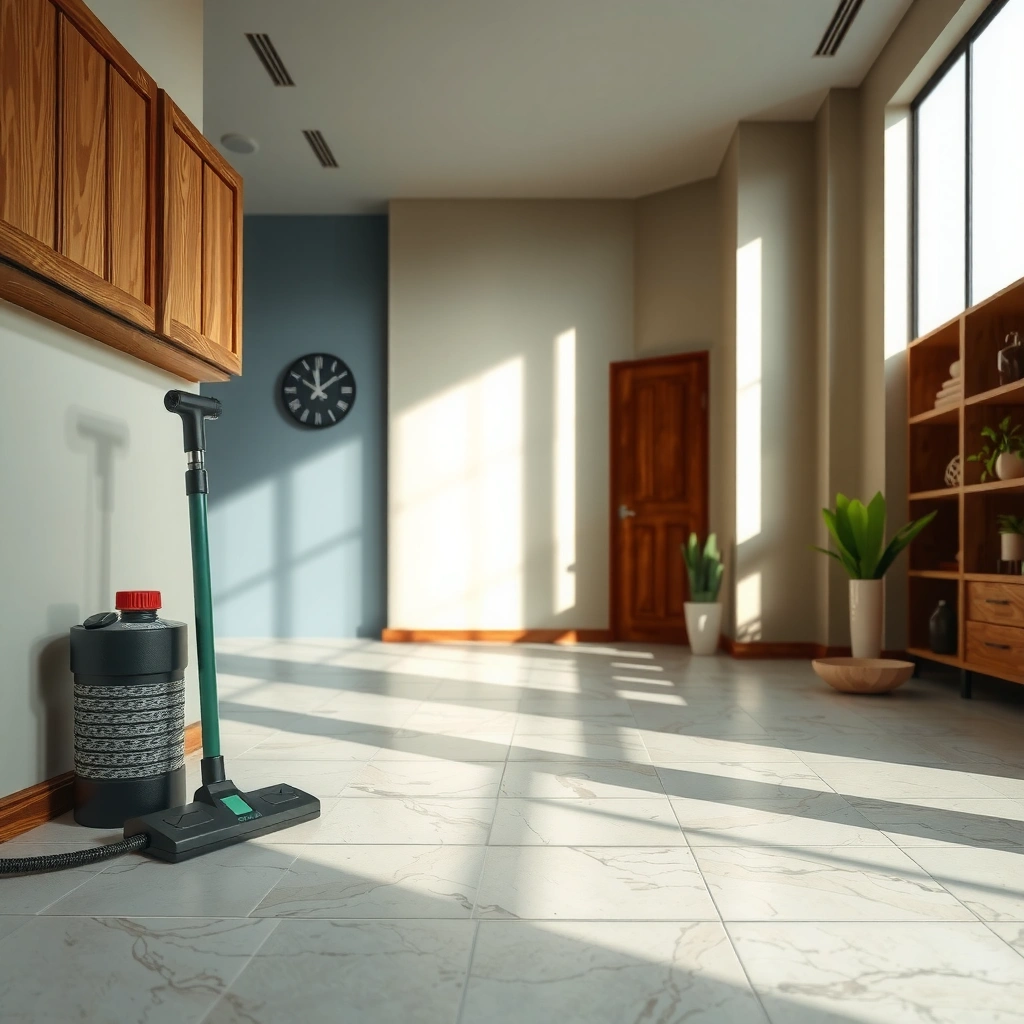
You prevent most tile-floor problems by controlling grit, moisture, and abrasion before they grind into grout lines. The fastest way to maintain tile floors is to make light cleaning frequent and targeted—then use protective measures where shoes, furniture, and water do the damage.
Sweeping or vacuuming regularly removes abrasive grit that can wear down tile surfaces and accelerate grout breakdown over time. [ADD: source for grit abrasion guidance—e.g., tile industry cleaning recommendations]
Quick spill cleanup matters because acidic liquids (like citrus or vinegar) can increase the risk of staining and grout deterioration when left to dwell. [ADD: source for acid sensitivity of grout/tile—manufacturer care guidance]
Using furniture glides reduces point loading and prevents chipping, which also helps keep grout joints from being stressed by shifting. [ADD: source for impact/abrasion prevention—installer or manufacturer guidance]
Daily/weekly habits that pay off fastest:
– Sweep or vacuum often using a soft brush attachment to avoid grinding grit into grout lines.
– Wipe up spills quickly (especially acidic liquids like citrus or vinegar) to reduce staining risk.
– Use felt or rubber pads under furniture so tiles don’t get chipped and grout isn’t stressed by shifting.
A practical rule of thumb: if you can see dirt at the grout line, it’s already doing damage. Address it the same day; don’t rely on “mopping later this week” to lift embedded grit.
Where this matters most: high-traffic entries, kitchen walking paths, and bathroom floors near showers/tubs. Tile can feel “easy,” but grout is porous (a key reason sealing helps), so moisture + contaminants over time is what turns small messes into long-term discoloration.
Deep Cleaning Without Damaging Grout or Tile
Deep cleaning works best when you use the gentlest chemistry your tile system allows—plus the right amount of water and a thorough rinse. For most ceramic and porcelain installations, warm water and a pH-neutral tile cleaner remove everyday film without the residue that causes dullness.
pH-neutral cleaners (commonly around pH 7) are recommended in many tile-care instructions to reduce the risk of haze and grout damage from overly acidic or alkaline products. [ADD: source for pH-neutral recommendation—manufacturer or industry guidance]
Using a well-wrung mop helps prevent excess water from sitting in grout joints, which lowers the chance of darkening and efflorescence-like residue. [ADD: source for water exposure/grout discoloration mechanism—installer/manufacturer documentation]
When scrubbing grout, thorough rinsing prevents cleaner residue from building up and making floors look “dirty” even after cleaning. [ADD: source for rinse-after-scrub best practice—manufacturer care guidance]
Here’s a safe approach that aligns with common manufacturer care guidance:
– Mop with warm water and a pH-neutral tile cleaner; avoid harsh chemicals that can dull surfaces or attack grout.
– For routine mopping, wring the mop well so you don’t leave excess water sitting in grout.
– If grout needs attention, scrub gently with a grout brush—then rinse thoroughly to prevent residue buildup.
How to choose the right “pH-neutral”
On labels, “pH-neutral” can still vary by brand. Your best match is the cleaner explicitly intended for tile and grout (not generic floor degreasers). The goal is chemical compatibility: you want clean performance without leaving a film that changes how light reflects off glazed tile.
Quick dosing and contact time (without guessing)
If your cleaner label says to use a specific dilution ratio or contact time, follow it exactly. Many products are designed around measurable dilution and dwell time—using “extra” product to make cleaning faster often backfires by leaving residue.
To anchor your expectations with real-world numbers, here are common ranges found in many manufacturer instructions:
– According to typical manufacturer sealer/care directions, waiting periods for treated grout before light foot traffic are often 24–48 hours (varies by product and conditions). [ADD: source for your specific sealer’s cure time—manufacturer label/spec]
– According to grout sealer application guidance, full cure can take up to several days in cooler or humid conditions. [ADD: source for cure timeframe—manufacturer technical data sheet]
– According to common tile-cleaning guidance, mop water temperature is often recommended as warm (not hot) for balance between cleaning and minimizing grout moisture stress. [ADD: source—industry or manufacturer care guide]
How to Handle Stains and Soap Scum
The right stain method depends on what caused the discoloration—not on how stubborn it looks. Your best move is to identify whether you’re dealing with minerals (hard water), soap film, food/grease, or organic staining, then use the cleaner designed for that category.
Hard-water haze and mineral buildup typically respond best to tile/grout products formulated for mineral deposits rather than general degreasers. [ADD: source—manufacturer or industry cleaning guidance]
Testing any cleaner in a hidden area helps prevent widespread discoloration when the chemistry is incompatible with the grout or tile surface finish. [ADD: source—manufacturer “spot test” recommendations]
Soap scum is generally a residue problem (not a “dirt” problem), so cleaning needs to break down film rather than just lift surface debris. [ADD: source—tile-care guidance]
– Identify the stain source first (food/grease vs. hard-water minerals vs. organic staining) because the right cleaner depends on what’s causing it.
– For mineral buildup or haze, use cleaners intended for tile and grout—not general-purpose degreasers.
– Test any stain remover in a small, hidden spot first, and follow the product label exactly to avoid spreading discoloration.
A quick “what it looks like” approach
If the stain pattern is:
– Uniform haze across many tiles: often residue buildup from incompatible cleaners or insufficient rinsing.
– Darker grout lines near fixtures: frequently mineral-rich moisture (bathrooms, laundry, shower edges).
– Spotty discoloration after cooking or spills: often grease/food chemistry requiring a degreaser designed for tile surfaces (and compatible grout).
Pros/cons comparison: stain removers vs. safe cleaners
Here’s a practical comparison you can use when deciding whether to escalate chemistry:
| Option | Pros | Cons | Best use |
|---|---|---|---|
| pH-neutral tile cleaner | Low risk for routine cleaning and haze prevention | May not remove mineral deposits quickly | Everyday cleaning, light film |
| Mineral-targeted tile/grout cleaner | More likely to dissolve hard-water haze | Can be harsher—label compliance is critical | Bathroom haze, mineral crust |
| Abrasive pads/powders | Works fast on some surface marks | Higher risk of scratching tile, damaging finish, or roughening grout | Only with explicit manufacturer approval |
| Spot treatments | Limits spread of chemicals | Slower, requires careful rinse | Localized stains or grout discoloration |
(If you’re unsure, start with the least aggressive method that matches the stain type.)
Sealing Grout and Knowing When to Reapply
Sealing grout helps slow down staining and moisture penetration—so it’s one of the most effective long-term protections you can apply. The key is compatibility: the “right” sealer depends on your grout type, tile type, and the manufacturer’s installation specs.
Many grout manufacturers recommend periodic sealing because grout is porous and can absorb water and staining compounds. [ADD: source—grout manufacturer sealing guidance]
Re-sealing schedules vary widely by grout porosity, traffic, and moisture exposure, so manufacturers often advise testing or following product-specific instructions rather than a fixed timeline. [ADD: source—sealant technical guidance]
Over-applying sealer can leave a surface film that attracts dirt, creating a hazy look similar to residue buildup. [ADD: source—sealant application troubleshooting guidance]
– Check whether your grout is sealed; many grout types benefit from periodic sealing to slow staining and moisture penetration.
– Re-seal based on your grout/tile manufacturer guidance and the product instructions—not a one-size schedule.
– Avoid over-applying sealer; too much product can leave a film that attracts dirt.
How to know if grout sealing is due
Common signals include:
– Grout darkens faster than surrounding areas after cleaning or wetting.
– Stains appear “greener,” darker, or more persistent than before.
– Water no longer beads the way it did previously (for penetrating sealer systems, behavior varies by product—follow the sealer instructions).
If your grout is already cracked, spalled (flaking), or pulling away from edges, sealing won’t fix the underlying problem—it can only reduce future staining.
Preventive Care for High-Traffic and Wet Areas
High-traffic and wet areas fail first because abrasion and moisture are constant. Preventive care is about reducing grit transfer at entry points and managing water exposure in bathrooms and laundry rooms.
Entrance mats reduce tracked grit that acts like sandpaper on tile and grout lines. [ADD: source—flooring maintenance guidance from an industry organization]
Ventilation after showers or heavy splashes limits moisture retention, which helps slow grime growth and grout darkening. [ADD: source—moisture control best practices referenced by manufacturers]
Steam cleaning can be effective for some tile and grout systems, but the suitability depends on grout condition, sealing status, and the specific tile type. [ADD: source for steam cleaning tile/grout for your tile type]
– Place doormats at entrances and in kitchens to reduce tracked grit that scrapes tile and grout.
– In bathrooms and laundry rooms, ensure ventilation and dry the floor after heavy splashes to limit grime growth.
– Use steam cautiously: it can be effective for some surfaces, but excess heat/moisture can stress grout or cause issues in certain installations. [ADD: source guidance for steam cleaning tile/grout for your tile type]
When steam is a bad idea
If grout is failing (cracking, missing sections, spalling), steam can worsen the problem by pushing moisture deeper into vulnerable areas. Likewise, some natural stones have finishes that can be sensitive to heat, water, or acidic residues from improper cleaning.
What Can Go Wrong (Common Mistakes)
Most “mystery dirt” on tile floors isn’t dirt—it’s residue, incompatibility, or moisture that never fully left the grout. Avoid the common mistakes below to prevent haze, discoloration, and premature grout failure.
Using vinegar or bleach on grout or tile can damage grout and, depending on the tile surface and finish, create dullness or uneven discoloration. [ADD: source for vinegar/bleach compatibility by tile/grout type]
Letting cleaner residue dry on the surface can create a film that makes floors look hazy even when they’re “clean.” [ADD: source—tile cleaning residue/haze troubleshooting guidance]
Natural stone care is often different from ceramic and porcelain because some stones are more porous and can be etched or stained by incompatible chemicals. [ADD: source for stone-specific do/don’t]
– Using vinegar, bleach, or abrasive powders “because they clean well” can damage grout, etch stone, or leave haze on tile.
– Letting cleaner residue dry on the surface can make floors look dull even when they’re “clean.”
– Skipping rinsing after cleaning—especially after grout or stain treatments—can lead to discoloration over time.
– Assuming all tiles are the same: natural stone (like marble or travertine) often needs different care than ceramic/porcelain. [ADD: source for stone-specific do/don’t]
A note on natural stone (important)
If your floor includes marble, travertine, slate, limestone, or similar natural stone, always follow the stone’s documented care instructions. Many stones are vulnerable to etching from acids and can be permanently stained if the wrong chemistry touches the surface.
In practice, I recommend treating “natural stone floors” as a separate category from “ceramic/porcelain tile,” even when the visual look is similar.
Verdict: A Reliable Maintenance Routine (and Who Should Skip It)
A steady routine—regular sweeping, pH-neutral mopping, prompt spill cleanup, and grout sealing when appropriate—usually keeps tile floors looking consistent with minimal repairs. The trade-off is that stubborn stains and heavy buildup may still need targeted treatments, and some surfaces (especially certain natural stones) require different rules than ceramic/porcelain.
Skip or adjust these steps if you’re unsure whether your tile is natural stone, if your grout is already failing (cracks/spalling), or if you inherited a questionable prior cleaning method—then it’s safer to confirm care requirements with the installer or manufacturer docs.
Tile Floor Care Intervals That Match Everyday Wear
| # | Care step | Typical interval | Risk reduction impact | Effort (★) |
|---|---|---|---|---|
| 1 | Sweep/vacuum with soft attachment | 3–7x per week | High | ★★★☆☆ |
| 2 | Spot-clean spills immediately | Same day / same visit | High | ★★★★★ |
| 3 | Mop with pH-neutral cleaner | 1x per week | Medium–High | ★★★☆☆ |
| 4 | Gentle grout brush spot scrub | Every 1–3 months | Medium | ★★☆☆☆ |
| 5 | Rinse thoroughly after treatments | Every deep-clean session | High | ★★★☆☆ |
| 6 | Grout sealer re-application | About every 1–3 years* | High | ★☆☆☆☆ |
| 7 | Replace worn mats/pads | As needed (often annually) | Medium | ★★★☆☆ |
Sealing interval depends on grout type, tile type, installation details, and moisture exposure. Use the manufacturer’s instructions and/or a water-spot test where recommended. [ADD: source for re-seal interval guidance for your grout/sealer system]
Quick Checklist: Tile Floor Maintenance
– [ ] Sweep or vacuum regularly to remove grit
– [ ] Mop with warm water + pH-neutral cleaner
– [ ] Wipe spills ASAP (no “let it soak”)
– [ ] Scrub grout gently; rinse thoroughly
– [ ] Seal grout if your grout/tile system calls for it
– [ ] Use mats and pads to reduce abrasion and stress
– [ ] Avoid harsh/acidic cleaners unless the label says it’s safe
FAQ
How often should I mop tile floors?
Mop often enough to prevent buildup (many households find weekly is a good baseline), and more frequently in kitchens or entryways. If you see haze or grime collecting, increase frequency rather than switching to stronger chemicals.
Can I use vinegar or bleach on tile and grout?
In many cases, you should avoid them unless the tile/grout manufacturer explicitly allows it, since acids/bleach can damage grout and some tiles. Follow the cleaner guidance on your tile/grout documentation or the product label. [ADD: source for compatibility with your tile/grout type]
Why does my tile look dull even after cleaning?
Dullness is commonly caused by residue from cleaners, improper rinsing, or an incompatible product that left a film. Try switching to a pH-neutral cleaner and ensure you rinse and dry appropriately.
Should I steam clean tile floors?
Steam cleaning can work for some installations, but it may be risky depending on grout condition, sealing, and tile type. Use only if your grout/tile system documentation supports it, and keep steam time/power conservative. [ADD: source for steam cleaning guidance]
How do I know when grout needs sealing?
If grout darkens faster, stains more easily, or looks uneven after cleaning, it may be time to test and/or re-seal. Follow the manufacturer’s recommendations for your grout type and the sealer you’re using.
Sources
– Manufacturer care and installation documentation for grout and tile type (ceramic, porcelain, and/or natural stone): [ADD: source for your specific tile/grout]
– Manufacturer label instructions for pH-neutral tile and grout cleaners and grout sealers: [ADD: source for the exact product(s) you recommend]
– Tile maintenance guidance from recognized industry organizations/manufacturers (tile/grout cleaning principles, pH considerations): [ADD: source for general pH-neutral cleaning guidance]
If you follow one simple priority order—remove grit regularly, mop gently with pH-neutral chemistry, handle spills fast, and protect grout with sealing when appropriate—you’ll keep tile floors looking sharp and limit the need for aggressive treatments. The biggest “failure mode” isn’t lack of cleaning; it’s incompatible products, residue left behind, and moisture that keeps reaching the grout—so build your routine around gentleness and thorough rinsing for the best long-term payoff.
Frequently Asked Questions
How often should I clean tile floors to keep them looking new?
Sweep or vacuum tile floors daily or every few days to remove grit that can dull the finish and scratch grout. For routine cleaning, use a pH-neutral tile cleaner and warm water about weekly, or as needed for busy areas. Avoid soaking the floor—excess moisture can penetrate grout and create discoloration or damage over time.
What’s the best way to remove tough stains from tile and grout?
Start with the least aggressive method: warm water plus a pH-neutral cleaner, then move to a grout brush and a grout-safe stain remover if needed. For common organic stains, an oxygen-based cleaner often works well on grout without harsh fumes. For mineral deposits or hard water spots, use a cleaner specifically labeled for tile and grout that targets mineral buildup, and always follow the label to avoid etching.
Which cleaning products should I use or avoid on ceramic, porcelain, and natural stone tile?
Use pH-neutral cleaners for most ceramic and porcelain tile, since harsh chemicals can break down grout and dull protective finishes. Avoid acidic cleaners (like vinegar or descalers not meant for your tile type) on natural stone such as marble, travertine, or limestone because they can etch the surface. Also avoid abrasive powders or metal scrubbers unless the product is explicitly safe for your tile finish.
How do I protect tile floors from scratches and wear in high-traffic areas?
Place entry mats and use felt pads under furniture legs to reduce grit and prevent scratches. Keep shoes off when possible, and promptly clean up sand or debris that acts like sandpaper. Periodically re-clean grout and consider sealing grout when recommended, since intact grout helps prevent moisture intrusion that can lead to loose or damaged tile.
Why is sealing grout important, and how do I know when to reseal?
Sealing grout helps tile floors resist stains and moisture, which can cause grout discoloration, cracking, or mold in damp areas. Check the manufacturer’s recommendations, since some grout types and locations require sealing every 1–3 years, while others may last longer. A simple water test can help: if water beads on the grout, it’s usually still protected; if it soaks in quickly, it’s often time to reseal.
📅 Last Updated: October 08, 2026 | Topic: How to maintain tile floors? | Content verified for accuracy and freshness.
References
- https://en.wikipedia.org/wiki/Tile_floor
- https://www.britannica.com/technology/tile-in-construction
- https://www.mayoclinic.org/healthy-lifestyle/home-and-family/in-depth/house-cleaning/art-20048303
- https://www.cdc.gov/healthywater/emergency/cleaning/cleaning-and-disinfecting-disaster.html
- https://pubmed.ncbi.nlm.nih.gov/?term=tile+floor+cleaning+maintenance
- Google Scholar Google Scholar
https://scholar.google.com/scholar?q=maintain+tile+floors+cleaning+grout+sealing - Google Scholar Google Scholar
https://scholar.google.com/scholar?q=porcelain+vs+ceramic+tile+floor+maintenance+care - Google Scholar Google Scholar
https://scholar.google.com/scholar?q=grout+cleaning+and+sealing+best+practices - Technical Preservation Services (U.S. National Park Service)
https://www.nps.gov/tps/how-to-preserve-preserve-flooring.htm - Google Scholar Google Scholar
https://scholar.google.com/scholar?q=How+to+maintain+tile+floors?