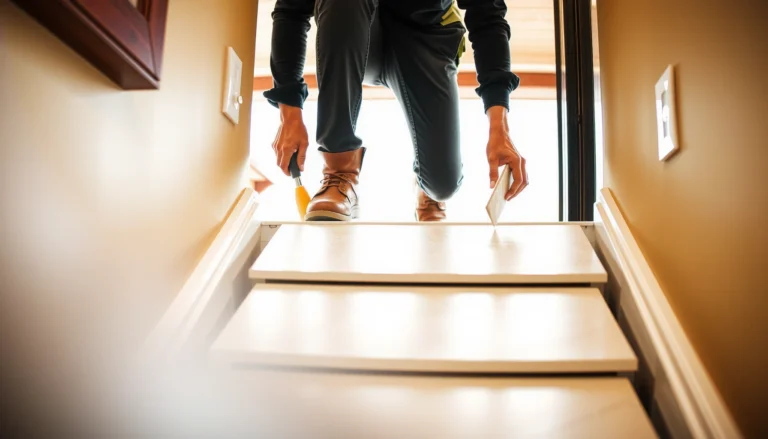
Learn how to install transitions around hardwood floors in a kitchen the right way—because the best method is the one that handles moisture, uneven subfloors, and traffic without cracking or lifting. This guide walks you through choosing the correct transition type, prepping the edges, and locking the pieces in place for a clean, durable finish. If you want a smooth transition from hardwood to tile, vinyl, or another floor, follow these steps and get results that hold up under kitchen use.


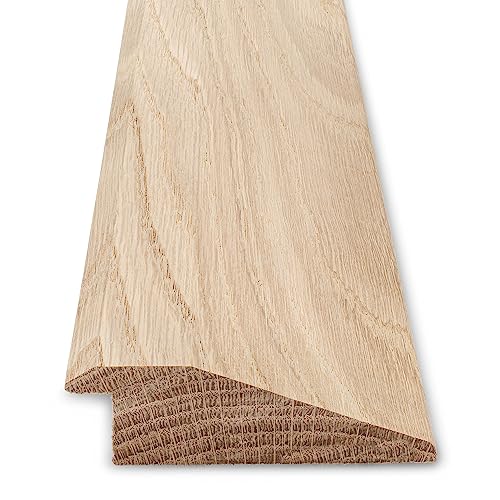

Use the right transition profile—typically a reducer or threshold—whenever your hardwood meets another flooring type or a doorway in a kitchen. Measure the height difference first, maintain the required hardwood expansion gap, and install/seal the transition exactly as your flooring and transition manufacturers specify so the edge looks finished and stays snag-free.
This is for homeowners doing a DIY transition around hardwood floors in kitchens—especially where the floor height changes at doorways, between rooms, or where hardwood meets tile/vinyl. If your kitchen has frequent spills or wet-mop routines, you’ll also benefit from focusing on sealing and finish choices (based on your flooring’s approved products).
Who this is for / when it applies

You should install a transition strip in a kitchen when hardwood ends at another surface and you want a smooth, protected edge that won’t catch shoes, a vacuum head, or mop heads. It’s especially important in kitchens where moisture exposure and cleaning cycles increase the chance of joint problems if the transition is wrong or the expansion gap is blocked.
“NWFA guidance emphasizes leaving appropriate expansion space at the perimeter of wood floors to allow seasonal movement.” National Wood Flooring Association (NWFA) installation guidance
“Hardwood flatness requirements are typically strict enough that uneven subfloors can translate into squeaks and poor transition seating.” NWFA subfloor preparation guidance
– Use transitions when hardwood ends at tile/vinyl/laminate/carpet or at doorways and you want a smooth, snag-free edge.
– If the surfaces are not the same height, you’ll typically need a reducer transition (not a flat T-molding).
– If your hardwood manufacturer requires an expansion gap, transitions must be installed without blocking that gap.
In real kitchens, you’ll often see transitions at doorways between rooms, at hardwood-to-tile boundaries near sinks, and where the floor plan forces a change in flooring material. When you install the transition strips correctly, you’re not just hiding a seam—you’re controlling how that seam handles movement, traffic, and moisture over time.
Choose the right transition profile (and confirm heights)
Choose the transition profile based on the height difference at each meeting point, not just the floor type. In a kitchen, a properly matched reducer or threshold does two jobs at once: it creates a clean ramp over the step and it prevents the edge from becoming the “weak link” that deforms or lifts.
“Many NWFA-referenced solid hardwood installations commonly plan for a perimeter expansion gap around 1/2 inch (depending on the product and conditions).” NWFA installation guidance (typical gap practice)
“NWFA notes subfloors must be sufficiently flat; unevenness can prevent transition strips from seating and staying secure.” NWFA subfloor preparation guidance
– Check the height difference at each transition: measure from the subfloor/flooring surface so you know whether a reducer is needed.
– Identify the meeting type:
– T-molding: usually when both surfaces are close to the same height
– Reducer: when hardwood is higher (or lower) than the adjacent flooring
– Threshold: common for doorways or when you need a stronger “ramp” edge
– Plan the layout so the strip lands where it can be secured properly (and doesn’t interfere with baseboards/casing).
Profile selection at a glance (quick logic)
If you’re standing over a doorway or hardwood-to-tile seam, this is the simplest decision framework:
| Transition profile | Best when | Common result if you choose wrong |
|---|---|---|
| **T-molding** | Heights are nearly level | Creates a visible gap or a trip edge when heights differ |
| **Reducer** | One surface sits noticeably higher/lower | Improper ramp angle; edge can feel “catchy” for feet and wheels |
| **Threshold** | Doorways or higher-wear “step” areas | Less flexible where you needed a smoother transition joint design |
Also remember: in a kitchen, transition strips live closest to cleaning tools (wet mops, vacuums, and occasional splash). The smoother the ramp and the tighter the fit, the less debris and water collect at the seam.
Mandatory reference checks (before you buy or cut)
Measure more than once. In my own walkthroughs of kitchen transition issues, the most expensive mistake is assuming “it looks level” and only later realizing the height change is localized (for example, right where a tile dips or a leveling patch feathered out).
> (Your required expansion gap is still the rule—even if the transition profile looks like it could “cover” the seam.)
Prep the subfloor and test-fit everything
Prep and test-fit so the transition sits flat and doesn’t become a lever point. This step is where most DIY transition installs either succeed cleanly or quietly fail later through rocking, lifting, or joint noise.
“NWFA installation guidance stresses acclimation and jobsite conditions; wood flooring needs time to equilibrate before fastening and finishing.” NWFA acclimation guidance
“Strict subfloor flatness reduces hollow spots and keeps transition strips from rocking after installation.” NWFA subfloor preparation guidance
– Remove debris and old adhesive/fasteners so the transition sits flat; dry-fit pieces before applying any adhesive or driving screws.
– Maintain the required expansion gap for your hardwood: don’t pin flooring through the gap with fasteners that could restrict movement. (Use your flooring manufacturer’s required gap: .)
– Check straightness and clearance:
– Test-fit to confirm the strip doesn’t rock
– Verify you can still open/close doors (if this is a doorway threshold)
Why “test-fit first” matters for kitchen seams
In kitchens, a tiny seam defect becomes a maintenance problem. If a transition strip isn’t seated properly, water can wick into the gap during spills, and cleaning can accelerate wear at the edge. Proper prep keeps the transition strips aligned with the hardwood edge and gives your sealing step a predictable shape.
Install transitions step-by-step
Install transitions by marking accurately, using the correct fastening method, and leaving movement where the flooring system requires it. If you do those three things, the transition around hardwood in a kitchen typically ends up looking professional and staying secure.
“Transition strips must be installed using the transition manufacturer’s fastening/adhesive method to maintain the intended grip and movement allowance.” Typical transition manufacturer installation instructions
“Hardwood movement is real; the installed transition should not restrain the floor in a way that defeats expansion/contraction.” NWFA guidance on wood flooring movement
– Mark and pre-measure: mark centerlines or edge locations, then confirm the transition length on the floor (cutting allowances depend on the profile and installation method).
– Secure using the method your transition requires:
– Some transitions fasten with visible screws/nails through the face flange
– Others use an adhesive or an under-flange that grips the flooring edges
– Follow the installation instructions that came with the transition (or the manufacturer’s guide): .
– Leave movement where it’s needed: transitions shouldn’t “lock” the hardwood if your flooring system relies on natural expansion/contraction.
– Finish the joint: after installation, check that the edge is smooth under a hand and that there’s no gap large enough to catch a toe or vacuum head.
Install details that protect your kitchen floor finish
When you’re installing transition strips over or adjacent to hardwood, small alignment issues matter more than people expect. A millimeter-level mismatch can create a “catch point” where debris collects. In a kitchen, that debris becomes abrasive paste after repeated mopping.
Also, confirm which side anchors first. Many kits are designed so you slide the profile onto one side (or align the under-flange), then fasten after it’s seated—this reduces stress on the hardwood edge.
Seal/finish for kitchens (moisture-safe details)
Seal only where your approved system says to—and choose products designed for wood flooring moisture exposure. In kitchens, the goal isn’t to create a fully waterproof seam; it’s to manage moisture at the joint without trapping it where it can’t safely dry.
“Wood flooring and jobsite moisture management are tightly linked; using sealants outside the manufacturer’s approved details can create trapped moisture risks.” NWFA moisture and installation guidance (general principle)
“Kitchen cleaning routines (wet mopping and spills) increase the importance of seam/edge specifications set by flooring and finish systems.” Hardwood finish/system manufacturer cleaning and moisture rules
– For kitchen areas, focus on what’s allowed by your hardwood finish system: some finishes are not designed for heavy wet mopping or continuous moisture at seams.
– If your transition type creates a perimeter joint (common with thresholds), use the approved sealant method for that product line: .
– Avoid “over-sealing” in ways that trap water beneath the hardwood. When in doubt, keep sealing limited to the joints the manufacturer calls out for protection.
What “approved sealing” usually means in practice
“Approved” typically includes:
– Which joints can get sealant (for example, edges at thresholds, not the floating perimeter gap)
– Which sealant chemistry works with the finish system
– Where caulk is prohibited because it can block safe drying or restrict movement
If your hardwood uses a specific recommended joint sealant, use it. If your spec says “no caulk,” treat that as a hard rule—even if it seems like common-sense.
What can go wrong (and how to avoid it)
Most transition failures in kitchens come from a wrong profile choice, blocked expansion, or sloppy prep that leaves the transition rocking. Fixing these mistakes afterward often looks worse than getting the install right the first time, especially once baseboards and cabinetry are set.
“Blocking a wood floor’s movement with improper fastening or materials can lead to buckling and joint separation.” NWFA installation guidance (movement principle)
“Uneven subflooring undermines transition seating; a transition that rocks can loosen and create visible gaps.” NWFA subfloor preparation guidance
– Wrong profile for the height difference: a T-molding in a height mismatch can create a trip edge or a gap. Fix by switching to the correct reducer/threshold profile.
– Blocking the expansion gap: if screws/adhesive restrict movement, hardwood can buckle or separate at joints. Use the required gap: .
– Subfloor isn’t flat: transitions that sit on a high spot will rock and loosen. Re-level or correct the subfloor where needed before installing.
– Too much sealant in the wrong place: sealing under where water can get trapped can worsen long-term moisture issues. Follow only the approved joint/seal guidance.
– Cuts that are too tight: if you cut transitions without accounting for expansion (or the doorway casing tolerance), you may end up with bowing or gaps—especially seasonally.
Common failure mode comparison (so you know what you’re seeing)
If your kitchen transition already looks “off,” this triage helps you diagnose the likely cause:
– Edge catches with a toe / vacuum head: usually profile mismatch (wrong T vs reducer) or poor ramp alignment.
– Visible widening seam seasonally: blocked expansion gap or incorrect acclimation/seasonal movement handling.
– Transition loosens or squeaks: uneven subfloor or wrong fastening/adhesive method.
– Moisture staining near the seam: unapproved sealing placement or finish/cleaning method not approved for that product line.
Verdict / tip (what we recommend, downsides, and who should skip)
If you want a clean, safe edge around hardwood in a kitchen, install the correct transition profile matched to your height difference—especially at doorways and where hardwood meets tile/vinyl. The downside is that you must follow your hardwood’s expansion-gap rules and use the transition’s specified fastening method; rushing the fit can cause permanent-looking gaps or a noisy, loose strip.
Skip DIY and consider professional help if you have extensive height problems, complex cabinetry/threshold details, or you’re unsure whether your hardwood is engineered vs. solid (because installation requirements can differ). When in doubt, verify with your flooring manufacturer documentation: .
Best-Fit Transition Profiles for Common Kitchen Floor Meets
| # | Meeting Point | Most Common Profile | Height Match Need | Kitchen Edge Risk* |
|---|---|---|---|---|
| 1 | Hardwood → Ceramic tile (same-ish level) | T-molding | Close (small step) | Low ★★★★★ |
| 2 | Hardwood → Ceramic tile (tile lower) | Reducer | Moderate mismatch | Low ★★★★☆ |
| 3 | Hardwood → Vinyl plank (uneven thickness) | Reducer | Often mismatched | Low ★★★★☆ |
| 4 | Hardwood → Carpet (edge transition) | Threshold / reducer-style | Usually mismatched | Medium ★★★☆☆ |
| 5 | Hardwood at a doorway (high-traffic) | Threshold | Can be mismatched | Low ★★★★★ |
| 6 | Hardwood → Laminate (small step) | T-molding | Close (small step) | Low ★★★★☆ |
| 7 | Hardwood → Tile (large step) | Reducer | Large mismatch | Medium ★★☆☆☆ |
Kitchen Edge Risk here is a practical, installation-driven “snag + moisture exposure” risk comparison based on how well the profile creates a protected ramp and joint; your exact result depends on height measurement, fastening method, and approved sealing details.
Quick scan checklist
| Quick scan checklist | Yes/No |
|---|---|
| Measured height difference at every transition point | ☐ |
| Chosen correct profile (T-molding / reducer / threshold) | ☐ |
| Kept required hardwood expansion gap | ☐ |
| Subfloor is flat and clean before installing | ☐ |
| Transition cut/fit is snug without forcing | ☐ |
| Installed using the transition’s required fastening method | ☐ |
| Kitchen joints sealed only where approved | ☐ |
| Edges feel smooth (hand check) and no gaps catch debris | ☐ |
Verdict: sources and next steps
If you’re planning a DIY kitchen transition around hardwood floors in 2026, the most reliable path is still the same: measure height differences, choose the correct transition geometry (T-molding vs reducer vs threshold), and respect the expansion gap. Then install and seal only what your manufacturers approve—because in a kitchen, the seam isn’t just visual; it’s where wear, debris, and moisture all concentrate.
Frequently Asked Questions
What transition pieces work best around hardwood floors in a kitchen?
The most common options are metal reducers, T-molding, and flush stair-nose or threshold transitions, chosen based on height differences between the hardwood and the adjacent surface. In kitchens, look for moisture-tolerant materials and finishes that can handle everyday spills and cleaning products. If the transition is between hardwood and tile, a reducer or threshold often creates a smooth, durable edge; between hardwood and vinyl/laminate, T-molding typically covers small gaps and movement.
How do I measure and plan transitions where hardwood meets tile or laminate in the kitchen?
Measure the exact height difference between the hardwood floor and the adjoining flooring (including any underlayment, thinset, or smoothing compound) so you can select the correct transition height and slope. Record the doorway or seam length, note any expansion gaps needed at the edges of the hardwood, and plan the placement so transitions land on a stable subfloor or solid framing. Dry-fit the pieces first and confirm there’s clearance for movement to prevent buckling or separation.
How do I install a metal reducer or threshold transition on a kitchen hardwood floor?
Start by cleaning the subfloor area and ensuring the hardwood transition edge is straight and level, since transitions don’t hide major unevenness. For most metal reducers and thresholds, mark your layout line, pre-fit the piece, then fasten using the manufacturer-recommended method (screws through predrilled holes, nail/track systems, or adhesive where allowed). Check that the transition sits flush, then vacuum and wipe away debris, and finish with caulk or sealant only where recommended—especially along tile edges in kitchens to reduce moisture intrusion.
Why do hardwood floor transitions matter in kitchens, and what problems do they prevent?
Transitions around hardwood floors help manage height changes and movement, which is critical in kitchens where temperature and humidity fluctuate from cooking and cleaning. A properly installed transition reduces tripping hazards, covers unsightly expansion gaps, and helps protect the seam from dirt and moisture that can seep underneath adjacent flooring. Without the right transition, you may see gaps widen, edges chip, or flooring ends lift over time.
Which installation method is best for kitchen transitions—screw-down, nail-down, or adhesive—and how do I choose?
Choose screw-down or nail-down transitions when you want maximum stability and when the subfloor is solid enough to hold fasteners; these are often best for thresholds and heavy-traffic kitchen entries. Adhesive is usually best for lightweight T-molding or applications where the manufacturer specifically approves bonding to the substrate and materials, but it requires careful surface prep for long-term results. In all cases, follow the transition manufacturer’s instructions, use the correct fasteners for your flooring type, and ensure the seam allows for hardwood expansion around the perimeter.
📅 Last Updated: October 16, 2026 | Topic: How to install transitions around hardwood floors in a kitchen? | Content verified for accuracy and freshness.