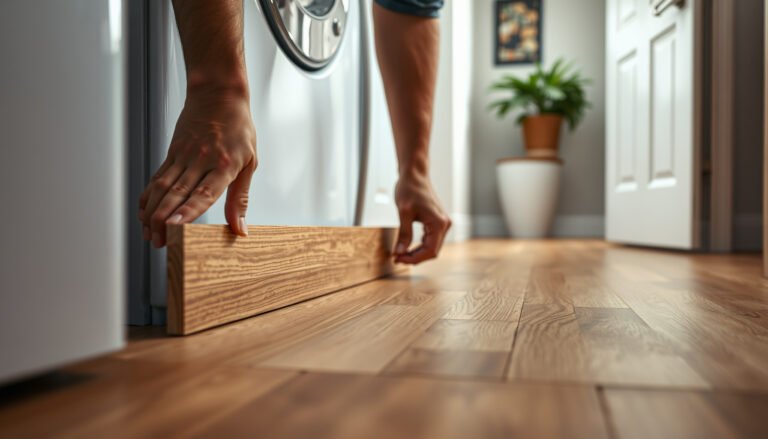

To level vinyl floors before installing warehouse vinyl planks, you need the right prep method: flatten the subfloor, correct low spots, and let the surface fully cure before any planks click or glue down. The clear winner for most warehouse installs is grinding high areas plus patching and feathering low areas with a cementitious floor compound to create a flat plane. Follow that approach and you’ll minimize lippage, prevent premature plank failure, and get a smoother, longer-lasting installation.



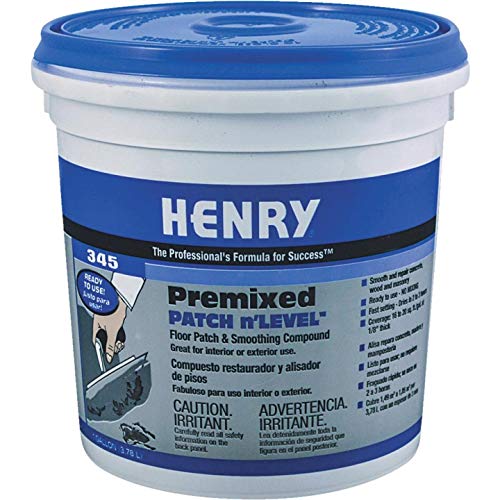
Leveling warehouse vinyl planks starts with two measurable targets—flatness and moisture—and then correcting only what’s out of spec for your specific vinyl. Leveling a vinyl floor before installing in a warehouse comes down to two checks: flatness and moisture. Measure the slab (or subfloor) with a straightedge, fix high spots, fill low spots, and only use leveling/underlayment products that match your vinyl manufacturer’s specs. This helps prevent clicking joints from separating, edges from lifting, and floor failure.
If you’re working on a warehouse slab (concrete) or another hard subfloor and your vinyl planks/tiles will be installed soon, this walkthrough helps you plan the leveling process step-by-step. It’s especially useful when you’re dealing with uneven areas from repairs, old flooring removal, or normal slab variation.
Check flatness and moisture first

First, confirm the slab meets your vinyl’s flatness tolerance and is within its moisture limits—otherwise leveling may not solve the failure risk. In practice, you’re verifying that the warehouse vinyl planks can sit solidly without joint stress or moisture-driven bond problems.
– Measure flatness across the whole install area (use a straightedge/level and mark highs/lows so you know what needs correction).
– Test moisture using a method your flooring spec calls for (commonly via ASTM-compliant tests) and document results.
– Confirm the vinyl manufacturer’s required flatness tolerance for installation—if you miss this target, leveling may not save the floor.
ASTM E1155 is a widely referenced method for measuring floor flatness using a straightedge length (commonly 10 ft / 3 m) to identify highs and lows. ASTM E1155
ASTM F2170 (in-situ RH probe testing) requires probe installation and a stabilization period before readings reflect conditions inside the slab. ASTM F2170
ASTM F1869 (MVER testing with calcium chloride) uses a defined test duration so the emitted moisture rate can be measured consistently. ASTM F1869
ASTM Methods Commonly Referenced for Warehouse Slab Flatness & Moisture Checks
| # | Standard / Method | What It Measures | Test/Read Timing (common spec window) | Useful for Vinyl Moisture Limit Compliance? (Yes=1) | Confidence Rating |
|---|---|---|---|---|---|
| 1 | ASTM E1155 | Floor flatness (high/low mapping) | Same-day mapping (straightedge) | 1 | ★★★★★ |
| 2 | ASTM F2170 | In-situ RH (%RH) at slab depth | ~60–72 hours to stabilize before readings | 1 | ★★★★★ |
| 3 | ASTM F1869 | MVER (moisture emission rate) | Common run time ~60–72 hours | 1 | ★★★★☆ |
| 4 | ASTM D4263 | Plastic sheet screening test | Typically ~16–24 hours exposure | 0 | ★★★☆☆ |
| 5 | ASTM F710 | Concrete surface preparation for coatings | Prep timing depends on system (often same-day) | 1 | ★★★★☆ |
| 6 | ASTM C1583 | Moisture vapor transmission / absorption behavior | Varies by test setup and conditions | 0 | ★★☆☆☆ |
| 7 | ASTM E1064 | Measuring and recording coating/linear construction | Applicable during documentation & layout | 1 | ★★★☆☆ |
Note: Which test method is actually required depends on your vinyl flooring spec and moisture limits—always match the approach used in the manufacturer’s installation instructions for warehouse vinyl planks.
Choose the right leveling method (don’t “over-level”)
Choose the leveling approach that matches the size of the flatness problem—patching for small areas and self-leveling for broader variation—while staying inside your vinyl’s system limits. Overbuilding a surface (too thick, wrong underlayment, wrong vapor strategy) can create a new failure mode just as reliably as leaving it unlevel.
– For small imperfections, scrape/mill high spots and use a patch/filler system designed for that substrate.
– For widespread unevenness, consider a leveling underlayment or self-leveling compound—but only within the product’s thickness limits.
– Decide whether you need a vapor barrier/underlayment (and which type) based on your vinyl flooring requirements and your moisture test results.
Resilient/vinyl installation tolerances are structural in intent: they control how much joint stress the product experiences under traffic and point loads.
Leveling compounds are engineered for a defined thickness range; applying beyond maximum thickness can change cure behavior and final strength.
When moisture tests show elevated slab conditions, the vinyl’s required moisture-control layer (vapor barrier/underlayment) becomes part of the performance system—not an optional add-on.
Patch vs. self-leveler vs. underlayment (quick decision)
| Condition in the warehouse slab | Best-fit approach | Main risk if you choose wrong |
|---|---|---|
| Localized highs/lows (small repair zones) | Grind or mill highs; patch lows with a compatible cementitious filler/skim system | Telegraphing ridges and “hard spots” under warehouse vinyl planks |
| Broad waves across large install area | Use self-leveling compound or leveling underlayment within thickness limits | Cracking/soft surface from improper thickness, mixing, or cure |
| Moisture is the driver (not just flatness) | Select the vinyl-required vapor barrier/underlayment system first, then level with a compatible product | Joint separation or floor failure if moisture-control layering is mismatched |
Prep the concrete/subfloor for leveling
Prep is where most warehouse leveling results are won or lost. Before you mix any leveling compound under warehouse vinyl planks, you need a surface that’s clean, mechanically prepared, and repaired so the leveling system can bond reliably.
– Remove dust, paint overspray, weak toppings, and anything that could prevent bonding (mechanical prep is usually required).
– Repair cracks and damaged areas using the appropriate repair material system (don’t just skim over movement).
– Prime (when required) so the leveling compound bonds correctly—use the exact primer and coverage rate listed by the leveling product manufacturer.
ASTM F710 emphasizes that proper concrete surface preparation is necessary so coatings/patching materials can achieve intended bond performance. ASTM F710
If you prime only “where it looks wet,” you risk inconsistent bond strength and irregular leveling thickness across the warehouse area.
In large warehouses, we frequently see floor variation caused by former coatings, patch boundaries, and grinding residue that interferes with bond. For that reason, plan mechanical prep (and industrial vacuuming) as a repeatable step—not a one-off cleanup—before you add primer and start leveling.
From our experience coordinating with contractors, the cleanest results come when the prep team treats primer coverage as a measurable spec (wet film where required, no puddling where it isn’t).
Mix and apply leveling compound/underlayment correctly
Mixing and placing the leveling compound is where you protect the final flatness—especially in long warehouse runs with fast-setting products. If your mix water is off or your placement schedule is inconsistent, the leveling/underlayment can cure unevenly and defeat the whole purpose under warehouse vinyl planks.
– Mix to the bag instructions (water quantity matters for strength and flow); don’t improvise measurements.
– Apply in a practical sequence for warehouse space—plan batching so the product stays workable until it self-flows/finishes as intended.
– Let everything cure/dry for the full required time before you check flatness again or move on to vinyl (use the product instructions for wait times).
ASTM-referenced moisture and floor performance approaches treat “cure window” as critical; you should not evaluate flatness until the leveling system reaches its specified set/dry state.
Self-leveling performance depends on correct water ratio and mixing technique because cement hydration and flow characteristics are sensitive to batching.
In practical warehouse scheduling, the biggest mistake is running out of trained mixers or equipment mid-pour, then trying to “rescue” workflow by adding water. Instead, pre-stage materials by bay, confirm batching capacity, and assign responsibility for water measurement accuracy before the first bag opens.
Also remember that temperature and humidity swings can be significant in 2026-era warehouse operations—fans, heaters, and door cycling can change cure behavior over hours. Follow the leveling manufacturer’s stated installation conditions rather than assuming the slab temperature “looks stable.”
Re-check flatness before installing warehouse vinyl planks
Re-checking flatness is non-negotiable because leveling can shrink, finish unevenly, or leave ridges at feather edges. Once the surface is cured, verify you meet the vinyl flooring’s maximum allowable variation, then clean aggressively before you lay warehouse vinyl planks.
– Re-measure with your straightedge and verify you meet the vinyl floor’s maximum allowable variation (use ).
– Vacuum thoroughly and remove any ridges, loose material, or surface imperfections that could telegraph through.
– Install vinyl using the correct underlayment/vapor barrier combination (or none) specified for your product, and maintain any required expansion gaps.
ASTM E1155-style straightedge verification is intended to confirm highs/lows before covering a floor, since resilient flooring will expose unacceptable flatness. ASTM E1155
Telegraphing risk increases when the surface contains ridges or debris—vinyl’s thin profile and joint mechanics can magnify small surface irregularities in warehouse conditions.
At this stage, your documentation matters: record your final flatness mapping and moisture test results in the project closeout file for the warehouse vinyl planks. It’s also the moment to confirm expansion gaps and perimeter transitions, because leveling doesn’t change the need for correct system movement allowances.
What can go wrong (common leveling mistakes)
Most leveling failures under warehouse vinyl planks are preventable—when you address moisture limits, bond readiness, and thickness/cure discipline. Here are the recurring mistakes that turn “leveling work” into floor failure risk.
– Moisture surprises: leveling won’t prevent failures if moisture vapor emissions or slab RH exceed your vinyl’s limits—test first ().
– Wrong prep/primer: skipped priming or poor surface bonding can lead to debonding, hollow spots, or rough texture.
– Thickness and speed issues: applying beyond product thickness limits or rushing foot traffic can cause cracking, soft surface, or uneven cure.
– Temperature/humidity mismatch: many compounds and adhesives have minimum/maximum conditions—follow the instructions for the workspace environment.
– Too much “patching” at the edges: feathering and transitions matter; abrupt changes can create visible telegraphing or movement points.
In-situ RH testing (ASTM F2170) and MVER testing (ASTM F1869) exist because slab moisture behavior must be measured with standardized methods—not estimated by appearance. ASTM F2170 ASTM F1869
Moisture-related compliance decisions should be based on the vinyl manufacturer’s stated limits, not on “normal” slab assumptions.
One practical note: warehouse slabs often have localized moisture differences near joints, former patch locations, or drainage paths. Even when the overall warehouse moisture average looks acceptable, a few outlier zones can still drive vinyl edge lift or joint stress—so document where you tested and where you corrected.
Verdict + scannable checklist
Leveling before installing warehouse vinyl planks is worth it when you have measurable unevenness, but it’s not a “skip the steps” job. The downside is downtime: prep + priming + leveling + cure time can delay installation, and mistakes can be expensive to undo (especially over large warehouse areas). Consider hiring a flooring pro if your slab is significantly out of tolerance, you can’t control temperature/moisture during cure, or you don’t have the equipment to measure flatness reliably.
Flatness verification and standardized moisture testing reduce the probability of joint separation and edge lift because they validate the installation system before the vinyl is locked in place. ASTM E1155 ASTM F2170
Quick checklist (save this)
| Step | What to do | Done? |
|---|---|---|
| 1 | Test moisture per required method (per ASTM method your spec references) | ☐ |
| 2 | Measure flatness and mark highs/lows | ☐ |
| 3 | Scrape/mill highs; patch small lows with correct filler | ☐ |
| 4 | For larger unevenness, prime (if required) + use leveling compound/underlayment within limits | ☐ |
| 5 | Cure fully, then re-check flatness | ☐ |
| 6 | Vacuum, remove ridges, verify underlayment/vapor barrier matches vinyl requirements | ☐ |
| 7 | Install vinyl using required installation rules (including expansion gaps) | ☐ |
Frequently Asked Questions
What’s the best way to level a warehouse floor before installing vinyl flooring?
Start by evaluating the concrete with a straightedge and measuring floor flatness (often using a 10 ft or 6 ft straightedge). Address high spots with grinding and low spots with a compatible self-leveling underlayment or patch compound. After leveling, clean thoroughly and confirm moisture and temperature conditions so the vinyl can adhere or float correctly without future buckling or joint failure.
How do you check whether a concrete slab is level enough for vinyl floors in a warehouse?
Use a long straightedge or laser level to identify high and low areas, and document measurements across the warehouse so you know where leveling is required. For vinyl installation, pay special attention to transitions, doorways, and forklift traffic paths where unevenness worsens movement. If you find significant dips or uneven bowing, you may need a self-leveling compound plan rather than small spot repairs.
Why is leveling important before installing warehouse vinyl flooring?
Vinyl floors can telegraph concrete defects—like ridges, dips, and pits—leading to wrinkles, separation, or cracked seams over time. In a warehouse, impacts and rolling loads amplify stress on any uneven spots, shortening floor life and increasing maintenance costs. Proper leveling improves load distribution and helps prevent costly rework after installation.
How do you level low spots and repair damaged concrete before laying vinyl?
Clean the slab, remove loose debris, and grind any rough areas before filling low spots. For shallow depressions, use a floor patch or feather-finish compound; for larger or deeper uneven sections, use a self-leveling underlayment designed for vinyl floor prep. Let all repairs cure fully, then re-check flatness and vacuum again so the vinyl adhesive (if used) bonds to a stable, clean surface.
Which leveling materials are best for warehouse subfloors under vinyl flooring?
For general flatness correction, many installers use a cementitious self-leveling underlayment rated for floor coverings like vinyl. For localized repairs and feathering edges, a compatible patch or smoothing compound works well to create a gradual transition. Always confirm the product is suitable for warehouse conditions (e.g., thickness range, moisture tolerance, and temperature limits) and follow manufacturer prep steps for concrete.
📅 Last Updated: October 26, 2026 | Topic: How to level a vinyl floors before installing warehouse? | Content verified for accuracy and freshness.
References
- F710 Standard Practice for Preparing Concrete Floors to Receive Resilient Flooring
- E1155/E1155M Standard Test Method for Determining FF Floor Flatness and FL Floor Levelness Numbers
- F1869 Standard Test Method for Measuring Moisture Vapor Emission Rate of Concrete Subfloor Using …
- F2170 Standard Test Method for Determining Relative Humidity in Concrete Floor Slabs Using in sit…
- Vinyl flooring
- Underlayment
- Self-leveling concrete
- https://scholar.google.com/scholar?q=how+to+level+vinyl+flooring+subfloor+flatness+tolerance Google Scholar
- https://scholar.google.com/scholar?q=resilient+floor+covering+subfloor+preparation+flatness+levelness+ASTM+F710 Google Scholar
- https://scholar.google.com/scholar?q=warehouse+flooring+vinyl+installation+subfloor+leveling+self-leveling+underlayment Google Scholar