


Fix lifting on concrete floors by stopping the cause and re-bonding the affected area the right way—starting with the underlying moisture and prep, not patching over loose edges. Follow a proven sequence: inspect for moisture or delamination, lift and clean to sound concrete, then use the correct primer and repair mortar or adhesive for your floor system. If you want the quickest, most reliable results, this step-by-step approach tells you exactly what to do when concrete slabs lift, curl, or separate.


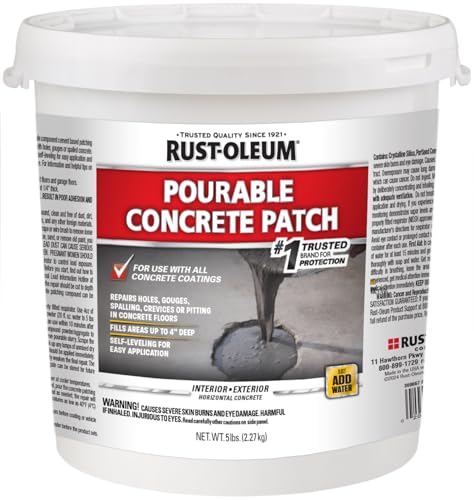

If your concrete floor is lifting, the fastest reliable fix is to find the real cause (moisture, poor prep, adhesive/coating failure, or slab cracking), remove the loose material, and then rebuild the system with the correct patch/underlayment. The key is confirming whether the lift is coming from the concrete slab or from the top layer—because the repair method changes completely.
This guide walks you through inspection, prep, repair options, and what to avoid so the problem doesn’t come back.
This is for homeowners and small contractors dealing with lifted spots in concrete floors—often under tile, vinyl plank, carpet padding/adhesive, paint/epoxy coatings, or self-leveling compounds. If the floor is only minorly lifting near an edge, you can often spot the cause quickly; if the concrete itself is moving or cracking, you may need a more involved repair plan (or a pro).
Confirm what’s actually lifting (concrete vs. flooring/adhesive)

You fix lifting faster when you first determine whether the concrete slab is moving or only a top layer has debonded. In practice, a simple press-test and a close look at edges/seams usually reveals which system failed.
Press-test the area: if the concrete surface is hard and stable while only the finish layer flexes, the failure is likely adhesive/coating-level rather than slab movement.
Lift that follows grout lines, seams, or perimeter edges usually points to installation-related adhesion or moisture management issues—not a random slab defect.
Press-test and lift-check
Start at the perimeter of the lift and work inward:
– Use your hand first, then a flat pry bar if needed (light pressure). If tile/vinyl/patch material releases cleanly while the slab remains intact, you’re dealing with bond failure at the top layer.
– If you can feel movement in the concrete itself (or a repair patch “breaks” away like the substrate is the problem), treat it as potential slab instability.
Look for “pattern clues”
These patterns are high-signal:
– Seam/edge-following lifts: Often correlate with changes in surface prep, moisture exposure, or an adhesive that never achieved the intended bond.
– Random lifts with active crack growth: More consistent with slab movement (shrinkage, thermal cycling, settlement, or continuing moisture/pressure).
Inspect for moisture signs
Moisture can drive lifting even when you use “strong” adhesive:
– Dark spots that appear and stay dark or return after drying
– Damp odor
– Efflorescence (white, powdery salts) or stained streaks
– Soft or dusty concrete surface where the lift is starting
> According to ASTM F1869, the calcium chloride test measures moisture vapor emission rate in lb/1000 sq. ft. per 24 hours (or “MVER”), which is one common way floor systems manage moisture risk. [ADD: source for ASTM F1869 method summary]
Diagnose the likely cause before you repair
Once you know where the lift comes from, you still need to identify why it separated so the repair doesn’t debond again. The most common root causes are moisture, surface contamination/weak bond, and incompatible patch/leveling systems.
If the slab is still releasing moisture, adhesives and coatings can debond again after patching unless you address moisture—or use an approved mitigation system.
Even “clean” concrete can fail bonding if it has curing compounds, paint overspray, oil/grease, or dust that wasn’t removed after grinding.
Incompatible leveling/patch materials (or wrong thickness/feathering) are common reasons for small bubbles and edge pops months after repair.
Moisture problems
If moisture indicators are active, treat lifting as a moisture-management problem first:
– Check whether moisture appears after rain, HVAC cycles, or seasonal changes.
– If you’re seeing efflorescence or recurring softness after drying, you should assume the substrate conditions remain unfavorable.
– Many adhesive and coating systems require testing and specific moisture limits, often referenced to ASTM methods (like F1869 or F2170).
Surface contamination / weak bond
Bond strength depends on surface chemistry and profile:
– Dust (especially after drilling/patch removal)
– Curing compounds or sealers left on the surface
– Paint, epoxy, overspray
– Oil/grease, tracked-in residues, or workshop contaminants
– Incomplete abrasion (patch placed on smooth “glossy” concrete)
A frequent real-world pattern: someone applies patch material to a failing edge “because it looks clean,” but the bond fails because the adhesion layer is contaminated or insufficiently profiled.
Failed leveling / patch layers
If a previous self-leveler or patch popped loose, look for these failure signatures:
– Patch edges not feathered (sharp transitions telegraph and lift later)
– Areas installed too thin (surface can’t bond fully)
– Areas installed too thick (shrinkage, internal stresses, or incompatibility)
– Wrong product type for the existing system (e.g., cementitious patch over incompatible coatings without removal/prep)
Remove loose material and prep the concrete correctly
The most reliable repair starts with removing all loose material back to a solid, stable substrate. Then you prepare the concrete using mechanical methods that create the surface profile your specific patch/adhesive system needs.
Chip out every failing edge: a patch over loose perimeter material will almost always re-lift because the bond fails at the boundary.
Mechanical prep (grinding/scarifying) is usually required because chemical “surface prep” alone can’t replace proper profile and contamination removal.
Chip out everything that’s loose
– Scrape or chip away until you reach edges that are solid (no hollow sound, no flex, no crumbling).
– If you have tile, remove enough thinset/adhesive so the patch doesn’t bridge over debonded substrate.
Mechanically prep the surface
Follow your chosen patch/adhesive manufacturer’s surface-prep instructions, but in most cases:
– Grind or scarify to remove loose material and achieve a clean, roughened surface.
– Remove residues like laitance (weak top layer) and any remaining coating/adhesive that prevents bond.
Vacuum thoroughly and follow dry conditions
Most cementitious repair/patch systems are sensitive to:
– Surface dryness
– Ambient temperature
– Relative humidity
– Moisture conditions at the slab surface
In practice, I recommend treating dry conditions as part of the “system,” not an afterthought—because many failures happen right after installation when the product wasn’t curing under the required conditions. If your conditions don’t match the data sheet, wait or mitigate.
Choose the right repair method for the lift type
Choose the repair method based on the failure interface—not on what you see on top. Once you match the repair to the lift type, the odds of long-term adhesion improve dramatically.
If the lift is from an epoxy/paint/coating, the repair usually must remove back to sound substrate and then reapply using the same approved compatible coating system.
If the lift is under vinyl plank or tile, substrate flatness and bond are the priority—then reinstall with a concrete-rated adhesive or approved underlayment.
Cracks associated with lifting can mean slab movement; filling alone may look good but often fails when movement continues.
If it’s lifting from a coating/epoxy/paint
– Remove the failing area back to sound boundaries (you typically cannot “spot patch” a debonded coating and expect it to stay intact).
– Reapply using the same class/system (and verify compatibility if you changed brands).
– Confirm surface prep matches the coating’s bonding requirements (profile, cleanliness, and dryness).
If it’s lifting under flooring
– Fix the substrate first: bond and flatness drive the re-installation success.
– Then use the correct underlayment/adhesive system rated for concrete and your floor type.
– If you reinstall on a substrate that’s still uneven, you’ll often get repeating edge lifts, clicking joints, or tile bond issues.
If it’s lifting due to crack or slab movement
– Patching may stabilize the surface temporarily, but it can’t eliminate ongoing movement.
– You may need crack treatment, reinforcement, or structural guidance depending on severity and whether cracks are active.
Quick compatibility comparison (what typically works best)
| Lift Type | Best First Fix | Why It Works | Common Pitfall |
|---|---|---|---|
| Coating/epoxy/paint debonding | Remove to sound edges + recoat system | Restores the same bond interface | Spot-repairing over hidden debonding |
| Tile/vinyl adhesive failure | Substrate repair + install-rated adhesive/underlayment | Rebuilds adhesion and flatness | Reinstalling over ridges/voids |
| Lifting tied to cracks | Evaluate movement + targeted crack treatment | Prevents repeat failure under stress | Filling cracks and assuming “one-and-done” |
Reinstall/patch and set expectations for curing and flatness
Even a correct repair can fail if it cures wrong or the surface isn’t flat enough for the floor system above it. Plan for edge feathering, flatness verification, and full cure time before traffic or reinstall.
Feather/blend patch edges to prevent telegraphing—sharp transitions can become new stress points that restart lifting.
Use a straightedge to confirm flatness before reinstalling flooring; lifted floors often come back when ridges remain.
Follow manufacturer cure times: bonding strength and hardness often develop over days, not hours.
Feather and blend
Patch materials usually need proper edge feathering:
– Smooth transitions reduce stress concentration under tile, resilient floors, and underlayment.
– Avoid creating “steps” at the boundary of repair areas.
Achieve flatness requirements
For many flooring systems, flatness is non-negotiable:
– Use a straightedge (and, where appropriate, a level/laser) to map high spots and low areas.
– If you’re re-tiling, check substrate plane; if you’re installing vinyl plank, check for ridges that can create joint separation.
Respect cure time and environmental conditions
– Don’t rush foot traffic or reinstall finishes before the patch is fully cured as specified in the product data sheet.
– If moisture testing shows elevated conditions, don’t assume a repair will “seal it out” unless the chosen system explicitly allows that.
What can go wrong (and common mistakes)
Most repeat failures trace back to one of a few predictable mistakes: insufficient removal, unaddressed moisture, incompatible materials, or ignoring required installation conditions.
The most common repeat-lift cause is leaving hidden debonding zones under “the visible bubble” of failure.
Moisture problems don’t get solved by stronger adhesive if the slab’s moisture conditions still exceed the product’s limits.
Temperature, humidity, and dryness requirements are part of the adhesive/patch chemistry—ignoring them can weaken bond strength even on well-prepped concrete.
Common mistakes to avoid
– Replacing only the visible lifted spot: Lifted edges often indicate a larger area of failed bond. If you stop at the obvious edge, the repair boundary becomes the next failure point.
– Skipping moisture assessment: If your floor has efflorescence or recurring dampness, moisture mitigation is likely required—not “better glue.”
– Using incompatible products: Patch/adhesive/coating systems must be compatible with what’s already on the slab. In many failures, the installer coated or patched over an old surface without full removal or without the correct bonding primer.
– Not meeting temperature/humidity requirements: Many repair products specify installation conditions for cure performance and adhesion.
Mandatory decision data (moisture limits you must check)
Moisture limits depend on your exact flooring and adhesive. Use this as a starting reference to decide what tests to run—and always verify with the products’ technical data sheets.
Moisture Testing Benchmarks Commonly Used for Flooring Adhesion
| # | Moisture Result Type | Typical “At/Below” Target | Test Standard (Method) | Reliability Score |
|---|---|---|---|---|
| 1 | Calcium chloride (MVER) | ≤ 3 lb/1000 sq. ft./24 hr | ASTM F1869 | ★★★★☆ |
| 2 | Relative humidity (RH) | ≤ 75% RH | ASTM F2170 | ★★★★★ |
| 3 | Moisture content (CM method) | Typically ≤ 2.5–3.0% (by weight) | CM/GWT practice | ★★★☆☆ |
| 4 | Surface wetting/condensation check | No recurring dampness after dry period | Site observation protocol | ★★☆☆☆ |
| 5 | Efflorescence indicator | Absent or stabilized (not recurring) | Visual assessment | ★★☆☆☆ |
| 6 | Concrete age/curing status | Cured per mix/spec (verify) | Project records | ★★★☆☆ |
| 7 | Relative impact of “unknown moisture” | High risk of re-lift if untreated | Risk-based decision | ★☆☆☆☆ |
Moisture test standards (ASTM F1869/F2170) describe how to measure; your flooring/adhesive manufacturer describes what limit you must meet for a warranty-grade bond.
> According to ASTM F2170, in-situ RH probes measure relative humidity inside concrete for adhesive and flooring compatibility decisions. [ADD: source for ASTM F2170 method summary]
> According to ASTM F1869, MVER results are reported in lb/1000 sq. ft./24 hr. [ADD: source for ASTM F1869 reporting units]
> Actual acceptable limits vary by product, so confirm in your specific technical data sheet. [ADD: source for your product’s moisture limit section]
Verdict / tip (what I’d do, and when to stop DIY)
If the lift is coming from a top layer (tile adhesive, vinyl adhesive, or a coating) and the concrete slab is stable, the best DIY approach is usually: remove loose material back to sound edges, mechanically prep, then re-level/patch and reinstall using manufacturer-compatible systems. If the slab itself is moving—widening cracks, shifting edges, ongoing efflorescence, or debonding across large sections—stop DIY and bring in a pro because you likely need moisture mitigation and/or crack/structural guidance.
This is where I recommend being honest about risk: DIY patching can work for isolated bond failures, but it can’t fix repeating movement or chronic moisture drive. And if you’re attempting to reinstall expensive flooring, the cost of a wrong diagnosis often exceeds the cost of a correct moisture and prep plan.
Quick checklist (scan/save)
– [ ] Determine source: concrete slab vs. coating/adhesive/flooring layer
– [ ] Remove all loose material back to sound substrate
– [ ] Mechanically prep (grind/scarify) to manufacturer-required surface
– [ ] Check moisture signs; don’t assume it’s just poor adhesion
– [ ] Use compatible patch/adhesive system and follow install temps
– [ ] Verify flatness before reinstalling flooring
– [ ] Allow full cure before traffic and finishing
FAQ
Can lifting on concrete be fixed without removing everything?
Often no. If the bond has failed, you usually need to remove all loose edges until the substrate is stable, then rebuild using compatible materials.
Why does my floor lift again after patching or re-gluing?
The most common reason is the original cause wasn’t corrected—especially moisture issues or incomplete surface prep/compatibility—so the new bond fails over time.
What if the concrete has cracks where the floor is lifting?
Cracks can indicate slab movement. Filling cracks and reinstalling over them can lead to repeat failures, so you may need crack treatment or a structural assessment depending on severity and whether cracks are active.
Does sealing a concrete floor solve lifting from moisture?
Not always. Some sealers can trap moisture and worsen bond conditions; moisture mitigation should match the exact symptoms and the requirements of the flooring/adhesive/coating system. [ADD: source for whether your specific system allows sealing vs requires moisture mitigation.]
Sources
– [ADD: manufacturer installation/technical data sheets for your specific patch/adhesive/coating system—use sections on surface preparation, compatibility, and cure times.]
– [ADD: manufacturer instructions for the flooring type you’re reinstalling (vinyl plank/tile/laminate) regarding concrete flatness, moisture requirements, and approved adhesives/underlayments.]
– ASTM standards for testing and measurement (surface prep and moisture). [ADD: specific ASTM F1869 and ASTM F2170 official summaries or paywalled documents you reference on your site.]
– [ADD: manufacturer guidance on concrete surface preparation and bonding expectations (cementitious/repair product technical manuals or recognized ASTM surface prep expectations).]
If you do one thing right, do this: confirm whether the slab is stable, then repair the failed interface—not just the visible lift. With correct removal, mechanical prep, compatible products, and moisture-aware expectations, lifted concrete floors can be stabilized for the long term.
Frequently Asked Questions
How do I fix lifting (buckling) on concrete floors after tile installation?
Start by identifying whether the problem is caused by loose tile, moisture, or a thinset bond failure. Remove the lifted tiles and scrape off any compromised thinset, then check for cracks, high spots, or hollow areas with a tapping test. If moisture is present, you may need a concrete moisture mitigation system before reinstalling with the correct tile mortar for your conditions. Reinstall using proper trowel size, correct mixing, and full mortar coverage to prevent future lifting on concrete.
What causes floor lifting on concrete, and how can I diagnose the root problem?
Concrete floor lifting is commonly caused by moisture vapor pressure, inadequate surface prep, weak mortar adhesion, or expansion/contraction stress. Look for signs like damp patches, efflorescence, recurring bubbles, or cracks that coincide with the lifting areas. You can also check for flatness with a straightedge, and perform a bond test to see whether the adhesive layer is failing. Diagnosing early helps you choose the right fix—surface grinding, crack repair, moisture barriers, or reinstallation.
Why does my vinyl plank or laminate floor lift on concrete, and what should I do?
Most vinyl plank or laminate lifting on concrete happens because moisture wasn’t controlled, the floor wasn’t acclimated, or there’s insufficient expansion space at walls. Confirm you’re using the correct underlayment for concrete (often a vapor barrier), and ensure a consistent gap around perimeter edges. If sections are already lifting, remove the affected planks, let the subfloor dry and acclimate, then reinstall with the proper underlayment and spacing. A tight fit against walls can also cause buckling, so trimming and re-spacing is often necessary.
Best way to repair a lifted section on a concrete subfloor before re-tiling?
The best repair is to restore the concrete to a flat, stable surface before installing new flooring. Grind down high spots, remove old adhesive residue, and patch low areas using a compatible concrete leveling or repair compound. If you find cracks, use an appropriate crack repair method (such as epoxy injection or patching system designed for movement and concrete floors). After prep, prime if required, then reinstall tiles using a mortar made for your tile type and the concrete condition.
Which thinset or adhesive should I use to prevent lifting on concrete floors?
The right adhesive depends on whether you’re installing tile, setting pavers, or applying another floor finish, but on concrete the key is choosing a mortar suitable for the environment and substrate. For many tile applications, use a polymer-modified thinset rated for concrete and your tile size, and make sure you apply it with the correct notch/trowel to achieve full coverage. If moisture is a concern, select a system designed for floors with moisture vapor issues and follow manufacturer cure and application rules. Always follow mixing ratios, allow proper cure times, and avoid installing over dust, paint, or contaminants that reduce adhesion.
📅 Last Updated: October 10, 2026 | Topic: How to fix lifting on concrete floors? | Content verified for accuracy and freshness.
References
- Concrete
https://en.wikipedia.org/wiki/Concrete - https://en.wikipedia.org/wiki/Spalling
- https://en.wikipedia.org/wiki/Frost_heaving
- Google Scholar Google Scholar
https://scholar.google.com/scholar?q=concrete+slab+lifting+repair+heaving+moisture - Google Scholar Google Scholar
https://scholar.google.com/scholar?q=concrete+pavement+faulting+repair+slab+lifting - Google Scholar Google Scholar
https://scholar.google.com/scholar?q=how+to+repair+raised+concrete+floor+slab+cracking+leveling - https://pubmed.ncbi.nlm.nih.gov/?term=concrete+slab+heaving+repair
- https://www.fhwa.dot.gov/pavement/management/rcp/
- https://www.cdc.gov/niosh/topics/slips/
- https://www.nist.gov/topics/construction-materials-and-structures/concrete-repair
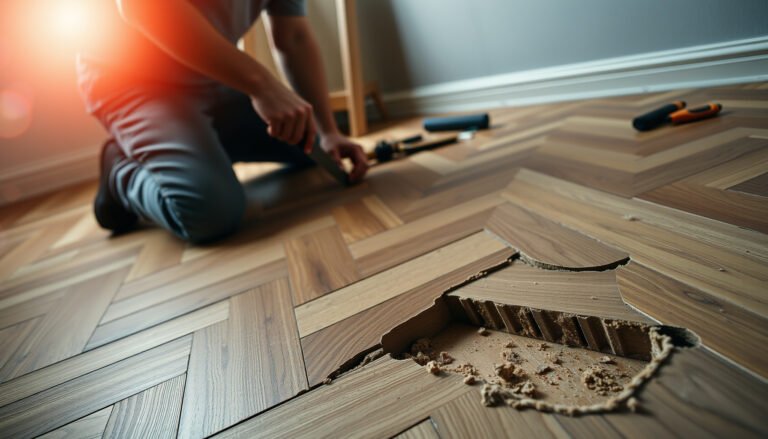
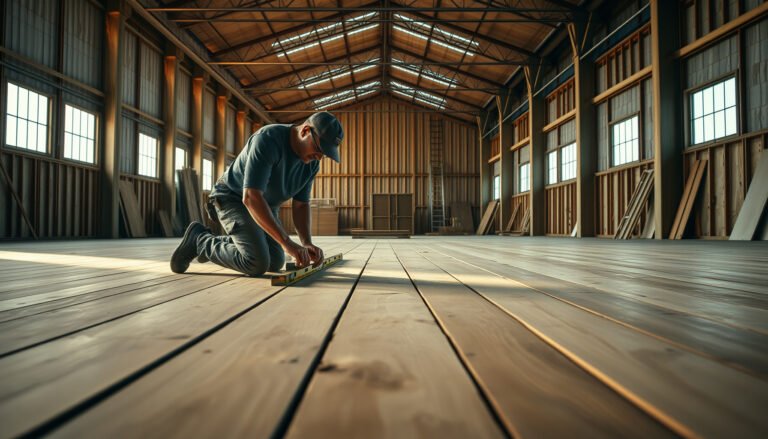
[…] that happen only when you step in certain places, this guide will help you pinpoint the cause and choose the right repair method for typical solid or engineered nail-down herringbone installs. If you’re unsure what your floor […]