
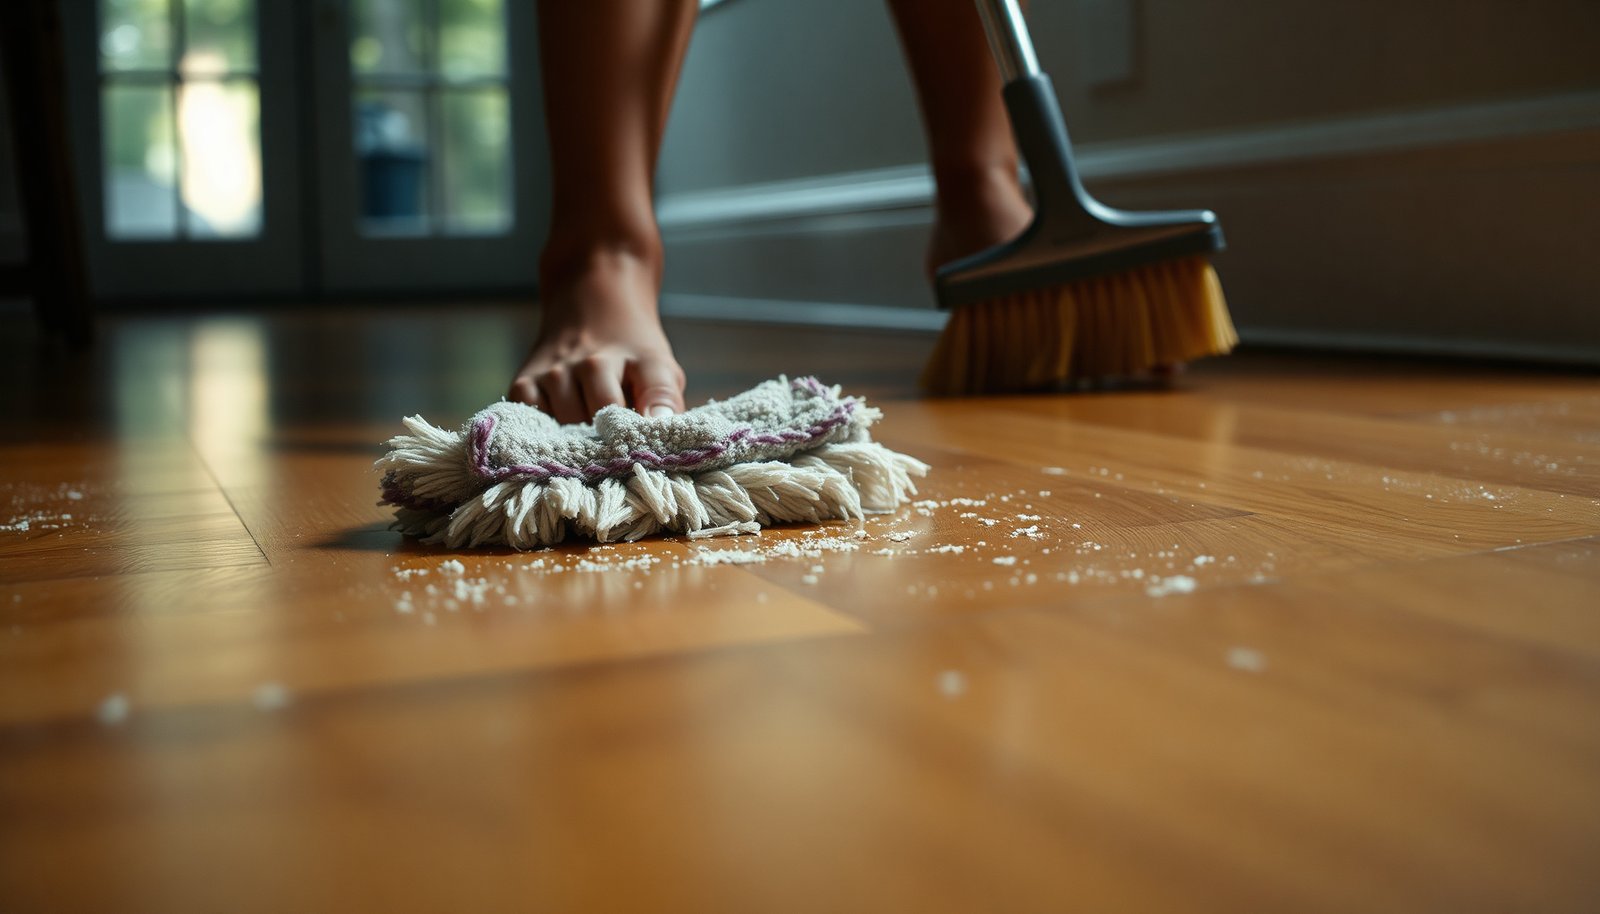

You kneel by the baseboard and spot dried plaster residue packed into the grain of your hardwood, leaving a chalky film that won’t wipe away. With the right approach—dry scraping first, then a careful wash with pH-neutral wood floor cleaner—you can lift the residue without dulling the finish. Set aside about an hour and use a plastic scraper, soft nylon brush, microfiber pads, and clean towels to get the surface looking even again.




If you’re dealing with plaster residue, start by dry-scraping and vacuuming first, then use a pH-neutral hardwood cleaner with barely damp mopping—never soaking the floor. For stubborn spots, you’ll usually need a targeted agitation method (soft brush/nylon pad) plus careful rinsing to avoid leaving haze or damaging the finish. This guide walks you through a safe, step-by-step clean so residue lifts without warping or dulling your wood.
This is for homeowners, renters, or contractors cleaning hardwood after plaster work, patching, or wall repairs—especially when dried powdery dust turned into a chalky film. It’s also useful if you’ve tried wiping with water and the residue just smeared or left a dull look.
Prep the room and remove loose plaster dust

– Sweep and dry-scrape any dried chunks, then vacuum thoroughly (especially along edges and corners).
– Protect vents, trim, and nearby surfaces with painter’s tape or plastic so you don’t spread residue while cleaning.
– Avoid aggressive scrubbing at this stage—powder can turn into paste when mixed with water.
Start by removing furniture (or at least pulling it back and covering legs). Use a plastic scraper or a putty knife with a light touch to lift dried plaster without gouging. Then vacuum with a hard-surface attachment; pay extra attention to baseboards, expansion gaps, and along stair nosings where plaster often collects.
In 2026, we’re seeing more renovations done while occupied, so residue control matters even outside the room you’re cleaning. Protecting vents and adjacent floors prevents “secondary contamination,” where plaster dust gets tracked onto hardwood later and shows up as haze during the final damp-mop step. If your vacuum has a beater brush, avoid it—use suction-only to reduce the chance of grinding fine powder into the finish.
To choose the right cleaner, remember that plaster residue is often mineral-based and can react to harsh chemicals. pH-neutral is your baseline because it minimizes risk to common sealed finishes (urethane, aluminum-oxide, conversion varnish, and acrylic systems) that can lose gloss when exposed to extreme pH.
Typical pH of Common Cleaners vs Hardwood Finish Safety
| # | Cleaner type | Typical pH (at household strength) | Main risk to finish | Finish-safe score |
|---|---|---|---|---|
| 1 | pH-neutral hardwood cleaner | 7.0–8.5 | Low chemical stress on topcoat | ★★★★★ |
| 2 | Mild dish soap (diluted) | ~7–9 | Can leave surfactant haze if not wiped/rinsed | ★★★☆☆ |
| 3 | Baking soda solution | ~8.3–9.0 | May dull gloss on some finishes | ★★☆☆☆ |
| 4 | Ammonia-based cleaner | ~11–12 | High alkalinity can cloud or soften coatings | ★☆☆☆☆ |
| 5 | Household bleach (sodium hypochlorite) | ~11–12 | Oxidizers can dull and discolor finishes | ★☆☆☆☆ |
| 6 | White vinegar (acetic acid) | ~2.4–3.0 | Acidity can dull or react with topcoats | ★☆☆☆☆ |
| 7 | General all-purpose cleaner (unknown formula) | ~6–10 (varies) | Formula uncertainty increases haze/finish risk | ★★☆☆☆ |
Test your cleaning approach in an inconspicuous spot
Before you treat the whole floor, you confirm two things: (1) the plaster residue lifts, and (2) the finish stays clear. A short test prevents “surprise haze” and avoids permanent dull patches that are hard to reverse.
– Use a pH-neutral cleaner on a hidden area to check whether the finish clouds or turns sticky.
– If the residue is still visible after the test, adjust technique (more time and agitation, not more water).
– Stop immediately if you notice finish lifting, gummy buildup, or discoloration.
Choose a location like the edge under a closet door or behind a piece of furniture. Apply your pH-neutral hardwood cleaner to a microfiber cloth or microfiber mop head that’s been wrung until nearly dry—then clean one small square (for example, roughly a 2 ft x 2 ft area). Wait a few minutes and wipe again with a clean, lightly damp cloth to see if a film remains.
If the plaster residue still looks chalky, resist the instinct to add more water. On hardwood floors, too much moisture can creep into seams and cause cupping or raised edges—especially in older installations. Instead, increase contact time (dwell) and use controlled agitation (soft brush or microfiber pad) in the tested area.
From a practical standpoint, plaster residue can create a stubborn “two-layer” problem: dry powder remains in the finish pores, while binder-like minerals produce a faint haze after wiping. That’s why your test should include both removal and final wiping with a clean cloth. In 2026, a lot of finishes also show smearing when residue is only partially lifted—so your test should check gloss, not just residue visibility.
Deep clean with pH-neutral cleaner (no soaking)
Barely damp is the goal because plaster minerals need chemistry and friction, not flooding. With pH-neutral hardwood cleaner and minimal moisture, you let the topcoat stay protected while residue dissolves or loosens.
– Dampen a microfiber mop (or cloth) lightly—wring it out so it’s mostly dry to the touch.
– Work in small sections, using gentle, steady passes to lift the plaster film.
– Go back with a clean, lightly damp cloth to remove any cleaner residue that could cause haze.
Work one strip at a time—think “section-first” cleaning rather than mopping the entire room. A good workflow is: damp mop pass → short dwell (per product instructions) → immediate wipe with a clean, slightly damp cloth to lift released residue and prevent cleaner buildup.
Pay attention to the direction of the wood grain. Plaster residue often migrates into grooves; wiping with the grain helps keep agitation from pulling minerals back across the surface. If you see streaking, stop and switch to a fresh microfiber cloth—streaks usually mean you’re redistributing loosened film rather than lifting it out.
This is also where you control temperature and drying time. Avoid strong fans blowing directly onto hardwood at close range; instead, ensure steady airflow so the floor dries evenly. Uneven drying can make haze more noticeable, particularly in bright daylight or near baseboards where plaster dust concentrates.
Target stubborn residue without damaging the finish
When the plaster outline is still visible, you need targeted agitation—not more water. A soft tool, minimal moisture, and repeated passes are how you remove the remaining chalky film while protecting the finish.
– For crusty spots, use a soft nylon brush or microfiber pad with minimal moisture to avoid scratching.
– Keep pressure controlled: let the cleaner dwell briefly (per label directions) rather than scrubbing hard.
– If there’s still a chalky outline, repeat the targeted step before moving to stronger methods.
Use the “controlled dwell” approach: apply the pH-neutral cleaner lightly, wait the time specified on the label, then agitate gently. For dried plaster that’s baked onto the finish, the goal is to gradually loosen mineral residue, not grind it deeper.
Here’s a comparison you can use while deciding how much agitation to apply:
| Approach | Pros | Cons / Watch-outs |
|---|---|---|
| Microfiber cloth wipe + pH-neutral cleaner | Lowest risk to gloss; good for haze and light films | May take multiple passes on crusty plaster |
| Nylon brush (soft bristles) on small spots | Reaches edges of chalky outlines without gouging | Too much pressure can dull high-gloss finishes |
| Microfiber pad with minimal moisture | Balances lift and control; works well on broad haze | Can smear residue if the pad stays dirty—swap pads often |
If you’re working on an area near baseboards, remember that plaster dust often settles thickest there. Take extra time at the edges during deep cleaning; otherwise, residue can reappear when you later wipe the room.
What can go wrong (and how to prevent it)
Most failures happen because water content, chemistry, or technique goes too far. By understanding the mechanics—especially how wood responds to moisture—you can prevent warping, cupping, and permanent dulling.
– Soaking the hardwood: excess water can seep at seams, causing swelling or cupping—use barely damp tools only.
– Using the wrong cleaner: acidic, alkaline, or harsh chemical cleaners can dull finishes or interact with residue; stick to pH-neutral products.
– Over-scrubbing dry dust: scrubbing plaster powder dry can grind it into the finish; always remove loose powder first.
– Leaving cleaner behind: residue from the cleaner itself can look like haze—follow up with a light rinse/wipe when needed.
Three common cause-and-effect issues are worth calling out:
1) Moisture exposure can change dimensions. According to the USDA Forest Products Laboratory, wood begins to shrink or swell as moisture content changes below the fiber saturation point (about ~30% moisture content). In practical terms, “barely damp” matters because water doesn’t need to puddle to raise localized moisture.
2) Indoor humidity drives hardwood movement. According to the National Wood Flooring Association (NWFA), maintaining typical indoor relative humidity in the roughly 35–55% range helps minimize cupping/crowning cycles. After plaster cleanup, drying conditions still affect how the floor settles.
3) Steam is high risk on hardwood. At normal atmospheric pressure, steam is about 212°F (100°C). According to NIST (water’s phase change reference), that temperature plus moisture makes steam mops a poor match for finish-preservation and seam protection. This is why “steam to remove plaster residue” often backfires.
Also avoid “chemical stacking” (for example: vinegar, then ammonia, then detergent). Plaster residue removal is rarely a one-product job; it’s a process where each step sets up the next step. If you still see chalk after cleaning, repeat the pH-neutral agitation cycle and wipe thoroughly rather than switching to stronger chemistries.
Verdict: the safest way to remove plaster residue from hardwood
For most finished hardwood floors, the best approach is dry removal first, then pH-neutral cleaning with lightly damp mopping and careful spot agitation. The downside is it can take multiple passes if the plaster dried hard or you’ve got a thick film near baseboards.
Skip this method (and reassess) if your floor has a very delicate finish (particularly antique waxed surfaces), extensive water damage, or if you see finish lifting during the test spot. Also pause if the residue keeps migrating after you’ve wiped with a clean cloth—this can indicate the mineral film is embedded and you may need a refinishing-focused plan rather than repeated damp cleaning.
If you’re cleaning floors after plaster work in 2026, treat residue removal as both a cleanliness and appearance problem. Removing grit prevents damage; removing haze preserves gloss.
Quick checklist (scan/save)
– [ ] Dry-scrape + vacuum loose plaster first
– [ ] Test pH-neutral cleaner in a hidden spot
– [ ] Mop lightly damp (no soaking), work in small sections
– [ ] Spot-clean stubborn areas with soft brush/microfiber pad
– [ ] Follow up with a clean light wipe to prevent haze
– [ ] Stop if finish clouds, lifts, or feels gummy
Frequently Asked Questions
What’s the best way to deep clean hardwood floors after removing plaster residue?
Start by dry-scraping plaster chunks with a plastic putty knife so you don’t gouge the hardwood. Then vacuum thoroughly with a brush attachment and use a pH-neutral hardwood floor cleaner with minimal moisture, working in small sections. For stubborn plaster dust, lightly dampen a microfiber pad and follow with a clean dry towel to prevent water from soaking into the wood.
How do you safely remove plaster residue without damaging hardwood finishes?
Avoid harsh chemicals like bleach, ammonia, or acidic cleaners that can dull or strip the finish. Use gentle methods first—dry scraping, vacuuming, and a soft microfiber—then escalate to a manufacturer-approved cleaner if residue remains. Always test any cleaner in a hidden area, and never soak the floor or leave wet pads sitting on the wood.
How can you get plaster dust out of hardwood floors when it won’t fully vacuum?
After vacuuming, wipe the surface with a barely damp microfiber mop using warm water mixed with a pH-neutral hardwood cleaner. Change the pad often so you don’t grind fine plaster particles into the finish. Finally, buff dry with a clean towel or dry microfiber to lift remaining residue and reduce the risk of streaking.
Why does plaster residue make hardwood floors look cloudy, and how do you fix it?
Plaster is calcium-based and the fine dust can leave a film that interferes with the floor’s finish, causing a dull or cloudy appearance. A deep clean using a pH-neutral cleaner can dissolve and remove that haze, followed by a dry buff to restore clarity. If cloudiness persists, you may need a second pass or a finish-safe spot treatment recommended for your specific hardwood finish.
Which cleaning products and tools are safest for deep cleaning hardwood floors with plaster residue?
Use tools like a plastic scraper, soft nylon brush, and microfiber pads to prevent scratches, along with a pH-neutral hardwood floor cleaner. If the residue is heavy, consider a cleaner specifically labeled safe for sealed hardwood and follow the label directions exactly. Skip abrasive pads, steam mops, and strong solvents—these can damage the finish, pull residue deeper, or warp the wood.
📅 Last Updated: November 04, 2026 | Topic: How to deep clean hardwood floors to remove plaster residue? | Content verified for accuracy and freshness.
References
- Lead Renovation, Repair and Painting Program | US EPA
- Silica and Worker Health | Silica | CDC
- Gypsum
- Wood flooring
- https://pubmed.ncbi.nlm.nih.gov/?term=gypsum+wood+interaction
- https://pubmed.ncbi.nlm.nih.gov/?term=wood+swelling+water+detergent
- https://pubmed.ncbi.nlm.nih.gov/?term=cleaning+agents+wood+surfaces+abrasion
- https://scholar.google.com/scholar?q=deep+clean+hardwood+floors+plaster+residue Google Scholar
- https://scholar.google.com/scholar?q=remove+drywall+mud+from+wood+floor Google Scholar
- https://scholar.google.com/scholar?q=hardwood+floor+cleaning+water+swelling+residue+detergent Google Scholar
[…] floor. The good news is that you can clean it up without gouging or dulling the finish by using a plastic scraper to lift the bulk, then a finish-safe solvent like mineral spirits or a targeted adhesive remover, […]
[…] cleaning with pH-neutral products—you can restore the surface in about 20–30 minutes using a plastic scraper, microfiber cloths, and gentle […]
[…] quickly while protecting the surface, even if you’ve only just applied the caulk. You will need a plastic scraper, a microfiber cloth, and a suitable remover for your floor’s finish, and you can usually get it […]