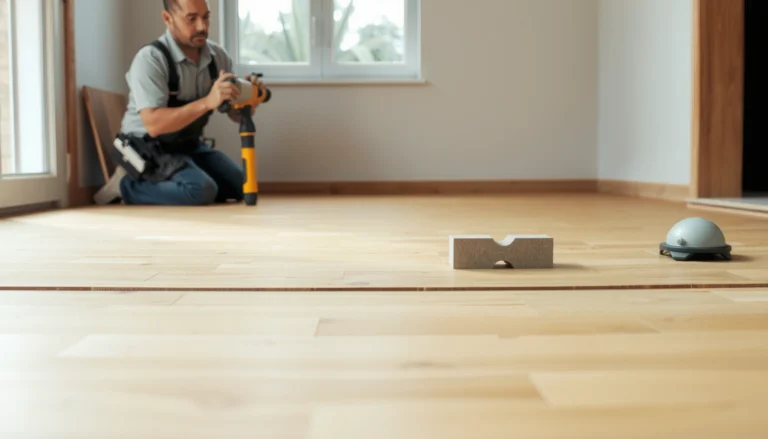

Want step-by-step instructions to install living room kitchen floors? Follow a precise sequence—prepping the subfloor, laying your flooring, and finishing with trim and transitions—to get a flat, secure result that lasts. This guide tells you exactly how to do it, so you can finish the job confidently without guesswork.




Installing living room kitchen floors correctly comes down to two things: make sure the subfloor is truly flat/stable/dry, and follow the exact locking/gluing method in your flooring manufacturer’s instructions (including expansion gaps). Most failures show up when prep is skipped (uneven subfloor, moisture) or when floating floors are installed without the required perimeter spacing.
If your living room and kitchen share the same floor—or you’re extending one material through both spaces—this guidance is directly relevant, especially for laminate, vinyl plank (LVP), click-lock floors, and engineered wood. Kitchens add foot traffic, cleaning moisture, and sometimes slab moisture risk, so the “boring” prep steps matter more than the surface look. As of 2026, these same installation principles still align with mainstream ASTM methods and manufacturer requirements; the biggest difference from house to house is the specific moisture and subfloor limits listed in your product documentation.
“Subfloors must be flat enough that the flooring can perform as designed; surface irregularities are a common driver of joint failure and movement.” ASTM F710 (underlayments and preparation for resilient floor coverings) — substrate requirements
“In-situ relative humidity testing (RH) is designed for slab moisture assessment and uses a standardized equilibrium approach.” ASTM F2170 — Standard Test Method for Determining Relative Humidity in Concrete Slabs Using in situ probes
“Calcium chloride testing is a standardized way to quantify moisture emission from slabs over a controlled test period.” ASTM F1869 — Standard Test Method for Measuring Moisture Vapor Emission Rate of Concrete Subfloor Using Anhydrous Calcium Chloride
Measure and Choose the Right Layout

This step prevents ugly seam placement and helps you avoid tiny sliver cuts near walls—problems that become obvious once the kitchen traffic pattern starts. The goal is a balanced plan that lands seams where the floor is strongest and transitions look intentional.
First, measure the living room and kitchen footprints together if you’re running one continuous floor. Then add waste for cutting, board defects, and alignment adjustments—commonly in the 5%–15% range depending on layout complexity and patterning. If you’re using a plank with a visual pattern direction (like hand-scraped wood-look), also account for extra cutting to maintain appearance consistency.
Next, decide the main direction of installation. Many installers run planks lengthwise to visually widen spaces, but you should also consider long seams: avoid placing a seam pattern where it will repeatedly get stressed (for example, under heavy rolling carts unless your flooring system is rated for it). Plan doorway thresholds and any required transition pieces early so you don’t end up forcing joints through door frames or cabinet bases.
Finally, mark your planned seam locations on the subfloor (or on paper) before you open flooring boxes. In my experience, once you’ve committed to a reference line, small layout decisions become far more expensive to fix than to “solve on paper.”
Concrete Slab Moisture Checks (ASTM Methods) & Typical Test Duration
| # | ASTM Method | What It Measures | Typical Duration | Best Fit for Kitchen Slabs |
|---|---|---|---|---|
| 1 | ASTM F2170 (RH Probes) | Concrete relative humidity | ~24 hours equilibration + readout | ★★★★☆ |
| 2 | ASTM F1869 (Calcium Chloride) | Moisture vapor emission rate (MVER) | ~60–72 hours test period | ★★★☆☆ |
| 3 | ASTM F710 (Moisture/Flatness Prep) | Subfloor preparation and surface condition | As needed during prep | ★★★★☆ |
| 4 | ASTM D4263 (Plastic Sheet Test) | Surface dampness indicator | Typically 24–48 hours | ★☆☆☆☆ |
| 5 | Temperature & RH conditioning | Stabilizes slab/moisture conditions before testing | Varies by spec (often several days) | ★★★★☆ |
| 6 | Underlayment vapor retarder check | Verifies underlayment perm performance | Set during installation | ★★★☆☆ |
| 7 | Manufacturer limit comparison | Determines pass/fail using product’s moisture thresholds | Immediate after readings | ★★★★☆ |
Note: durations are typical ranges based on the cited ASTM methods; always follow your flooring manufacturer’s stated moisture limits and required test method.
ASTM F2170; ASTM F1869; ASTM F710; ASTM D4263Prep the Subfloor (This Is Where Most Jobs Succeed or Fail)
This is the make-or-break phase: if the subfloor isn’t flat, stable, and dry, the floor won’t behave correctly—even with a high-quality product. Your objective is to remove movement and flatten the surface so joints lock (or adhesives cure) as designed.
Start with flatness. Use a straightedge and level across the kitchen + living room footprint; address high spots by grinding and correct low spots by approved patching methods. For slab or subfloor preparation, common guidance aligns with ASTM substrate expectations—for example, resilient flooring standards often reference 3/16 inch in 10 feet as a flatness target depending on the system. ASTM F710
For wood subfloors, stability (no squeaks, no deflection) matters just as much as flatness; loose subfloor panels can “telegraph” movement into plank seams over time.
Then confirm moisture. For concrete slabs, use the moisture test method your manufacturer requires. Many systems explicitly reference in-situ RH testing (ASTM F2170) or calcium chloride testing (ASTM F1869);ASTM F2170; ASTM F1869 if the product lists an allowed moisture level, you must compare to that threshold (not to a generic number).
Remove baseboards/trim if your installation method requires flooring to slide under trim. Finally, vacuum thoroughly—underlayment and adhesive systems can fail when debris prevents proper contact or when dust ruins adhesion chemistry.
“Measuring flatness before installation reduces the risk of hollow spots and seam stresses that can lead to gapping.” ASTM F710 — substrate preparation principles
“Concrete moisture verification methods are standardized so installers can make pass/fail decisions against product limits.” ASTM F2170 and ASTM F1869
“If the wrong moisture test method is used, you may not be able to compare your results to the flooring manufacturer’s stated thresholds.” [ADD: cite flooring brand’s moisture test-method requirement]
Install Underlayment, Moisture Barriers, and Expansion Gaps
This stage protects your floor from moisture and dimensional movement while ensuring the right layer stack. Use underlayment and vapor barriers only if your flooring system calls for them; adding the wrong layer can prevent proper locking performance or trap moisture.
Read the layering instructions line-by-line. Some click-lock vinyl/plank systems require a specific attached pad or a separate vapor barrier; others forbid extra padding to avoid excessive compressibility. This is especially important in kitchens where cleaning and mopping can increase moisture exposure risk.
Leave expansion gaps around walls and fixed objects. “Floating” floors move with seasonal humidity, so perimeter spacing is not optional. For kitchens with fixed cabinets or islands that don’t move, plan the floor stop and spacing at the perimeter rather than forcing boards under non-movable structures.
Use the exact expansion gap value from your flooring specification (e.g., “__ in / __ mm”)—insert it here as: [ADD: exact expansion gap from your flooring spec].
If your moisture barrier requires seam taping, tape exactly per instructions. Don’t improvise—tape adhesion and barrier overlap details affect continuity.
“Floating floor systems depend on perimeter expansion space to accommodate normal expansion and contraction.” [ADD: manufacturer statement from your flooring spec]
“Layering instructions are product-specific; underlayment compatibility affects joint stability and lock performance.” [ADD: manufacturer underlayment compatibility guidance]
“Moisture barriers rely on proper overlap and, when specified, taped seams to maintain vapor continuity.” [ADD: manufacturer vapor barrier seam-overlap/taping instructions]
Lay the First Rows and Keep Everything Square
This is where your entire installation either stays aligned or slowly goes off. Start with a reference line, dry-fit the first rows, and confirm your starting square before you click/lock boards into place.
Create a straight chalk line using your layout plan. Dry-fit the first 2–3 rows without fully committing if your system allows it, especially if you’re bridging living room into kitchen with one material run. Use spacers to maintain consistent perimeter gaps and keep board edges from creeping inward as you work.
As you lay, maintain the required seam stagger. Don’t copy a random pattern—follow the product’s minimum offset rules (e.g., minimum __ inches/mm between end joints). [ADD: manufacturer joint-stagger requirement]
In kitchen traffic paths, seam stability matters because planks experience repeated compressive loads from shoes, carts, and dropped items.
Cut for Edges, Doorways, and Irregular Shapes
This part makes the difference between “works” and “looks professionally planned.” Measure from the installed position whenever possible, not from room dimensions alone, because walls and thresholds are rarely perfectly square.
For cutting:
– Use the correct tool for your floor type (example guidance: score-and-snap for some LVP/laminate formats, and a saw with a guide for engineered wood).
– Mark cut lines using a board placed in its installed orientation so the tongue/groove ends fit cleanly and maintain the correct perimeter gap.
Plan transitions at doorways and height changes. If living room and kitchen have different flooring thicknesses or if you’re ending at tile, use reducers or transition strips matched to your height difference. If you skip this, you can end up with an exposed lip that catches debris and shoes.
“Accurate cutting depends on referencing installed conditions, especially near doorways, reveals, and out-of-square walls.” [ADD: manufacturer cutting/measurement guidance if available]
“Transitions should be selected to match thickness/height differences so joints remain supported and edges don’t flex.” [ADD: manufacturer transition strip guidance]
What Can Go Wrong (And How to Avoid It)
Most installation failures trace back to subfloor prep mistakes, moisture mismatch, or ignoring product-specific movement rules. If you recognize the symptoms early, you can prevent them from spreading into multiple plank rows.
Bubbles/soft spots: usually come from trapped debris, incompatible underlayment, or uneven subfloor support. Vacuum thoroughly, check for low areas, and confirm underlayment is allowed for your product.
Gaps at seams or failed locks: usually result from forcing boards, skipping the required expansion gap, or not acclimating to room conditions before installation. Insert your exact acclimation guidance here: [ADD: exact acclimation time/conditions from your flooring spec].
Also verify the tongue-and-groove or click-lock surfaces are clean; dust and damaged edges can prevent full engagement.
Uneven transitions: happen when adjacent rooms aren’t leveled to a consistent plane or when you forget height differences between materials. Build a level plan, then choose transitions that accommodate it.
To make decision-making easier, here’s a structured comparison of DIY vs professional installation for living room + kitchen floor runs.
| Option | Pros (Why people choose it) | Cons (What can derail the project) | Best Fit For |
|---|---|---|---|
| DIY (floating/click-lock) | Lower cost; faster scheduling; straightforward when subfloor is already flat | Prep mistakes and wrong underlayment/layer stack can cause joint gapping | Flat/stable subfloor, clear manufacturer instructions, simple transitions |
| DIY (glue-down or engineered) | Can be excellent for vibration control and stability when done correctly | Adhesive cure timing, moisture compatibility, and bond conditions are unforgiving | Moisture-verified concrete and proven adhesive compatibility |
| Professional install | Better handling of difficult transitions; consistent leveling; moisture testing alignment | Higher cost; schedule dependencies | Major subfloor issues, suspected moisture, radiant heat, or complex legacy floors |
“Subfloor preparation standards emphasize minimizing irregularities because they translate into stresses at joints.” ASTM F710
“Moisture failures are often the result of reading slab conditions through a method that doesn’t match the product’s required test approach.” ASTM F2170; ASTM F1869
Verdict: A DIY-Doable Job—With Prep Accuracy
If your subfloor is already flat, stable, and you’re installing a product with a clear installation method—especially click-lock vinyl/laminate—installing living room kitchen floors is usually a solid DIY project. The downside is that kitchens punish shortcuts: moisture verification, correct underlayment selection, and expansion gap discipline directly affect whether seams stay tight under daily use.
Skip DIY (or plan professional help) if you have major subfloor unevenness, suspected moisture issues, or complicated conditions like radiant heat, badly uneven concrete, or irregular legacy flooring. When in doubt, follow your flooring manufacturer’s installation instructions exactly—especially the moisture test method, acceptable moisture limits, acclimation requirements, expansion gap value, and required layer stack.
[ADD: name/model of your flooring brand/spec]
To summarize the “DIY vs pro” decision, here’s a criteria-based VS table you can scan quickly.
| Criteria | DIY click-lock | Professional install |
|---|---|---|
| Subfloor flatness correction | ★★★☆☆ | ★★★★☆ |
| Moisture testing method alignment | ★★★☆☆ | ★★★★☆ |
| Layer stack correctness (underlayment/barrier) | ★★★☆☆ | ★★★★☆ |
| Expansion gap discipline | ★★★☆☆ | ★★★★☆ |
| Doorway/threshold transitions | ★★★☆☆ | ★★★★☆ |
| Time to correct mistakes | ★★☆☆☆ | ★★★☆☆ |
| Tool proficiency (saw/levels/fitment) | ★★★☆☆ | ★★★★☆ |
| Warranty alignment | Variable | More consistent |
| Handling complex conditions (radiant heat/legacy) | ★★☆☆☆ | ★★★★☆ |
| Consistency of seam stagger | ★★★☆☆ | ★★★★☆ |
| Verdict | Best when prep is solid | Best when conditions are tricky |
Quick Checklist (Scan Before You Start)
– [ ] Subfloor flatness checked and corrected (use straightedge/level)
– [ ] Moisture verified within manufacturer limits (use the required ASTM method)
– [ ] Correct underlayment/moisture barrier installed (only if required)
– [ ] Expansion gap maintained around walls/fixed objects ([ADD: exact value from spec])
– [ ] First row aligned using a reference line
– [ ] Staggered seams per flooring rules (minimum offset: [ADD])
– [ ] Doorways and transitions planned with reducer/trim pieces
– [ ] Floor cleaned before finishing and baseboards/trim reinstalled
FAQ
Do I need to remove baseboards to install living room kitchen floors?
Often yes, if the flooring needs to slide under trim. Some systems can be installed without removing baseboards if there’s enough clearance—check your flooring manufacturer’s instructions ([ADD: source for your product’s clearance guidance]).
Can I install the same flooring across both living room and kitchen?
Yes in many cases, but confirm transitions, expansion needs, and kitchen-specific moisture guidance. If the manufacturer allows one continuous run, still plan expansion breaks where required.
What’s the biggest reason floors start separating or gapping?
Usually insufficient prep (uneven subfloor or moisture issues) or ignoring expansion gaps and locking/stagger rules. Follow the manufacturer’s recommended subfloor tolerances and gap requirements ([ADD: exact tolerance and gap values from your spec]).
Is acclimation required?
Many flooring types require acclimation in the installation space before laying. Use the exact acclimation instructions from your flooring manufacturer ([ADD: acclimation time/conditions from product documentation]).
What transitions should I use between rooms?
Typically you use thresholds/reducer strips where heights differ or at doorways for a tidy edge. Choose a transition type that matches your flooring thickness and height difference ([ADD: recommended transition guidance from your flooring spec]).
Sources
– ASTM F710 — Standard Practice for Preparing Concrete Floors to Receive Resilient Flooring (includes substrate prep/flatness expectations).
– ASTM F2170 — Standard Test Method for Determining Relative Humidity in Concrete Slabs Using in situ probes.
– ASTM F1869 — Standard Test Method for Measuring Moisture Vapor Emission Rate of Concrete Subfloor Using Anhydrous Calcium Chloride.
– ASTM D4263 — Standard Test Method for Indicating Moisture in Concrete by the Plastic Sheet Method.
– [ADD: Flooring manufacturer installation guide/spec sheet for your exact product line—subfloor prep, expansion gap, moisture limits, underlayment requirements, acclimation instructions]
– [ADD: Moisture testing guidance from the manufacturer’s recommended test method documentation]
– [ADD: Any local building requirements if you’re working in a region with specific flooring/subfloor standards (cite official local code source where applicable)]
When you treat subfloor prep and moisture verification as non-negotiable, installing living room kitchen floors becomes far more predictable: your seams lock, your surface stays flat, and your flooring holds up to daily kitchen use. Start with measurement and layout, follow the product’s layer stack and expansion rules exactly, and plan transitions early—then you’ll spend your time enjoying the finished floor instead of troubleshooting gapping later.
Frequently Asked Questions
How do I choose the right flooring for a living room kitchen area?
Start by deciding what performance you need most: durability, water resistance, and comfort underfoot. For living room kitchen floors, common options include waterproof vinyl plank, ceramic or porcelain tile, and engineered hardwood with a strong finish. If your kitchen sees spills or wet mopping, prioritize water-resistant or waterproof materials and look for appropriate slip resistance, especially near sinks. Also consider underlayment needs and whether the material can handle frequent foot traffic and temperature changes.
What is the step-by-step process to install living room kitchen floors?
Begin by measuring the room, ordering extra flooring for cuts, and removing the old floor down to a clean, level subfloor. Next, check subfloor flatness and address high spots or low areas with patching compound so your floors don’t flex or separate. Install the correct underlayment (if required), acclimate materials like vinyl or hardwood, then lay planks or tile in a planned layout with proper expansion gaps. Finish by installing transitions at doorways, caulking where needed, and reinstalling trim after the flooring is fully set and secure.
How do I prepare my subfloor to prevent squeaks and uneven tile in a kitchen-living room?
Proper subfloor preparation is critical for long-lasting results. Verify flatness with a straightedge and fix uneven areas before installation; tile floors require a smooth, stable surface to reduce cracking and lippage. If you have squeaks or loose boards, secure them to joists, and if the subfloor is damaged, replace or patch it rather than layering over it. Let all subfloor materials dry fully and remove dust so your adhesive or underlayment bonds correctly.
Which underlayment is best for floating vinyl plank or laminate in a kitchen and living room?
For living room kitchen floors that use a floating installation, choose underlayment designed for your specific system and moisture conditions. If you’re installing over concrete or in a moisture-prone area, look for an underlayment with an attached vapor barrier or use a separate moisture barrier rated for subfloor conditions. Avoid generic underlayment that’s too soft, because it can cause click-lock joint separation over time. Always follow the flooring manufacturer’s instructions on thickness and compatibility to protect warranty coverage.
Why do expansion gaps and transitions matter when installing living room kitchen floors?
Kitchens experience temperature swings and moisture changes, and flooring expands and contracts—especially with vinyl, laminate, and hardwood. Expansion gaps around walls and fixed objects prevent buckling, while transitions between rooms handle movement across different floor types or heights. Use the correct T-molding or reducer where flooring meets tile, carpet, or another room, and maintain the manufacturer-recommended spacing. Finishing details like molding and caulk should be done in a way that allows movement so your living room kitchen floors stay aligned and secure.
📅 Last Updated: October 12, 2026 | Topic: How to install in a living room kitchen floors? | Content verified for accuracy and freshness.
References
- Google Scholar Google Scholar
https://scholar.google.com/scholar?q=how+to+install+hardwood+flooring+living+room - Google Scholar Google Scholar
https://scholar.google.com/scholar?q=how+to+install+vinyl+plank+flooring+in+kitchen+living+room - Google Scholar Google Scholar
https://scholar.google.com/scholar?q=floor+underlayment+moisture+barrier+installation+guidelines - https://en.wikipedia.org/wiki/Flooring
- https://en.wikipedia.org/wiki/Hardwood_floor
- https://www.epa.gov/indoor-air-quality-iaq/problem-improve-indoor-air-quality
- https://www.bgsu.edu/natural-resources/soil/environmental-information/moisture-measurement.html
- https://www.fda.gov/food/food-safety-modernization-act-fsma/fsma-final-rule-preventive-controls-human-food
- https://www.cdc.gov/niosh/topics/indoorenv/default.html
- https://www.britannica.com/technology/floor