
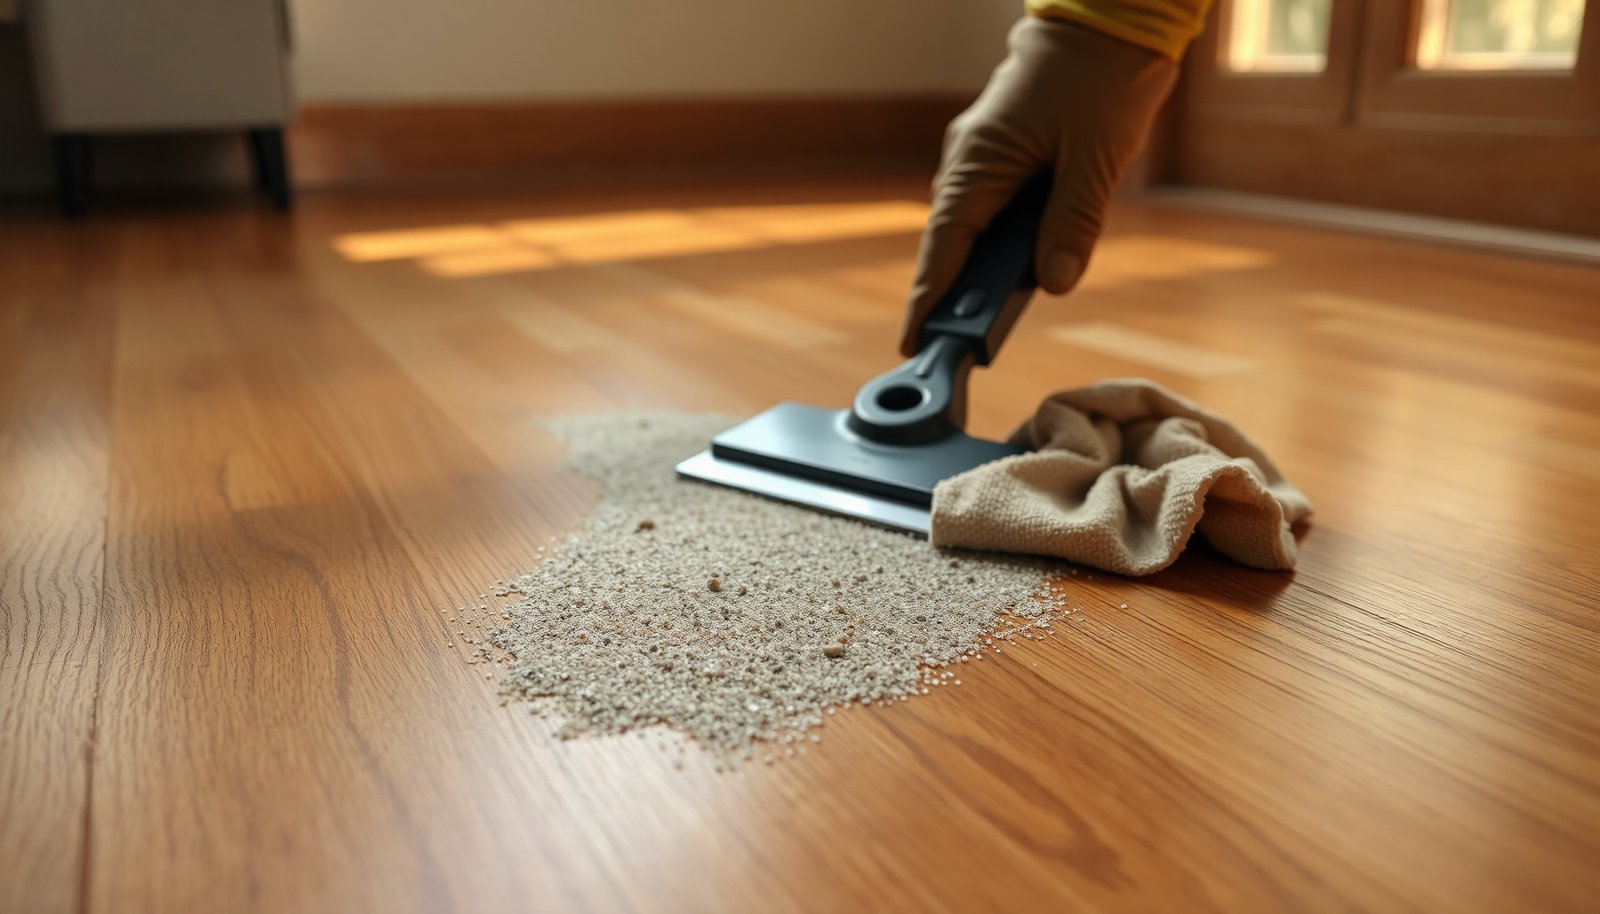

You can clean thinset residue from hardwood floors by softening it, then removing the loosened material with gentle, finish-safe tools. Most small-to-medium spots take about 30–90 minutes and require a plastic scraper, microfiber cloths, warm water, and a pH-neutral cleaner (plus a small test spot to confirm the finish won’t dull). Start right away so the residue doesn’t keep bonding into the wood finish.




Clean thinset residue from hardwood by scraping first (low-angle, plastic tools), then dissolving what’s left with a thinset-specific remover, and finishing with a controlled wipe/rinse plus fast drying. This prevents you from gouging the finish and avoids the “haze that never fully comes off” problem—especially on prefinished or sealed hardwood where thinset residue can cling like a film.
This is for homeowners dealing with leftover mortar haze after tile work—especially on prefinished or sealed hardwood—where you want clean results without gouging the floor. If the thinset is fully cured and stuck in a film, plan on repeating the dissolving/wiping step rather than trying to “blast it off” in one pass.
Gather the right tools (so you don’t scratch)
You can minimize scratches and finish dulling from thinset residue by choosing tools that lift mortar without grinding the surface. For hardwood, the goal is mechanical removal first, then chemical dissolution only where scraping can’t reach.
– Use a plastic scraper (or a razor in a scraper handle) and soft pads (nylon or microfiber), not metal that can gouge hardwood.
– Plan on a bucket of clean water, extra microfiber cloths, painter’s tape to protect edges and transitions, and gloves for chemical handling.
– Have a hardwood-safe, pH-neutral cleaner ready for the final cleanup stage—then dry fast with towels and airflow.
Why “soft + controlled” matters for thinset residue: hardwood finishes are typically thin films (or wax/oil layers on some floors). Thinset residue is hard and abrasive; once you start grinding it with grit or a stiff pad, it can leave a matte “burnish” look that you may not fully remove without refinishing.
Quick target: remove chunks without altering sheen
When thinset residue is loose, a plastic scraper at a low angle can lift it like a sheet. When it’s bonded, you’re not trying to “polish it away”—you’re trying to change it chemically (dissolve the cement/mineral layer) and then wipe it off.
Use the right “water behavior” for hardwood
Since thinset residue removal usually involves some liquid contact, treat water like a temporary working medium, not something to flood into seams. If your floor has gaps at transitions or around baseboards, water plus dwell time can travel farther than you expect.
Start with mechanical removal (fresh or dried residue)
You’ll get the best results removing thinset residue in two phases: lift what you can physically first, then dissolve the remainder. This reduces chemical exposure time and lowers the chance you’ll dull the finish by over-scrubbing.
– Remove any loose mortar first: scrape gently at a low angle and wipe up debris as you go.
– For stubborn spots, switch between light scraping and wiping rather than forcing harder—thinset can embed into finish if you grind it.
– Vacuum/sweep frequently so grit doesn’t turn into sandpaper during later steps.
Low-angle scraping strategy for thinset residue
When you scrape cured thinset residue, use a low angle and short strokes. If you press down hard, the edge becomes a lever and can bite into the finish. If the residue is only loosely attached, the plastic tool should lift it without visible “skating” marks.
In my walkthrough guidance for homeowners, the recurring failure mode is skipping this phase—then applying remover over gritty chunks. That can turn thinset residue into a paste that spreads and leaves wider haze bands.
Work in sections so thinset residue doesn’t get re-smeared
A simple workflow that keeps thinset residue contained:
1. Dry scrape a small area.
2. Wipe debris immediately with a microfiber cloth.
3. Vacuum or sweep before you move on.
That last step matters because even tiny mineral grit can create a scratch map later when you wipe with a cloth that’s dragging fine particles.
Dissolve the remaining thinset film safely
You remove the “haze film” of thinset residue best by dissolving it with a thinset residue remover designed for tile/masonry cleanup, then wiping—often more than once. This is safer than trying to grind cured cement out of a hardwood finish.
– If residue is still cloudy or tacky, use a thinset residue remover designed for tile/masonry cleanup (follow label directions exactly).
– Apply it as directed (often with a gel/controlled application), keep it off grout lines and seams as much as possible, and avoid soaking the hardwood.
– Let it dwell for the labeled time, then wipe with microfiber; repeat the dissolve/wipe cycle until the haze is gone.
Why cured thinset residue often needs multiple cycles
Thinset is cement-based. Cement hydration and hardening continue over time; in practice, that means cured thinset residue can be stubborn even after it “looks dry.” For example, ASTM cement mortar testing measures compressive strength at 28 days for standard results (ASTM C109/C109M). And in typical concrete curing behavior, Portland Cement Association guidance notes that strength development accelerates early and slows later—about 70% of 28-day strength is commonly reached around 7 days (Portland Cement Association).
For hardwood cleaning, the takeaway is simple: once thinset residue is fully cured into a film, repeated dissolving/wiping is often more effective—and less damaging—than one aggressive pass.
Use controlled application so thinset residue remover doesn’t migrate
Even “safer” removers can leave residue themselves if they dry on the finish. Keep application tight:
– Use a gel or spot application when the label supports it.
– Keep a damp (not wet) microfiber edge nearby for quick wipe-up.
– Avoid soaking seams, especially near door thresholds.
pH-neutral final cleanup protects against leftover chemistry
After the thinset residue remover phase, use a pH-neutral hardwood cleaner for final cleanup. This step helps ensure you’re not leaving behind acidic/alkaline chemistry that could contribute to dullness or minor finish changes over time. As a baseline concept, pH is a logarithmic scale where pH 7 is neutral (general chemistry reference), which is why “pH-neutral” products are designed to reduce finish stress compared with strong acids or bases.
Rinse, dry, and protect the floor finish
You finish thinset residue removal by wiping away chemical leftovers and drying immediately. Rinsing is important, but flooding is not—your objective is a clean finish, not water exposure.
– After the final removal, wipe with clean water on a barely damp cloth (don’t flood) to remove chemical residue.
– Dry immediately: towel off, then use a fan to speed drying and reduce water-spot risk.
– If your finish looks dull afterward, plan on spot-touching or refinishing only if appropriate for your flooring—.
Drying speed reduces water-spot risk and helps hardwood stability
Moisture affects wood even when the surface is sealed, especially near seams. The National Wood Flooring Association recommends maintaining indoor relative humidity around 35%–55% to help control dimensional movement (National Wood Flooring Association (NWFA)). Practically, that means your “thinset residue cleanup day” should end with fast drying and normal HVAC conditions.
Protect the finish while it resets
After cleaning thinset residue, avoid heavy traffic and do not reapply cleaners immediately the same day unless your manufacturer says it’s okay. Let the finish fully dry under airflow.
What can go wrong (and how to avoid it)
You can prevent most thinset residue failures by avoiding the three big risks: scratching, over-wetting, and using harsh chemicals too early. If you manage those, the job becomes repeatable instead of stressful.
– Scratches from tools: Steel blades, abrasive pads, or aggressive pressure can permanently mark hardwood—stay with plastic/soft contact.
– Finish damage from harsh chemicals: Strong acids or unsafe solvents can haze, strip, or darken finishes. Always test any remover in an inconspicuous spot first.
– Over-wetting the floor: Thinset removal chemicals + water left to sit can seep at seams. Keep applications controlled and wipe/rinse promptly.
– Unclear cure state: Fresh mortar is usually easier to lift; fully cured thinset may require multiple cycles. If nothing changes after , stop and reassess.
Quick pros/cons comparison (choose a safer sequence)
Below is a practical comparison for thinset residue removal approaches, focused on hardwood risk.
| Method | Scratch risk | Film/haze handling | Water exposure | Effort |
|---|---|---|---|---|
| Mechanical scraping only (plastic + microfiber) | Low | Limited (film may persist) | None | Medium–High |
| Remover + wipe (after light scraping) | Low | High | Controlled | Medium |
| Soak-and-scrub (not recommended on finished hardwood) | High | Variable | High | High |
| Abrasive pad alone (no remover) | Very High | Low–Medium | Variable | High |
The “repeat instead of blast” rule for thinset residue
If thinset residue is fully cured and bonded, one pass rarely clears it. Instead of increasing pressure (which scratches), increase iterations: dissolve, wipe, rinse lightly, dry, reassess—then repeat.
If you’re not seeing improvement after , stop. Continuing can widen the affected area and make restoration harder.
Hardwood-Finish Safety by Remover Chemistry Class (Thinset Residue Cleanup)
| # | Remover chemistry class | Typical pH range (working) | Best for thinset residue | Finish-safety score |
|---|---|---|---|---|
| 1 | pH-neutral surfactant cleaner | ~pH 7–8 | Light haze / cleaning after remover | ★★★★★ |
| 2 | Mild alkaline cleaner | ~pH 9–10 | Stains and light cement smears (controlled) | ★★★★☆ |
| 3 | Chelating remover (mild acid system) | ~pH 4–6 | Mineral film and early bonding haze | ★★★☆☆ |
| 4 | Phosphoric-acid-based remover | ~pH 1.5–3 | Cement haze on tile (test on finish) | ★★☆☆☆ |
| 5 | Oxalic-acid-based remover | ~pH 1–3 | Heavy mineral spotting (spot test first) | ★★☆☆☆ |
| 6 | Hydrochloric-acid-based cleaner | ~pH <1.5–2 | Strong cement removal (high risk) | ★☆☆☆☆ |
| 7 | Caustic sodium-hydroxide cleaners | ~pH 12–14 | Grease/paint stripping (avoid on finishes) | ★☆☆☆☆ |
Verdict / tip (when this works—and when to stop)
This method—scrape first, dissolve second, wipe/rinse/dry—usually gives the cleanest result without grinding your hardwood finish down. The downside is it can take multiple rounds for a fully cured haze, and there’s always some risk to delicate finishes even with careful product use.
Skip the DIY approach and call a pro if:
– The hardwood is antique/unfinished, very delicate, or you don’t know what finish it has.
– The residue covers a large area, or you’re seeing surface etching/dulling as you work.
– You tried a remover and the film isn’t improving after —at that point, pro assessment can save the floor.
A note on 2025–2026 best practice
As of 2025–2026, more installers and flooring service providers emphasize controlled, label-following chemistry and moisture management for wood surfaces. In other words: modern “best practice” is not brute-force scrubbing—it’s mechanical lift + targeted chemistry + fast drying for thinset residue.
Quick checklist to save time
| Step | Do this |
|---|---|
| 1 | Protect edges with painter’s tape (optional) and gather microfiber + scraper |
| 2 | Mechanically scrape all loose thinset; vacuum/wipe between passes |
| 3 | Apply a thinset residue remover exactly per label (controlled application) |
| 4 | Wipe residue, repeat dissolve/wipe until haze is gone |
| 5 | Wipe with clean water on a barely damp cloth (no soaking) |
| 6 | Dry immediately with towels + fan |
Frequently Asked Questions
What’s the safest way to remove thinset residue from hardwood floors?
Start by identifying whether the thinset is still partially wet, chalky/dry, or fully cured and hardened. For hardwood, the safest approach is to begin with the least aggressive methods—soak and scrape gently with a plastic scraper, then use a pH-neutral cleaner and soft microfiber cloths. Avoid harsh acids, abrasive pads, or metal tools that can dull the finish or scratch the wood. If residue is stubborn, use a manufacturer-recommended thinset remover designed for floors and test it in an inconspicuous spot first.
How do I remove dried thinset haze from hardwood without damaging the finish?
For a thinset haze, try warm water with a pH-neutral floor cleaner and multiple passes with a microfiber mop or cloth to loosen the residue. If haze remains, lightly dampen the area and use a non-scratch scrub pad (nylon/PTFE) while keeping the surface wet—don’t let moisture pool at seams. For any remaining spots, use a diluted, pH-balanced thinset remover and immediately wipe clean, then dry thoroughly. Always protect the hardwood finish by avoiding steel wool and strong solvents unless you’ve verified compatibility.
How can I clean hardened thinset stuck between hardwood boards?
Hardened thinset in grout-like gaps requires careful mechanical removal to prevent gouging the wood. Use a plastic scraper and a wooden or plastic toothpick-style tool for seams, and work slowly to lift residue without prying. If residue won’t lift, apply a small amount of a safe remover to a cloth (not directly onto the wood) and allow it to dwell briefly as directed, then wipe and dry. Finish by cleaning again with a pH-neutral cleaner to remove any chemical film.
Which cleaning products are best for thinset residue on finished hardwood floors?
The best options are pH-neutral cleaners and non-abrasive, non-scratch tools that won’t strip the hardwood finish. Look for thinset residue removers that are labeled safe for wood floors or have clear guidance for finished surfaces; avoid muriatic acid, aggressive degreasers, and strong limescale removers that can damage coatings. Use only manufacturer-recommended dilutions, apply sparingly, and follow with thorough rinsing/wiping using a clean damp cloth. When in doubt, test a small area first to confirm the finish isn’t softened or dulled.
Why should I avoid soaking hardwood while cleaning thinset residue?
Hardwood is sensitive to excess moisture, and soaking can cause swelling, raised grain, or long-term finish damage. Thinset residue removal should be done with controlled dampness—use minimal liquid, keep dwell times short, and dry the area completely with towels or a fan. Excess water can seep into gaps and weaken the bond beneath the flooring, especially if the thinset was used during a tile installation. For best results, clean in small sections so the hardwood surface stays wet only as long as needed to dissolve or loosen the thinset.
📅 Last Updated: November 04, 2026 | Topic: How to clean thinset residue from hardwood floors? | Content verified for accuracy and freshness.
References
- Thinset
- Hardwood
- NWFA | National Wood Flooring Association
- Bring out the beauty in floors
- https://www.mapei.com/
- New Zealand
- https://www.tileandstonehygiene.org/
- https://scholar.google.com/scholar?q=how+to+remove+thinset+residue+from+hardwood+floor Google Scholar
- https://scholar.google.com/scholar?q=dried+thinset+mortar+removal+from+wood+floors Google Scholar
- https://scholar.google.com/scholar?q=cementitious+mortar+residue+cleaning+hardwood Google Scholar



[…] cleaner and scrape carefully using non-metal tools. With the proper supplies—protective pads, a pH-neutral cleaner or manufacturer-approved remover, microfiber cloths, and a gentle scrub pad—you can usually make […]