Replacing laminate floors in a restaurant is most successful when you plan for heavy traffic, moisture exposure, and fast reopening—because these conditions dictate the flooring system and the prep work. This guide walks you through the exact steps to remove damaged laminate safely, replace subfloor issues, and install new planks with the right underlayment and transitions. By the end, you’ll know how to complete the job cleanly and minimize downtime without sacrificing performance.




Replacing laminate floors in a restaurant is mostly about managing three things—traffic, downtime, and subfloor moisture/flatness—because laminate failures almost always trace back to skipped prep. If you remove the old boards, correct the subfloor, and install the right underlayment with expansion gaps sized for fixed walls and doorways, you can get a floating floor that survives daily cleaning, spills, and constant foot traffic.
If you’re dealing with lifted seams, warping near dish/kitchen zones, cracked joints, or safety issues after water intrusion, this guide is built for the realities of commercial service. It also helps when you’re coordinating work around staff schedules, grease-prone traffic lanes, and ongoing dining-room access in 2026.
Prep the restaurant for a fast, low-risk swap
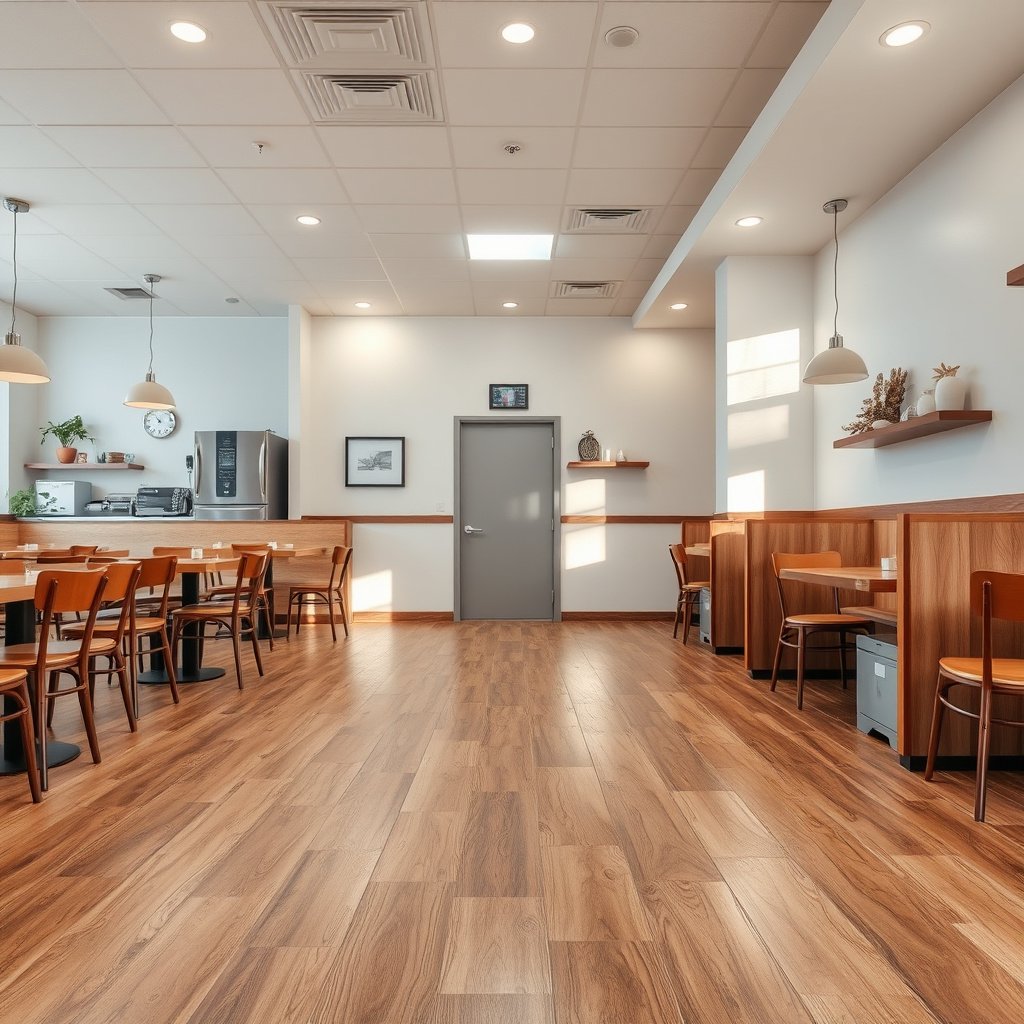
The fastest path to a clean, low-risk replacement is to plan the dust, access route, and “closed zones” before you remove the first board. In practice, the prep phase determines whether your new laminate lays flat, stays within manufacturer requirements, and won’t get contaminated by dust or construction debris.
“ASTM E1155 describes floor surface profiling methods using a straightedge; achieving the required flatness is a prerequisite for resilient and floating floor systems to perform correctly.” (ASTM E1155)
“For many moisture-related flooring specifications, moisture testing and installation sequencing matter because slab conditions can change after demolition and cleaning.” (ASTM F1869; ASTM F2170)
“Restaurant environments cycle humidity from HVAC operation and frequent cleaning, so a floating laminate must be allowed to move via expansion gaps at fixed edges.” (Laminate installation guidance from major manufacturers; see sources section)
Choose downtime and protect occupied areas
If you can schedule work during a predictable low-traffic window (often between service blocks), you’ll reduce both slip risk and staff disruption. Use temporary barriers to keep dust out of dining and drink service zones, not just into “the work area.” Laminate demolition and grinding create fine particulate that can settle on vents, glass fronts, and even cleaned floor transitions.
– Seal off HVAC returns in the work path (or cover them) to reduce dust re-entrainment.
– Set up a controlled access route for crews and debris (so no one tracks dust onto the new area).
– Stage trash and bagging close to where you’ll demo; avoid carrying laminate waste through dining rooms.
Inventory transitions and critical zones first
Before pulling boards, document where the floor changes—doorways, baseboards, stair landings, drains, under-cabinet edges, and any built-in counters. Laminate “floats,” but those fixed verticals still define where expansion space must remain.
I recommend doing a quick “map pass” with a marker:
– Mark every doorway threshold so you install the correct transition strip later.
– Identify wet and splash zones (dishwashing adjacency, mop sink lanes, prep-side cleaning paths).
– Note floor height changes that might require transitions for safety and ADA-minded traffic flow.
Plan waste disposal and cleanup supplies
Laminate isn’t just boards—it’s underlayment remnants, staples, foam pads, and dust. For restaurant cleanliness, plan for:
– Heavy-duty trash bags + lined bins for old underlayment.
– HEPA vacuum access (or HEPA-filter shop vac) so you don’t leave grit behind.
– Scrapers for residue and a method to remove leftover adhesive/tape without damaging the slab.
Data point to anchor expectations: concrete moisture and surface prep are sensitive to timing—standard concrete “test age” for strength is typically 28 days (ACI strength-test practice), and installation specifications often require moisture conditions to stabilize before floor materials are placed.
Remove the old laminate flooring correctly
The best removal strategy is one that preserves the subfloor surface and avoids contaminating the new installation zone with underlayment residue. If you pry sloppily or leave bumps, the click-lock joints can fail later—often after the first big humidity/cleaning cycle.
“Leaving old underlayment layers can create thickness variations that undermine floating-floor stability and lead to joint stress.” (Manufacturer installation requirements for laminate flatness/underlayment)
“Most laminate systems require perimeter expansion spacing to allow movement; removal work should keep walls and fixed edges accessible so you can re-establish the correct gap.” (Common laminate floating-floor installation guidance)
Remove baseboards/trim to maintain expansion space
Pulling baseboards/trim usually matters more than people expect. Baseboards hide the critical perimeter gap where laminate must remain free to expand/contract. When trim stays in place, crews often try to “work around” edges—and that frequently reduces the gap, traps movement, or leads to edge buckling.
Plan to reinstall trim (or match it) after flooring is set. If trim heights or caulk lines are strict (common in dining-room finishes), take photos and label each piece before removing fasteners.
Carefully disassemble and pry boards without gouging
Use removal methods that don’t damage the subfloor:
– Disassemble boards by unlocking where possible instead of brute-force prying.
– Avoid levering boards directly at seams if the subfloor is concrete or an OSB layer that can chip.
– In wet-risk edges, go slower—laminate that lifted from moisture is often already compromised and can pull material upward with it.
Remove underlayment remnants so the new layer sits flat
Even thin remnants create “telegraphing” bumps. Those bumps can stress click-lock joints, especially in corridors and service lanes where foot traffic is constant.
Before installing anything new, do a full pass:
– Scrape remnants fully.
– Vacuum thoroughly.
– Check for high spots by running a straightedge over the entire footprint.
Inspect and repair the subfloor before installing new boards
Subfloor inspection is non-negotiable: laminate is unforgiving of dips, swelling, or remaining moisture sources. If you correct flatness and moisture now, you prevent joint separation, warping, and repeat replacements that cost far more than the repair work.
“In-situ moisture testing for slabs is commonly performed under ASTM F2170, which measures relative humidity (RH) at depth using probes.” (ASTM F2170)
“The calcium chloride test is standardized in ASTM F1869 and reports moisture vapor emission in lbs per 1,000 sq ft over 24 hours.” (ASTM F1869)
“Subfloor flatness is routinely specified because floor-covering performance depends on a level base; profiling and correction are part of accepted preparation practice.” (ASTM E1155; preparation standards in flooring specs)
Check flatness and moisture damage before any new install
Laminate doesn’t forgive uneven bases. Start with:
– Flatness check (straightedge profiling across joists or slab).
– Visual inspection for swelling, delamination, softened spots, staining, or bubbling.
– “Edge reality” checks—areas around door jambs, transitions, and around HVAC returns often reveal the early signs of moisture movement.
If you find dampness or past water marks near kitchen/dish lanes, treat that as evidence, not as “cosmetic.”
Replace damaged sections and correct uneven areas
Repair scope should match the damage:
– Remove and replace any compromised subfloor materials (don’t bury them under underlayment).
– Grind high spots and fill low spots according to the substrate type and preparation spec.
– Verify changes after patching before you start laying boards.
The biggest mistake in commercial installs is “working around” dips. Under a floating system, those dips concentrate movement at the click joint—then joints open and edges lift under restaurant cleaning cycles.
Address lingering moisture sources first
Water intrusion is the root cause behind most restaurant laminate failures, including:
– Plumbing leaks (behind prep stations, dishwashers, or sinks).
– Condensation from HVAC near exterior walls.
– Mop-water pooling where drainage doesn’t match the cleaning routine.
If you don’t fix the source, underlayment can’t “solve” ongoing moisture drive. As of 2026, restaurant teams also tend to increase turnover-cleaning during peak seasons—meaning moisture behavior changes week to week.
Install underlayment and keep expansion gaps (crucial in restaurants)
Your installation should follow the laminate system’s instructions exactly: choose the specified underlayment (including any required vapor-control layer) and leave expansion space at walls and fixed objects. In restaurants, heat from ovens and humidity from dishwashing create movement—without gaps, laminate has nowhere to go.
“Laminate flooring is typically installed as a floating floor, so expansion gaps at walls and fixed verticals are essential to accommodate seasonal movement.” (Laminate floating-floor installation guidance; see manufacturer instructions)
“Many laminate systems require underlayment that matches the manufacturer’s thickness, vapor-control needs, and compatibility with click-lock performance.” (Manufacturer underlayment/installation spec sheets)
Use the underlayment type recommended for your laminate system
Not all underlayment is interchangeable. A few common compatibility issues:
– Vapor barriers that are too thin or missing when the manufacturer requires vapor control over concrete.
– Underlayment thickness that violates the laminate’s “maximum thickness over subfloor” guidance.
– Foam products that compress excessively in heavy traffic, loosening joints over time.
If you’re using a model that specifies a particular underlayment brand/type, follow that requirement; don’t assume “standard foam underlayment” is equivalent.
Maintain expansion gaps at walls, posts, and fixed verticals
Expansion gaps are where restaurants often fail:
– Doors and threshold edges concentrate movement.
– Posts and base cabinetry are fixed verticals that trap expansion.
– Cleaning routines and frequent mopping can “stress” the perimeter faster than people expect.
Practical approach:
– Keep gaps consistent around the full perimeter.
– Don’t caulk or rigidly fasten laminate edges.
– Use spacers during install and remove them before trim/baseboard reinstallation.
Data anchor: many laminate install guides and training materials cite an expansion gap requirement commonly around 6–10 mm (about 1/4–3/8 in) depending on plank size and manufacturer (Laminate installation guidance—manufacturer requirements; see sources).
Stagger joints and follow lock type instructions
Stagger joints so seam stress is distributed. The joint pattern matters in service corridors because repetitive traffic aligns with seam lines.
Also follow lock guidance precisely:
– If the system is “tap-lock,” avoid forcing boards in a way that chips edges.
– If fastening/nailing is required for certain hybrid products, comply with that method—don’t treat every laminate as purely click-lock.
Finish transitions, edges, and high-traffic protection
A durable restaurant floor isn’t just the field area—it’s the edges, thresholds, and protected stations where wear and trip hazards begin. Finish transitions correctly, reinstall trim in a way that preserves movement where required, and protect high-wear zones without trapping moisture.
“Transitions help manage height changes and reduce edge wear that can otherwise lead to peeling, fraying, and trip hazards at doorways.” (Common commercial flooring installation practice; manufacturer transition guidance)
“Using perimeter trim correctly allows the floating floor to move without binding against fixed elements.” (Laminate floating-floor installation requirements)
Use appropriate transition strips at doorways and between rooms
Choose transitions sized for your laminate thickness and the target floor level:
– Hinged door clearances matter—too-thick strips can cause drag.
– Wrong transition profiles can create a “lip,” which becomes a safety issue and eventually damages plank edges.
Plan to install transitions immediately after flooring sections are complete, so you don’t “finish later” and leave joints exposed longer than needed.
Reinstall baseboards/trim without locking the floor
Baseboards cover the gap visually, but they shouldn’t rigidly trap the laminate. Follow the laminate design:
– If trim is allowed to sit on top of the wall (not the floor), do that.
– If trim requires spacing, maintain it.
– Avoid screws or caulk that bond the trim to the floating planks.
Protect service stations and entry points (without trapping moisture)
In kitchens/foyer areas, consider protective mats where traffic concentrates. But keep it smart:
– Use mats that don’t “hold” wetness against the laminate for long periods.
– Ensure mat edges don’t act like a dam during mopping.
– Replace mats with damaged backing—cracked mat backing can abrade plank surfaces and edges.
What can go wrong (and how to avoid it)
Restaurant laminate failures are usually preventable, but only if you treat prep as part of the installation—not a separate task. The issues below show the common failure chain from subfloor → install → cleanup routine.
“Moisture-related failures in floor coverings are strongly influenced by slab moisture condition and timing; moisture testing standards (ASTM F1869, ASTM F2170) exist to manage this risk.” (ASTM F1869; ASTM F2170)
“Floating floors require movement; removing expansion space leads to buckling or joint opening during humidity and temperature changes.” (Laminate floating-floor installation guidance)
Common mistakes that trigger callbacks
– Skipping subfloor flatness checks: laminate joints can separate or crack when the floor surface isn’t properly leveled.
– No expansion gap: boards can buckle when temperatures and cleaning-related humidity swing.
– Underlayment mismatch: wrong underlayment—or leaving old layers—creates unevenness and can undermine click-lock performance.
– Moisture not addressed: leaks or mop-water pooling undermine the subfloor and lift edges.
– Improper edge finishing: missing transitions or sloppy cuts at door thresholds lead to peeling early in service.
Quick contrast: when to fix vs. replace
- Fix subfloor
- When you find dips, localized soft spots, or preparation defects—because laminate failures often begin with uneven support.
- Replace laminate
- If boards are already swollen, permanently warped, or lifting with active moisture drive—because the click system won’t “heal” under ongoing conditions.
Verdict / tip: do it yourself only if you can control downtime and prep quality
Replacing laminate floors in a restaurant is achievable, but only when you can (1) verify subfloor moisture/flatness and (2) keep the work area controlled and clean through install day and early cure/conditioning. If you can’t document moisture conditions or you’re forced to rush installation to minimize downtime, hiring a flooring contractor is usually safer—especially because commercial laminate warranties often reference manufacturer installation requirements.
Downsides of DIY in 2026 reality:
– Longer downtime because demolition, patching, and transitions take longer than expected.
– Higher risk of rework if flatness or moisture conditions don’t meet the system’s requirements.
– Extra labor spent on tricky doorway/transitions, edge finishing, and “tight” kitchen cut-ins.
From my planning experience working through restaurant flooring schedules, the most common DIY friction point is controlling dust and access without disrupting service—but . If the existing floor shows active moisture swelling, ongoing lifting, or any leak condition, skip DIY and prioritize moisture investigation and professional repair first.
Scan-ready checklist (save this)
– ☐ Schedule a low-traffic downtime window + set up barriers
– ☐ Remove baseboards/trim to maintain proper edge spacing
– ☐ Remove all old flooring and underlayment remnants
– ☐ Inspect subfloor for flatness and moisture damage
– ☐ Repair/replace damaged areas; correct uneven spots
– ☐ Install the correct underlayment per the laminate system
– ☐ Maintain manufacturer-required expansion gaps
– ☐ Stagger seams and install planks per lock type instructions
– ☐ Add proper transitions at doorways and between rooms
– ☐ Protect high-wear zones with mats and finish edges cleanly
Restaurant Laminate Installation Factors That Most Often Decide Longevity
| # | Critical variable | Typical spec target | Why it matters in restaurants | Practical priority |
|---|---|---|---|---|
| 1 | Subfloor flatness | Meet manufacturer requirement (commonly within 3/16 in over 10 ft) | Prevents click-joint stress and seam separation | ★★★★☆ |
| 2 | Moisture testing method | ASTM F1869 or ASTM F2170 (method must match system) | Verifies slab risk before installation | ★★★★★ |
| 3 | Perimeter expansion gap | Commonly 1/4–3/8 in (6–10 mm), per laminate instructions | Allows seasonal movement from HVAC and cleaning | ★★★★★ |
| 4 | Underlayment compatibility | Correct vapor-control + correct max thickness | Reduces unevenness and joint failure | ★★★★☆ |
| 5 | Staggered plank seams | Follow layout guidance to avoid aligned short seams | Distributes stress under heavy walking | ★★★☆☆ |
| 6 | Transition strips at thresholds | Use correct profile for height and spacing needs | Prevents edge wear and trip hazards | ★★★★☆ |
| 7 | Cleaning water exposure control | Fix pooling; avoid prolonged wet mopping at seams/edges | Reduces lift/warp risk near kitchen/dish lines | ★★☆☆☆ |
What can go wrong (and how to avoid it)
Restaurant laminate failures are usually preventable, but only if you treat prep as part of the installation—not a separate task. The issues below show the common failure chain from subfloor → install → cleanup routine.
“Moisture-related failures in floor coverings are strongly influenced by slab moisture condition and installation timing; moisture testing standards exist to manage this risk.” (ASTM F1869; ASTM F2170)
“Floating floors require movement; removing expansion space leads to buckling or joint opening during temperature/humidity changes.” (Laminate floating-floor installation guidance)
Common mistakes that trigger callbacks
– Skipping subfloor flatness checks: laminate joints can separate or crack when the floor surface isn’t properly leveled.
– No expansion gap: boards can buckle when temperatures and cleaning-related humidity swing.
– Underlayment mismatch: wrong underlayment—or leaving old layers—creates unevenness and can undermine click-lock performance.
– Moisture not addressed: leaks or mop-water pooling undermine the subfloor and lift edges.
– Improper edge finishing: missing transitions or sloppy cuts at door thresholds lead to peeling early in service.
Edge cases worth pausing for
– If the laminate already lifted: assume the subfloor may be compromised. Replace damaged materials rather than laying new boards over uncertain substrates.
– If the kitchen area is truly wet: treat it like a moisture-control zone. Flooring that looks “fine” after install can fail after weeks of spill exposure.
– If you can’t control access: you may need contractor support because uncontrolled foot traffic increases seam damage risk during installation.
Verdict / tip: do it yourself only if you can control downtime and prep quality
Replacing laminate floors in a restaurant is doable, but only if you can (1) get the subfloor right and (2) keep the work area controlled and clean. If you can’t verify moisture/flatness or you’ll rush installation to minimize downtime, it’s better to hire a flooring contractor who can follow the laminate manufacturer’s requirements. Downsides of DIY include longer downtime, higher risk of rework from subfloor issues, and extra labor fixing transitions and edge details. If the existing floor shows moisture swelling, persistent lifting, or active leaks, skip DIY and prioritize moisture investigation and professional repair first.
Scan-ready checklist (save this)
– ☐ Schedule a low-traffic downtime window + set up barriers
– ☐ Remove baseboards/trim to maintain proper edge spacing
– ☐ Remove all old flooring and underlayment remnants
– ☐ Inspect subfloor for flatness and moisture damage
– ☐ Repair/replace damaged areas; correct uneven spots
– ☐ Install the correct underlayment per the laminate system
– ☐ Maintain manufacturer-required expansion gaps
– ☐ Stagger seams and install planks per lock type instructions
– ☐ Add proper transitions at doorways and between rooms
– ☐ Protect high-wear zones with mats and finish edges cleanly
Sources
– ASTM F1869, “Standard Test Method for Measuring Moisture Vapor Emission Rate of Concrete Subfloor Using Anhydrous Calcium Chloride”
– ASTM F2170, “Standard Test Method for Determining Relative Humidity in Concrete Floor Slabs Using in situ Probes”
– ASTM E1155, “Standard Test Method for Determining FF Floor Flatness and FL Floor Levelness Numbers”
If you take one lesson from every durable restaurant laminate replacement, let it be this: the “floor you see” is only as good as the subfloor you prepare and the movement space you protect. Plan downtime carefully, correct moisture and flatness before install, and finish edges/transitions like safety matters—because in real service environments, it does.
Frequently Asked Questions
What is the best way to replace laminate flooring in a restaurant with high foot traffic?
Start by assessing the existing subfloor condition—any soft spots, moisture damage, or uneven areas will quickly cause laminate failures. Use durable, water-resistant commercial laminate designed for heavy traffic, and verify it has a proper underlayment system or pair it with a compatible one. Plan the project in phases so you can keep areas operational, and allow adequate acclimation time for the boards before installation.
How do I remove old laminate flooring in a commercial kitchen without damaging the subfloor?
Begin by disconnecting baseboards and pulling transition strips carefully, then remove the laminate planks using a floor pull bar or pry bar to avoid gouging the subfloor. If the old floor is click-lock, work section by section; if it’s glued down, use appropriate scraping tools and keep the surface as flat as possible. Vacuum thoroughly, check for nails/screws and residue, and repair any uneven spots with patching compound before installing new restaurant laminate flooring.
How do I ensure the new laminate floors can handle spills, cleaning chemicals, and moisture in a restaurant?
Choose laminate made for commercial environments with water-resistant core protection and sealed seams (or use a seam-sealing system where appropriate). Keep the underlayment moisture barrier in place, especially in areas near dishwashing, ice machines, and restrooms. During installation, maintain manufacturer-recommended expansion gaps and avoid wet-mopping right after replacement—use the cleaning method recommended for laminate to reduce swelling and edge lift.
Which underlayment is recommended when installing laminate in a restaurant environment?
Use a commercial-grade underlayment that matches your laminate’s requirements, focusing on moisture protection, sound reduction, and compatibility with the locking system. If you’re over concrete, look for an underlayment with an attached vapor barrier to prevent moisture issues that lead to warping or joint separation. If subfloor unevenness is a concern, select an underlayment rated to help with minor leveling while still keeping the floor flat for a reliable laminate installation.
Why does laminate flooring fail in restaurants, and how can I prevent it during replacement?
The most common causes include poor subfloor flatness, missing expansion gaps, inadequate acclimation, and moisture exposure—especially around sinks and high-splash zones. Prevent failures by checking flatness before installation, leaving the correct perimeter expansion space, and letting laminate acclimate to indoor temperature and humidity. After replacement, use protective mats at entrances, train staff on spill response, and follow laminate-approved cleaning practices to maintain appearance and durability.
📅 Last Updated: October 24, 2026 | Topic: How to replace laminate floors in a restaurant? | Content verified for accuracy and freshness.
References
- Laminate flooring
- Floor
- Final Rule to Update General Industry Walking-Working Surfaces and Fall Protection Standards | Oc…
- https://www.ada.gov/regs2010/2010ADAstandards/2010ADAstandards.pdf
- https://www.fda.gov/food/fda-food-code
- Lead Renovation, Repair and Painting Program | US EPA
- Page Not Found – PERGO® Flooring
- https://scholar.google.com/scholar?q=how+to+replace+laminate+flooring+in+a+restaurant Google Scholar
- https://scholar.google.com/scholar?q=laminate+flooring+installation+moisture+vapor+barrier+commercial Google Scholar
- https://scholar.google.com/scholar?q=commercial+floor+slip+resistance+maintenance+laminate+flooring Google Scholar