


Learn how to clean stubborn fine dust from hardwood floors without grinding it deeper into the grain. The fastest, safest approach is dry removal first—microfiber mopping or a HEPA-filter vacuum—followed by a lightly damp mop to lift the remaining haze. This method beats heavy scrubbing when the dust is caked on or feels permanently embedded.


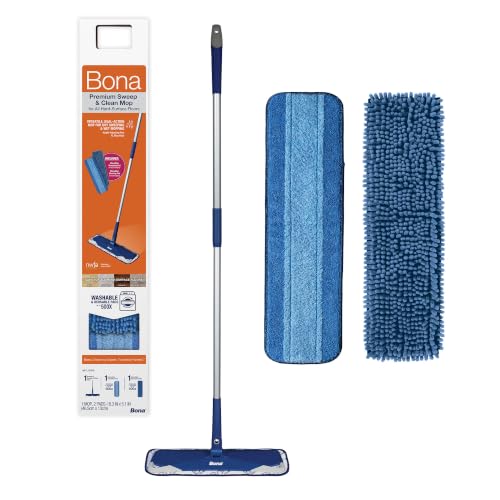

If fine dust is clinging to your hardwood and won’t come up with a regular sweep, switch to a vacuum with a soft floor tool and a microfiber method (slightly damp, then dry-buff). For stubborn areas, use a barely damp microfiber cloth with a pH-neutral cleaner made for finished wood floors—don’t flood the surface.
This guide is for people dealing with that “powdery” dust layer on hardwood floors (especially along baseboards, in high-traffic spots, and after vacuuming/sweeping). It’s also helpful if the dust seems to spread or smear instead of lifting.
What to do before you clean (so you don’t spread the dust)

The fastest way to stop fine dust from turning into a bigger problem is to remove loose grit first and only then move to damp cleaning. If you skip that step, you can grind particles into the finish and create the haze you’re trying to avoid.
Fine dust can include “resuspended” particles that behave like grit when dragged across a floor, so pre-pickup reduces micro-scratching risk.
According to the U.S. EPA, PM2.5 refers to particles with an aerodynamic diameter ≤ 2.5 µm, which are small enough to cling and redistribute during dry sweeping.
According to NIOSH dust terminology, the “respirable” fraction is commonly defined as ≤ 4 µm, which helps explain why dust can hang around on horizontal surfaces.
Start by removing loose grit with a vacuum or a dry microfiber to prevent scratching—fine dust can still act like abrasive grit once it’s been mixed with tracked soil. Use slow passes rather than quick back-and-forth motions, and don’t press down hard on the microfiber. Fine particles transfer easiest when pressure compresses dust into the finish instead of letting the fibers trap it.
Work with good lighting and focus on dust-prone zones first: along baseboards (where air currents deposit particles), seams (where tiny debris collects), and corners (where mops and tools often miss). When you do multiple passes, change direction on the third pass—this helps capture dust that’s caught in the micro-texture of the finish rather than simply flattening it.
Finally, check compatibility with damp cleaning. Many finished hardwood floors can tolerate minimal moisture, but some finishes (or failed/peeling coatings) can’t. If the manufacturer’s care guide specifically restricts moisture, treat that as a hard rule—even if the dust is stubborn.
Best tools for fine dust (dry removal that actually lifts)
The best dry strategy for powdery dust is to use a vacuum with the right head and a microfiber tool that traps particles instead of pushing them. When dry removal is done correctly, you often won’t need to damp-clean large areas at all.
According to U.S. EPA definitions, PM10 refers to particles with an aerodynamic diameter ≤ 10 µm, which are common in household “dust layers” and can be moved by airflow and sweeping.
True HEPA-style filtration is designed to capture extremely small particles; U.S. DOE HEPA guidance commonly cites 99.97% removal for 0.3 µm particles.
A soft floor tool reduces direct contact between brush bristles and the finish, which lowers the chance of dulling or embedding fine residue.
Use a vacuum with a soft bristle/brush roll attachment or a suction-only hard-floor setting. Avoid aggressive bristle contact—hard bristles can “polish” dust into the finish and leave you with a smeary look after you think you’ve cleaned.
For dusting, use a microfiber mop or dusting pad designed to trap fine particles. The key is the microfiber’s ability to hold dust in its fibers (and in the mop head’s built-in capture design). If your pad simply redistributes powder, switch to a fresh pad—once the fibers load up, they behave more like a film-spreader than a dust-catcher.
Empty the vacuum canister/bag promptly, and check the brush/head for hair or debris that can re-release dust. This matters more than many people expect: clogged airflow reduces suction at the floor, which encourages dust to scatter.
Particle-size context: why “fine dust” sticks differently
Particle-Size Cutoffs That Overlap With “Fine Dust” on Floors
| # | Particle category (definition) | Typical max size | Why it matters on hardwood | Max size (µm) |
|---|---|---|---|---|
| 1 | Ultrafine particles (UFP: less than 0.1 µm) | Extremely small | Resuspends easily and clings to finish haze | 0.1 |
| 2 | Respirable fraction (NIOSH convention) | ≤ 4 µm | Hard to “sweep away” without trapping | 4 |
| 3 | PM2.5 (U.S. EPA) | ≤ 2.5 µm | Common in indoor dust layers | 2.5 |
| 4 | Thoracic fraction (NIOSH convention) | ≤ 10 µm | More likely to settle, still redistributes | 10 |
| 5 | PM10 (U.S. EPA) | ≤ 10 µm | Includes coarse dust that “plays along” with fine dust | 10 |
| 6 | Inhalable fraction (NIOSH convention) | ≤ 100 µm | Can form a film if mixed with moisture/residue | 100 |
| 7 | Sand (USDA soil-texture class: 63–2000 µm) | Coarser grit | Scratches can happen if swept dry | 2000 |
As of 2026, many households are also dealing with more frequent “dust cycles” (HVAC use, weather changes, and tracked particles). If your dust looks like powder along baseboards, particle-size behavior is only part of the story—tool choice and moisture control are what prevent smear and haze.
Damp-cleaning method for stubborn dust (microfiber + minimal moisture)
The quickest cure for stubborn powdery residue is a barely damp microfiber wipe followed immediately by a dry-buff. The goal is to lift residue into the cloth (not to soak the finish), then remove any remaining haze with a clean, dry microfiber.
For hardwood care, the safest moisture level is “damp to the touch,” because over-wetting can damage the wood and compromise finishes.
According to U.S. EPA particulate definitions, PM2.5 particles (≤ 2.5 µm) can cling to surfaces; damp microfiber helps capture what suction/dry tools miss.
A dry-buff step immediately after wiping reduces the chance of a cleaner film that can look like “more dust.”
Applying cleaner to the cloth (not pouring onto the floor) lowers the risk of puddling in seams and edges.
Lightly dampen a microfiber cloth or mop pad—aim for “damp to the touch,” not wet. Wring it thoroughly so there are no drips or pooling along the wood grain or near baseboards. This is where most people accidentally create a haze: if the cloth is too wet, the cleaner water can leave behind residue as it dries.
Wipe with the grain in small sections. Work one manageable area at a time so you can dry-buff immediately after. The follow-up dry microfiber pass is not optional if you’re trying to eliminate that “powdery” look—dry-buff pulls remaining residue and prevents a drying film.
Use a pH-neutral cleaner specifically intended for finished hardwood. Apply it to the cloth (not poured on the floor). If you’re choosing between “all-purpose” cleaners and a wood-floor formula, the wood-floor pH-neutral approach is usually the safer bet for preserving finish appearance and reducing sticky residue risk.
If you’re wondering whether you’re doing enough moisture, here’s a practical decision rule: if you can see wetness on the finish, you’re too wet. If the floor feels dry within seconds and you still see visible residue, try a fresh microfiber and a slightly more controlled wipe—rather than adding more liquid.
Dry vs. damp: pros and cons for fine dust
| Method | Pros | Cons / Watch-outs |
|---|---|---|
| Vacuum + microfiber (dry capture) | Lowest risk to finish; fast; ideal for daily/weekly dust | May not remove residue film if dust was mixed with tracked grime |
| Barely damp microfiber + dry-buff | Lifts fine residue film; reduces smear-haze; targets baseboards and traffic lanes | Requires correct moisture control; not ideal for unknown/unfinished/failed coatings |
When dust is embedded or leaves a film (deeper approach)
If dust is embedded or leaving a film, you need repeat passes with clean microfiber—not more pressure. The “deeper” approach is really a residue-management process: capture, re-cloth, dry-buff, and reassess.
If a wipe leaves dullness, that’s often cleaner/residue film being redistributed—switching to fresh microfiber prevents re-deposit.
When floors accumulate mixed dust + tracked oils, targeted spot cleaning with a damp cloth reduces the chance of spreading contamination.
Steam increases heat and moisture exposure; unless your hardwood manufacturer permits it, steam can damage certain finishes and coatings.
If dust builds up into a film, repeat the damp-cleaning step but with fresh microfiber pads/cloths so you’re not redistributing the residue. This is the point where many cleaning cycles fail: people use the same “dirty but still looks fine” pad until the residue overloads it.
For sticky spots (often from tracked-on grime + dust), do targeted spot cleaning. Damp cloth, gentle wipe, then dry-buff. Work small and stay consistent—don’t scrub hard, because abrasion can dull the finish and make future dust clinging worse.
Avoid steamers and harsh chemicals unless your flooring manufacturer explicitly allows them. Heat can soften some finishes, and leftover residues from incompatible chemicals can make the floor appear perpetually dusty. This is especially relevant in 2026 as more households use multi-surface cleaners by default—fine dust problems often get worse when the finish chemistry is altered.
Also pay attention to baseboards and edges. Dust films often “seed” the floor from those areas; if you only clean the center, you may feel like dust is coming back overnight.
What can go wrong (and how to avoid it)
The most common failures are over-wetting, using abrasive tools, and skipping microfiber changes. Fix these three issues and stubborn dust removal becomes dramatically more predictable.
Over-wetting can cause wood swelling or finish-related problems because hardwood floors are sensitive to moisture exposure.
Abrasive pads can dull the finish, making it easier for fine dust to cling and harder to remove cleanly later.
Dirty microfiber can smear residue and create a dull “haze” that looks like more dust after cleaning.
Over-wetting: soaking hardwood can cause swelling or finish damage—use minimal moisture and dry-buff right after. If you see puddles at seams, stop and switch methods. Use cleaner on the cloth, not the floor, and keep wipe passes short.
Using abrasive pads or rough scrubbers: they can dull the finish and change its surface behavior. Once the finish is micro-damaged, dust has more “grip,” and what was previously a powdery layer becomes an ongoing maintenance issue.
Skipping pad changes: if you keep wiping with a loaded microfiber, you can spread the residue into a wider haze. This is why changing the cloth often “solves” the problem even if you’re repeating the same steps.
If you don’t know the finish type, don’t assume “finished hardwood” means “safe for damp cleaning.” Some coatings and older finishes are less forgiving. When in doubt, test in an inconspicuous area first—then decide whether damp cleaning is truly appropriate.
Verdict: the safest routine (and who should skip the damp method)
The safest routine for finished hardwood in 2026 is: vacuum first, then clean with a barely damp microfiber using a pH-neutral wood-floor cleaner (applied to the cloth), and dry-buff. This approach minimizes scratching, lifts residue film, and reduces the risk of haze caused by over-wetting.
Vacuum-first reduces grit risk because fine particles can act like abrasives if trapped debris is dragged across the finish.
pH-neutral cleaners for finished hardwood help reduce the chance of finish dulling or residue buildup compared with harsher “all-purpose” chemicals.
Skip damp methods if you have peeling/failed coatings or if your manufacturer’s care instructions restrict moisture exposure.
Downsides: damp methods take longer and require quick drying to avoid haze. They may also be inappropriate if your floor is unfinished, badly worn, or has unknown coatings.
Skip the damp approach (or stop and confirm the right care) if you don’t know your finish type, the floor has peeling/failed coatings, or the manufacturer’s care instructions explicitly warn against moisture. In those scenarios, focus on dry pickup and professional assessment.
Quick scan checklist (save this)
| Task | Do | Don’t |
|---|---|---|
| Dry pickup | Vacuum first + microfiber dusting | Sweep aggressively or dry-brush hard |
| Moisture | Use barely damp microfiber | Soak, flood, or leave puddles |
| Cleaner | pH-neutral cleaner for finished hardwood (applied to cloth) | Vinegar/ammonia/unknown “all-purpose” chemicals |
| Finishing step | Dry-buff immediately | Let it air-dry with cleaner residue |
Frequently Asked Questions
How do I clean stubborn fine dust from hardwood floors without scratching them?
Start by dry-sweeping with a soft microfiber dust mop to lift fine dust instead of grinding it into the finish. For stubborn areas, lightly mist the floor with a hardwood-safe cleaner or water on the mop head (not the wood) and wipe with a clean microfiber pad. Avoid abrasive pads, stiff brushes, or excessive pressure, since fine particles act like sandpaper on hardwood flooring.
What’s the best method to remove dust that’s embedded in hardwood floor seams?
Vacuum with a floor brush attachment using a low to medium suction setting to avoid lifting finish while pulling dust from gaps and edges. Follow with a slightly damp microfiber cloth or mop, focusing on baseboards, molding lines, and expansion gaps where fine dust collects. If dust remains, use a microfiber cloth wrapped around a small tool (like a putty knife wrapped in cloth) to gently pull debris from seams.
Which cleaning tools work best for fine dust on finished hardwood floors?
Use a microfiber dust mop or flat microfiber pad designed for hard surfaces, because the fibers trap fine particles effectively. A vacuum with a bare-floor setting and a soft brush roll helps remove dust before mopping. Pair this with a hardwood-safe cleaner and a separate, clean microfiber pad for wet cleaning so you don’t redeposit dust across the floor.
Why does fine dust keep coming back after I mop my hardwood floors?
Fine dust often gets smeared or pushed around when the mop pad is dirty or overly damp, especially if you’re mopping without first removing loose particles. Using a wood-cleaning solution that isn’t appropriate for your finish can also leave a film that attracts more dust. To fix this, vacuum or dry-mop first, rinse or replace mop pads often, and use a hardwood floor cleaner recommended for your floor’s finish type.
What’s the best way to deep-clean fine dust after renovations or sanding on hardwood floors?
First, HEPA-vacuum thoroughly and use tack-free microfiber dusting methods to remove ultra-fine debris before any moisture touches the wood. Then damp-mop with a hardwood floor cleaner diluted per label directions, using clean microfiber pads and minimal liquid. Finally, buff dry with a separate dry microfiber cloth to prevent streaking and to ensure no residual dust remains on the hardwood floor finish.
📅 Last Updated: October 29, 2026 | Topic: How to clean stubborn fine dust from hardwood floors? | Content verified for accuracy and freshness.
References
- https://www.cdc.gov/asthma/in_the_home/default.htm
- Lead Renovation, Repair and Painting Program | US EPA
- Dust
- HEPA
- Microfiber
- Wood flooring
- Vacuum cleaner
- https://scholar.google.com/scholar?q=cleaning+fine+dust+hardwood+floors+microfiber Google Scholar
- https://scholar.google.com/scholar?q=hardwood+floor+cleaning+dust+reduction+hepa+vacuum Google Scholar
- https://scholar.google.com/scholar?q=dust+resuspension+damp+mopping+hard+surfaces+study Google Scholar



[…] grit and keeps your finish intact. If you’re dealing with stuck dust, a barely damp cloth with a pH-neutral cleaner will lift the residue cleanly—no heavy scrubbing […]