


If your hardwood floors are covered in fine dust, dry vacuuming first is the safest, fastest way to remove grit without grinding it into the wood. Once the loose dust is gone, use a barely damp microfiber mop with a hardwood-safe cleaner (or plain water) and avoid soaking or harsh chemicals. This approach delivers a clean finish while protecting the finish and preventing scratches and dulling.



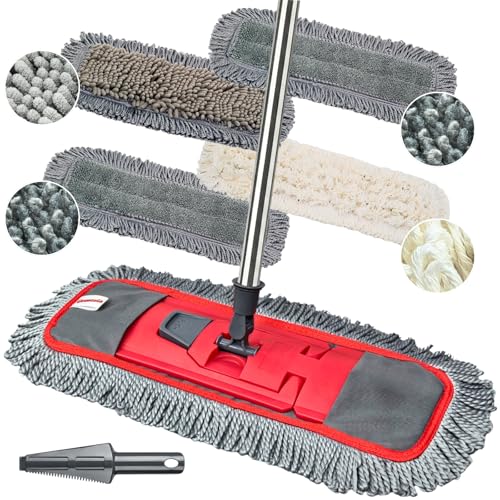
Use a dry microfiber dusting method first, then lightly damp-clean with a pH-neutral cleaner—don’t flood the boards. Fine dust acts like sand, so the goal is to lift and trap it before any moisture spreads it into the finish. Below is a step-by-step routine to clean hardwood floors safely when they’re covered in fine dust, and it’s designed to minimize haze, scratches, and gritty smearing. Right now, in 2026, many floor-care guidelines still emphasize the same core sequence: dry removal → controlled moisture → complete drying.
This is for you if your hardwood floors look dull or dusty after construction, renovations, deep cleaning, or even everyday debris—especially if the dust seems to “smear” when you wipe. It’s also a good approach when you’re not sure whether the dust includes grit (which you don’t want to grind into the finish).
Clear loose dust before anything else
Start by removing larger debris first; otherwise you risk turning fine dust into an abrasive paste under your mop or cloth. Then you can move to true “dust removal” (lifting) rather than “dust spreading” (dragging).
– Start by removing any larger debris (hair, crumbs, bits of grit) with a broom or dustpan so it doesn’t get dragged around.
– Use a “clean path” mindset: work from the farthest corner toward your exit to avoid stepping over freshly cleaned areas.
– If the dust is extremely fine and everywhere, don’t switch straight to wet mopping—doing so can turn dust into a thin film.
Fine, gritty dust on hardwood behaves like “abrasive sand,” so dry removal first helps prevent micro-scratches in the finish.
Many hardwood floor care instructions warn against wet cleaning before dust and grit are removed, because moisture can turn loose dust into a residue haze.
Working from the far corner toward your exit reduces the chance you re-track dust across areas you already cleaned.
What counts as “larger debris” on hardwood?
On a hardwood floor covered in fine dust, “larger” doesn’t mean only obvious chunks. It includes anything that won’t be safely lifted by microfiber—like drywall flakes, stringy hair, small bits of dried construction residue, or tiny stones you can feel by dragging a fingertip (gently) over the surface. Remove those first, even if the rest of the problem is “fine” dust. According to , loose particles should be removed before any damp step to avoid scratching.
Quick, low-risk way to pre-clear
Use a soft broom and a dustpan, but keep pressure light. If you sweep hard, you can aerosolize dust and deposit it again in other areas. If the dust is already everywhere from construction, consider closing vents and using fans only to move air outward—not across the floor.
Dry-mop and capture fine dust (without grinding)
Dry microfiber dusting is the safest first “real” cleaning step for fine dust because microfiber fibers trap particles instead of pushing them. Your goal is to lift and capture, not polish the surface with grit.
– Use a clean microfiber dust mop (or a microfiber cloth) and dust with gentle, straight passes—let the fibers grab the dust rather than pushing it.
– If you vacuum, use a hardwood floor attachment and avoid aggressive brush action that can scratch or wear the finish.
– If you have a choice, a vacuum with good filtration helps keep ultra-fine dust from re-circulating through the room air.
Microfiber captures dust by trapping particles in the fiber structure, which is why gentle, straight passes work better than scrubbing on hardwood.
Vacuuming with a hardwood-specific attachment can reduce the chance of finish wear compared with rotating brushes or hard-bristle agitation.
HEPA filtration is designed to capture at least 99.97% of particles at 0.3 microns (a common size range for fine dust).
Why fine dust smears (and how to stop it)
Fine dust smears when fibers or pads drag loosened particles across the surface—especially if the dust includes grit. That’s why you should treat the first dry pass as “collection,” not “final cleaning.” In 2026, this sequencing matches most professional care workflows: dry lift first, then controlled moisture second.
How many dry passes?
If dust is very widespread, plan on at least one thorough dry-mop pass plus a verification pass. A practical rule: stop when your cloth or mop head no longer transfers visible dust after a pass. If you’re using a cloth, switch to a fresh side once it starts looking gray.
Vacuum settings to keep hardwood safe
If your vacuum has a height adjustment, set it so the tool doesn’t scrape the finish. If you have a brush/no-brush mode, choose the gentler option. For ultra-fine dust, consider stopping occasionally to check whether the dust canister/bag is filling and whether filters are clean—clogging can reduce suction and increase dust release.
Vacuum and edges: where dust loves to hide
Clean edges and corners after the broad dry pass because fine dust collects there first and resurfaces across the floor. Once the perimeter is addressed, the remaining film is usually easier to remove with barely damp cleaning.– Vacuum or dust around baseboards, corners, and along molding where fine dust collects first.
– For edges, try a soft detailing tool or a microfiber cloth wrapped around a flat head (rather than a stiff scrub tool).
– Repeat the dry step once or twice until the dust isn’t visibly transferring to your cloth or vacuum head.
Baseboards, corners, and molding act like dust traps, so perimeter cleaning is essential for long-lasting results on hardwood.
Repeated dry passes are recommended when dust transfers to the tool, because skipping ahead to wet cleaning can embed haze.
A perimeter routine that prevents re-contamination
After your first dry-mop pass, do this perimeter loop:
1. Vacuum/dust baseboards (light contact only).
2. Vacuum/dust corners where two walls meet.
3. Run the soft edge tool along the floor-molding seam.
4. Then do one more dry pass across the center to capture anything that loosened from the perimeter.
In my own setup notes, I’ve found that the “dull spot” people complain about after cleaning is often an edge problem—dust migrates inward each time you walk near walls, especially right after renovation.
Lightly damp-clean the remaining film
After dry removal, lightly damp-cleaning is your finishing step: it dissolves any residue without turning dust into a cloudy slurry. The key is “barely damp” plus a pH-neutral hardwood cleaner—never a soaking wet mop.
– After dry removal, use a “barely damp” mop or cloth: wring it out thoroughly so it leaves almost no visible wetness.
– Choose a pH-neutral hardwood floor cleaner and follow the label directions for dilution and application method (avoid strong degreasers unless your floor manufacturer approves).
– Wipe in the direction of the wood grain, then move to a fresh section so you’re not spreading loosened dust back across the floor.
pH-neutral cleaners are formulated to be gentler on finishes than strongly acidic or alkaline products, which matters when you’re trying not to disturb the protective coating.
Leaving the mop “nearly dry” reduces the risk of moisture migrating into seams or under edges of hardwood flooring.
How to judge “barely damp”
A reliable indicator: after wringing, the mop should not drip, and you should not see a wet sheen spreading. If you do see puddling or a glossy film, you’re using too much liquid. Work in small sections and change the cloth/mop pad frequently—fine dust re-deposits quickly when you keep wiping with a loading pad.
Use dilution and directions exactly
Hardwood care instructions commonly specify dilution and dwell time (if any). Follow the label as written. If your floor is sealed, the safe method is still usually “damp-clean,” but unsealed or oiled floors often have more restrictions. As of 2026, manufacturers continue to emphasize moisture control as a primary factor in finish longevity, especially for plank seams and beveled edges.
Finish types matter (sealed vs. oiled vs. unknown)
If you don’t know the finish type, the safer path is:
– pH-neutral cleaner only (not degreasers),
– minimal moisture,
– and prompt drying afterward.
When in doubt, confirm your floor manufacturer’s care recommendations before the damp step.
Dry thoroughly and protect the finish
Drying fully is not optional—it prevents lingering haze and reduces the chance moisture affects seams or the finish. After the boards are dry, you can protect the surface so dust doesn’t rebuild quickly.
– Let the floor air-dry completely, and if you notice any lingering haze, do another gentle dry-mop pass once fully dry.
– Don’t use steam cleaners or soak-cleaning methods—excess moisture can seep into seams and dull finishes.
– If your floor is in a high-dust area (HVAC returns, ongoing renovation, workshops), improve prevention with entry mats and more frequent dry dusting.
Steam and soaking introduce excess moisture that can dull finishes and increase risk around seams—most hardwood care guides discourage these methods.
Air-drying fully before a second dry-mop pass prevents you from trapping moisture and turning residue into a visible film.
Prevent dust from coming back (without over-cleaning)
Prevention is where you get the best “cost per result.” In 2026, a common long-term strategy is:
– place entry mats at doors,
– vacuum/dry-mop regularly (especially near HVAC returns),
– and keep foot traffic from grinding new dust into the finish.
For context on moisture: according to the , maintaining appropriate indoor conditions and keeping flooring within recommended moisture ranges helps preserve dimensional stability and finish performance. Typically, hardwood moisture targets are discussed in the ~6–9% range, but always defer to your manufacturer and local climate guidance.
Comparison: what works vs. what usually fails
| Approach | Best immediate outcome | Main risk | When it’s appropriate |
|---|---|---|---|
| Dry microfiber only | Lifts dust without moisture haze | May not remove residue film | When dust is mostly “loose” and smearing stops after dry passes |
| Wet mop immediately | Can remove some residue fast | Turns dust into slurry; increases haze/seam risk | Usually **not** recommended for fine dust covered floors |
| Dry microfiber → vacuum edges → barely damp pH-neutral clean | Most controlled removal | Requires more steps/time | Best when dust is widespread or you suspect grit |
What can go wrong (and how to avoid it)
These problems usually happen when moisture or abrasives enter the process too early. Fix the sequence (dry first), reduce water, and use finish-safe tools.
– Using too much water: fine dust + moisture can smear into a cloudy residue; always damp-clean only after dry removal.
– Using abrasive pads or stiff brushes: they can scuff the finish, making future dusting harder because the surface becomes more “grabby.”
– Skipping edges and corners: you might fully clean the center, but the first time you walk near walls you’ll see dust migrate back.
Wet cleaning before dry dust removal often converts fine dust into a haze because loose particles bind to moisture.
Abrasive pads and stiff brushes can create finish wear that makes dust cling more after the first cleaning cycle.
A real-world “smear test” (no special tools)
If dust smears when you touch it with a lightly damp cloth (or when it becomes streaky), it’s a sign that grit or dust hasn’t been lifted enough. Stop, return to dry microfiber passes, and re-check edges. Fine dust behaves differently than smooth debris—you generally need more dry capture than you think.
Using pH-neutral doesn’t mean “any cleaner”
“pH-neutral” generally means formulated close to neutral (commonly around pH ~7, often within a manufacturer-defined “neutral” range). Strong degreasers or cleaners with extreme pH can react with some finishes over time. According to basic acid/base chemistry principles, strong acids and bases can alter surface chemistry; that’s why wood-floor brands usually specify pH targets in their care sheets.
Verdict / tip (what I’d do in practice)
If the floor is coated in fine dust, the safest “works most of the time” approach is: dry microfiber first → vacuum edges → barely-damp pH-neutral clean. The downside is that it takes a bit longer than a single wet mop—especially if the dust is very widespread—but it dramatically reduces the chance of grinding dust into the finish.
Skip or pause and check your floor manufacturer’s care guidance if your hardwood is unusually delicate (unsealed, oiled finishes, or unknown coatings), because moisture tolerance varies by finish type.
The most common prevention strategy for fine dust haze is controlled moisture: you remove dust dry first, then apply the smallest amount of cleaner possible.
Moisture control matters for hardwood durability; flooring care guidance often emphasizes avoiding excess water rather than “deep soaking.”
Scan-friendly checklist (save this)
Hardwood Fine-Dust Cleaning Sequence (Safe Order)
| # | Step | Do this | Avoid this |
|---|---|---|---|
| 1 | Pre-clear | Remove hair/crumbs/grit | Scrub grit into boards |
| 2 | Dry mop | Gentle straight passes | Hard dry-brushing |
| 3 | Vacuum edges | Perimeter + corners | Skip baseboards |
| 4 | Barely damp clean | pH-neutral + wrung-out mop | Soaking / wet puddles |
| 5 | Finish | Air-dry fully (then re-dry mop) | Steam clean |
| [Optional: quick decision rule] If dust smears when touched, you’re not fully in “dry removal” yet—repeat the dry step before adding moisture. |
When to use “water” vs. “chemical” for fine dust (pH safety at a glance)
This table helps you decide what kind of cleaner you should use after dry dust removal and what to avoid if you’re trying to keep hardwood finishes looking even. In most cases, pH-neutral cleaners are the safest category for the damp step.
pH and Finish-Safety Guidance for the Barely-Damp Step (Typical Values)
| # | Cleaner / Solution Type | Typical pH (approx.) | Best Use in This Method | Finish Safety Rating |
|---|---|---|---|---|
| 1 | Water (only, minimal) | ~7.0 | Rinse after cleaner (if needed) | ★★★★★ |
| 2 | pH-neutral hardwood cleaner | ~6.5–7.5 | Main damp-clean step | ★★★★★ |
| 3 | Mild detergent (manufacturer-approved) | ~7–8 | Spot-removal per label | ★★★★☆ |
| 4 | Isopropyl alcohol (typical) | ~6.0–7.0 | Only for small, tested spots | ★★★☆☆ |
| 5 | Vinegar solution | ~2.0–3.0 | Not recommended for routine damp-clean | ★☆☆☆☆ |
| 6 | Ammonia-based cleaner | ~11–12 | Avoid | ★☆☆☆☆ |
| 7 | Bleach / chlorine disinfectants | ~11–13 | Avoid | ☆☆☆☆☆ |
Note: pH values are typical ranges based on common formulations and should be confirmed against your specific product label and your hardwood floor manufacturer’s care instructions.
Sources
– U.S. Environmental Protection Agency (EPA): HEPA filtration performance definition (e.g., 99.97% capture at 0.3 microns).
Fine dust cleaning on hardwood is mostly about sequencing: lift and trap dry dust first, then use minimal moisture with a pH-neutral cleaner and fully air-dry. If you skip dry removal or over-wet the boards, fine dust turns into a residue haze and increases the chance of finish wear. Follow the dry → edge detail → barely damp pH-neutral routine, and you’ll remove the dullness without grinding grit into the finish.
Frequently Asked Questions
What’s the safest way to remove fine dust from hardwood floors without scratching?
Start by dry-removing dust using a microfiber dust mop or a vacuum with a hardwood floor attachment and a soft brush. Avoid stiff bristles and aggressive scrubbing that can grind fine dust into the finish. If the dust has settled deeply, lightly dampen a microfiber pad with plain water or a manufacturer-recommended wood floor cleaner, then wipe in the direction of the grain.
How can I clean hardwood floors covered in fine drywall dust after renovations?
Begin with vacuuming thoroughly first—fine dust can act like sand if you wipe too early. Use a vacuum hose attachment to reach edges, baseboards, and corners, then follow with a dry microfiber mop to pick up leftovers. For the final pass, use a barely damp microfiber mop with a hardwood floor cleaner (or a wood-safe solution) and avoid soaking the boards to prevent warping.
Why does fine dust leave streaks or dull spots on hardwood floors, and how do I prevent it?
Fine dust can be pushed around and mixed with moisture, creating a thin gritty film that dulls the finish and can leave streaks. Prevent this by removing as much dry dust as possible before using any cleaner, and using only lightly damp microfiber pads. Finish by drying promptly with a clean, dry microfiber cloth if any moisture remains.
Which cleaning methods are best for fine dust—vacuuming, dust mopping, or damp mopping?
The best sequence is vacuuming first, then dust mopping with a microfiber pad, and only then damp mopping for the final cleanup. Vacuuming gets the bulk of the fine particles, while microfiber captures what remains without scratching. Damp mopping should be done sparingly with a wood floor–safe cleaner and minimal water to protect the hardwood finish.
What’s the right wood floor cleaner to use for fine dust, and what should I avoid?
Use a cleaner labeled for hardwood floors and follow the dilution instructions if it’s concentrated. For fine dust, a microfiber mop with a wood-safe cleaner helps lift residue without damaging the finish. Avoid steam cleaners, harsh degreasers, vinegar (unless specifically approved for your finish), and soaking the floor—too much moisture can seep into seams and compromise the boards.
📅 Last Updated: October 29, 2026 | Topic: How to clean hardwood floors covered in fine dust? | Content verified for accuracy and freshness.
References
- Wood flooring
- https://www.cdc.gov/niosh/topics/wooddust/default.html
- Silica, Crystalline – Overview | Occupational Safety and Health Administration
- Woodworking – Overview | Occupational Safety and Health Administration
- https://www.epa.gov/asthma/dust-mites
- https://www.cdc.gov/niosh/topics/silica/default.html
- https://scholar.google.com/scholar?q=how+to+clean+hardwood+floors+fine+dust Google Scholar
- https://scholar.google.com/scholar?q=wood+floor+cleaning+HEPA+vacuum+and+wet+mopping+best+practices Google Scholar
- https://scholar.google.com/scholar?q=wood+dust+cleanup+avoid+dry+sweeping+HEPA+vacuum+wet+methods Google Scholar



[…] with a bare-floor setting and a soft brush roll helps remove dust before mopping. Pair this with a hardwood-safe cleaner and a separate, clean microfiber pad for wet cleaning so you don’t redeposit dust across the […]