


Struggling to clean dried dust from hardwood floors? Use a slightly damp microfiber mop first, then follow with a dry buffing pass to lift powder without grinding it into the finish. For stubborn dust clumps, switch to a hardwood-safe cleaner applied sparingly and wipe immediately—this is the fastest, safest way to restore a clean, streak-free surface.



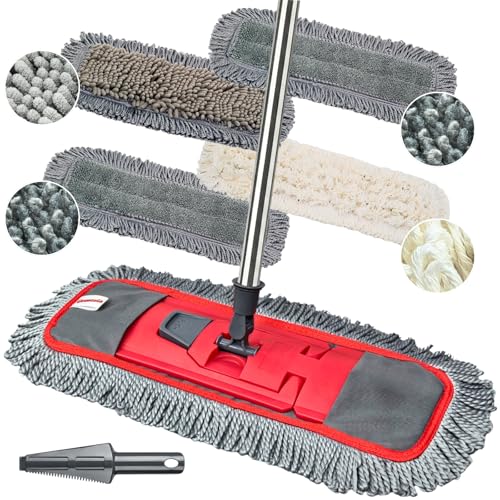
Dried dust comes up best with a “dry first” approach—vacuum or dust-mop to remove loose grit, then use a barely-damp microfiber wipe only if anything remains. Keep the floor dry enough to avoid soaking seams, because gritty residue can scratch and dull many hardwood finishes when you scrub.
This is for anyone dealing with dusty-looking hardwood after neglect, seasonal storage, construction/cleaning mess, or everyday dust that’s dried and stuck around seams and corners—especially when normal mopping just spreads the residue.
Tools and cleaning products to use

The right tools for dried dust are the ones that lift grit first, then remove the remaining film without wetting the wood. For most finished hardwood floors, you’re aiming for mechanical removal (vacuum/dust-mop) plus a final, lightly damp pH-neutral wipe.
Hardwood-care best practices prioritize removing loose particles first, because gritty dust acts like abrasive when dragged across the finish.
According to the U.S. EPA, PM10 includes particles smaller than 10 micrometers—fine enough to lodge in seams and settle onto floors after everyday dust.
What to grab (and why)
– Soft-brush vacuum attachment or a microfiber dust mop (dry removal): Use this first to prevent grinding grit into the finish. Soft bristles and microfiber reduce “drag abrasion,” which is the main scratching mechanism when dust is sandy.
– Microfiber cloths/mop pads + a pH-neutral hardwood floor cleaner (final wipe): Microfiber captures residue instead of pushing it around. A pH-neutral cleaner (around neutral pH) is typically the safest category for finished floors because it’s less likely to interfere with common finish chemistries than acidic or alkaline cleaners.
According to the U.S. Department of Energy, HEPA filtration is rated at capturing **99.97% of particles at 0.3 micrometers**, which explains why HEPA vacuums reduce “redistributed dust” during cleaning.
A quick compatibility note on cleaner labels
Not all “floor cleaners” are equal. When possible, choose a product explicitly intended for your hardwood finish type (polyurethane/urethane, varnish/lacquer, wax, or penetrating oil). If your floor is prefinished, the manufacturer’s care instructions in the finish-specific guide usually matter more than general household formulas.
Finish types and what “dry-first + light wipe” can handle
Below is a practical, finish-oriented starting point for dried dust cleanup. Use it to decide how cautious you should be with moisture.
Dry-First Suitability for Dried Dust Cleanup by Hardwood Finish (2026)
| # | Finish type | What it protects | Best final wipe approach | Dry-first safety score |
|---|---|---|---|---|
| 1 | Factory aluminum-oxide (pre-finished) | Hard surface film | Barely-damp microfiber + pH-neutral | ★★★★★ |
| 2 | Waterborne polyurethane | Durable clear coat | Barely-damp microfiber + pH-neutral | ★★★★☆ |
| 3 | Classic oil-modified urethane/varnish | Top-coat with sheen layer | Barely-damp microfiber, wipe dry fast | ★★★★☆ |
| 4 | Conversion varnish / lacquered surface | Hard, film-like finish | Barely-damp wipe; avoid over-wetting seams | ★★★★☆ |
| 5 | Acrylic sealer (some prefinished lines) | Moderate protective coat | Dry-first + pH-neutral; dry immediately | ★★★☆☆ |
| 6 | Wax-finished hardwood | Wax layer + surface build | Barely-damp wipe only if compatible; dry fast | ★★☆☆☆ |
| 7 | Penetrating oil (oiled/unfinished-look) | Soak-in protection, softer surface | Dry-first only; use finish-approved oil method | ★☆☆☆☆ |
Step-by-step: remove dried dust without scratching
The fastest safe way to remove dried dust is: lift grit dry first, then do a barely-damp microfiber wipe (and dry immediately). This sequence prevents the “sanding effect” that happens when gritty particles get trapped in a wet mop or scrub pad.
According to wood science, wood changes dimension significantly as moisture content rises toward the fiber saturation point (about 30% moisture content), which is why over-wetting seams can cause damage.
According to the U.S. EPA, PM2.5 particles are smaller than 2.5 micrometers, making them more likely to slip into gaps and persist after quick dry cleaning.
Step 1: Lift the dust dry
Vacuum with a soft-brush attachment or sweep gently with a microfiber dust mop. The goal is not a spotless shine on the first pass—it’s removing the bulk of particles that can scratch your finish later. If the dust feels gritty, avoid “circling” aggressively; instead, use straight strokes and overlap passes so grit lifts rather than spreads.
HEPA filtration is designed to capture extremely small particles (99.97% at 0.3 micrometers), which helps reduce the amount of dust you later re-deposit during wiping.
What I recommend in real home maintenance: This matters because the final wipe is for residue film, not grit removal.
Step 2: Wipe lightly to pick up residue
Slightly dampen a microfiber cloth with a pH-neutral hardwood floor cleaner (or a product explicitly recommended for your finish). Wipe in the direction of the grain so you don’t drag fibers across the surface.
Key technique details:
– Use barely-damp, not wet: wring cloths until they feel damp, not dripping.
– Replace pads often: if the pad looks gray, flip or swap. Reloading the mop head with loosened grit can recreate haze.
– Work small sections: about one room section at a time prevents moisture from sitting at seams.
Step 3: Dry immediately
After the final wipe, use a clean, dry microfiber cloth to remove any remaining moisture—especially in edges and seams. Drying immediately is the difference between “cleanup” and “micro-swelling” where water can wick into the flooring gap system.
To keep this method efficient, use a two-cloth workflow: one damp cloth for residue, one dry cloth for final pull-off. It’s slower than mopping, but it’s materially safer for finishes and subfloor seams.
Dry-first vs. traditional wet mopping (why order matters)
| Method | Pros | Cons | Best for |
|---|---|---|---|
| Dry-first → barely-damp wipe → immediate dry | Lowers scratch risk; controls moisture exposure | Takes a bit longer than quick wet mopping | Dried dust, haze, and seam buildup |
| Wet mop first (skip dry lift) | Fast initial coverage | Spreads grit, dulls finish, and can over-wet seams | Only lightly soiled floors with no visible grit |
Stubborn spots: seams, corners, and edge buildup
Dried dust typically reappears in seams and along baseboards because particles collect where airflow and foot traffic slow down. The solution is to do targeted dry lift (and then a controlled, barely-damp wipe) rather than flooding edges.
Corners trap dust because airflow patterns and micro-circulation promote particle settling, so a single pass with a mop usually leaves a gray residue.
US EPA defines PM10 as particles smaller than 10 micrometers, which can migrate into small gaps and remain after quick surface cleaning.
Corners and along baseboards
Use a dry microfiber cloth first to pick up surface buildup. Follow with a lightly damp cloth only if needed—avoid flooding the line where baseboards meet the floor. If you see wetting creeping into gaps, stop and dry with a separate cloth.
Between boards and tight gaps
For residue that feels “stuck,” use a soft, non-scratching tool such as a soft nylon brush to lift the film. Then vacuum again with the soft attachment before you wipe.
This “lift → vacuum → wipe” loop prevents the common failure mode: wiping residue deeper into seams where it’s hard to remove and can dull the top finish as it accumulates.
Texture and detail areas
Textured floors and beveled edges often hold onto dust. Wipe with microfiber, and change to a clean section frequently so you’re not redepositing gray dust. If the detail is very tight, switch to a smaller microfiber cloth folded into a narrow edge to keep pressure controlled.
What can go wrong (and how to avoid it)
The most common problem is people scrubbing dried dust like it’s dried-on mud—turning grit into a micro-sanding tool. The second most common problem is introducing excess moisture, which can wick into seams and create damage over time.
According to wood engineering principles, wood moisture uptake toward the fiber saturation point (around 30% moisture content) can change dimensions, so over-wetting seams is risky.
In vacuuming, using abrasive tools or stiff brooms can redistribute grit; removal tools are intended to lift particles without grinding.
Scratching from gritty dust
If the dust feels sandy, don’t “scrub it out.” Vacuum first, then do the barely-damp microfiber wipe. Think of the first pass as “mechanical filtration,” not cleanup.
Damaging the finish with the wrong cleaner
Avoid:
– vinegar and other acids
– harsh degreasers
– abrasive cleaners or scrubbing powders
– cleaners intended for stone/ceramic instead of hardwood
These choices can dull sheen, haze the finish, or—on some surfaces—leave residues that attract more dust.
Water damage from over-wetting
Never steam-clean unless your specific finish manufacturer explicitly allows it. Steam adds heat and moisture simultaneously, which can drive water into seams and edges.
If you have unfinished/oiled floors, cleaning methods vary significantly by finish system and maintenance plan.
Verdict / tip: the safest approach for most hardwood
Use the dry-first → barely-damp wipe → immediate dry method. It’s the lowest-risk workflow for removing dried dust without dulling or scratching most finished hardwood floors, including common polyurethane and varnish systems.
As of 2026, the biggest improvement for most households is simply changing the order: vacuuming or dust-mopping before any water-based step. That single change prevents grit from turning your microfiber into an abrasive pad.
Downsides and who should skip this:
– If you suspect wax buildup, deep contamination, or an unfinished/oiled surface, a generic “wet wipe” can cause uneven sheen or residue issues—skip the wipe or follow the finish’s documented care method.
– If you see signs of moisture-related problems (cupping, lifting, or finish flaking), stop and consult the floor manufacturer or installer before adding any cleaner.
Manufacturer care guides generally require “use minimal moisture” for finished hardwood, because excess liquid can penetrate seams.
Quick checklist (save this)
| Task | Do | Don’t |
|---|---|---|
| First pass | Vacuum with a soft-brush attachment or microfiber dust mop | Use stiff brooms or abrasive scrub pads |
| Second pass | Use a lightly damp microfiber + pH-neutral hardwood cleaner | Soak the floor or leave it wet |
| Edges/seams | Use a soft nylon brush + vacuum again | Flood the gaps or soak baseboards |
| Final | Dry with a clean microfiber cloth | Let moisture sit until it air-dries |
Sources
– U.S. Environmental Protection Agency (EPA): PM2.5 and PM10 definitions (particle size thresholds).
– U.S. Department of Energy: HEPA filtration efficiency and particle-capture performance at 0.3 micrometers.
– USDA Forest Products Laboratory / wood science reference materials: Wood moisture behavior and fiber saturation point concept (~30%).
When hardwood looks dull with dried dust, the fix is usually not stronger cleaning—it’s better sequencing and controlled moisture. Lift loose grit first, wipe only with a barely-damp microfiber (preferably with a pH-neutral hardwood cleaner), and dry immediately, especially at seams and edges. If you confirm your finish type and follow the manufacturer’s moisture guidance, you’ll restore a cleaner look while minimizing the risk of scratches, haze, and long-term finish wear.
Frequently Asked Questions
What’s the safest way to remove dried dust from hardwood floors without scratching?
Start by dry-dusting with a microfiber mop or soft-bristle broom to pick up loose particles first. For dried dust that’s stuck, lightly dampen a microfiber cloth with warm water (or a hardwood floor cleaner) and gently blot the area instead of scrubbing hard. Avoid abrasive pads, steel wool, and overly wet mopping, since excess water can damage wood finish and leave marks.
How do I clean dried dust after vacuuming hardwood floors?
Vacuum thoroughly using a soft brush attachment, then inspect corners, edges, and along baseboards where dust collects. To lift remaining dried dust, wipe with a slightly damp microfiber cloth in the direction of the wood grain, then immediately dry with a clean cloth. If dust is gritty, use a hardwood-safe cleaner on the cloth (not poured directly onto the floor) and work in small sections.
How can I remove stubborn, crusty dust buildup on sealed vs. unfinished hardwood?
For sealed hardwood, you can use a mild hardwood floor cleaner and a microfiber mop/cloth to loosen dried dust without soaking the surface. For unfinished hardwood, use the gentlest approach first—dry dusting and light damp wiping only—because unfinished wood is more absorbent and can spot. If the dust is truly embedded, consider a very light wood-safe cleaner and test in an inconspicuous area to prevent discoloration.
Which cleaning products are best for dried dust on hardwood floors?
The best options are microfiber tools and a pH-neutral hardwood floor cleaner to avoid harming the finish. Skip harsh degreasers, vinegar-heavy solutions, and ammonia-based cleaners, which can dull or degrade some finishes over time. If you only have dust, a dry microfiber method is often enough; if it’s residue, a small amount of cleaner applied to the cloth helps lift dried dust safely.
Why does dried dust look streaky or feel gritty on hardwood, and how do I prevent it?
Dried dust often mixes with moisture from air, cooking, or HVAC cycling, forming a thin film that’s harder to lift and can leave streaks if wiped with dirty cloths. Use clean microfiber cloths/mop pads and change them frequently to avoid re-depositing dust. To prevent buildup, dust regularly with a microfiber mop and keep a no-shoe policy or mats at entrances to reduce tracked grit that can scratch hardwood when it dries.
📅 Last Updated: October 29, 2026 | Topic: How to clean dried dust from hardwood floors? | Content verified for accuracy and freshness.
References
- Wood flooring
- Lead Renovation, Repair and Painting Program | US EPA
- https://www.hud.gov/program_offices/healthy_homes/healthy_homes/lead
- https://www.cdc.gov/nceh/lead/index.htm
- https://pubmed.ncbi.nlm.nih.gov/?term=dust+removal+wet+mopping
- https://pubmed.ncbi.nlm.nih.gov/?term=hardwood+floor+cleaning
- https://pubmed.ncbi.nlm.nih.gov/?term=lead+dust+cleanup+floor+cleaning
- https://scholar.google.com/scholar?q=how+to+clean+dried+dust+from+hardwood+floors Google Scholar
- https://scholar.google.com/scholar?q=hardwood+floor+maintenance+dry+dust+removal+dust+mop+vacuum Google Scholar
- https://scholar.google.com/scholar?q=lead+dust+cleanup+floor+cleaning+wet+mopping+hepa+vacuum Google Scholar



[…] on hardwood floors by removing grit dry first, then using the least moisture possible with a damp microfiber mop and a hardwood-safe cleaner. For stubborn spots, spot-scrub with cleaner applied to the cloth (not […]