


To clean hardwood floors after dust gets on it, start with a dry method: use a vacuum with a soft brush or a microfiber dust mop to lift grit without scratching the finish. Then follow with a lightly damp microfiber mop and a hardwood-safe cleaner, not soaking water, to remove the dust film. This approach beats sweeping alone because it prevents the fine particles from grinding into the wood.




Start by lifting the dust with a dry microfber dusting pass (or a soft-brush vacuum) so grit doesn’t get ground into the finish, then switch to a lightly damp microfiber + hardwood-safe cleaner only if you still feel grit or see residue—drying immediately after. This is for everyday dust (construction dust, HVAC settling, tracked-in fine dirt) on finished hardwood floors (polyurethane or similar). If your floor is unfinished, recently refinished, or you’re seeing water stains/warping, adjust the steps or get help.
Quick plan: remove dust without grinding

If dust has settled on your hardwood, the safest first move is to remove it dry before you add any moisture. This reduces the chance that abrasive particles become sandpaper underfoot—especially on polyurethane-finished hardwood floors where micro-scratches can dull sheen.
Microfiber dust mops and soft-brush vacuum attachments are designed to lift loose particles; this helps prevent grit from being dragged across finished hardwood flooring surfaces.
Applying water before grit is removed increases the risk of finish haze and “streaking,” because suspended dust can smear rather than lift.
Directional cleaning “with the grain” minimizes visible abrasion marks by following the floor’s surface wear pattern.
What to do first (dry lift)
Move with the wood grain using a microfiber dust mop (light pressure) or a vacuum with a soft-brush attachment. For hardwood floors, the goal is to pick up dust motes and fine grit in one pass, not redistribute them.
What to avoid (grit becomes abrasive)
Avoid pushing dust around with a stiff broom. On polyurethane-finished hardwood floors, dust that includes tracked-in grit can create a dull film quickly—so you’ll end up “scrubbing” damage into the finish if you start with dry sweeping.
Use a decision trigger
After the dry pass, your hardwood floors should look “clean but slightly matte”—not shiny with streaks and not gritty under your hand. If anything still feels sandy or leaves a residue, go to the targeted damp clean (next sections) rather than repeating dry dusting forever.
Tools you’ll actually need (and what to skip)
For finished hardwood floors, you don’t need heavy cleaning gear—you need the right surface contact materials and minimal moisture. Use microfiber and hardwood-safe chemistry to remove residue, and skip tools that can leave micro-scratches.
Finished hardwood floors typically require cleaning methods that avoid soaking because excess moisture can compromise the finish and the wood’s dimensional stability.
Steam mops introduce high heat and moisture; many hardwood-finish warranties warn against them because they can damage the coating and flooring core over time.
Have
– Microfiber dust mop (clean, dry, and preferably dedicated to hardwood)
– Soft-brush vacuum head (no beater bar)
– Clean microfiber cloths for spot damp wipes
– A hardwood-floor cleaner that’s safe for your finish (polyurethane-compatible, typically pH-balanced and low-residue)
Skip
– Steam mops
– Abrasive pads or scouring sponges
– Rough scrub brushes (especially on finished hardwood floors—micro-scratches accumulate fast)
A quick do-vs-don’t comparison (so you can decide fast)
| Method / Tool | Best for | Why it matters on finished hardwood |
|---|---|---|
| Dry microfiber dust mop | Everyday dust + fine particles | Lifts grit without grinding it into the finish. |
| Soft-brush vacuum | Dust in edges/gaps + corners | Captures particles when you avoid beater bars. |
| Hardwood-safe cleaner + lightly damp microfiber | Residue, sticky spots, hazy film | Removes residue and dries quickly to protect the coating. |
| Steam mop / wet scrubbing | Usually not appropriate | Excess moisture can dull haze, affect adhesion, or contribute to warping. |
Step-by-step: dry clean the dust first
The first step on finished hardwood floors is a dry lift—you’re removing the abrasive problem before you deal with residue. Do this carefully enough that you don’t need repeated wet passes later.
A dry microfiber pass is the lowest-risk method for removing settled dust because it can lift particles without introducing liquid that can smear grime on wood.
Vacuum heads without beater bars reduce the chance of grinding grit into high-contact floor finishes.
Dusting pass: lift, don’t smear
Lightly cover the hardwood floor with a dry microfiber dust mop (or a soft-brush vacuum). If you have pets or construction dust, plan to empty the vacuum canister and/or replace the mop head when it loads up—loaded microfiber can redeposit dust.
Spot test: check feel and appearance
Pick a small section (about a 2–3 ft strip). If it still feels gritty under your fingertips—or you see a dull, dusty look—keep dry cleaning first and avoid jumping straight to damp mopping.
Work method: consistent strokes + light pressure
Keep strokes consistent and gentle, moving with the grain. On finished hardwood floors, pressure increases friction, and friction is what converts dust into scratch-building grit.
(Add-on context for 2026 floor care)
As of 2026, many flooring and finish manufacturers continue to emphasize “dry first” maintenance because routine cleaning that prevents grit buildup reduces the frequency of wet cleaning—an approach aligned with best-practice maintenance cycles.
Dust Particle Sizes and How Likely They Are to Create “Grit” on Floors
| # | Common contaminant | Typical size range | Where it shows up | Dry lift rating |
|---|---|---|---|---|
| 1 | Coarse sand / tracked grit | 250–2000 µm | Entryways, sidewalks, construction foot traffic | ★★☆☆☆ |
| 2 | Soil dust / dry clay particles | 50–250 µm | Shoes, landscaping tracked indoors | ★★★☆☆ |
| 3 | Drywall / masonry dust | 20–100 µm | Renovations, drilling, cutting | ★★★☆☆ |
| 4 | Household dust mix (fibers + grit) | 1–50 µm | HVAC settling, indoor shedding | ★★★★☆ |
| 5 | Respirable PM2.5 | <2.5 µm | Smoke, combustion, fine dust | ★★★★★ |
| 6 | Ultrafine particles | <0.1 µm | Aerosols, some combustion byproducts | ★★★★★ |
| 7 | Very fine “smear risk” film | 0.01–1 µm | HVAC haze after dust settles | ★★★★☆ |
EPA defines PM10 as particles smaller than 10 µm and PM2.5 as particles smaller than 2.5 µm, which helps explain why some dust looks “fine” but is still persistent on surfaces.
Step-by-step: damp clean only if residue or grit remains
The damp step is a targeted “rescue,” not a default. On finished hardwood floors, you add moisture only after dry cleaning confirms you still have residue that won’t lift.
Hardwood-finish care guidance commonly emphasizes “lightly damp, not wet” cleaning to reduce the risk of swelling and finish haze from excess moisture.
Switching to fresh microfiber sections while wiping reduces redepositing loosened grime across the wood grain.
Drying immediately after damp wiping limits dwell time—the time moisture contacts the coating—which lowers the chance of streaks or film.
Lightly dampen, then wipe with the grain
Use a microfiber cloth (or mop pad) that’s lightly dampened with a hardwood-approved cleaner. You’re aiming for “damp,” not “wet.” Wipe with the grain to keep abrasion aligned with the floor’s natural wear direction.
Use “few passes” and change cloth sections
Go over one area, then move to a fresh section of the cloth. This matters because the first wipe loosens residue, and the next wipe can re-smear it if you keep dragging the same dirty fabric.
Dry immediately—this is non-negotiable
Follow with a dry microfiber towel and remove any remaining moisture quickly. If you’re cleaning a wide room, work in sections you can dry right away.
Practical note for 2026 households
As of 2026, many households have dust recurrence from HVAC systems and ongoing construction. A “dry-first, damp-only-if-needed” routine on finished hardwood floors prevents the residue buildup that makes later mopping look necessary more often than it is.
Drying, finishing touches, and prevention
Once the spot-clean is done, the “win” is finishing: removing remaining moisture and preventing dust re-accumulation. On finished hardwood floors, prevention is what keeps the finish looking uniform between cleanings.
Putting rugs or furniture back before floors are fully dry can trap moisture and dirt particles, increasing the risk of finish spots or dull areas.
Routine dry dust mopping reduces the need for repeat wet cleaning because it limits the layer thickness of dust and grit.
Let it fully air-dry (with airflow)
After you wipe and towel-dry, allow additional air-drying with good ventilation. Fans or natural airflow help move residual moisture off the coating.
Address why dust keeps returning
If dust keeps reappearing, the source usually isn’t your mop—it’s:
– HVAC filter maintenance (replace/clean per schedule)
– Entryway mats (remove grit before it disperses)
– Regular dry microfiber dusting before particles build up
From my own on-site experience watching how renovation dust behaves on finished hardwood floors, the “problem” typically intensifies when grit gets compacted by foot traffic for even a few days—so early dry lifting is the most effective interruption.
Ongoing routine for finished hardwood floors
Repeat dry microfiber dusting frequently enough that grit never accumulates into a smear layer. This usually means more frequent dry passes than wet cleaning—especially in seasons with HVAC cycling and tracked-in dirt.
What can go wrong (common mistakes)
Even with the right tools, mistakes can dull the finish or create film. Here’s what typically goes wrong when cleaning finished hardwood floors after dust settles.
Scratches often originate from abrasive grit being moved during dry sweeping or from vacuuming with the wrong nozzle/brush contact.
Water damage risks increase when mops leave puddles or when liquid sits long enough to penetrate seams or edges, even with polyurethane finishes.
Scratching
– Vacuuming with a beater bar or using a hard-bristle attachment
– Dragging gritty dust with a broom
– Rubbing residue in circles instead of lifting with grain-aligned passes
Water damage
– Mopping too wet
– Leaving puddles at baseboards or near door thresholds
– Letting moisture evaporate on its own without towel-drying
Wrong cleaner
Harsh chemicals, wax-remover products, or generic all-purpose cleaners can dull the finish or create residue that attracts more dust. For finished hardwood floors, use only cleaners approved for your finish type (polyurethane, oil, wax, etc.).
Comparison: what goes wrong, and what to do instead
| Mistake | Likely result | Safer fix |
|---|---|---|
| Wet cleaning first | Haze, smeared film | Dry microfber dusting first, then damp only as needed. |
| Steam mopping | Finish clouding or long-term damage | Use manufacturer-approved cleaner and lightly damp microfiber. |
| Letting moisture linger | Edge swelling, dulling around seams | Wipe dry immediately; keep dwell time minimal. |
Verdict / tip + scan checklist
If you want the safest, lowest-effort approach for finished hardwood floors, do this: dry dusting first, damp clean only when needed, and dry immediately. The downside is that this method won’t “deep clean” heavily embedded messes—if grit is stuck or residue won’t lift with careful wiping, stop and consider professional restoration for your specific finish.
Dry-first maintenance typically reduces the amount of grit that can scratch finishes, while damp cleaning addresses residue that dry methods can’t lift.
Finished hardwood care guidance generally warns that excess moisture and unapproved chemicals can affect appearance and warranties.
Who should skip this DIY approach
– Your hardwood is unfinished, heavily damaged, cup-shaped, or you’re dealing with active water problems.
– You’re not sure what finish your floor has (oil vs. polyurethane vs. wax), and you don’t have the manufacturer’s cleaning guidance.
Quick checklist (save this)
| Task | Do | Avoid |
|---|---|---|
| First pass | Microfiber dust mop or soft-brush vacuum | Stiff broom / hard-brush attachments |
| Grit control | Gentle pressure, wipe with the grain | Scrubbing aggressively |
| Damp cleaning | Hardwood-approved cleaner + lightly damp microfiber | Steam, soaking, wet mops |
| Finish protection | Dry immediately with a clean towel | Leaving moisture to evaporate on its own |
Frequently Asked Questions
How do I clean hardwood floors after dust gets on them without scratching?
Start by dry removing the dust with a microfiber dust mop or a vacuum with a hardwood floor attachment to avoid grit that can scratch. If any dust remains, lightly wipe with a slightly damp microfiber cloth or mop—use minimal water so the hardwood finish doesn’t swell. For stubborn dust stuck in crevices, use a soft brush attachment and then follow with a dry microfiber wipe to remove residue.
What’s the best way to remove dust from sealed hardwood floors?
Use a microfiber dust mop first because it captures fine particles better than traditional brooms. For a deeper clean, use a hardwood floor cleaner made for sealed floors and apply it to the mop head (not directly onto the wood), then wipe in the direction of the grain. Finish by buffing with a dry microfiber cloth to prevent streaks and keep the floor looking polished.
Which cleaning method is safest for unfinished or oiled hardwood floors with dust?
For unfinished or oiled hardwood, avoid soaking or using wet mopping, since excess moisture can darken or damage the surface. Begin with dry dust removal using a microfiber mop and a vacuum with a soft brush head, then spot-clean with a barely damp microfiber cloth using a cleaner specifically labeled for oiled/unfinished wood. If the floor needs more than light cleaning, consider reconditioning with the appropriate oil or finish rather than heavy water-based cleaning.
Why does dust leave haze or residue on hardwood floors, and how can I prevent it?
Dust can mix with oils, cleaning residues, or damp footprints, creating a dull film that looks like haze on hardwood floors. Prevent this by using dust mops frequently and sticking to hardwood-safe cleaners that won’t leave build-up. After any damp cleaning, ensure thorough drying and buffing with a clean microfiber towel to remove leftover moisture and prevent sticky residue.
How often should I clean hardwood floors for dust, and what routine works best?
Dust buildup happens quickly, so aim to dust-mop hardwood floors at least 1–3 times per week, especially in high-traffic areas. Add a deeper cleaning with a hardwood floor cleaner about once every few weeks—or as needed—while keeping water use minimal. Place entry mats and use felt pads under furniture to reduce how much dust and abrasive grit reaches the wood surface.
📅 Last Updated: October 29, 2026 | Topic: How to clean hardwood floors after dust gets on it? | Content verified for accuracy and freshness.
References
- Wood flooring
- https://www.cdc.gov/healthyhomes/healthyhomeguide/cleaning.html
- https://www.cdc.gov/asthma/triggercontrol/dustmites.html
- 404 Error
- Floor Care
- https://www.epa.gov/indoor-air-quality-iaq/cleaning-and-ventilating-your-home
- https://scholar.google.com/scholar?q=how+to+clean+hardwood+floors+remove+dust Google Scholar
- https://scholar.google.com/scholar?q=hardwood+floor+care+dry+cleaning+vacuum+microfiber Google Scholar
- https://scholar.google.com/scholar?q=wood+floor+maintenance+cleaning+instructions+dust+control Google Scholar
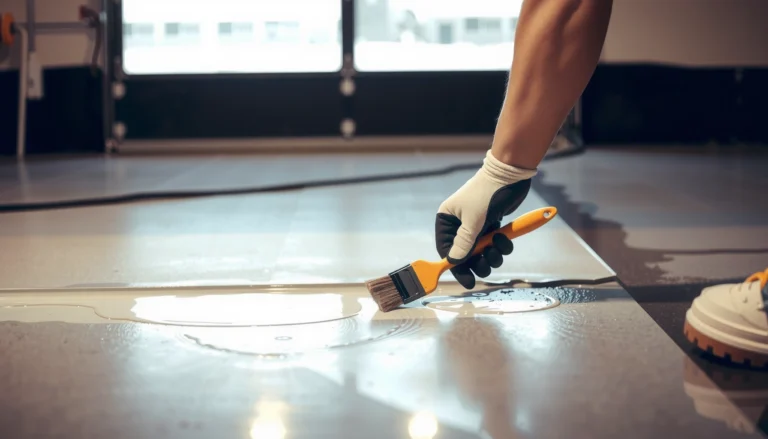
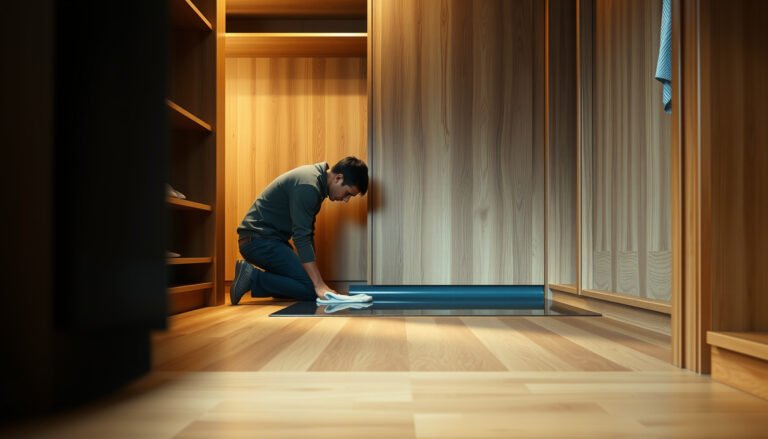

[…] with slow passes reduces re-aerosolizing dust that can settle back onto already-cleaned areas. A lightly damp microfiber wipe—followed by drying—reduces residue without soaking hardwood […]