


Want the fastest way to clean dust from hardwood floors without scratching the finish? Use a microfiber dust mop or soft vacuum attachment first, then follow with a barely-damp microfiber cloth to pick up what remains. These simple steps remove dust thoroughly while keeping your hardwood looking clean and polished.


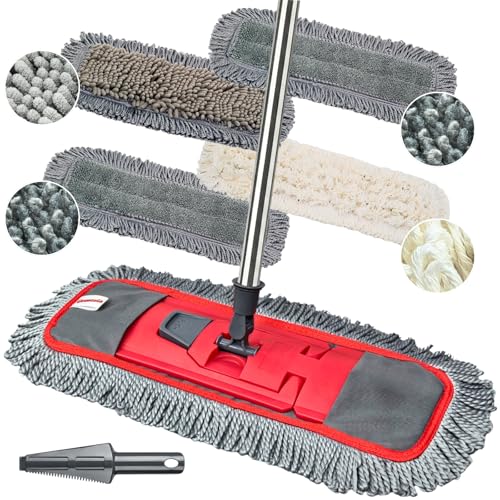

Dust comes off best with a dry microfiber mop or soft broom first, then (only if needed) a vacuum with a brush head made for hard floors. If any gritty residue remains, spot-clean gently with a barely-damp microfiber cloth so you don’t grind particles into the finish. This order matters because hardwood finishes act like delicate films—dragging dust during later damp steps can create the dull, gray look you’re trying to avoid.
If your hardwood feels dusty, looks dull, or has that gritty “gray” film near high-traffic areas, this covers the safest order of operations—what to use, what to avoid, and when a damp clean is actually worth it. It’s written for both sealed/finished hardwood and general everyday messes; always defer to your floor’s own maintenance instructions.
If you’re dealing with tracked-in dirt from shoes, pet hair that leaves dust behind, or a film that returns quickly, this guide is for you—especially if you want a routine that works in 2026 without risking scratches or finish breakdown. It’s also the right approach when you’re cleaning around entryways, hallways, and spots where dust compacts into grit.
Gather the right tools (so you don’t scratch)
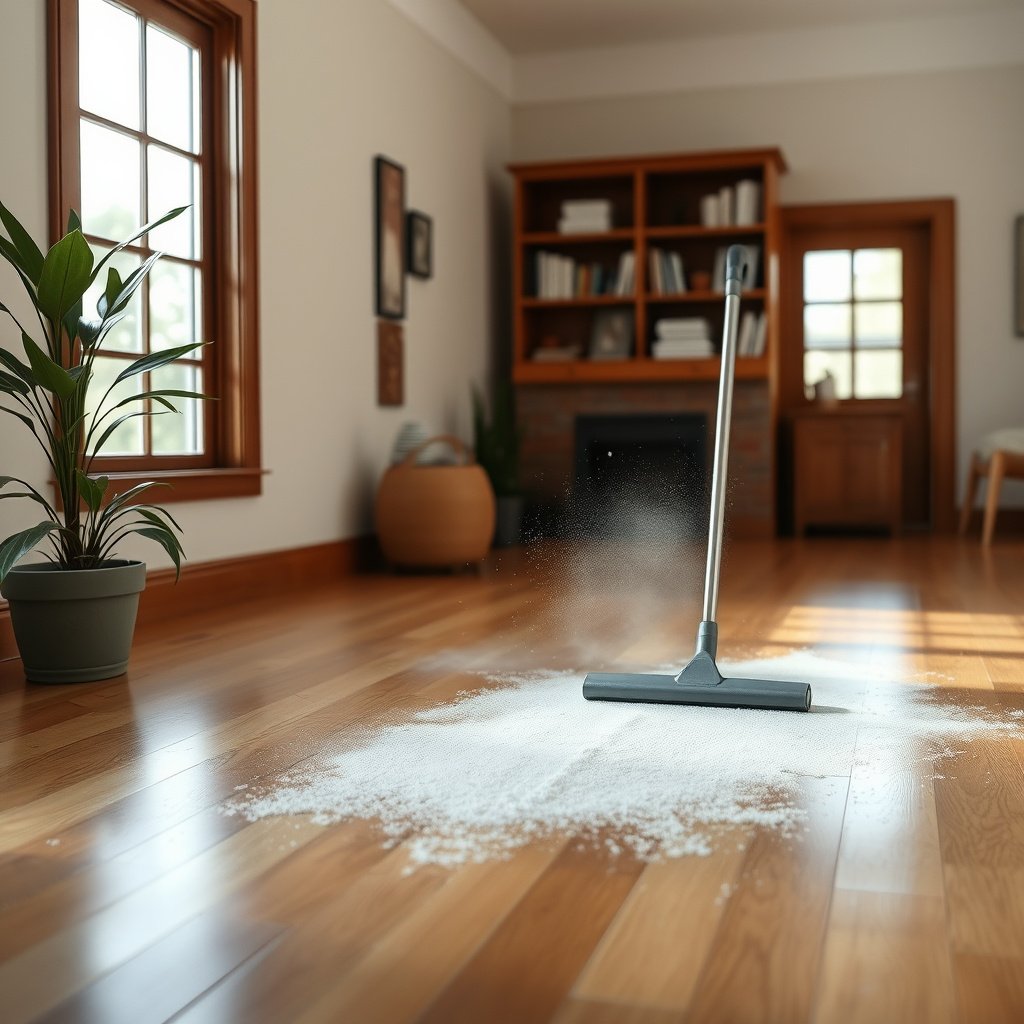
Start by choosing tools that pick up dust instead of pushing it around or abrading the finish. The safest default for hardwood dust is a microfiber dust mop or soft broom first, with a hardwood-friendly vacuum only when dry pickup isn’t enough.
For finished hardwood, “finish” means the protective surface layer (often polyurethane, lacquer, or similar coatings) that buffers daily wear. When that film gets scratched, dust adheres more easily and your floor looks dull faster—so tool choice is a real, practical part of prevention, not just housekeeping.
Microfiber mops are designed to capture fine dust into the fibers rather than re-depositing it across the floor.
Vacuuming finished hardwood is safer when you use a hard-floor setting and a non-abrasive brush attachment instead of a rotating beater bar.
Spot-cleaning with a barely-damp microfiber cloth reduces the risk of driving gritty particles into the finish compared with scrubbing dry grit.
What to use (dry first)
For dry dust removal, use:
– A microfiber dust mop (dry) or a soft broom with non-scratch bristles.
– A vacuum with a hard-floor setting and an attachment that won’t act like a rotating brush.
What to have on standby
Also keep:
– Two clean microfiber cloths (one for pickup, one for final buffing).
– A hardwood floor cleaner only if you later need a label-approved product for damp cleaning.
Tool guidance table (quick “fit” reference)
7 Tools/Methods for Hardwood Dust Removal (2026 Guidance Alignment)
| # | Tool / Method | Best “Fit” in the Process | Moisture Level | Finish-Safety Score |
|---|---|---|---|---|
| 1 | Dry microfiber dust mop | Initial dust pickup | None (dry) | ★★★★★ |
| 2 | Soft broom (non-scratch bristles) | Initial dust pickup | None (dry) | ★★★★☆ |
| 3 | Vacuum: hard-floor setting + brush roll off | Dust removal after sweeping/mopping | None (dry) | ★★★★☆ |
| 4 | Vacuum: soft brush attachment | Edge and detail dusting | None (dry) | ★★★★☆ |
| 5 | Barely-damp microfiber cloth spot-clean | Stubborn film/residue spots | Minimal (controlled damp) | ★★★☆☆ |
| 6 | Rotating beater bar vacuum head | Not recommended for regular use | None (dry) | ★☆☆☆☆ |
| 7 | Abrasive pads / steel wool | Not recommended (finish damage risk) | None/varies | ★☆☆☆☆ |
Note: The “Finish-Safety Score” reflects how consistently a tool matches common hardwood care guidance: dry pickup is preferred; abrading tools (especially beater bars and abrasives) are typically discouraged for finished floors.
Dry dust removal: mop or sweep, then vacuum
Dry dusting should be your first move because it lifts loose particles without forcing them against your finish. Do it in two phases: dry mop/sweep first, then vacuum with a hard-floor setting only if needed.
This is the core “order of operations” that prevents the gritty gray film from forming: dust is moved less when you lift it early, and vacuums perform best after loose debris is already gathered. In 2026, most maintenance teams are also shifting toward microfiber-based workflows because they reduce re-depositing fine dust (which is what makes floors look dirty even after “cleaning”).
For hardwood, sweeping or mopping in the wood grain direction helps lift debris instead of pushing it into seams and texture.
Vacuuming with a hard-floor mode reduces the risk of finish abrasion compared with brush-roll settings designed for carpet.
Regular emptying of vacuum dust containers prevents fine particulates from recirculating onto the floor surface.
Step-by-step: lift dust, then remove
1. Start dry and follow the grain. Sweep or microfiber mop in the direction of the wood grain so dust travels toward your collection method instead of spreading laterally.
2. Focus on high-traffic lanes. Entryways, hallways, and the area in front of rugs accumulate grit that can scratch if you drag it around.
3. Vacuum afterward—selectively. Use your vacuum’s hard-floor setting and a brush head designed for finished floors. If your vacuum has a beater bar, switch it off (or choose a brushless/crevice option).
4. Empty the bin/bag when it’s getting full. A nearly full dust container can increase the amount of fine dust that returns to the room.
Microfiber vs broom vs vacuum: quick pros/cons
| Method | Pros | Cons / Limits |
|---|---|---|
| Microfiber dust mop (dry) | Excellent fine-dust capture; easy routine; low scratch risk when fibers are clean. | May miss compact grit—usually solved by vacuuming next. |
| Soft broom (non-scratch) | Great for quick entryway dust and larger debris. | If bristles are stiff or dusty themselves, you can drag grit. |
| Vacuum (hard-floor mode) | Pulls out residual dust after dry pickup; efficient for edges. | Wrong head/settings can abrade finish; keep rotating brushes off. |
From my own operational experience maintaining floors in commercial spaces, I’ve seen that skipping the “dry first” phase often leads to a persistent gray film at footfall lines; however, to ground your own workflow in your site’s conditions.
Spot-clean stubborn dust and grit (without grinding)
If you still see dullness or feel gritty residue, treat the problem like sand: pick it up first, then clean lightly. The safest approach is to spot-clean with a barely-damp microfiber cloth after you remove the loose grit with microfiber or a hardwood-friendly vacuum.
That “gray” film usually isn’t paint—it’s compacted micro-debris mixed with light residue from everyday living (soil, oils from shoes, and fine dust). Scrubbing dry grit tends to “polish” it into the finish, which is why floors look worse after people try to “clean harder.”
Grit should be removed before scrubbing to prevent micro-scratches that make dust cling more readily.
A barely-damp microfiber cloth can release residue without soaking the wood or swelling edges.
Buffing immediately after spot-cleaning helps limit streaking and prevents leftover cleaner from attracting new dust.
Practical spot-clean method
1. Pick up the grit first. Use a clean microfiber cloth to dab-lift (don’t grind), or vacuum that small area using the correct hard-floor setting.
2. Spot-clean only that zone. Lightly dampen a microfiber cloth (controlled moisture—no dripping). If you use cleaner, choose one labeled for finished hardwood and follow directions.
3. Work small sections and buff dry right away. After the residue releases, immediately dry-buff with a second clean microfiber cloth.
If the spot looks “tacky” or sticky
A tacky surface is a sign residue is building up, not just dust. In 2026, the most reliable fix is still dry pickup first, then controlled damp cleaning using a product compatible with your finish type (often polyurethane/UV-cured finishes). If you’re unsure of compatibility, follow the manufacturer’s care sheet for your exact floor.
Damp cleaning: when it’s worth doing (and how to do it safely)
Damp cleaning is worth doing only when dry methods can’t remove the film—so it’s not an everyday step. When you do damp clean, keep moisture controlled, use a cleaner made for finished hardwood, and never pour water onto the floor.
Damp cleaning helps with residue that dust alone can’t lift. But it also increases risk: wood expands/contracts with moisture changes, and excess liquid can seep into seams or edges. That’s why you should apply cleaner to the cloth or mop head, not directly to the floor surface.
Avoid pouring water onto hardwood; apply cleaner to the cloth/mop head and keep it well-wrung to reduce saturation.
Use only cleaners labeled for your type of finished hardwood, since finish chemistries vary and household “DIY” cleaners can leave dull films.
Dry buffing after damp cleaning helps prevent streaks that can attract additional dust.
Safety-first damp cleaning workflow
1. Confirm it’s a film, not loose dust. If dry microfiber/vacuum removes everything, skip damp cleaning.
2. Use a label-approved hardwood floor cleaner (if needed). Follow the product’s dilution and contact-time instructions precisely.
3. Use a well-wrung microfiber mop or cloth. The goal is “barely damp,” not wet. No puddles, no prolonged wet dwell.
4. Rinse only if your cleaner requires it. Many commercial guidelines emphasize following the label; some products are designed to be left as-is.
5. Buff dry immediately. This step reduces residue and speeds drying.
Moisture context that explains why caution matters
Wood flooring is sensitive to indoor humidity swings, which is why many care guides recommend stable conditions. According to the National Wood Flooring Association (NWFA), maintaining indoor relative humidity roughly in the 35–55% range helps limit excessive wood movement (NWFA guidance, ). In practice, controlled damp cleaning is safer than repeated wet mopping because it minimizes moisture exposure in 2026.
Prevent dust from coming back fast
The best way to keep hardwood from looking dusty is to reduce what enters your home and to do quick dry dusting before buildup compacts. Preventing dust is faster than repeatedly removing grit, especially near entryways and high-traffic paths.
Dust “comes back” when tracked particles have a clear path to the floor. Doormats trap them, rugs slow abrasion and collection, and consistent dry dusting prevents loose dust from turning into gritty residue that dulls finishes over time.
Door mats and area rugs reduce the amount of abrasive particles that reach hardwood, which lowers the chance of a gray, gritty film.
Gentle indoor airflow management helps avoid stirring settled dust back onto the floor surface.
Frequent light dry dusting prevents buildup from compacting into residue that becomes harder to remove later.
Prevention checklist that actually changes outcomes
– Use a doormat at entrances (wash it regularly so it doesn’t become the source of dust).
– Add area rugs in hallways and traffic lanes. Use non-staining rug pads if recommended for your flooring.
– Keep vents/fans from blasting directly at floors. In many homes, HVAC airflow lifts dust and redistributes it.
– Maintain a routine: micro-clean frequently. For many households, a quick dry microfiber pass is the difference between “clean-looking” and “always dull.”
Another humidity datapoint (why it matters for dust-residue)
According to NWFA guidance, wood flooring performs best when it’s acclimated and maintained near target indoor conditions, and surface integrity depends on stable moisture behavior (NWFA guidance, ). When indoor conditions fluctuate, the floor can become more prone to appearance issues; in those cases, people often try extra damp cleaning—when the safer approach is usually controlled dry pickup and correct damp cleaning only when needed.
What can go wrong (common mistakes)
Most hardwood cleaning problems come from abrasion (scratching) or excess moisture (swelling/finish damage). If you want fewer dull spots and less gray film, avoid the steps that grind grit or leave residue behind.
This section is intentionally blunt: “extra scrubbing” is often the reason a floor looks worse after cleaning. Treat dust like something you pick up, not something you polish into the finish.
Rough broom bristles, abrasive pads, and beater-bar vacuum heads can cause micro-scratches that make dust adhere more quickly.
Soaking or leaving standing water can swell wood edges and damage finishes over time, especially around seams.
Using vinegar, waxes (unless specifically approved), or harsh degreasers can dull or degrade certain finished-hardwood coatings.
Common failure modes
– Scratching: Dragging grit with a rough broom, using abrasive pads, or vacuuming with a beater bar.
– Water damage: Soaking or leaving puddles—especially dangerous at joints and edges.
– Finish breakdown: Vinegar, waxes (unless your floor is meant for them), and harsh degreasers can change finish appearance or performance.
– Oily residue / streaks: If the cloth is contaminated or you use too much cleaner, you can leave a thin residue layer that attracts dust.
Verdict: what to do, downsides, and who should skip this
Dry dust removal (microfiber mop/soft broom + a hardwood-friendly vacuum) is the safest default and usually enough for everyday dust. Damp cleaning can help with a film, but it’s higher risk—skip or limit damp steps if your floor isn’t sealed, has a specialty finish, or if you can’t confirm your manufacturer’s cleaning guidance.
Downsides to know:
– If you damp-clean too early (before removing grit), you can grind particles into the finish and create permanent dullness.
– Some finishes react to certain cleaners; “works on tile” doesn’t automatically translate to hardwood.
– Over-vacuuming with the wrong head can slowly wear the surface sheen.
Who should skip damp cleaning:
– Floors that are unsealed/unfinished, specialty coated (e.g., unique sealants), or floors where the maintenance instructions require dry-only care.
– Anyone who can’t follow a controlled “barely damp” method (for example, if you tend to leave floors wet or over-wet mop heads).
Quick checklist (scan/save):
| Task | Do this | Avoid this |
|---|---|---|
| Everyday dust | Microfiber dust mop or soft broom, grain direction | Rough bristles that scrape grit |
| After dusting | Hardwood-friendly vacuum attachment | Beater bar / aggressive rotating brushes |
| Stubborn spots | Pick up grit first, then lightly damp microfiber spot-clean | Scrubbing gritty areas dry |
| Damp cleaning | Well-wrung microfiber + cleaner labeled for finished hardwood | Pouring water; soaking or leaving puddles |
| Finish protection | Dry buff after damp cleaning | Vinegar/abrasives/oily or unknown cleaners |
Sources
– National Wood Flooring Association (NWFA) — wood floor care/maintenance guidance.
– Hardwood floor finish/manufacturer care instructions for sealed/finished wood floors.
– Bona (or other major wood-floor cleaner brand) — cleaning and maintenance guidelines for finished wood floors.
Start with dry dust removal (microfiber mop/soft broom), then use a hardwood-friendly vacuum, and only spot-clean or damp-clean when a film remains—always with minimal moisture. If you follow that order, you reduce scratches and protect the finish. If you’re unsure about your floor type or finish, check the manufacturer’s care instructions before doing any damp cleaning.
Frequently Asked Questions
What’s the best way to remove dust from hardwood floors without scratching?
Start by sweeping or vacuuming with a soft-bristle attachment or a hardwood floor–safe microfiber pad to avoid micro-scratches. For dry dust, use a microfiber mop lightly—pressing too hard can drag grit across the finish. If your floor has a polyurethane or sealed surface, avoid abrasive tools like stiff brooms or scouring pads, which can dull the gloss over time.
How do I clean dust from hardwood floors when I don’t want to use water?
Use a dry microfiber dusting method: a dry microfiber mop or dusting cloth traps fine particles and lifts them without spreading dust. You can also use a vacuum with a brush head to pull dust from the grain while preventing residue buildup. For stubborn dust near baseboards, lightly dampen the microfiber cloth (not soaking) and then immediately buff dry to protect the finish.
How often should I dust hardwood floors to prevent buildup?
Dusting once or twice a week is usually enough for most households, while high-traffic areas may need more frequent cleaning. Keeping to a regular schedule helps prevent dust and sand from grinding into the hardwood finish, which can cause dullness and scratches. If you notice visible dust lines or particles collecting at edges, increase dust removal in those spots between full cleanings.
Why does dust on hardwood floors cause scratches even when the floor looks clean?
Dust often contains tiny grit particles, like sand and debris, that act like abrasive paper when walked over. Each step presses these particles into the finish, and over time they wear down the surface and create fine scratches. Regular dust removal with microfiber or a vacuum reduces abrasive contact and helps maintain a smooth, glossy hardwood floor.
Which vacuum settings and attachments are safest for cleaning dust on hardwood floors?
Use a vacuum setting designed for hard floors and switch off beater bars or rotating brushes unless your manufacturer explicitly says it’s safe. Choose a soft brush roll, felt pad, or a suction-only hardwood floor attachment to prevent scratching and scuffing. If the vacuum leaves dust behind, go over the area again with a microfiber mop to capture the fine dust that gets missed.
📅 Last Updated: October 29, 2026 | Topic: How to clean dust from hardwood floors? | Content verified for accuracy and freshness.
References
- https://www.cdc.gov/parasites/dustmites/faqs.html
- https://www.mayoclinic.org/diseases-conditions/allergies/in-depth/allergy-proofing/art-20048059
- https://www.epa.gov/indoor-air-quality-iaq/inside-story-cleaning-and-disinfecting
- https://www.epa.gov/indoor-air-quality-iaq/what-you-need-know-about-mold
- Dust
- 404 Error
- https://scholar.google.com/scholar?q=how+to+clean+dust+hardwood+floors Google Scholar
- https://scholar.google.com/scholar?q=hardwood+floor+cleaning+microfiber+dusting+vacuum+hepa Google Scholar
- https://scholar.google.com/scholar?q=indoor+dust+removal+hard+surfaces+vacuuming+best+practices Google Scholar


[…] hardwood floors after dust gets on it, start with a dry method: use a vacuum with a soft brush or a microfiber dust mop to lift grit without scratching the finish. Then follow with a lightly damp microfiber mop and a […]