


You can clean fresh dirt from hardwood floors fast—without scratching—if you follow the right order: dry removal first, then a barely damp mop. This guide shows the quickest, safest method to lift gritty particles, rinse residual film, and prevent discoloration. If you want the cleanest finish with the least risk, this is the approach to use.




If you’ve got fresh dirt on hardwood, the fastest safe move is to dry-pick it up first, then clean with a barely-damp microfiber and a hardwood-safe cleaner (not soaking water). The goal—especially in 2026—is to remove grit before it abrades the finish, then eliminate any soil residue and dry immediately so you don’t dull the sheen over time.
This advice is for anyone dealing with newly tracked-in mud or dirt on finished hardwood—particularly when it’s still loose and hasn’t been pressed into the surface. If the dirt is already wet, sticky, or oily, the steps below still help you limit spreading, but you’ll want to work even more quickly and avoid scrubbing while the material is abrasive.
Step 1: Remove fresh dirt without grinding it in

Start by lifting the loose material without rubbing it. This prevents gritty particles from acting like sandpaper against your polyurethane (or other) finish.
Loose dirt is most likely to be removed dry. In 2026, the most reliable approach is to think “lift, don’t sweep hard.” A soft broom, microfiber dry-sweeping pad, or a vacuum with a soft floor brush reduces scratch risk because you’re minimizing friction while the particles are still airborne/loose instead of embedded.
Fresh, loose debris should be dry-lifted first because grit is abrasive and can scratch the hardwood finish if you wipe too soon.
Vacuum heads designed for hard floors (soft brush/low-aggression attachments) reduce the chance of grinding fine particles into a protective topcoat.
What “dry-lift” looks like (and what to avoid)
– Gently sweep in small sections using a soft-bristle broom or a dry microfiber pad.
– Use a vacuum with a soft brush when you have fine sand-like dirt (it captures more particles than a broom alone).
– Avoid aggressive scrubbing with a dry rag—cloth can trap grit and drag it across the finish.
Why grit is the real problem (abrasive risk)
Even “small” grit can abrade finishes, especially early in the day after track-in mud. Mineral hardness is one reason: quartz-based sand is extremely hard, so dragging it—even lightly—can create micro-marring.
According to USGS explanations of mineral hardness using the Mohs scale, quartz scores 7 on the Mohs hardness scale (1812).
According to USGS mineral hardness explanations, calcite scores 3 on the Mohs hardness scale (1812).
According to USGS mineral hardness explanations, feldspar typically scores about 6 on the Mohs hardness scale (1812).
Abrasive Components Common in Tracked-In Dirt (Mohs Scale)
| # | Tracked dirt component | Typical mineral | Mohs hardness | Priority to dry-lift |
|---|---|---|---|---|
| 1 | Road/sandy grit | Quartz | 7 | ★★★★★ |
| 2 | Windblown dust with sand | Feldspar | 6 | ★★★★☆ |
| 3 | Gravel fines | Hematite/iron oxides | 5–6 | ★★★☆☆ |
| 4 | Limestone dust | Calcite | 3 | ★★☆☆☆ |
| 5 | Clay-rich track-in | Clay minerals | ~1–2 | ★☆☆☆☆ |
| 6 | Cinder/ash flecks | Silicates | ~5 | ★★★☆☆ |
| 7 | Mixed soil with grit | Varies (sand + clay) | Often 2–7 | ★★★★☆ |
Step 2: Vacuum or sweep, then spot-check edges and corners
A second pass is what keeps you from “cleaning the middle and leaving the damage” around seams. After the first lift, you should spot-check edges, corners, and door zones before any moisture touches the floor.
Dirt doesn’t distribute evenly. In real homes (and in many commercial entryways), tracked material concentrates near baseboards, floor vents, and thresholds where shoes pivot and drag. If you miss those areas, later foot traffic can move remaining grit outward, turning a small spot into a broader dull patch.
Hardwood cleaning guidance commonly emphasizes removing debris from seams and edges before using liquids, because trapped grit can be redistributed later.
Spot-checking with strong side lighting helps you see residual grit that isn’t obvious under normal overhead lighting.
Quick walk-through method (2 minutes, no tools)
– Stand 1–2 feet back and look for tiny specks with light at a shallow angle.
– Run your hand lightly (clean, dry) along the seam line and near the baseboard—if grit comes up, remove it dry first.
– If you have a vacuum, use the hose/crevice tool at corners rather than blasting dirt across the room with suction alone.
Where to check first
– Near exterior doors and interior thresholds
– Along cabinet toe-kick edges and the long walls where people walk
– Under movable furniture bases where dirt collects then gets ground into the finish when furniture shifts
Step 3: Clean with minimal moisture (microfiber + hardwood-safe cleaner)
Once the loose grit is removed, you can clean—briefly and lightly—so you remove soil residue without soaking the finish or driving water into the joints.
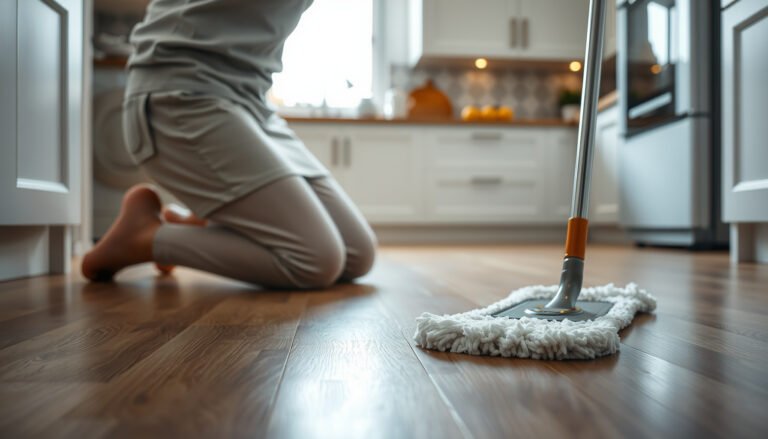
The safest default is a barely-damp microfiber cloth paired with a hardwood floor cleaner designed for finished wood. Barely-damp means the cloth leaves almost no visible wetness; you’re transferring a small amount of solution to lift remaining soil, not flooding the surface.
For finished hardwood, many manufacturer and trade guidelines recommend using a damp (not wet) microfiber and avoiding soaking or standing water.
Cleaning with products labeled for “finished hardwood floors” is safer than using generic degreasers or vinegar-based mixes that may not be compatible with your coating.
How to wipe without streaking or pushing dirt
– Use microfiber: fold it so you have multiple clean faces to work the spot.
– Wipe with the grain (directionally) to reduce the chance of lifting finish edges.
– Work small: wipe the affected area, then immediately wipe again with a clean, lightly damp section if needed.
– Use the right cleaner: only what your floor manufacturer approves for your finish type (polyurethane, urethane, oil, etc.).
Cleaners to approach carefully
– Avoid harsh degreasers unless your finish spec explicitly allows them.
– Be cautious with vinegar and “natural” acids: they’re sometimes recommended online, but compatibility depends on finish chemistry.
– Skip steam entirely for most finished hardwood floors.
If you’re unsure about compatibility, start with your floor’s care sheet, then confirm the cleaner label matches that finish type.
Step 4: Dry immediately to protect the finish
Drying is not optional—it’s the difference between “spot-cleaned” and “permanently dulled.” As soon as you finish wiping, buff dry to remove moisture film before it reaches seams.
Water exposure can change how finishes look, and—depending on the flooring construction—excess moisture may contribute to edge breakdown or swelling over time. Even if the floor doesn’t warp today, repeated damp wiping is a common path to a dull, hazy surface in high-traffic zones.
After damp cleaning, removing residual moisture with a dry microfiber helps prevent dulling caused by leftover film in wood seams.
Airflow (fans) speeds drying and reduces the time liquids remain in edges and joints.
Practical drying steps
– Buff dry immediately with a clean, dry microfiber towel.
– Keep fans on for a short period, especially near doorways or floor registers.
– Don’t place rugs immediately over freshly cleaned spots if they trap moisture.
What can go wrong (and how to avoid it)
Even the right product can fail if the process goes out of order. The most common issues are abrasive grit still being present, using too much water, and using a cleaner not approved for your finish.
Here’s where the risk usually shows up:
– Rubbing grit into the finish: wiping before debris is removed can dull the sheen quickly.
– Too much water: soaking or leaving puddles can weaken protective layers and raise the chance of finish clouding.
– Wrong cleaner: chemicals that strip or soften coatings can leave uneven gloss.
– Staining from wet mud: mud often carries dark soil and minerals; delaying cleaning can make residue harder to remove.
Comparison: what to do vs. what to avoid
| Approach | What happens | Best use |
|---|---|---|
| Dry-lift → barely-damp microfiber → buff dry | Removes abrasives first, then cleans without soaking, and prevents moisture film. | Fresh track-in dirt on finished hardwood (most cases). |
| Wet mop or soaking cloth | Spreads grit and adds excess moisture, increasing dullness/edge stress risk. | Usually not recommended for finished hardwood. |
| Acid/alkaline cleaners not approved for your finish | Can haze, strip gloss, or leave residue you’ll see later. | Only if manufacturer specifically approves. |
Standing or excess water is a common root cause of finish dulling and joint swelling concerns in wood flooring guidance.
When mud is still abrasive, scrubbing can create micro-scratches that aren’t fully removable without refinishing.
Special case: mud that’s becoming paste
If the dirt is transitioning from loose to sticky paste, the safest strategy is:
1) Lift dry surface clumps gently,
2) Blot any remaining moisture (don’t smear),
3) Then use a barely-damp microfiber for residue, followed by immediate buff-drying.
If the spot has already dried hard, you may need extra careful spot treatment and possibly a product recommended for that specific buildup—follow your floor manufacturer’s guidance.
Verdict / tip
The safest default is exactly this sequence: dry-pick up first, then clean with a barely-damp microfiber and a hardwood-safe cleaner, and dry immediately. It’s conservative, works across most finished hardwood finishes, and minimizes abrasion.
The downside is that this approach relies on the dirt being fresh enough to lift and not fully embedded. If the mud is already smeared into a paste, baked on, or mixed with heavy staining minerals, you may need a more targeted method (still minimal moisture) and extra patience.
Skip this method—or at least adjust it—if your floor is unfinished, heavily worn/peeling, or you can’t confirm what finish is on it. In those cases, moisture and cleaners behave differently, and the safest route is to follow the flooring manufacturer’s written care instructions or consult a professional.
Using minimal moisture with microfiber aligns with common finished hardwood care guidance to reduce the chance of haze or finish breakdown.
Order matters: removing grit before wiping reduces the likelihood of micro-scratches from abrasive particles.
Quick checklist (scan/save)
– ☐ Dry-pick up loose dirt (sweep or vacuum with soft brush)
– ☐ Check corners/seams; repeat removal if grit remains
– ☐ Wipe with barely-damp microfiber + hardwood-safe cleaner
– ☐ Wipe dry right after cleaning
– ☐ Don’t use soaking water or harsh/unknown cleaners
Dry-lift first prevents abrasive particles from being dragged across the wood finish during wiping.
Sources
– National Wood Flooring Association (NWFA) — Care and maintenance guidance for cleaning finished wood floors (including avoiding soaking/over-wetting).
– USGS — Mineral hardness information used to explain the Mohs hardness scale referenced in abrasive risk discussions.
– If you share the brand/model or finish type (e.g., prefinished vs unfinished, oil vs polyurethane), I can help point you to the exact official care spec—
Fresh dirt on hardwood is easiest to manage when you act like a “grit removal first” professional: lift debris dry, wipe with minimal moisture using a hardwood-safe cleaner, and buff dry right away. Do that, and you’ll remove the soil without trading one problem (mud) for another (dullness or micro-scratches) as traffic continues through your space in 2026 and beyond.
Frequently Asked Questions
What’s the best way to clean fresh dirt off hardwood floors without scratching?
Sweep or vacuum first using a soft brush attachment to remove loose grit before it grinds into the wood finish. For fresh dirt, lightly dampen a microfiber mop with clean water (or a hardwood floor cleaner) and wipe in the direction of the grain. Avoid soaking the floor, and dry with a clean microfiber towel immediately after cleaning to prevent moisture from seeping into seams.
How do I remove muddy footprints or wet dirt tracked onto hardwood floors?
Let the mud or dirt dry slightly if it’s very wet, then gently scrape off excess with a plastic scraper or a soft cloth. Next, wipe with a damp microfiber mop using a hardwood-safe cleaner diluted according to label directions, then rinse with a lightly damp cloth if the product calls for it. Dry thoroughly right away, because standing moisture can dull or warp hardwood floors and loosen finish over time.
How can I get rid of grit that’s already stuck in the finish of hardwood?
Start by loosening particles with dry dusting—use a vacuum or dry microfiber cloth—before applying any liquid. If residue remains, use a slightly damp microfiber cloth with a small amount of pH-neutral hardwood floor cleaner, applying gentle pressure rather than scrubbing hard. For stubborn spots, repeat the process in small steps; aggressive scrubbing and abrasive pads can damage the finish and leave visible scratches.
Why is it important to clean fresh dirt quickly on hardwood floors?
Fresh dirt often contains abrasive particles like sand and tiny stones that can scratch hardwood finishes when walked on or wiped in with a wet mop. Moisture from mud and cleaning liquids can also seep into joints and edges, leading to swelling, cupping, or dulling. By cleaning dirt promptly with safe methods, you protect the floor’s finish and help maintain its appearance.
Which cleaning products are safest for hardwood floors when dealing with dirt?
Use pH-neutral, hardwood floor–approved cleaners and microfiber mops or cloths to avoid damaging the finish. Avoid harsh chemicals like vinegar, ammonia, bleach, or all-purpose degreasers, as they can strip or haze protective coatings. If you’re unsure, test any cleaner in an inconspicuous area first, and always follow label dilution instructions for effective dirt removal without harming your hardwood.
📅 Last Updated: October 29, 2026 | Topic: How to clean fresh dirt from hardwood floors? | Content verified for accuracy and freshness.
References
- Wood flooring
- 404 Error
- https://www.armstrongflooring.com/residential/en-us/support/maintenance-and-care/hardwood.html
- https://www.woodflooring.com/care-and-maintenance/cleaning/
- https://www.mayoclinic.org/healthy-lifestyle/adult-health/in-depth/household-hygiene/art-20044851
- https://scholar.google.com/scholar?q=how+to+clean+fresh+dirt+from+hardwood+floors+without+damaging+finish Google Scholar
- https://scholar.google.com/scholar?q=wood+flooring+cleaning+microfiber+vacuum+moisture+effect+on+finish Google Scholar
- https://scholar.google.com/scholar?q=hardwood+floor+cleaning+agents+detergent+abrasive+damage+study Google Scholar
[…] the finish? Use a microfiber dust mop or soft vacuum attachment first, then follow with a barely-damp microfiber cloth to pick up what remains. These simple steps remove dust thoroughly while keeping your […]
[…] or vacuum attachment to lift grit without scratching, then follow with a lightly damp mop using a hardwood-safe cleaner. If you have thick dust buildup, a quick rinse-and-dry pass beats scrubbing because it removes […]