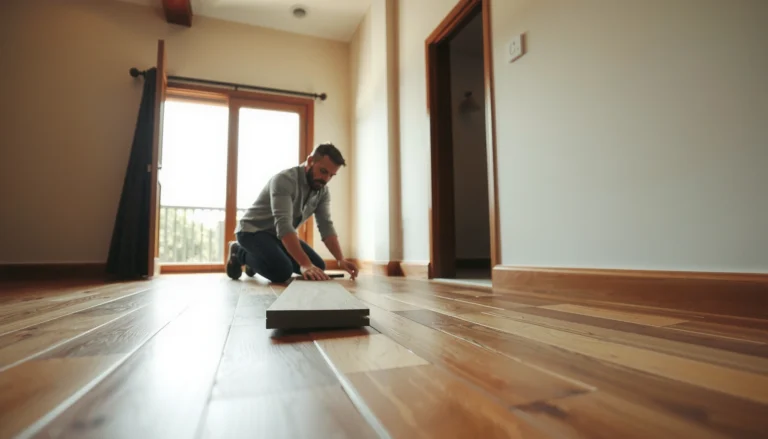
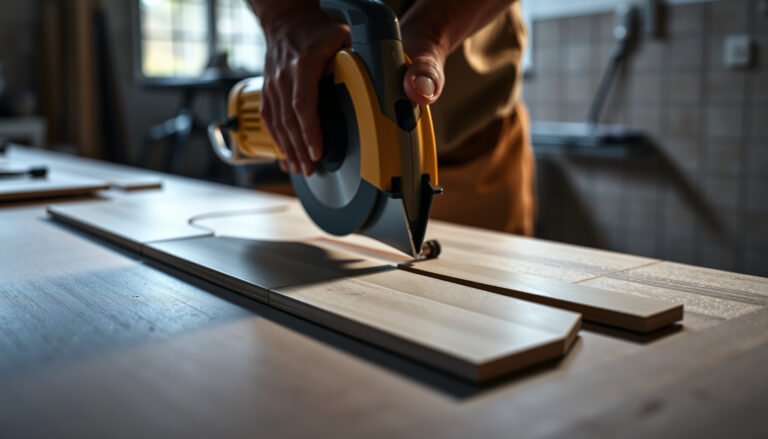
Install vinyl floors on a balcony with confidence using this step-by-step guide that takes you from subfloor prep to finishing trims. If you have a balcony with a stable, properly leveled surface, this is the fastest path to a clean, water-resistant floor install without professional tools. You’ll see exactly what to do before you click or glue the planks down—so the job holds up through weather and foot traffic.




You can install vinyl floors on a balcony only if your exact vinyl product is specifically approved for outdoor/wet-area conditions (and you follow the manufacturer’s moisture protection, expansion gap, and transition details). If you choose correctly and prep the subfloor properly—especially flatness and vapor/moisture control—vinyl can perform much better than “lay it and hope,” even in sun and rain exposure.
This guide is for homeowners refreshing balcony flooring who want a practical, safer approach than guessing. It’s especially relevant if your balcony sees regular rain, condensation, or direct sun—because vinyl performance is tightly linked to the manufacturer’s approved temperature/UV limits and installation requirements.
Check the balcony suitability and pick the right vinyl

If your vinyl is not explicitly rated for balcony/exterior/wet-area use, it’s usually a bad bet—because temperature swings, UV, and ongoing moisture exposure can degrade materials and adhesives. The fastest way to avoid failure is to confirm the product’s rated use case first, then choose the correct installation method the manufacturer allows.
“Outdoor / wet-area rated” is an installation eligibility condition, not a marketing claim—check the installation guide/spec sheet for the exact approved environments.
Vinyl flooring warranties commonly require adherence to listed temperature ranges, moisture/vapor requirements, and expansion-gap rules.
Choose the installation method (floating click-lock vs glue-down) only if it matches what your specific product manual allows for that use environment.
Confirm rating, temperature range, and UV limits
Start by verifying the flooring is explicitly described as:
– “exterior,” “balcony,” “outdoor,” “wet areas,” or equivalent language in the installation instructions
– within the allowed temperature range (and any freeze/thaw limitations, if applicable)
– within the product’s sunlight/UV exposure limits (some products are designed for interior light only)
According to ASTM standards used in resilient floor testing frameworks, performance claims for resilient flooring are tightly linked to environment and installation conditions (for example, moisture and subfloor requirements are treated as governing variables).
Decide: click-lock (floating) or glue-down
Balconies are one of the trickiest environments for vinyl because the floor system experiences movement from thermal expansion and airflow-related condensation. That means you must match your vinyl type to the method it’s designed for:
– Click-lock (floating): typically relies on correct expansion gaps and a stable, flat substrate so the locking joints aren’t stressed.
– Glue-down: relies on compatible adhesive chemistry and a controlled moisture/vapor plan so adhesive bond and substrate stability hold up.
Floating vinyl relies on perimeter movement; if you don’t leave the required gap, joints can buckle or separate during temperature swings.
Only proceed if the subfloor won’t trap water
Even if the vinyl is “waterproof” against spills, ongoing moisture trapped under the flooring layer can still cause problems—especially mold risk and adhesive/substrate failure.
Rule of thumb: if water can realistically reach the slab (rain intrusion, railing leaks, poor drainage), you need a moisture protection system that prevents trapped water and supports drainage.
Gather materials and tools that match your vinyl type
The materials you choose should match your vinyl’s installation system, not just its click pattern or thickness. The wrong underlayment, adhesive, or transition hardware can create failures even when the vinyl itself is rated correctly.
For glue-down vinyl, use the manufacturer-approved adhesive (including required trowel/notch and spread/open-time rules) to meet performance expectations.
For floating click-lock vinyl, use only the approved underlayment and moisture/vapor layers (or none, if the manual says so) to avoid seam/lock joint stress.
For click-lock (floating) vinyl
Typical items include:
– the approved underlayment (or “no underlayment” if specified)
– any required vapor/moisture control layer per the product manual
– spacers to maintain the perimeter expansion gap
– a straightedge/chalk line for layout and a suitable cutter for LVP/LVT (score-and-snap or a fine-tooth blade per the manual)
For glue-down vinyl
Typical items include:
– manufacturer-approved adhesive
– the specified trowel/notch size (adhesive spread rate matters for bond)
– seam/edge and transition components if required by the system
– edge finishing supplies (trim/thresholds) designed to accommodate movement
Core tools (for either type)
Have these ready before you start:
– measuring tape, chalk/marker, and a long straightedge
– spacers sized to your required expansion gap
– a clean shop vacuum and broom
– PPE and ventilation appropriate for cutting and (if glue-down) adhesive use
Prepare the balcony subfloor (this is the make-or-break step)
Subfloor preparation determines whether the locking joints hold up (floating) or whether the adhesive bond survives (glue-down). On balconies, prep must also address moisture and drainage paths, not just cleanliness and flatness.
Vinyl installations are sensitive to substrate flatness; many resilient flooring manuals require a tight “maximum deviation” tolerance to prevent joint stress and telegraphing.
Moisture control is governed by the flooring system’s testing method and limits (often referencing ASTM test methods), especially when water can reach the slab.
Before installation, remove everything that prevents adhesion or prevents a stable floating base—old adhesive residue, loose coatings, and high/low spots.
Clean and inspect
Remove:
– loose debris, dust, grit
– old adhesive residue (for glue-down), paint overspray, flaking coatings
– anything that prevents a stable bond (glue-down) or stable flat support (floating)
Achieve the required flatness tolerance
You must follow your specific product’s required flatness limit. Use the exact figure from your vinyl’s installation guide:
– Flatness requirement (insert from your manual):
As a practical note, balconies often have variations from slab finishing, waterproofing overlaps, and drainage slopes—so check with a straightedge and feeler gauge rather than assuming “looks flat” is enough.
Plan moisture and drainage (test and protect)
If water can get to the slab, follow the flooring system’s moisture/vapor guidance. Common references include:
– ASTM F2170 (In-Situ Relative Humidity probes) and/or
– ASTM F1869 (Calcium Chloride test)
According to resilient floor moisture practices tied to ASTM methods, concrete moisture testing is used to determine whether the substrate meets the flooring system’s allowable limits.
Also verify drainage: water needs a path to run off rather than collect at the flooring layer. If the balcony waterproofing or slope is questionable, address that first—vinyl doesn’t replace an exterior waterproofing system.
Install vinyl floors on a balcony (floating vs glue-down)
This is where you translate the manual into real field steps—layout, expansion gaps, and the correct bonding method. Do it correctly, and vinyl can handle the balcony’s movement; do it generically, and you increase the risk of joint separation and moisture-related failure.
Maintain the manufacturer’s required perimeter expansion gap; resilient floors expand/contract with temperature and humidity, even outdoors.
Floating click-lock vinyl should not be permanently adhered unless the product instructions explicitly allow it.
Glue-down installations must respect adhesive open time so the flooring bonds while adhesive is workable.
Start with layout planning
Before cutting:
– dry-fit rows
– plan around door thresholds and any railing/wall intersections
– keep the required perimeter expansion gap
Use the exact expansion gap guidance from your installation instructions:
– Expansion gap requirement (insert from your manual):
Click-lock (floating) approach
For click-lock balcony installations:
– Follow the locking method exactly (board angle/engagement steps as described).
– Keep cuts clean—jagged edges and off-square cuts increase seam stress.
– Do not add extra adhesives to lock joints unless the manual explicitly permits it.
Glue-down approach
For glue-down:
– Spread adhesive only over the area you can cover within the adhesive’s required open time:
– Adhesive open time guidance (insert from adhesive spec):
– Press boards/planks as directed and keep alignment consistent.
– Remove squeeze-out residue before it cures if the manual warns it can interfere with trims/transitions.
Seam and stagger requirements
Resilient plank/vinyl systems require specific staggering patterns and minimum offsets to manage joint integrity.
– Offset/stagger requirement (insert from your product guide):
Keep the working environment clean and dry
Even if vinyl is water-resistant, installation dust and debris can compromise:
– click-lock joint engagement (floating)
– adhesive bond performance (glue-down)
Seal edges and transitions to reduce water intrusion
The biggest balcony failure risk often isn’t the vinyl panel—it’s how water gets behind it at edges, thresholds, and corners. Proper perimeter detailing and transition systems protect the installation from persistent wetting and trapped moisture.
Balconies need movement-tolerant perimeter detailing; rigidly pinning vinyl where it must expand/contract increases buckling and seam stress.
Seal only areas your manufacturer approves for your flooring system to avoid trapping moisture underneath.
Use the correct transition and trim profile so water sheds rather than pools at junctions.
Use the right trim/transition system
You typically need:
– perimeter edging/trim sized for your flooring thickness
– threshold details where the vinyl meets doors or interior surfaces
– corner trims and wall/rail interfaces that respect movement
Match components to the flooring thickness and the manual’s recommended edge system.
Seal what’s approved—don’t create a moisture trap
Follow the manufacturer’s sealing map and approved materials:
– Sealing/trim guidance reference:
In general, improper sealing can prevent evaporation and turn a “water-resistant” design into a moisture-retention problem.
Don’t defeat expansion
Balcony conditions swing with sun and temperature. Every perimeter or junction detail should be movement-aware:
– respect the expansion gap
– use trim that allows the system to move without compressing joints
What can go wrong (and how to avoid it)
Most balcony vinyl failures trace back to one of five issues: wrong product rating, poor flatness, missing expansion gaps, inadequate moisture planning, or incorrect edge sealing. Treat those categories as your risk checklist and you’ll eliminate the majority of preventable problems.
Many vinyl products are designed to resist spills, not to serve as a fully exterior floor under UV and freeze/thaw extremes.
Subfloor bumps can cause floating click-lock seams to fail over time by concentrating stress at the joints.
Common failure modes (and how to reduce risk)
1) Vinyl not rated for balcony conditions
– Risk: UV degradation, edge curling, lock joint problems, or adhesive/substrate failures.
– Avoid: only proceed when the manufacturer states balcony/outdoor/wet-area approval.
2) Poor subfloor flatness
– Risk: click-lock seam separation or glue-down bond failure.
– Avoid: follow the exact flatness tolerance from your manual:
– Flatness tolerance:
3) Missing expansion gaps
– Risk: buckling, gapping seams, and separation during thermal cycles.
– Avoid: measure and install spacers—then remove them on schedule.
4) Improper moisture management
– Risk: moldy buildup, adhesive failure (glue-down), or substrate deterioration.
– Avoid: follow ASTM-based testing guidance where required by the manufacturer, and install approved vapor/moisture layers.
5) Sealing mistakes
– Risk: trapped moisture at edges/corners.
– Avoid: only seal the areas the manufacturer approves for your system.
Quick pros/cons comparison: floating vs glue-down on a balcony
| Factor | Click-lock (Floating) | Glue-down |
|---|---|---|
| Main requirement | Stable, flat substrate + correct expansion gap | Moisture-controlled substrate + correct adhesive/open time |
| Movement handling | Designed to float and move with temperature | Can be less forgiving if moisture or substrate movement disrupts bond |
| Typical balcony risk | Seam stress from poor flatness or sealed/perimeter restraint | Adhesive bond failure if moisture/vapor limits aren’t met |
| Best fit (when allowed) | When manual permits exterior balcony use and you can prep flatness | When manual allows and you can meet adhesive + moisture specs |
Verdict: do it only if your product is approved—here’s a quick checklist
Do it only if your vinyl product is explicitly approved for balcony/outdoor/wet-area use, and you can meet the exact installation requirements for flatness, moisture/vapor control, expansion gaps, and movement-aware transitions. If your balcony has frequent standing water, extreme temperatures outside the product’s limits, or you can’t correct substrate flatness and drainage, skip this DIY approach and consider an exterior-rated balcony flooring system instead.
One honest downside: balcony vinyl installs are detail-sensitive, so the “easy” part is laying planks—the “hard” part is getting moisture control and edge/transition detailing right.
Typical Installation Specs Homeowners Must Match for Balcony-Grade Vinyl (Industry Benchmarks)
| # | Spec to verify | Common benchmark | Why it matters on balconies | Confidence ★ |
|---|---|---|---|---|
| 1 | Perimeter expansion gap (floating) | ~6 mm (1/4 in) typical | Prevents buckling from thermal cycling | ★★★☆☆ |
| 2 | Flatness tolerance (floating) | ≤ 3 mm over 1.8 m (≈3/16 in over 6 ft) typical | Protects click joints from stress | ★★★☆☆ |
| 3 | Concrete moisture testing method | ASTM F2170 or ASTM F1869 (as specified) | Determines whether adhesive/bond is allowed | ★★★★☆ |
| 4 | Adhesive spread/open-time compliance | “No more than can be covered within open time” | Avoids poor bond or adhesive skinning | ★★★★☆ |
| 5 | Staggered plank offsets (minimum) | Typically ≥ 1/3 plank length (product-dependent) | Improves joint durability under movement | ★★★☆☆ |
| 6 | Edge sealing strategy (approved-only) | Seal perimeter/transition gaps per manual | Reduces water entry without trapping moisture | ★★★☆☆ |
| 7 | UV/exposure limitation (product-dependent) | Must match outdoor/wet-area wording in specs | Protects against discoloration and brittleness | ★★★☆☆ |
Frequently Asked Questions
What’s the best type of vinyl flooring to install on a balcony?
For balconies, choose waterproof vinyl flooring such as luxury vinyl plank (LVP) or luxury vinyl tile (LVT) rated for exterior-like conditions. Look for products with strong water resistance, a tight locking system or adhesive-free installation, and an underlayment compatible with outdoor humidity. If your balcony gets direct sun and temperature swings, pick a vinyl with good dimensional stability and a wear layer suitable for foot traffic.
How do I prepare a balcony floor before installing vinyl planks?
Start by cleaning the surface thoroughly—remove dust, paint overspray, grease, and any loose material—then check for cracks, uneven spots, and low/high areas. Fill cracks and level dips with a suitable cement patch or self-leveling compound designed for outdoor subfloors. Finally, ensure the balcony is dry and the surface is smooth enough for vinyl flooring; most issues with vinyl come from installing over uneven or moisture-prone areas.
How do I install vinyl flooring on a balcony without water damage?
Use a waterproof vinyl flooring system and treat the installation like a moisture-managed project. Install around the perimeter with proper expansion gaps and avoid trapping water under the edges; if your balcony has a slope, follow the manufacturer’s guidance so locks or seams aren’t stressed. Seal transitions and penetrations (like drains or pipe holes) with a waterproof sealant and consider using compatible underlayment or a moisture barrier if the subfloor requires it.
Which installation method is best for balcony vinyl floors: click-lock or glue-down?
Click-lock (floating) vinyl is often faster and easier, but it depends on a stable, flat subfloor to prevent movement and joint separation in wet conditions. Glue-down vinyl can provide more secure bonding for areas with vibration, but it requires the correct adhesive and careful attention to moisture conditions. Many balcony owners prefer click-lock for DIY convenience, yet glue-down may be better if the floor is properly prepped and the manufacturer recommends it for exterior exposure or damp environments.
How can I handle expansion gaps and temperature changes when installing vinyl on a balcony?
Vinyl flooring expands and contracts with temperature, so you must leave expansion gaps around walls, posts, and any fixed objects according to the installation instructions. Use spacers during installation, and don’t force planks tight—this helps prevent buckling during hot weather and gaps during cold snaps. Finish the edges with trim or waterproof thresholds designed for wet areas so the balcony flooring stays secure while still allowing movement.
📅 Last Updated: October 27, 2026 | Topic: How to install vinyl floors in a balcony? | Content verified for accuracy and freshness.
References
- Vinyl flooring
- https://en.wikipedia.org/wiki/Vinyl_plank
- Vapor barrier
- F710 Standard Practice for Preparing Concrete Floors to Receive Resilient Flooring
- F1869 Standard Test Method for Measuring Moisture Vapor Emission Rate of Concrete Subfloor Using …
- F2170 Standard Test Method for Determining Relative Humidity in Concrete Floor Slabs Using in sit…
- https://scholar.google.com/scholar?q=vinyl+floor+installation+balcony+moisture+subfloor Google Scholar
- https://scholar.google.com/scholar?q=resilient+floor+covering+installation+guidelines+subfloor+preparation Google Scholar
- https://scholar.google.com/scholar?q=vinyl+plank+flooring+outdoor+deck+balcony+installation Google Scholar