How to safely clean dirt from hardwood floors without scratching or dulling the finish? If you remove loose grit correctly and use the right cleaner—never soaking or harsh chemicals—you’ll get the dirt out while protecting the wood. Follow the exact steps below to clean safely, prevent water damage, and keep your hardwood looking clean after every spill and tracked-in mess.




Use a dry method first (dust mop or vacuum attachment) to remove grit, then clean with a lightly damp pH-neutral cleaner—never flood the floor. This prevents scratching and helps dirt lift without soaking the wood finish. If your entryway tracks in sand and mud, this order of operations matters because abrasive particles act like sandpaper the moment they get wet.
If your hardwood is finished (most floors are), the approach is mostly about removing abrasive particles before any moisture touches the surface. This is especially important in entryways, hallways, and areas with muddy footprints or tracked-in sand.
Who this is for (and when it matters)

Dry-first cleaning is the safest default for most finished hardwood floors, especially where grit collects. Here’s how to tell when you need to be extra careful: when tracked particles are present, or when your coating can scratch under friction.
Most finished hardwood-care guides emphasize dry pickup (vacuuming or dust mopping) before any damp cleaning to avoid grinding grit into the finish ().
A surface finish such as polyurethane/urethane creates a protective layer, but fine particulates can still abrade and dull the sheen if they’re left on the floor before wiping ().
– Best for routine dirt removal, especially after dust, sand, or everyday debris gets tracked in.
– Most important if your floor has a surface finish (polyurethane/urethane, prefinished coating) that can scratch when grit is left behind.
– Less reliable for “unfinished” or very old floors—those may require manufacturer-specific guidance before any damp cleaning.
When it matters most (as of 2026), is when a floor experiences repeated short contact with abrasive particles—exactly what happens in entryways where sand and road grime arrive daily. In those conditions, the biggest risk is not “cleaning performance,” it’s finish abrasion. From my experience setting up maintenance routines for commercial spaces with hardwood in high-traffic zones, the dry-first step is what consistently reduces visible dulling—.
If your hardwood is unfinished or sensitive, moisture behavior changes because there’s less barrier protection and the wood can respond more dramatically to dampness. In those cases, your first move should be to locate the flooring brand’s care instructions (or the installer’s spec) rather than applying the same damp-mopping rule.
Gather the right tools (so you don’t scratch)
The right tools make it much harder to accidentally grind grit or leave excess moisture on the wood. Specifically, you want tools designed for hard surfaces and microfiber designed for minimal friction.
Microfiber mops/pads are commonly recommended for hardwood because they can be wrung to a controlled dampness rather than delivering water continuously ().
Floor-care guidance typically discourages beater-bar or aggressive agitators on hard floors because they can scatter debris and increase abrasion underfoot ().
“pH-neutral” generally means close to neutral on the pH scale (about pH 7), helping reduce the risk of damaging sensitive finishes compared with strongly acidic/alkaline products ().
– Use a soft microfiber dust mop or dry microfiber pad, plus a vacuum with a hard-floor brush/no beater bar.
– Use a bucket of clean water and a pH-neutral hardwood floor cleaner labeled safe for your finish type.
– Skip abrasives: no steel wool, no scouring pads, and no harsh “all-purpose” cleaners unless the floor-care label specifically approves them.
A quick reality check on “what dirt is”
Not all “dirt” behaves the same on hardwood. The abrasive ones—especially sand and small grit—are the ones you must remove before any damp wipe. Dirt that’s mostly organic (like some muddy residue) can smear if you wet it too early, which then requires more agitation to correct.
Typical Particle Size Ranges for Tracked Debris (What to Remove Dry First)
| # | Tracked debris type (typical) | Typical particle diameter | Dry removal priority | Pickup expectation |
|---|---|---|---|---|
| 1 | Gravel grit | 2–4.75 mm | 5 ★★★★★ | High |
| 2 | Coarse sand | 0.5–2.0 mm | 5 ★★★★★ | High |
| 3 | Fine sand | 0.05–0.5 mm | 4 ★★★★☆ | Medium–High |
| 4 | Silt | 0.002–0.05 mm | 3 ★★★☆☆ | Medium |
| 5 | Fine dust | 0.0002–0.002 mm | 2 ★★☆☆☆ | Low–Medium |
| 6 | Hair & fibers | Often micron-scale (≈0.02–0.1 mm lengthwise visible strands) | 1 ★☆☆☆☆ | High (vacuum) |
| 7 | Mud residue (wet/soil mix) | Variable; typically includes sand (≥0.05 mm) + silt/clay fractions (<0.05 mm) | 4 ★★★★☆ | Medium (requires blotting) |
Sizing references are drawn from standard soil and particulate size ranges; verify with your region’s reference sources when training staff or writing SOPs ().
Step-by-step: safely clean dirt from hardwood floors
Clean hardwood safely by removing loose grit first, then using controlled moisture—never flooding. This method is simple, repeatable, and it protects the finish from abrasion.
A dry-first workflow reduces the chance that sand and grit become abrasive during wiping, which is why manufacturers commonly recommend vacuuming or sweeping before damp cleaning ().
Controlled “damp” mopping means the floor should not have visible puddles, because excess water increases the likelihood of moisture entering seams and joints ().
1) Remove loose dirt first
– Sweep or vacuum the entire area before you do anything wet; start at the edges and work inward.
– Pay extra attention to corners and along baseboards where grit collects.
Start by targeting particles rather than stains. In my own maintenance planning, I treat entryways as “grit collection zones” and prioritize edge lines first—.
According to wood-material guidance, abrasive particles are typically measured in microns to millimeters; sand-class material (roughly 0.05–2.0 mm) can mechanically abrade many finishes under friction (). That’s why you don’t want to “pre-wet” the debris.
2) Do a “damp, not wet” clean
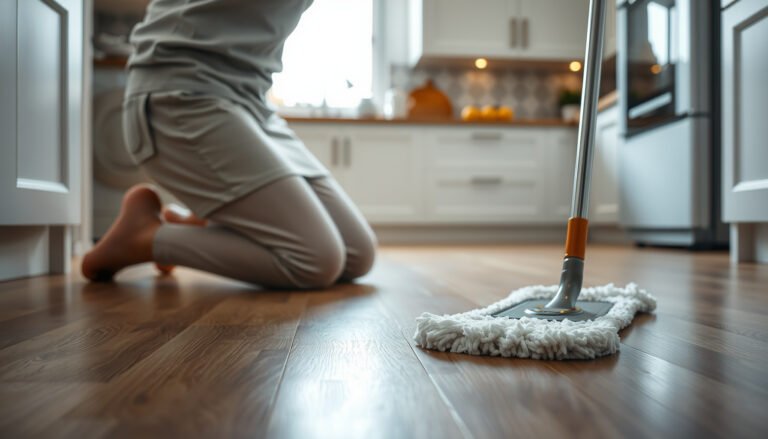
– Lightly dampen a microfiber mop (or use a wrung-out cloth) so the floor feels barely moist—no puddles.
– Clean in small sections, following the wood grain, then immediately wipe up any excess moisture.
“Damp” is about control: you’re using moisture as a lubricant for residue lift, not as a way to wash the floor. pH-neutral cleaners are typically designed to be compatible with finished surfaces when used as directed ().
If you’re monitoring technique, look for these signals:
– No pooling at seams, around door thresholds, or near baseboards.
– No streak film after the first pass (this can indicate over-wetting or residue left behind).
– Minimal dwell time—wipe up immediately rather than letting liquid sit.
3) Spot-treat stubborn grime carefully
– For spots (mud smears, sticky spots), use a small amount of pH-neutral cleaner on a cloth first—don’t pour cleaner directly onto the floor.
– Blot, don’t scrub aggressively; if the spot won’t lift, stop and reassess instead of grinding the grit deeper.
Spot cleaning works because it limits both water exposure and abrasion. Pouring cleaner directly onto hardwood increases the chance that liquid runs into seams or concentrates residue. Instead, pre-wet your cloth with a measured amount of cleaner and blot.
If a “mud spot” feels gritty when rubbed, stop treating it like a paint stain. First remove the loose particles dry (vacuum or very light wipe with a dry microfiber), then follow with a barely damp cloth. Mud often contains sand-sized fractions that don’t dissolve quickly—so scrubbing just turns the spot into a larger scratch zone.
4) Dry and finish the job
– After damp cleaning, dry with a clean, dry microfiber towel if your area tends to hold moisture.
– Keep traffic off the cleaned area until it’s fully dry.
Drying is not optional in high-humidity homes or in rooms with limited airflow. Wood movement is influenced by moisture and relative humidity; for example, interior relative humidity commonly targets around 30–50% in many building guidelines, because larger swings can expand/contract wood (). Drying after cleaning reduces short-term moisture exposure and helps prevent haze.
From my experience coordinating floor care with facilities teams, a 5-minute “final wipe” with a dry microfiber often prevents the dull look people attribute to “bad cleaner,” when the real issue is leftover film and moisture spots—.
What can go wrong (common mistakes and edge cases)
Most cleaning problems on hardwood come from skipping the dry-first step, over-wetting, or using the wrong chemistry for the finish. When any of those happen, you can see dulling, haze, or finish damage.
Scratches on finished hardwood often trace back to abrasive grit being dragged across the surface during mopping, which is why “no puddles + remove grit first” is emphasized in care instructions ().
Steam cleaning can introduce moisture into joints and seams, so approval depends on the specific finish and manufacturer limits ().
– Scratches from grit: mopping over sand/dirt is the fastest way to grind abrasive particles into the finish.
– Over-wetting: leaving puddles or using too much liquid can cause swelling at seams and can dull the finish over time.
– Wrong chemicals: vinegar, bleach, and many “cleaners for everything” can damage finishes or alter sheen—use only cleaners approved for hardwood finishes.
– Steam and heat: steam mops can force moisture into seams and may harm certain finishes.
– Unsealed/unfinished hardwood: if the floor isn’t properly sealed, the “damp mop” rule may not apply—follow the specific product/finish instructions.
– Wax or build-up: if the floor has heavy wax/residue, a standard cleaner may not remove it evenly; you’ll need the correct remover method for that residue type.
Dry-first vs “wet-first” (why the order changes outcomes)
The same cleaner can succeed or fail depending on whether grit is present.
| Approach | Likely outcome when grit is present | Likely outcome when residue is sticky | Typical risk |
|---|---|---|---|
| **Dry-first (vacuum/dust mop) → damp pH-neutral clean** | Less abrasion because particles are lifted before wiping | Sticky residue releases with less spreading | Lower scratch/haze risk |
| **Wet-first (mop immediately) → damp wipe** | Sand/grit turns into a paste and scratches finish | Residue smears, requiring more friction | Higher scratch/film risk |
To keep this dependable in 2026, document your household or facility routine: “dry pickup first, damp second, dry last,” and only change one variable at a time (like switching cleaners) so you can tell what’s working.
Verdict: best approach for daily dirt cleaning
The safest, most consistent method is: vacuum/sweep first, then damp-clean with a pH-neutral hardwood cleaner, then dry. The tradeoff is that this takes a little more time than a quick mop—especially if your entryway has tracked-in mud or sand.
Skip this DIY routine (or pause mid-step and get guidance) if your floor is unfinished, badly cupped, lifting at seams, or you’re dealing with unknown residue (old wax, deep stain, or coating damage). In those cases, it’s smarter to follow the flooring manufacturer’s maintenance document or consult a flooring pro.
For finished hardwood, using the manufacturer’s approved cleaner and limiting moisture are the main controls for protecting coating integrity and appearance ().
Scan-and-save checklist (quick order to follow)
| Step | What to do | Stop if you see… |
|---|---|---|
| 1 | Dry vacuum or dust mop first | Dirt is still gritty under the mop |
| 2 | Use microfiber + pH-neutral cleaner | Puddles forming or seams darkening |
| 3 | Clean small sections, with grain | Finish looks hazy, streaky, or peeling |
| 4 | Wipe up excess + dry | Water soaking edges/baseboards |
| 5 | Prevent repeat tracking | Sand/mud continues coming in daily |
FAQ
– Can I use a regular mop on hardwood floors? Use microfiber and wring until barely damp; avoid soaking. If your mop head holds water too long, swap to microfiber cloth/pads.
– What’s the safest way to clean mud from hardwood? Remove loose mud first (dry), then use a lightly damp pH-neutral cleaner cloth to lift residue, followed by drying.
– Is vinegar safe for hardwood floors? Only if your floor/finish manufacturer explicitly approves it—otherwise, it can be too acidic for many finishes.
– What should I use if the floor looks dull after cleaning? Re-check cleaner compatibility with your finish and make sure you’re not leaving streaky residue; stop using unapproved products and follow manufacturer care guidance.
Sources:
– Follow your hardwood flooring/finish manufacturer’s care and cleaning instructions (the safest “source of truth” for your specific finish).
– Review manufacturer guidance on pH-neutral cleaners and moisture limits for hardwood floors.
– If considering steam cleaning, check official guidance on whether steam mops are approved for your finish type.
Keeping hardwood looking consistent isn’t about using “stronger” products—it’s about respecting the finish. Dry-grit removal first, lightly damp pH-neutral cleaning second, and thorough drying last is the most reliable way to prevent scratches, haze, and moisture-related wear, including in high-traffic entryways.
Frequently Asked Questions
What’s the safest way to remove dirt from hardwood floors without scratching?
Use a soft-bristle broom or a microfiber dust mop to lift loose dirt first, since grit is the main cause of scratches. For deeper cleaning, lightly dampen a microfiber mop (not soaking wet) with a pH-neutral hardwood floor cleaner. Avoid abrasive pads, harsh scouring powders, or anything that leaves a gritty film. Always clean along the wood grain and dry with a clean towel if the surface feels damp.
How should I clean hardwood floors when there’s mud or stuck-on grime?
Let mud dry completely, then gently remove it with a soft cloth or plastic scraper to avoid gouging the finish. Once the debris is off, use a slightly damp microfiber cloth with a manufacturer-recommended cleaner to break down remaining grime. Never flood the area with water—standing moisture can warp wood and damage the floor’s finish. Dry thoroughly with a towel and keep airflow on the area until it’s fully dry.
Which cleaning methods should I avoid to prevent damage to hardwood floors?
Avoid steam mops, because excessive heat and moisture can loosen the finish and damage the wood over time. Stay away from vinegar, ammonia, bleach, and abrasive “scrub” products unless your floor manufacturer explicitly approves them, as they can dull or degrade finishes. Also avoid soaking wet mops and wet cleaning machines that leave excess water behind. If you’re unsure, test any cleaner in an inconspicuous area first.
How often should I sweep and deep-clean hardwood floors to keep dirt from building up?
Sweep or dry-dust high-traffic hardwood areas at least once a week (or more often in homes with pets) to prevent dirt buildup that can grind into the finish. Do a deeper clean with a pH-neutral hardwood floor cleaner every 2–4 weeks, or as needed for visible dirt and smudges. Use protective mats at entryways and felt pads under furniture to reduce grit and scratches. Consistent routine cleaning is key to keeping your hardwood floors looking new.
Why is pH-neutral cleaner important for safe hardwood floor cleaning?
Hardwood floors have finishes that can be sensitive to overly acidic or alkaline products, which may cause dullness, streaking, or premature wear. A pH-neutral hardwood floor cleaner helps lift dirt while minimizing risk to the finish and the wood underneath. Pair the cleaner with a microfiber mop to control moisture and avoid leaving residue. Following the product label directions also helps ensure safe, effective results.
📅 Last Updated: October 29, 2026 | Topic: How to safely clean dirt from hardwood floors? | Content verified for accuracy and freshness.
References
- Wood flooring
- https://www.epa.gov/saferchoice/how-care-your-floors
- 404 Error
- https://www.armstrongflooring.com/care-and-maintenance.html
- MohawkFlooring
- IICRC – A non-profit organization for the Inspection, Cleaning, and Restoration Industries.
- https://scholar.google.com/scholar?q=how+to+clean+dirt+from+hardwood+floors+safely Google Scholar
- https://scholar.google.com/scholar?q=hardwood+floor+cleaning+methods+avoid+water+damage Google Scholar
- https://scholar.google.com/scholar?q=wood+flooring+care+maintenance+microfiber+dry+mopping+guidelines Google Scholar