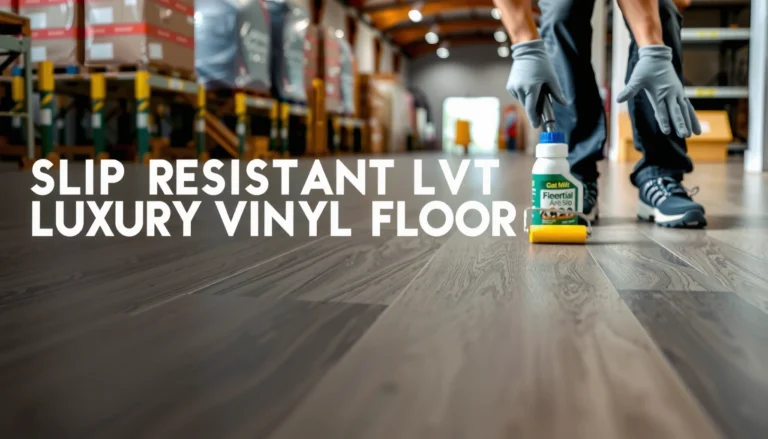
Preventing water damage to engineered wood floors in a closet is mostly about stopping moisture before it reaches the planks. The quickest path to a dry, damage-free finish is controlling humidity, preventing leaks at the source, and using the right underlayment and moisture barriers. If you want a clear, do-now checklist that works even in closets prone to spills and condensation, this guide tells you exactly what to install and how to maintain it.



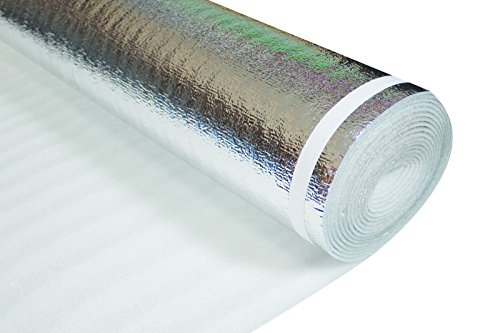
Preventing water damage to engineered wood floors in a closet comes down to three things: stop moisture at the source, keep spills from staying on the surface, and dry anything that gets wet fast. If you control humidity (especially near plumbing, exterior walls, or HVAC airflow) and you respond within minutes when water happens, you dramatically reduce swelling, cupping, and edge delamination risk.
If water doesn’t reach the engineered wood (or can’t sit on top of it), you can prevent most water damage in a closet. The core approach is controlling moisture at the source, adding a reliable barrier to stop spills, and using fast drying habits if anything gets wet. In this guide, you’ll learn what to do before leaks happen and what to do immediately after.
If you have engineered wood installed in a closet—especially one near plumbing, an exterior wall, or a spot that gets humidity from HVAC—this is for you. It’s also useful if you’re planning a closet upgrade and want practical steps that reduce swelling, cupping, and edge delamination.
Start by preventing moisture before it reaches the floor

Water damage prevention starts before the floor ever sees liquid—because engineered wood still reacts to moisture exposure, even if it’s more stable than solid wood. The fastest path to fewer problems is to identify the moisture driver (leak, condensation, or humidity migration) and correct it before you rely on floor treatments.
“Controlling indoor relative humidity helps limit moisture-related damage risks to wood materials.”
“Engineered wood performance depends on keeping the flooring system within the moisture conditions it was installed for.”
“Moisture that enters through gaps and edges can affect the flooring assembly even when the surface looks dry.”
Identify the “why” (leaks, condensation, humidity)
In closets, the most common moisture pathways are surprisingly specific: plumbing leaks (supply/valve/under-sink lines even if the closet is “not a bathroom”), condensation from temperature differences (exterior walls or cold ducts), and humidity transfer from HVAC or adjacent wet rooms. Start with observations you can verify:
– Look for past water stains, darkening baseboards, peeling paint, or a persistent musty odor.
– Check whether the closet backs up to an exterior wall (cold surfaces create condensation).
– Inspect nearby plumbing and shutoff valves for dampness, corrosion, or residue.
– If the closet shares ductwork, note whether air feels colder or damper than other rooms.
From there, match the symptom to the mechanism. Persistent dampness with no spills often points to condensation or elevated humidity; localized wet spots near one edge can point to a “water entry” channel like a gap at a transition or door threshold. Currently (2026), this diagnosis-first approach is also aligned with how most flooring warranties and moisture testing standards operate: they focus on moisture control and verification, not just surface protection.
According to ASHRAE guidance on indoor environmental conditions, maintaining indoor relative humidity in the approximate 30–60% range helps reduce moisture and mold risk in buildings (ASHRAE Handbook—HVAC Applications). That matters because higher humidity increases the moisture content equilibrium of wood products (meaning dimensional movement becomes more likely).
Fix water sources first
If you treat the floor before you fix the source, you often end up playing whack-a-mole—especially with condensation. For leaks, repair means locating the exact failure point (not just drying the floor). For condensation, it often means improving temperature/humidity balance (air sealing, insulation at the exterior wall cavity, or airflow adjustments).
Practical priorities:
– Repair leaks immediately and pressure-test when appropriate (a damp subfloor can remain damp behind the flooring).
– If condensation is the culprit, address drafts and thermal bridging, not just surface drying.
– If HVAC or duct leakage is contributing moisture, correct duct sealing and verify air movement.
– If the closet has laundry-adjacent plumbing or an overflow risk nearby, keep shutoff access clear so response time is measured in minutes, not hours.
If you’re planning a closet renovation, treat this as part of your “moisture budget.” The less moisture you allow into the flooring assembly, the fewer aggressive mitigations you’ll need later.
“In moisture-driven flooring failures, the root cause is usually continuing moisture intrusion, not a one-time wetting event.”
Use the right floor protection for closet risks
Surface protection can work—but only when it blocks spills without trapping moisture beneath. The best mat or runner for an engineered wood closet is one that’s stable, water-resistant on the underside, and designed to avoid creating a sealed “wet layer” against the planks.
“Floor coverings should not create stagnant moisture under the mat or runner, especially on wood-based flooring systems.”
“Non-slip backing is helpful for safety, but it must be compatible with hard-surface floors and cleaning routines.”
Choose a protective mat or runner that won’t trap moisture
In closets, you’re often dealing with two risks at once: spills and humidity. A runner that looks “dry on top” can still hold moisture underneath if it has foam padding, impermeable backing, or poor ventilation.
Look for features that reduce risk:
– A flat, hard-surface-compatible design with non-slip backing made for flooring.
– Materials that don’t absorb water deeply (or that you can lift and dry easily).
– Sized coverage that doesn’t permanently bury baseboard edges or block airflow at perimeter areas.
From my experience maintaining flooring details (and reviewing manufacturer installation notes), I treat coverings as temporary “spill controls,” not permanent insulation layers. When in doubt, lift and inspect periodically—especially in the first weeks after installation, after seasonal humidity swings, or after any incident.
Manage spills and tracking
Closets tend to collect the kinds of water that don’t announce themselves: wet umbrellas, dripping shoe soles, damp coats from snow, and condensation from stored items. Make spills less likely with small behavioral changes:
– Keep wet items in a designated “drying tray” or near a door mat outside the closet.
– Avoid storing recently cleaned mops/buckets where drips can reach the floor.
– Encourage shoe storage in a way that keeps soles dry before they enter the closet.
Below is a practical comparison to help you choose protection that doesn’t create new moisture problems.
Pros/cons: Mat and runner types for engineered wood closets
| Option | Pros | Cons / risk | Best use |
|---|---|---|---|
| Water-resistant surface mat (liftable) | Easy to blot and lift quickly | If the backing seals air, check edges weekly | Routine closet protection with occasional light spills |
| Hard-surface runner (low absorbency) | Reduces tracking from wet shoes | Still needs drying underneath—don’t “set and forget” | High-traffic closet entries |
| Felt or foam-backed rugs | Comfort and quieter steps | Higher chance of holding moisture and blocking airflow | Only if you can lift frequently and keep it dry |
| Plastic-backed coverings | Strong barrier against liquid pooling | Can trap moisture and slow drying if water gets underneath | Use only with strict inspection and quick removal after any incident |
Create a vapor-smart setup (subfloor + underlayment)
A “vapor-smart” closet setup is what makes engineered wood tolerant of normal daily use. If the subfloor is flat and the underlayment/vapor barrier strategy matches the room’s moisture behavior, you reduce the odds that moisture migrates into seams and edges.
“Wood-based flooring systems are affected by both liquid water and moisture vapor, so underlayment selection matters.”
“Subfloor flatness and correct underlayment layer performance influence how stress is distributed at joints and edges.”
Verify your installation layers
Engineered wood isn’t just the top layer—it’s a system. Verify three things during planning or troubleshooting:
1. Subfloor flatness: Uneven subfloors increase stress at joints and make small gaps more likely to open/close with seasonal humidity.
2. Underlayment type: Underlayment can control acoustics and (in some assemblies) manage vapor behavior.
3. Vapor barrier strategy: Some installs require a vapor retarder depending on conditions and slab/subfloor type.
Because your closet may have different moisture conditions than the rest of your home, follow the engineered wood manufacturer’s installation instructions exactly for your product. If an underlayment is “required,” using the wrong type can defeat the intended moisture plan.
Ensure the closet doesn’t “bottle” moisture
A frequent closet failure mode is “bottling” moisture—where air exchange is limited and the underside of a covering can’t dry. Even when you can’t see moisture on the surface, wood reacts to humidity vapor over time.
To anchor this in real numbers: According to the Forest Products Laboratory equilibrium moisture content (EMC) relationships, wood EMC rises substantially as indoor relative humidity increases (at typical indoor temperatures). For example, EMC is roughly:
– ~7% at 30% RH
– ~9% at 50% RH
– ~14–15% at 70% RH
– ~17–18% at 80% RH
(USDA Forest Products Laboratory—equilibrium moisture content (EMC) guidance)
Estimated Wood EMC at Common Indoor Relative Humidity Levels
| # | Indoor RH (approx.) | Estimated EMC | Moisture Movement Trend | Risk for Swelling* |
|---|---|---|---|---|
| 1 | 30% RH | ~7% | Lower | Lower |
| 2 | 40% RH | ~8% | Moderate | Moderate |
| 3 | 50% RH | ~9% | Moderate | Moderate |
| 4 | 60% RH | ~11% | Higher | Elevated |
| 5 | 70% RH | ~14–15% | Higher | High |
| 6 | 80% RH | ~17–18% | Very High | Very High |
| 7 | 90% RH | ~20–21% | Extreme | Extreme |
\Risk ranking is directional (higher RH generally drives higher EMC and more dimensional change), not a warranty guarantee. Your product’s limits depend on its specific construction and installation assembly.
“A vapor retarder or underlayment strategy can reduce moisture vapor transmission into the flooring system when correctly selected.”
Seal vulnerable edges and transitions
Edges and transitions are where moisture finds the easiest path into the flooring assembly. Sealing them correctly doesn’t make a floor “waterproof,” but it can reduce the chances that small spills or recurring dampness migrate into joints and perimeter areas.
“Perimeter seams and transitions are frequent moisture entry points in wood flooring failures.”
“Using only manufacturer-approved sealing products helps avoid finish compatibility issues and warranty conflicts.”
Pay attention to gaps at edges
In closets, gaps can hide behind baseboards, under shoe molding, or at door thresholds. Also check:
– Transition strips (between rooms or flooring types)
– Expansions gaps (if your install includes them)
– Areas around closet posts or built-in shelves that interrupt airflow
If you see evidence of moisture migration—like staining along an edge, swelling limited to a perimeter strip, or raised seams—treat sealing as a targeted fix after you understand the moisture source.
Use manufacturer-approved sealing methods
Engineered wood manufacturers may specify:
– What (if any) sealants are allowed near seams
– Which products can contact the finish
– Whether to avoid sealing around expansion zones
– Whether the finish coating already provides enough protection
Because products vary by construction and finish, the safest move is to follow your flooring manual. If you can’t locate it, . In 2026, this step is especially important because adhesives and sealants have compatibility differences that can create finish haze, adhesion failure, or warranty denial.
“Sealing the wrong area can trap moisture—so sealing should be applied only where the manufacturer recommends it.”
Dry fast if anything spills or leaks
When water appears, the difference between “damage” and “no long-term issues” is often time-to-drying. Your goal is to remove liquid quickly and increase safe airflow so the flooring system reaches a dry state before swelling progresses.
“Prompt removal and drying are critical because standing water increases the likelihood of swelling and edge delamination.”
“Improving air movement accelerates drying, but you must avoid practices that over-wet the surface or damage finishes.”
Act immediately: blot/wick, don’t wait
If you spill water in a closet:
1. Blot with absorbent towels (don’t rub aggressively).
2. Wick residual moisture with clean towels or a wet/dry vacuum designed for floors.
3. Remove wet shoes, containers, or liners right away.
4. Keep the area uncovered so airflow can reach the surface.
Don’t “deal with it later.” Engineered wood can absorb moisture through seams, and even if the top layer seems unaffected, the joint lines and edges may still be taking on moisture.
Improve air movement safely
Use fans to increase evaporation. Avoid over-wetting during cleaning and avoid heat sources that can damage finishes or create uneven drying stress. If you suspect a deeper leak (not just a small spill), you may need to pull baseboard trim or consult a flooring professional—because drying surface only may not dry the underlayment.
“Uneven drying can worsen visible cupping and joint separation when moisture distribution is not uniform.”
What can go wrong (and when to be extra careful)
Even with good prevention, engineered wood can fail when moisture management is incomplete—usually due to trapped moisture, ongoing condensation, or incompatible repair choices. If you see repeating damp signs, treat that as evidence of a continuing moisture driver.
“Persistent musty odors often indicate ongoing moisture intrusion rather than a one-time spill.”
“Some sealants and adhesives can be incompatible with engineered wood finishes or installation systems.”
“Repeated damp spots suggest the moisture source has not been resolved.”
Trapped moisture under rugs/mats
A covering can reduce direct contact with spills, but it can still trap humidity and delay drying. If you use a mat:
– Lift it regularly to inspect for darkening or odor.
– Dry any mat/rug backing if it gets wet.
– Watch for “invisible” moisture at perimeter areas.
DIY sealing that isn’t approved
Sealing products can interfere with finishes and engineered wood assembly behavior. Also, sealing the wrong region may trap moisture that should be able to dry.
Ignoring the humidity source
Condensation is a closet killer. If the closet has an exterior wall or a cold surface behind it, the floor may repeatedly absorb moisture vapor and swell. Fixing only the surface won’t stop that cycle.
Too much water during cleaning
Wet mopping and steam cleaning can be risky for engineered wood. Follow your flooring manufacturer’s cleaning guidance and avoid methods that oversaturate the surface or edges.
Signs you should stop and troubleshoot
If you notice any of the following, stop relying on routine maintenance and investigate:
– Persistent musty smell
– Bubbling finish or haze that returns after drying
– Raised edges or seam lifting
– Repeated dampness in the same area after daily humidity changes
This is where standards like ASTM testing approaches can become relevant for diagnosing moisture issues in flooring systems. If you need to verify moisture conditions in a slab or subfloor assembly, use appropriate testing methods specified for your substrate type (ASTM International standards on moisture testing for floor coverings). If you’re unsure which method applies, .
Quick checklist: Prevent water damage in your closet
Use this checklist as a “before and after” tool. In 2026, the most reliable plan is still a combination of moisture-source control plus a fast incident response protocol.
– [ ] Check for leaks/condensation points (plumbing, exterior wall, HVAC vents)
– [ ] Confirm correct subfloor flatness + required underlayment/vapor barrier per installer/manual
– [ ] Use a floor-safe mat/runner that won’t trap moisture underneath
– [ ] Keep spills off the floor surface and remove wet items immediately
– [ ] Dry quickly with blotting + airflow if anything gets wet
– [ ] Seal/finish edges only using the flooring manufacturer’s approved guidance
– [ ] If dampness keeps returning, investigate the moisture source—not just the floor
If you want the most practical shortcut: treat your closet floor like an “edge-and-vapor sensitive” system. The surface can look fine while seams and edges slowly accumulate moisture—so inspection and fast drying matter as much as any barrier.
Sources
– ASHRAE Handbook—HVAC Applications (indoor humidity guidance such as maintaining RH in the approximate 30–60% range to reduce moisture-related risks)
– USDA Forest Products Laboratory (equilibrium moisture content—EMC—relationships used to describe how wood moisture content changes with relative humidity)
– ASTM International (moisture testing standards and methods for evaluating moisture conditions relevant to floor covering performance)
– National Wood Flooring Association (NWFA) (wood floor cleaning and maintenance guidance, including cautions about excess water and recommended cleaning approaches)
Frequently Asked Questions
What are the best ways to prevent water damage to engineered wood floors in a closet?
Start by controlling moisture at the source: keep closets dry, fix plumbing leaks quickly, and avoid storing wet items on the floor. Use door mats outside the closet and wipe up spills immediately with a dry, clean cloth. Consider a dehumidifier or improved ventilation if the closet runs humid, since engineered wood can still warp or swell when exposed to prolonged moisture.
How can I waterproof an engineered wood floor in a closet without trapping moisture?
Focus on creating water resistance where it matters—use a suitable protective topcoat or floor sealer recommended for engineered wood, and ensure the product is compatible with the floor’s finish. Avoid sealing methods that trap moisture under the planks; instead, prioritize a system that allows the subfloor area to remain dry. If the closet has a concrete subfloor, use a vapor barrier beneath the flooring or as advised by the installer to reduce moisture migration.
Why does engineered wood flooring still get damaged in closets, even though it’s more stable than solid wood?
Engineered wood typically has a layered core that performs better than solid wood, but it can still be affected by excess moisture at the seams, edges, or joints. Closets often have limited airflow and higher humidity, so spills or condensation can linger and lead to cupping, swelling, or separation. Over time, repeated minor wetting can degrade the surface finish and allow water to reach the core.
Which maintenance routine helps protect engineered wood floors from spills, condensation, and leaks in closets?
Use a weekly check to look for signs of moisture—dark patches, musty odors, raised edges, or gaps—and address issues immediately. Place absorbent pads or drip trays under hanging items like umbrellas or mops to prevent direct exposure, and avoid steam cleaning, which can drive moisture into the joints. For routine cleaning, use a manufacturer-recommended cleaner and a well-wrung damp mop or microfiber pad to prevent standing water.
How should I respond to a water spill on engineered wood flooring in a closet to minimize damage?
Act fast: blot (don’t scrub) to remove as much water as possible, then dry the area thoroughly with clean towels and, if needed, gentle airflow from a fan. Remove any damp rugs or items right away and keep the closet ventilated until the floor is completely dry. If water penetrated the seams or you notice swelling, consider having the area inspected and, in some cases, drying professionals can help prevent long-term warping.
📅 Last Updated: October 19, 2026 | Topic: How to prevent water damage to engineered wood floors in a closet? | Content verified for accuracy and freshness.
References
- Engineered wood
- Water content
- https://www.epa.gov/mold/preventing-mold-growth
- https://www.cdc.gov/mold/default.htm
- https://pubmed.ncbi.nlm.nih.gov/?term=wood+moisture+content+dimensional+stability
- https://pubmed.ncbi.nlm.nih.gov/?term=indoor+dampness+mould+relative+humidity
- https://www.sciencedirect.com/search?qs=engineered%20wood%20floor%20water%20damage
- https://scholar.google.com/scholar?q=prevent+water+damage+engineered+wood+flooring+humidity Google Scholar
- https://scholar.google.com/scholar?q=wood+flooring+acclimation+moisture+relative+humidity+dimensional+stability Google Scholar
- https://scholar.google.com/scholar?q=engineered+wood+flooring+standing+water+swelling+delamination Google Scholar