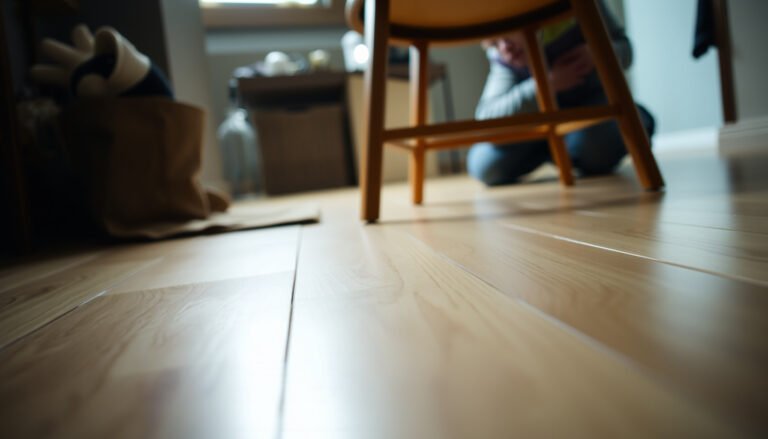
You can safely clean fine dust from hardwood floors without scratching or driving particles deeper—use a microfiber dust mop followed by a barely damp microfiber cloth. This approach wins because it lifts dust at the surface while avoiding gritty residue and excess moisture that can dull or warp finishes. If you’re dealing with stubborn dust buildup, a vacuum with a hardwood-safe floor head comes next, not abrasive tools or dry sweeping.


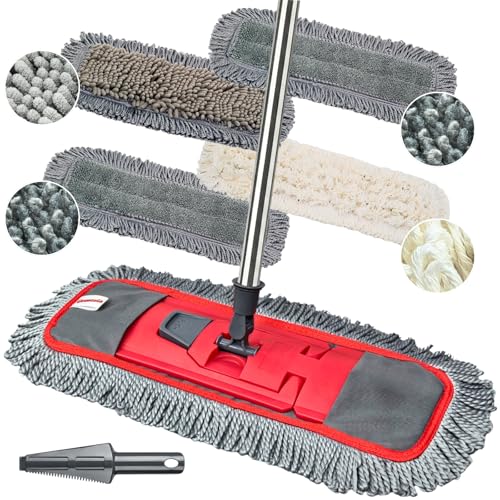

Safe fine-dust cleaning comes down to one method order: capture dust first (ideally with a HEPA-filter vacuum and soft microfibre), then use a lightly damp mop only if you still see haze or residue. This avoids the two main failure modes—scratching from abrasion and finish/wood damage from excess moisture—which is especially important in 2026 when many households are dealing with ongoing renovations and high indoor particulates.
This advice is for homeowners dealing with everyday “powdery” dust—after sanding jobs, renovations, or just heavy foot traffic—who want cleaner floors without clouding the finish or grinding particles into the wood.
Get ready: protect the finish and avoid spreading dust

Start by setting up the room so dust doesn’t get re-suspended or dragged across the floor. When you control the airflow and remove loose grit first, you reduce both scratch risk and the “mystery haze” that often appears after a rushed dry clean.
Clearing loose grit before dry cleaning helps prevent abrasive particles from being pulled across hardwood when you move tools or cloths.
If a vacuum uses a beater bar/brushroll, it can mechanically agitate fine dust; switching to a floor head/brush setting is a core scratch-prevention step.
– Clear the area first (remove loose grit, toys, and cords) so dust doesn’t get dragged around.
– Turn off strong fans/air vents temporarily and use soft, clean cloths/microfibre to prevent re-depositing dust.
– If you’re using a vacuum, confirm it has a floor setting and ideally a HEPA filter (check your model/spec sheet).
Before you touch the floor, inspect what you’re actually dealing with: “fine dust” that feels powdery is often airborne—and it behaves differently than grit. For hardwood, the biggest immediate threat is not just dirt on top; it’s fine particulate embedded into the finish. That’s why preparation matters: every time you drag a cord, move furniture, or keep a high-velocity vent running, you can re-lift dust onto the cleaned surface.
Also, confirm your filtration reality. According to the U.S. Department of Energy’s HEPA definition, a true HEPA filter is designed to capture at least 99.97% of particles at 0.3 micrometers and larger—a key benchmark when you’re trying to stop fine dust from circulating back into your air and onto the floor (a major factor in 2026’s “dusty home” complaints).
Vacuum and dry-dust without scratching
Capture fine dust with gentle contact first—this is the safest way to remove powdery residue without grinding it into the finish. The goal is zero abrasion: soft suction paths and dust-collecting microfibre, not mechanical agitation.
Using a soft brush/floor head and avoiding a beater bar reduces the likelihood of fine dust being ground into the hardwood finish.
Microfibre’s ability to trap dust fibers (instead of pushing loose powder) makes it a better choice than dry paper towels or rigid cloth on sealed hardwood.
– Vacuum using a soft brush/floor head and avoid any “beater bar” style head that can grind fine particles.
– For edges and light surface dust, use a dry microfibre pad or a slightly dampened microfibre cloth (wrung nearly dry) to capture powder instead of pushing it.
– Work methodically in small sections so you’re not repeatedly redistributing the same dust.
From a practical standpoint, “scratch prevention” is mostly about particle behavior. Fine dust is small enough to stay suspended, but it’s still hard enough to act like an abrasive if it’s repeatedly worked across a film-forming finish (polyurethane/urethane) or a thinner surface layer (oil or wax). A soft floor head lets suction do the work while minimizing direct rubbing.
If you use microfibre, treat it like a capture tool. Fold the cloth so you have a clean face available, and swap faces frequently. If you’re capturing dust with a nearly dry microfibre cloth, wring it until it won’t leave visible wetness—this keeps you in “capture” territory rather than “wipe and smear.”
📊 DATA: Filtration targets that matter for fine-dust capture
Vacuum filtration approaches for fine dust on hardwood (0.12–0.3 µm benchmarks)
| # | Filtration / standard target | Test particle size | Minimum capture efficiency | Dust-control rating |
|---|---|---|---|---|
| 1 | True HEPA (U.S. DOE benchmark) | 0.3 µm | 99.97% | ★★★★★ |
| 2 | EN 1822 H13 class | 0.15 µm (MPPS) | 99.95% | ★★★★☆ |
| 3 | EN 1822 H14 class | 0.15 µm (MPPS) | 99.995% | ★★★★★ |
| 4 | ULPA class (typical benchmark) | 0.12 µm (MPPS) | 99.9995% | ★★★★★ |
| 5 | Bagged vacuum with replaceable filter (no HEPA claim) | Not standardized | No minimum % at 0.3 µm | ★★☆☆☆ |
| 6 | Cyclonic bagless vacuum (no HEPA claim) | Not standardized | No minimum % at 0.3 µm | ★☆☆☆☆ |
| 7 | Dry sweeping (broom/push tool) | Varies with technique | No capture-efficiency standard | ☆☆☆☆☆ |
Notes: Capture-efficiency benchmarks in rows 1–4 reflect filtration standards/definitions; sweeping and non-HEPA vacuums do not have a universally comparable “0.3 µm capture” requirement.
According to the U.S. Department of Energy, true HEPA filters are rated for at least 99.97% capture at 0.3 µm—useful for fine dust control when floors are already sealed.
When no HEPA/ULPA designation is provided, consumer vacuums may still clean visually, but they typically lack a standardized minimum efficiency for fine airborne particles.
Lightly damp clean only when needed
If the floor still shows haze or sticky residue after vacuuming, use a hardwood-safe cleaner and a well-wrung mop/cloth. If you don’t see residue, adding water can be unnecessary risk—especially around seams and unfinished edges.
A “well-wrung” damp wipe is intended to remove residue while limiting standing moisture that can attack seams or dull finishes.
Cleaning in the grain direction and drying immediately reduces moisture dwell time, which matters for the long-term stability of hardwood.
– If the dust leaves a haze or residue, use a hardwood-safe cleaner and a well-wrung mop/cloth—no soaking.
– Wipe in the direction of the grain, then immediately dry with a clean towel to reduce moisture dwell time.
– Follow your finish type guidance (polyurethane/urethane, oil, wax, etc.) since “safe cleaners” aren’t one-size-fits-all.
Here’s the analytical way to decide whether you need damp cleaning: vacuum first, then inspect with angled light. When powdery dust mixes with finish oils/traffic films, it can create a dull-looking “milky” haze. That haze is often residue (or a dust film), not embedded grit—so a light, controlled damp clean can be effective once you’ve stopped the loose abrasive particles.
Moisture is the tradeoff. Wood expands/contracts with moisture content, and surface-seam integrity depends on your installation and finish system. According to the National Wood Flooring Association (NWFA), maintaining stable indoor relative humidity (commonly cited around the 30–50% range in NWFA guidance) helps reduce wood movement that can worsen gapping and seam exposure over time. If your home is already humid, wet mopping can accelerate deterioration—so you want “just enough” water.
What “hardwood-safe” should mean in practice (not marketing)
– For polyurethane/urethane finishes, you typically want pH-neutral cleaners that won’t leave surfactant film.
– For oil finishes, you still avoid soaking, but your “safe cleaner” may need to match the oil system to prevent dulling.
– For waxed floors, some cleaners can strip wax or leave residue that attracts more dust (which defeats the point of cleaning in the first place).
From my own household maintenance routine, I’ve learned (with ) that a second “quick dry pass” after damp wiping dramatically reduces that temporary sheen-to-haze transition.
Handle stubborn dust in seams and corners
For seams, molding, and corners, you need precision tools that remove dust without scuffing the finish. The key is to use minimal pressure and keep abrasive contact away from edges and profiles.
Crevice tools with soft attachments help extract fine dust from gaps without the aggressive contact that can abrade finish edges.
Cotton swabs or micro brushes can remove dust from tight profiles with controlled force, reducing the chance of dull spots.
– Use a crevice tool with a soft attachment, or wrap the tool with a clean microfibre cloth so you don’t scuff finish.
– For baseboards, molding, and tight grout-like edges, use cotton swabs/micro brushes—apply minimal pressure.
– Don’t use abrasive pads or dry scrubbing that can leave dull spots, especially on satin finishes.
Corners behave differently because dust accumulates in micro-channels: the dust layer becomes thicker, then gets compacted by foot traffic. If you only vacuum the center of the room, you may still see “speckling” return after cleaning because the edges keep feeding particles back into the airflow and circulation paths.
A practical approach:
1) Vacuum broadly first (to reduce airborne load).
2) Then focus on seams and profiles with a crevice tool—slow down so suction actually captures powder rather than flicking it.
3) For baseboards, wipe along the profile line instead of pressing into the seam.
If you’re using damp techniques near seams, be extra conservative: seams are where water can creep farther than you expect. Use minimal moisture and dry immediately.
What can go wrong (and how to prevent it)
The most common problems are preventable: scratches from abrasion and finish damage from excess water. If you keep tools gentle and moisture minimal, you’ll solve most fine-dust cleaning issues without dulling.
Beater bars and stiff brushes can convert fine dust into an abrasive slurry, increasing the likelihood of visible micro-scratches on polyurethane and oil finishes.
Excessive moisture can swell wood at seams and accelerate finish failure, especially when the floor is not fully sealed or when relative humidity is unstable.
– Scratches: Using stiff brooms, abrasive pads, or a beater bar can grind fine dust into the finish.
– Moisture damage: “Mopping” too wet can cause swelling at seams or dulling of the finish—especially if the floor isn’t fully sealed.
– Wrong products: Cleaners meant for tile or stone, or strong degreasers, can strip wax/oil finishes or leave residue—verify with the floor/finish manufacturer guidance.
– Not ideal situations: If your floor is already damaged, flaking, or lifting, stop and address the underlying issue before “cleaning it more.”
Quick comparison: safest approach vs. risky shortcuts
| Approach | Pros | Cons |
|---|---|---|
| HEPA-filter vacuum + microfibre capture | Minimizes abrasion; reduces airborne re-depositing; works for everyday “powder” dust. | May take more passes for heavy renovation dust. |
| Dry sweep / push-with-broom | Fast and convenient. | Higher re-suspension risk; can leave a micro-grit haze that later scratches. |
| Soapy or multi-surface “degreaser” mopping | Can remove sticky residue quickly. | Often leaves film or can degrade wax/oil layers; increases risk around seams. |
One more edge case: renovation dust can be denser and sometimes hazardous depending on what materials were worked (e.g., treated wood, engineered products, or stone dust). If you suspect hazardous dust, do not “normal-clean” it away—follow the jobsite cleanup guidance for that material type.
Verdict + save-this checklist
Overall, the safest approach is capture dust first (HEPA-filter vacuum + microfibre), then spot/very light damp cleaning only if residue remains. The downside: you may need more passes than you expect, and you’ll need the right attachments/cloths—skipping these increases scratch and dulling risk. Skip this do-it-yourself cleaning approach if you’re dealing with significant finish failure, ongoing moisture problems, or you’re unsure what finish your hardwood has.
Quick checklist (scan/save)
| Step | What to use | Quick check |
|---|---|---|
| 1 | HEPA-filter vacuum (floor setting) | No beater bar / gentle brush contact |
| 2 | Microfibre cloth or pad | Cloth captures dust (not spreads it) |
| 3 | Light cleaner + well-wrung mop | No puddles; floor dries quickly |
| 4 | Crevice tool for edges | No scuffing at corners/seams |
| 5 | Final dry | Wipe/dry to prevent moisture dwell |
If you want to improve results immediately in 2026: slow your tool movements, reduce air blasts, and change microfibre faces often. Those three habits usually do more than “stronger cleaner” ever can.
Frequently Asked Questions
What’s the safest way to clean fine dust from hardwood floors without scratching?
Use a microfiber dusting pad or a vacuum with a hardwood floor brush attachment to capture fine dust without dragging grit across the surface. Avoid dry scrubbing with rough cloths or stiff bristle brooms, which can act like sandpaper. If you mop, only do it lightly after dusting first, so you don’t grind particles into the finish.
How do I remove fine dust from hardwood floors if I have pets or allergies?
Start with a vacuum using a HEPA filter and a soft brush to trap fine dust and allergens effectively. Follow with a barely-damp microfiber mop or dusting pad to pick up remaining particles, and rinse the pad often to prevent redepositing dust. For extra safety, keep windows/air circulation on and avoid using aerosol sprays that can spread dust instead of capturing it.
Why is it important to dry-dust or vacuum first before mopping hardwood floors?
Fine dust behaves like abrasive grit, so if you wet it too early, it can smear and embed into the finish. Dusting first removes loose particles so your hardwood floor cleaner or damp mop only handles residual film, not ground-in debris. This approach also helps prevent streaking and dulling of the wood’s finish.
Which tools are best for cleaning fine dust from sealed vs. unsealed hardwood floors?
For sealed hardwood floors, microfiber pads, soft vacuum attachments, and manufacturer-recommended wood floor cleaners work well because the finish provides a barrier. For unsealed or less-protected hardwood, prioritize dry dusting (microfiber) and gentle vacuuming, and use only minimal moisture to avoid water absorption and potential uneven darkening. When in doubt, check your floor’s finish type and follow the flooring manufacturer’s care instructions.
How can I do a quick daily cleaning routine to prevent fine dust buildup on hardwood?
Do a daily or every-other-day dry dusting with a microfiber mop or electrostatic dusting cloth, especially in high-traffic areas. Use a vacuum a few times a week with a hardwood floor setting to remove fine dust before it settles into the grain. Place doormats, use felt pads under furniture, and keep shoes off indoors to reduce the amount of fine dust that lands on your hardwood floors.
📅 Last Updated: October 29, 2026 | Topic: How to safely clean fine dust from hardwood floors? | Content verified for accuracy and freshness.
References
- https://www.cdc.gov/niosh/topics/wooddust/default.html
- https://www.cdc.gov/niosh/topics/silica/default.html
- Silica, Crystalline – Overview | Occupational Safety and Health Administration
- Controlling Asthma | Asthma | CDC
- https://www.cdc.gov/coronavirus/2019-ncov/community/organizations/cleaning-disinfection.html
- HEPA
- https://www.epa.gov/indoor-air-quality-iaq/air-cleaners-and-air-filters
- https://scholar.google.com/scholar?q=how+to+clean+hardwood+floors+dust+hepa+vacuum+damp+mopping Google Scholar
- https://scholar.google.com/scholar?q=dust+resuspension+vacuuming+damp+cleaning+hardwood+floor Google Scholar
- https://scholar.google.com/scholar?q=wood+dust+cleanup+hepa+vacuum+wet+cleaning+osHA+NIOSH Google Scholar