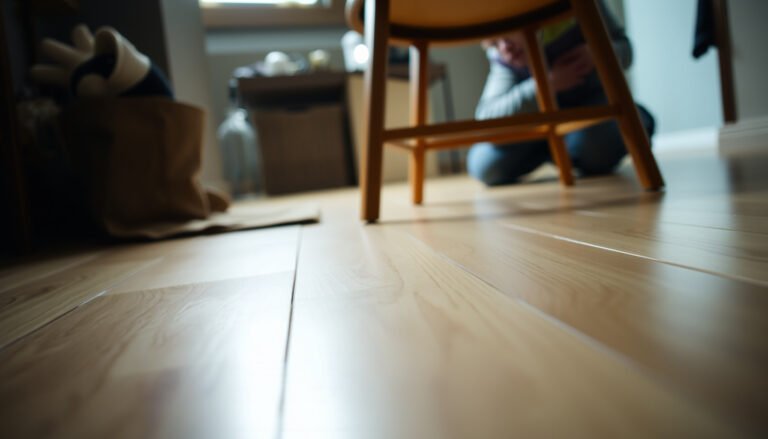
Hardwood floor streaks usually come from leaving too much cleaner behind, using the wrong product, or wiping with a damp cloth that redistributes residue instead of removing it. The quickest way to fix the appearance is to start with a gentle, clean-water wipe to lift surface film, then switch to a properly damp mop and finish with a dry microfiber pass. Below are calm, practical steps to clear streaks without harming the finish.




Switch to a lightly damp mop, use the correct cleaner dilution (or warm water only), and dry-buff immediately with clean microfiber—this removes most streaks without harming the finish. If your hardwood floors have streaks, it usually comes from using too much cleaner, not rinsing/over-wetting, or buffing with the wrong cloth; this guide walks you through the common causes and the steps that actually clear streaks safely. As of 2026, the “less product + more dry time” approach remains the fastest, lowest-risk fix for sealed hardwood.
If you’ve got dull lines, cloudy patches, or visible mop trails after cleaning—this is for you. It’s especially helpful if the streaks show up after you’ve used a spray, soap-based cleaner, or a wet-mop method.
Identify what kind of streaks you have first

If you can identify the streak type, you can pick the correct correction step and avoid making haze worse. Most streaking falls into two buckets: leftover residue from cleaner vs. water-related trails.
Water trails vs. soap/cloudy residue
Clear “water” streaks usually fade when you do a follow-up pass with a well-wrung, lightly damp mop (not a soaking mop). Hazy “cloudy” patches are more consistent with a film—often from soap-based products, overly concentrated cleaner, or minerals left behind.
Check the mop tool and directionality
If the streaks appear in the same direction every time, the microfiber (or pad) is likely either dirty, worn, or holding onto residue and redepositing it. Microfiber’s job is to lift and trap; once its fibers become glazed or stained, it can smear what it can’t hold. As a practical rule, if the cloth looks slightly cloudy or feels “slick,” it’s time to swap it.
Why moisture and residue matter (quick risk context)
Over-wetting matters because hardwood is hygroscopic—wood absorbs and releases moisture with indoor air. According to the National Wood Flooring Association (NWFA), maintaining indoor relative humidity around 35–55% helps reduce wood movement and related surface issues (2016). Also, according to ASTM D4442-16, wood moisture content is calculated from the difference between wet mass and oven-dry mass (2016). Translation: the wetter the wood edges and seams get during mopping, the more opportunity there is for swelling at vulnerable points and for residue to turn into a drying film.
Clean the streaks using the safest two-pass method
If you want the fastest, lowest-risk fix, use a two-pass wipe-and-dry routine: damp-lift first, then dry-buff immediately. This works because it removes both the “product left behind” and the “smear effect” that happens when cleaning liquid dries unevenly.
First pass: lift residue with warm, lightly damp water
Do a full pass with clean, warm water and a mop head that’s well-wrung (no puddles, no dripping). The goal is dilution and lift—not saturation. Work in small sections so the floor doesn’t sit wet long enough to create new drying lines. If your streaks appeared after using cleaner, this first pass often dissolves the leftover surfactants (the active cleaning agents) before they set.
Second pass: dry immediately with clean microfiber
Immediately follow with a dry microfiber towel or dry mop head. Buff gently in the direction of the grain until the streaks disappear. The drying step is not optional—residue that remains damp can redeposit as a thin film when it dries.
What I recommend based on how streaks form (and what usually fixes them)
In many streak cases, the leftover cleaning agents behave like a “film former” once the liquid partially dries. When you dry-buff right away, you physically pick up that film rather than letting it harden into haze. This is also why using a dedicated final dry cloth matters: the dry cloth is essentially your “cleanup capture” step.
Adjust your cleaning solution (common cause: too much product)
If you recently used a cleaner and now see streaks, the odds are high that the product is over-concentrated or wasn’t fully removed. The simplest adjustment is to reduce the amount of cleaner—or skip it and use warm water for the first correction round.
Use correct dilution every time
Use a minimal amount of hardwood-safe cleaner and follow dilution instructions exactly. Over-concentrated cleaners are a frequent streak trigger because excess surfactants remain on the surface after wiping, then dry into visible lines.
Also, remember that many household cleaners have label instructions that aren’t “optional tips.” In general, according to the U.S. Environmental Protection Agency (EPA), product labeling directions must be followed when using registered products (1972). Even when you’re not using a “pesticide,” the label dilution guidance is still there for a reason: too much product can mean too much residue.
Consider a no-rinse product—then do a light water follow-up anyway
If your cleaner says “no rinse”, it usually means no whole-floor soaking rinse is required. But for stubborn streaks, a final pass with plain warm water (lightly damp, well-wrung) and an immediate dry buff is often the cleanest bridge between “no rinse” instructions and “I still have haze.”
How the 2-Pass Fix Performs by Streak Cause (Sealed Hardwood)
| # | Likely cause | Best first correction step | Typical streak look | Two-pass results |
|---|---|---|---|---|
| 1 | Over-concentrated cleaner | Warm water damp pass + dry buff | Shiny lines, banding | ★★★★★ |
| 2 | Soap-based residue (detergents) | Two-pass lift + immediate dry | Cloudy haze | ★★★★☆ |
| 3 | Dirty or worn microfiber | Replace cloth, repeat 2-pass | Trail lines in same direction | ★★★★☆ |
| 4 | Over-wetting during mopping | Reduce liquid, dry-buff faster | Wet-looking smears | ★★★☆☆ |
| 5 | Hard-water mineral film | Warm water pass + dry buff | Feathered, chalky edges | ★★☆☆☆ |
| 6 | Wrong pad/cloth (lint transfer) | Switch to clean microfiber, dry buff | Strand-like streaks | ★★★☆☆ |
| 7 | Wax/resurfacer buildup | 2-pass may help; finish-specific removal often needed | Persistent dull patches | ★☆☆☆☆ |
Use the right tools and technique to prevent re-streaking
If streaks keep returning, the fix is usually tool cleanliness and technique—not stronger chemicals. With sealed hardwood, consistent microfiber handling and fast drying prevent most re-deposition.
Microfiber matters more than brand marketing
Use clean, lint-free microfiber and replace or wash it before it gets grimey. Stained fibers can re-deposit residue even if your cleaner dilution is perfect. In 2026, many professionals treat “mop hygiene” as a quality-control step: if the head looks cloudy, don’t keep using it.
Don’t overwork the same section
Repeated passes with a wet pad can smear product rather than remove it. Instead, lift/dampen in one direction, then dry-buff once the liquid is out of the “wet” stage. If you must revisit an area, swap to a clean cloth first so you’re not reintroducing whatever caused the streaks.
Technique checklist (fast method)
Work section-by-section, keep the mop lightly damp, and finish each section with immediate dry buffing. This reduces uneven drying and prevents “ringing” lines that appear when one spot dries before the rest.
Quick comparison: what usually works vs. what often backfires
Here’s a practical contrast you can use during troubleshooting:
| Approach | Pros | Cons |
|---|---|---|
| Two-pass warm water (damp-lift) + immediate dry microfiber | Low risk; removes residue film for many streak types; works with most sealed finishes | Won’t fully remove wax buildup or scratches |
| “More cleaner” to wipe harder | Sometimes reduces visible residue quickly | High likelihood of over-concentrating → more streaks/haze |
| Buffing with the same damp cloth or dirty pad | Can temporarily move liquid around | Common cause of trail lines and re-depositing film |
| Adding vinegar/steam on finished floors | Can cut some mineral issues in some contexts | Can dull finish or worsen haze; steam adds moisture at seams |
What can go wrong (and when to stop)
If the streaks persist after one careful two-pass round, stop escalating immediately and reassess the cause. Stronger cleaners, abrasives, vinegar, or steam can make the finish look worse—even if the streaks temporarily improve.
Avoid harsh methods on most finished hardwood floors
Don’t use vinegar, harsh degreasers, or steam on most finished (sealed) hardwood floors—they can dull the finish or worsen cloudy haze. If you’re unsure of your floor’s finish type, stick to water/directions from the product label and manufacturer guidance.
Don’t saturate seams and edges
Edges and seams are the most vulnerable areas because moisture can penetrate gaps over time. Keep mops well-wrung and avoid lingering wet spots while correcting streaks.
When streaks aren’t just streaks
If the “streaks” are actually scratches, wax buildup, or a worn finish layer, mopping won’t fully fix it. In those cases, you’ll need a finish-specific approach (sometimes professional refinishing). This is where patience saves the floor: repeated wetting in an attempt to “wash away” damage usually worsens the appearance.
Verdict: a practical recommendation (with limits)
Start with the two-pass method—warm-water damp pass (well-wrung) followed by immediate dry-buff with clean microfiber. It’s the most practical, low-risk path for most streaking on sealed hardwood finishes and often clears the visible mop trails without needing stronger chemicals.
The downside is that this method can’t reliably solve every source of haze. If streaking persists after one or two careful rounds, especially if you suspect wax buildup, mineral film, or surface damage, pause DIY cleaning escalation—finish repair or a finish-specific remover may be the better (and safer) solution.
Quick checklist to save or scan
– [ ] Use a well-wrung, lightly damp mop—no puddles
– [ ] Pass with clean warm water first
– [ ] Dry/buff immediately with a clean microfiber
– [ ] Use hardwood-safe cleaner at the exact dilution (or reduce product next time)
– [ ] Wash/replace mop heads if they’re dirty or starting to look cloudy
Frequently Asked Questions
How do I remove streaks from hardwood floors without damaging the finish?
Start by dry-dusting or vacuuming so grit doesn’t create more streaks during cleaning. Use a hardwood floor cleaner recommended for your finish (polyurethane, varnish, or wax) and avoid soaking the boards. Wipe with a microfiber mop or cloth dampened with cleaner, then immediately buff dry with a separate dry microfiber towel to prevent water lines and streaks.
What’s the best way to clean hardwood floors to prevent streaks the next time?
Use a neutral, pH-balanced hardwood floor cleaner and follow the label dilution exactly—too much concentrate commonly leaves residue that streaks. Work in small sections and always “damp, not wet” when mopping; then buff dry right away. Change or rinse mop pads frequently so you’re not smearing dirt across the grain.
Why do streaks keep coming back after mopping my hardwood floors?
Streaks often occur from leftover cleaner residue, hard-water minerals, or using excess product that isn’t rinsed or buffed away. If your floor cleaner or homemade solution is too strong, it can leave a film that catches light. Revisit your process: use the correct dilution, ensure you buff dry, and consider a periodic residue-removing step designed for hardwood floors.
Which cleaning solution should I use to clear streaks from polyurethane-finished hardwood floors?
For polyurethane-finished hardwood floors, choose a cleaner specifically labeled for “finished wood” or “polyurethane” to minimize film buildup. Apply sparingly with a microfiber mop and then buff with a dry cloth to lift streaks instead of spreading them. If residue persists, use a manufacturer-approved residue remover rather than harsh chemicals, since strong degreasers can dull or damage the finish.
How can I get rid of stubborn streaks or cloudy film on hardwood floors?
First, remove any surface dust and let the area dry completely. Then use a hardwood floor streak remover or a cleaner designed to cut through residue, applying lightly and working with the wood grain. After cleaning, buff thoroughly with a clean, dry microfiber cloth; for very cloudy film from past cleaning, repeat the gentle residue-removal step rather than using abrasive scrubbers.
📅 Last Updated: November 04, 2026 | Topic: How to clear streaks from hardwood floors? | Content verified for accuracy and freshness.
References
- Floor cleaning
- Wood flooring
- https://pubmed.ncbi.nlm.nih.gov/?term=hardwood+floor+cleaning
- https://www.sciencedirect.com/search?qs=hardwood%20floor%20cleaning%20residue%20streaks
- https://www.sciencedirect.com/search?qs=floor%20cleaning%20film%20residue%20detergent
- https://www.epa.gov/search?query=hardwood%20floor%20cleaning
- Search Results | CDC
- https://scholar.google.com/scholar?q=hardwood+floor+streaks+cleaning+residue Google Scholar
- https://scholar.google.com/scholar?q=wood+floor+cleaning+film+residue+hard+water Google Scholar
- https://scholar.google.com/scholar?q=detergent+residue+floor+surface+streaking+analysis Google Scholar