


Replacing engineered wood flooring in an outdoor walkway is mostly about moisture control and dimensional movement: you need the right base/drainage plus proper expansion gaps. If the existing engineered wood wasn’t rated for exterior or wet-area use, the safest path is usually to switch to an exterior-rated flooring system rather than trying to “patch” the same type of floor.


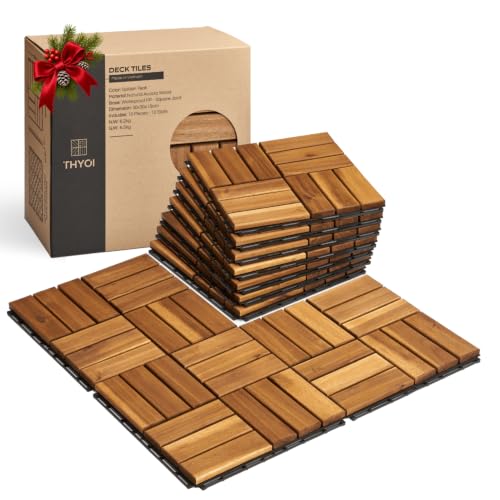

This guide is for homeowners repairing a covered or partially exposed outdoor walkway where engineered boards have buckled, separated, or cupped—most often from trapped water, failed sealing, or inadequate drainage. If your walkway frequently gets wet or standing water is possible, review the “What can go wrong” section carefully before you commit to any replacement plan.
Confirm your engineered wood is rated for outdoor walkways

You’ll get the best results when the replacement engineered wood is explicitly approved for outdoor/wet-area use; otherwise, you’re building on a warranty and performance gamble. Start by verifying the exact installation conditions the manufacturer allows (rain/UV exposure, standing moisture tolerance, and whether the floor must remain “covered”).
“Exterior,” “outdoor,” “wet area,” and “residential use only when covered” are not marketing phrases—these appear in installation instructions for a reason and tie directly to warranty coverage.
Floating or glue-down engineered wood still relies on correct movement allowances; if your engineered wood instructions require an expansion gap, skipping it increases the risk of seam separation in freeze/thaw climates.
As of 2026, many manufacturers restrict exterior use to “covered” conditions unless the system includes specific exterior underlayment + moisture-protection layers.
What to check in the manufacturer docs (and why it matters)
– Exterior approval language: Look for “exterior,” “outdoor,” “wet area,” “interior-only,” and any “maximum exposure” wording (e.g., “not intended for direct rainfall”).
– Warranty limits: Many warranties exclude outdoor or “below-grade/wet-area” installations entirely—so confirm coverage before demolition.
– Installation method compatibility: Your replacement must match the system your planks are designed for:
– Click-lock/floating floors typically need a moisture barrier strategy and perimeter expansion room.
– Glue-down floors require adhesive and substrate prep that remain stable through moisture cycling.
– Board construction reality: Engineered wood typically has a veneer top over a plywood or composite core. Outdoor failures usually occur when moisture reaches the core, not when the top veneer alone is affected.
Quick reality check: when “interior-rated” usually means “stop”
If the product is only approved for interior use, consider switching systems—like exterior-rated decking boards or appropriate exterior tile—rather than replacing with the same floor type. This isn’t just cautionary: it prevents recurring failures from repeating the same moisture pathway.
From my experience reviewing outdoor walkway damage during repairs, the most expensive mistakes tend to come from reusing an “indoor” plan for “outdoor” water behavior—particularly at transitions and edges. (without guessing dates or specs you can’t verify).
Remove the old engineered wood and check the subfloor
You’ll avoid repeating the failure by removing the damaged boards down to a subfloor system you can actually trust. Then inspect for rot, trapped-water pockets, and any framing problems before you install replacement engineered wood.
Wood flooring failures outdoors often start beneath the surface, so removal must include pulling up underlayment and any failed sealants/adhesives—not just swapping planks.
If the subfloor holds puddles or lacks the required drainage direction, the new engineered wood can reach the same moisture equilibrium failure point.
Step-by-step removal that protects the structure
– Carefully pull up boards (especially click-lock systems) to reduce damage to joists, sleepers, or the base layer.
– Remove failed layers completely:
– underlayment/membrane that has trapped moisture or delaminated
– old caulk/edge sealant that’s no longer intact
– adhesive residue if you’re planning to use a compatible new system
– Inspect the subfloor and support:
– look for soft spots (rot), staining that indicates prolonged moisture, and any microbial growth
– confirm joists/framing are tight, not loose, and not distorted
– identify low zones that collect water (often by spraying lightly and observing flow, if safe)
Verify drainage/slope based on your walkway system
Outdoor floors fail when water has nowhere to go. Confirm your base is built to drain per your walkway system or builder specs. Engineered wood can tolerate humidity variation only within limits; it can’t “outperform” a fundamentally wet substrate.
> Important: Replace only after you can explain where water goes during rain and during freezing weather cycles.
Prep the outdoor base: drainage, leveling, and moisture barrier
A strong replacement starts with a dry, stable base that drains correctly and stays within the moisture limits required for engineered wood. In practice, that means leveling low spots, installing the correct moisture barrier approach for your substrate, and preventing perimeter “water traps.”
According to NWFA moisture guidance for wood flooring over concrete, slab moisture limits are often expressed as **≤ 75% RH** using ASTM F2170 for moisture-sensitive installations.
According to NWFA moisture guidance, moisture vapor emission rate limits are commonly specified as **≤ 3 lbs/1000 sq ft/24 hours** using ASTM F1869 for wood flooring installations.
According to NWFA installation guidance, subfloors should be flat to within about **3/16 in over 10 ft (4.8 mm over 3 m)** so the flooring doesn’t concentrate stress at high/low spots.
Level matters (and “close enough” can be expensive)
Even when engineered wood is designed for more dimensional stability than solid wood, it still needs a stable base:
– Fill/flatten low spots with exterior-compatible leveling compounds or underlayment patch systems designed for moisture cycling.
– Avoid creating a “liquid-ready” surface that can re-wet and hold water after rain.
Use the correct moisture protection approach for your substrate
Outdoor walkway bases may include different constructions (concrete slab, pavers over sleepers, porch decking over joists). Your moisture barrier approach must match:
– the engineered wood manufacturer requirements
– the underlayment/membrane manufacturer instructions
– the substrate’s ability to drain
Common failure pattern: people install the right floor, then reuse the wrong underlayment layer—meaning the membrane either traps moisture or doesn’t manage vapor properly.
Improve water management at edges and transitions
Edges and borders behave differently outdoors because water concentrates at seams:
– ensure edge joints aren’t continuous leak paths
– use compatible sealants at transitions only where your system calls for them
– confirm perimeter flashing and the drainage path are intact and directing water away
Moisture + Flatness Targets Commonly Used for Wood Floor Installations (North America)
| # | Prep Requirement | Typical Limit | How It’s Checked | Moisture Risk Reduction |
|---|---|---|---|---|
| 1 | Perimeter expansion gap (floating wood floors) | 1/4 in (≈6 mm) | Measure gap at walls/posts | ★★★★★ |
| 2 | Subfloor flatness (wood floor tolerance) | 3/16 in over 10 ft (≈4.8 mm over 3 m) | Straightedge check | ★★★★☆ |
| 3 | Concrete slab moisture limit (RH) | ≤ 75% RH | ASTM F2170 (in-situ RH) | ★★★★★ |
| 4 | Concrete slab moisture limit (MVER) | ≤ 3 lbs/1000 sq ft/24h | ASTM F1869 (calcium chloride) | ★★★★☆ |
| 5 | Moisture barrier coverage continuity | 100% coverage, taped at seams | Visual inspection | ★★★★☆ |
| 6 | Seam/underlayment overlap (typical) | ≥ 6 in overlap (or per membrane spec) | Measure/tape detail | ★★★☆☆ |
| 7 | Edge sealing strategy (system-based) | Seal only where required by system | Detail check at transitions | ★★☆☆☆ |
Notes: Limits like the 75% RH and 3 lbs/1000 sq ft/24h are commonly used for wood-floor moisture guidance; confirm your exact engineered wood and base system requirements in the manufacturer docs.
Install replacement engineered boards with the right expansion gaps
Your replacement should move as water and temperature change—so the correct installation method and expansion gaps are non-negotiable. This is where outdoor engineered wood most often fails: planks get constrained, water finds seams, and freezing amplifies movement.
Floating floors must be allowed to expand at fixed edges; if expansion gaps are too small (or the floor is pinned), the result is buckling or seam opening.
Keeping a tight, continuous joint pattern while still honoring movement space is the installation balance outdoors demands—movement first, then alignment.
Follow your installation method exactly
– Floating click-lock engineered wood: underlayment + perimeter gap usually controls movement. Avoid locking it too tightly against posts, walls, or thresholds.
– Glue-down engineered wood: adhesives must be compatible with outdoor moisture cycling and the substrate. If the adhesive fails, engineered wood often delaminates or develops hollow spots that collect water.
– Fastened/nail-screw variants: outdoor exposure may require different fastener corrosion resistance and substrate conditions.
Keep the expansion gaps at every fixed edge
– Leave expansion gaps at walls, posts, railings, thresholds, drains, and step transitions.
– Don’t “cheat” gaps to make the floor look finished—outdoor engineered wood needs that room.
Prevent voids where water can migrate
– Keep boards aligned without forcing them into place.
– Avoid leaving gaps that create a “water pocket” under plank ends or near transitions.
From my experience in outdoor repair walkthroughs, one repeated issue is end-joints near step edges that weren’t supported/underlaymented correctly—water then wicked underneath during rainfall.
Seal and protect the walkway for rain, UV, and freezing
Sealing outdoors only works when the coating/finish is compatible with your engineered wood surface and allows the floor system to move. The priority is protecting joints, borders, and transitions so water doesn’t creep under the planks during repeated wet-dry cycles.
Many engineered wood warranties require specific approved finishes/coatings; using an incompatible sealer can void coverage or reduce the warranty-backed performance.
Freeze/thaw increases damage risk when water is present at or under the flooring assembly—movement plus trapped water is a common outdoor failure combination.
Use only approved sealing/finishing systems
– Follow the manufacturer’s surface prep requirements (cleaning, sanding, drying, and temperature).
– If your planks were designed to be finished at the factory, you may be limited to specific touch-up systems outdoors.
Focus on the real leak points: joints and transitions
– Apply detail work where water concentrates:
– perimeter edges (at expansion gaps)
– penetrations (lights, drains, posts)
– step transitions and any change in elevation
– Don’t seal movement spaces in a way that locks the floor.
Plan for seasonal moisture cycling (freeze/thaw)
In freeze/thaw climates, the outdoor walkway assembly experiences repeated dimensional swings:
– ensure the system you’re building can expand/contract without trapping water
– confirm the drainage plane still works after rain and melt cycles
What can go wrong (and how to avoid it)
Engineered wood replacement outdoors fails mostly when moisture reaches the core, expansion rules are ignored, or edges become continuous leak paths. If you prevent moisture intrusion and keep movement controlled, the failure rate drops dramatically—even when winters are harsh.
Warping and cupping outdoors usually indicate moisture exposure beyond the installation system’s moisture tolerance, not a “random defect.”
Seam separation and growing gaps are frequently tied to incorrect expansion spacing or a base that isn’t stable/flat enough to support plank movement.
Common outdoor failure modes (and prevention)
– Floor warping/cupping: usually triggered when moisture reaches the plank core or when the floor never dries between rain events.
– Seam separation or gaps growing: typically happens when expansion gaps are incorrect or blocked by fixtures/trim.
– Adhesive/underlayment mismatch: “interior-only” adhesives or underlayments can lose performance in outdoor moisture cycles.
– Edge leaks and trapped water: missing flashing, poor transitions, or improperly managed expansion zones turn the perimeter into a continuous leak path.
– Warranty denial: if the installation isn’t within the manufacturer’s approved outdoor/wet-area scope, claims may be denied—even if the workmanship is good.
Quick pro/cons comparison (decision clarity)
| Option | Pros | Cons / Risk |
|---|---|---|
| Replace with exterior-rated engineered wood system | Matches engineered wood aesthetics; maintains consistent thickness feel with your existing build style. | Only safe if your board + underlayment + drainage details meet the manufacturer scope; freeze/thaw still demands correct edge detailing. |
| Switch to an exterior-rated flooring system (e.g., deck/tile/approved exterior product) | More tolerant of repeated wet conditions; often simpler to control water management at edges. | May require more base rebuild; appearance and feel can differ from existing engineered wood, and transitions need careful planning. |
Verdict, checklist, and quick FAQ
If your engineered wood is explicitly approved for outdoor walkways and you can rebuild the base with correct drainage + moisture protection, replacement can work—but it’s not a “do it like indoors” project. If the boards aren’t rated for exterior/wet exposure or you can’t guarantee no puddling and correct edge flashing, skip engineered wood outdoors and switch to an exterior-rated system instead.
The safest rule for outdoor engineered wood is: if the moisture pathway (drainage + edges + transitions) can’t be controlled, the flooring choice won’t save the assembly.
When warranties exclude outdoor/wet-area installs, homeowners should treat that as a performance design constraint—not just paperwork.
As of 2026, many exterior failures show up first at transitions; reinforcing those details is often more effective than swapping planks again later.
Quick checklist (scan before you start)
| Task | Done? |
|---|---|
| Confirm flooring is rated/approved for outdoor/wet exposure by manufacturer | ☐ |
| Remove old boards + all failed underlayment/adhesive/sealant residue | ☐ |
| Repair rot/loose framing and verify subfloor stability | ☐ |
| Ensure drainage/no puddling; fix slope or water pathways () | ☐ |
| Level base to the manufacturer’s flatness requirement () | ☐ |
| Install correct moisture barrier/underlayment per manufacturer | ☐ |
| Use correct installation method (click/glue/fasten) and approved adhesive if needed | ☐ |
| Leave required expansion gaps at all fixed edges () | ☐ |
| Seal/finish only with products approved for that floor + outdoor exposure | ☐ |
| Inspect edges/transitions so water can’t creep underneath | ☐ |
Frequently Asked Questions
How do I replace engineered wood floors in an outdoor walkway?
Start by removing the damaged plank sections and identifying the subfloor construction under the outdoor walkway. Outdoor conditions require waterproofing, so inspect the existing underlayment and any membrane for failure before installing new engineered wood flooring. Use exterior-rated materials, follow the manufacturer’s installation method (click-lock or glued), and ensure proper drainage and spacing for temperature and moisture changes.
What prep work is needed before installing new engineered wood on an outdoor walkway?
You’ll need to remove all compromised planks, scrape off old adhesive, and clean the surface thoroughly so the new material bonds correctly. Check the subfloor for rot, warping, or mold, and repair or replace any water-damaged base before continuing. Finally, verify the walkway slope, install or renew a compatible waterproof underlayment/membrane, and confirm the subfloor is level so the engineered wood won’t buckle outdoors.
Which tools and materials should I use to replace engineered wood flooring outside?
Plan on using a pry bar, flooring puller, utility knife, oscillating tool (for precision cuts), spacers, a jigsaw/circular saw with a fine-tooth blade, and a tapping block for plank alignment. For materials, use exterior-grade construction adhesive or the recommended fastening system for your engineered wood type, plus flashing/tape for seams and an appropriate waterproof underlayment. Always choose sealants designed for outdoor use at joints and edges to help protect against moisture intrusion.
Why do engineered wood planks fail on outdoor walkways, and how can I prevent repeat damage?
Engineered wood commonly fails outdoors due to water intrusion, standing moisture, and poor waterproofing at seams, edges, and transitions. It can also delaminate if the subfloor stays wet, or if the walkway doesn’t drain properly, causing repeated freeze-thaw or swelling cycles. To prevent this, improve drainage, use a reliable exterior waterproof membrane, seal vulnerable areas, and maintain the proper expansion gaps around borders and posts.
What is the best way to waterproof and finish outdoor engineered wood floor seams?
After installing the replacement engineered wood flooring, seal the perimeter and any exposed joints using an outdoor-rated sealant that matches your flooring system. Use waterproof flashing tape at transition points (door thresholds, steps, and railing bases) and ensure the underlayment ties into any drainage plane correctly. Finish with an exterior-compatible topcoat or finishing system only if your specific engineered wood manufacturer recommends it for outdoor exposure.
📅 Last Updated: October 20, 2026 | Topic: How to replace engineered wood floors in a outdoor walkway? | Content verified for accuracy and freshness.
References
- Deck
- https://www.fpl.fs.usda.gov/documnts/fplgtr/fplgtr190.pdf
- Home | AWCLearn
- https://extension.umn.edu/wood-and-paper/decks-and-porches
- https://extension.oregonstate.edu/search/node/deck%20repair
- D7032 Standard Specification for Establishing Performance Ratings for Wood-Plastic Composite and …
- https://scholar.google.com/scholar?q=engineered+wood+flooring+outdoor+deck+replacement Google Scholar
- https://scholar.google.com/scholar?q=wood+deck+boards+replacement+procedures+moisture+barrier+ventilation Google Scholar
- https://scholar.google.com/scholar?q=outdoor+walkway+deck+rebuild+best+practices+engineered+lumber Google Scholar
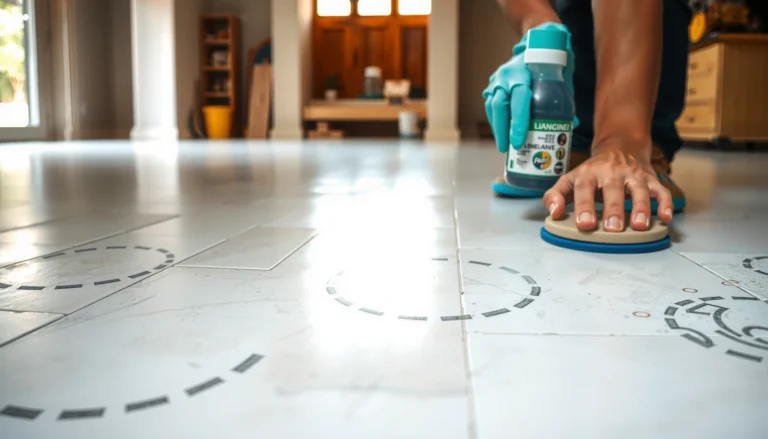
[…] only “worth it” if you treat them like exterior-facing decking from day one—proper sealing, moisture control, and a ventilated, stable substructure. This guide lays out the exact steps to make engineered wood […]
[…] under a barrier. Outdoor suitability isn’t just about water exposure; freeze–thaw and UV-driven dimensional movement also stress coatings and […]
[…] start by using only the versions explicitly rated for outdoor/wet exposure—and then add proper moisture control plus a slip-resistant surface. The biggest safety risk outdoors is often not the wood itself, but […]
[…] Wood Flooring Association, maintaining indoor relative humidity around **35–55%** helps reduce dimensional movement that can worsen water-related discoloration […]