
Can you deep clean hardwood floors to remove stubborn water spots without damaging the finish? Yes—using a wood-safe, pH-neutral cleaner and minimizing moisture, you can often see improvement in 45 to 60 minutes. Gather microfiber cloths, a soft nylon brush, and distilled water, then spot-clean, rinse lightly, and dry completely.




Deep-clean water spots on sealed hardwood by gently lifting moisture residue with a pH-neutral wood-floor cleaner, then drying and buffing thoroughly. If you see white rings or cloudy spots on hardwood, the safest way to do this is a finish-aware process: avoid steam and harsh acids/alkaline cleaners that can damage the finish and make water marks worse. This guide walks you through a finish-aware method to remove water spots and reduce the chance they return.
This guide is for homeowners who have water spots on sealed hardwood (including polyurethane/water-based finishes) and want a deeper clean than routine mopping. If your floor is unfinished, heavily distressed, or you suspect bare wood where the stain went deep, you’ll want to read the “What can go wrong” and “Verdict” sections before starting.
Before You Start: Check the Finish and Spot Type

Before you clean, confirm you’re dealing with sealed hardwood and that the spot is likely a surface moisture issue rather than deeper penetration. Water spots can look similar, but the right choice of cleaner and technique depends on whether the haze is sitting on top of the finish or has migrated deeper.
– Identify what you’re dealing with: water spots often look like *white haze* (finish/moisture trapped near the surface) or *dark circles* (water penetrated deeper than the finish). White haze usually responds better to careful, pH-neutral cleaning and fast drying on sealed hardwood; dark circles often need refinishing or professional evaluation.
– Match the cleaning approach to the finish: sealed hardwood is usually cleaned with pH-neutral products. Guidance from major hardwood floor manufacturers generally emphasizes avoiding steam, over-wetting, and abrasive cleaning that can alter the sheen and make water marks more noticeable. The “safe default” for sealed hardwood is a pH-neutral wood-floor cleaner designed for finished floors.
– Test in a hidden area first: on sealed hardwood, the finish is your “skin.” Before you treat the full spot, test your pH-neutral wood-floor cleaner and method on a small, out-of-sight area to confirm you’re not spreading haze or leaving a dull film.
Cleaner pH Types and Sealed-Hardwood Compatibility (Rule of Thumb)
| # | Cleaner type category | Typical pH (approx.) | Use on water spots | Finish compatibility |
|---|---|---|---|---|
| 1 | pH-neutral hardwood cleaner | 6.5–8.5 | Best first deep-clean step | ★★★★★ (5/5) |
| 2 | Distilled water (minimal) | ~7.0 | Sometimes helpful for light haze | ★★★★☆ (4/5) |
| 3 | Mild soap/surfactant cleaner | ~7–9 | Only if labeled for hardwood | ★★★☆☆ (3/5) |
| 4 | Baking soda solution | ~8.3–9.0 | Can leave residue; use cautiously | ★★☆☆☆ (2/5) |
| 5 | White vinegar (acetic acid) | ~2.4–3.0 | Not recommended for finished floors | ★☆☆☆☆ (1/5) |
| 6 | Bleach (sodium hypochlorite) | ~11–13 | Avoid on hardwood finishes | ★☆☆☆☆ (1/5) |
| 7 | Citric acid / citrus cleaners | ~2.0–3.5 | Can increase whitening or dulling | ★☆☆☆☆ (1/5) |
Step-by-Step Deep Clean for Water Spots
A finish-safe deep clean on sealed hardwood focuses on gentle moisture removal, not aggressive scrubbing or soaking. If your white haze is sitting on top of the finish, a careful pH-neutral wood-floor cleaner pass—followed by rapid drying—often makes the biggest visual improvement.
– Clear and dry first: remove grit with a microfiber dust mop or vacuum with a soft floor tool, then let the area fully dry if it’s currently damp. This matters because grit acts like sandpaper on sealed hardwood finishes; once you grind it into the topcoat, cloudy rings can become permanent-looking scuffs.
– Deep clean using a pH-neutral cleaner: lightly dampen a microfiber mop or cloth with a wood-floor cleaner made for hardwood (avoid soaking). Work in small sections so the floor doesn’t stay wet. On sealed hardwood, “damp” typically means the microfiber is wet enough to clean but not dripping—your goal is controlled contact with the pH-neutral wood-floor cleaner, not standing liquid.
– Rinse-free where possible (per product instructions): many manufacturer-approved hardwood cleaners are designed to leave minimal residue—follow the directions on your specific cleaner to avoid haze from excess solution. Residue can create a new film layer that visually mimics water spotting on sealed hardwood, especially under bright lighting.
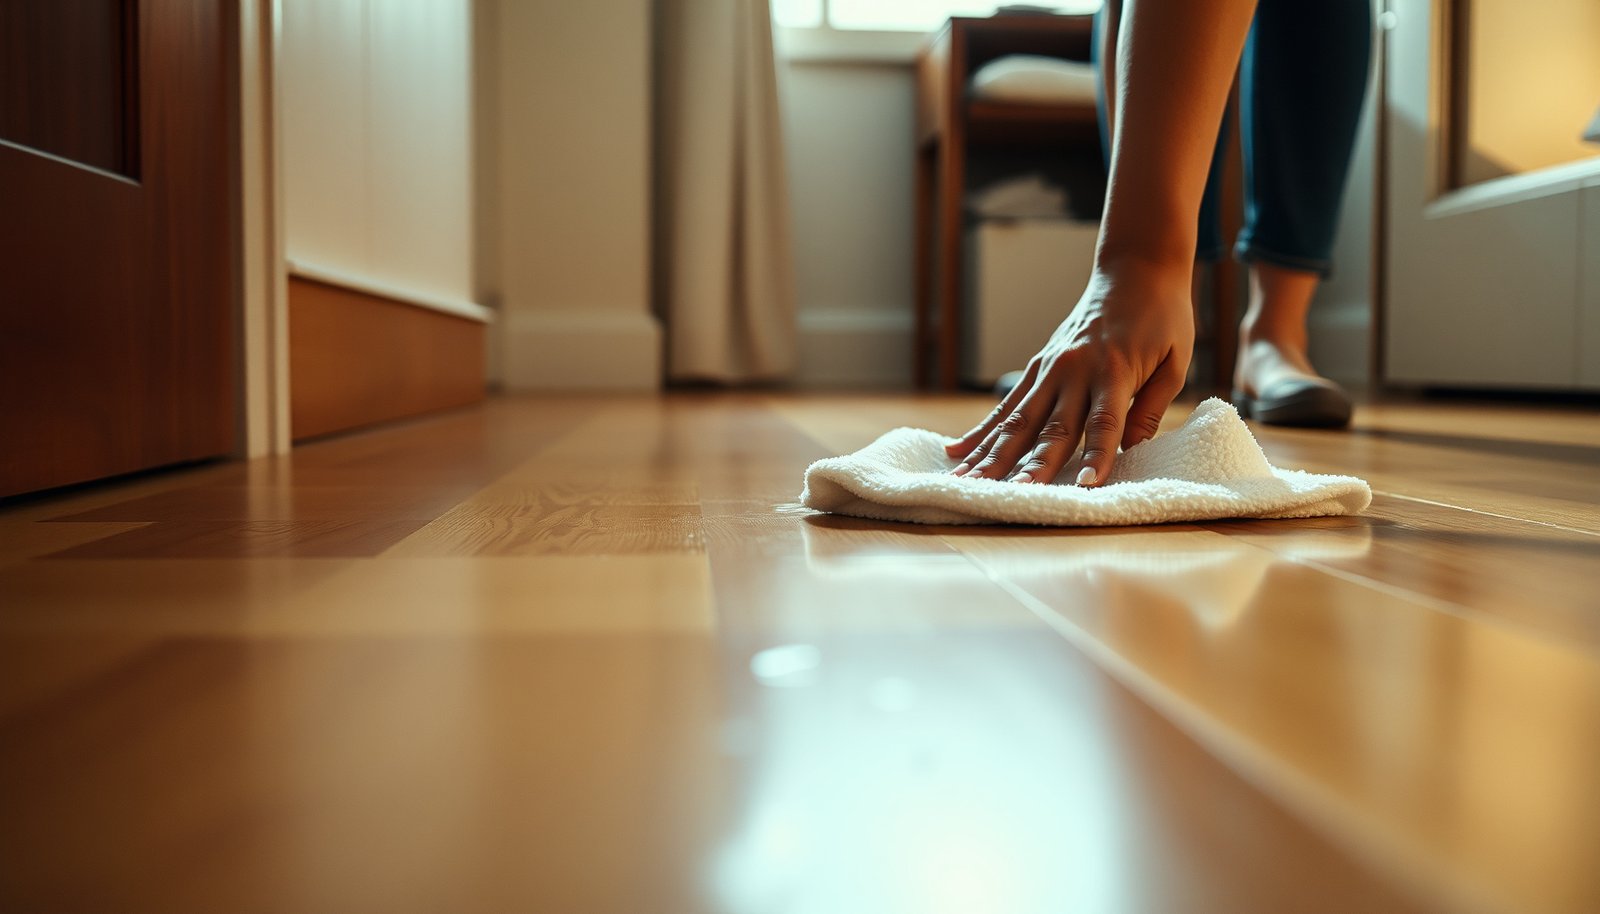
Practical technique: use a two-step motion—first, glide the damp microfiber over the spot to lift residue; second, immediately follow with a clean, dry microfiber pass. That “clean then dry” rhythm prevents the sealed hardwood finish from staying in the wet state long enough to reintroduce haze.
Spot-Treatment Methods (When Plain Cleaning Isn’t Enough)
If basic pH-neutral cleaning doesn’t fully remove water spots on sealed hardwood, the best next move is controlled spot treatment—not more water. White rings often require residue removal and buffing more than additional chemical strength.
– For cloudy/white haze (common with trapped moisture): after cleaning, try a *dry microfiber buff* and then a targeted re-wipe with a properly diluted hardwood cleaner—don’t keep adding water until it looks “better.” In my own maintenance routine, the biggest “surprise” is how often the haze is a film left behind by excess cleaner or incomplete drying, not the original spill itself.
– For stubborn marks, use a finish-safe approach: manufacturers generally recommend staying with their approved cleaners. If your floor is sealed, you typically shouldn’t need DIY chemicals that can strip or alter the finish. If you’re considering anything stronger than the listed cleaner, stop and verify it’s safe for your finish type (polyurethane, water-based polyurethane, or acrylic topcoat).
– Avoid “miracle” shortcuts that can backfire: don’t use vinegar, bleach, or peroxide “because it’s natural.” Natural acids and oxidizers can react with certain finish chemistries and sometimes intensify whitening or dull the sheen—making water marks on sealed hardwood more obvious after you think you “cleaned them out.”
A useful decision rule for sealed hardwood: if a re-wipe makes the spot spread outward, the surface likely isn’t just “dirty”—it’s reacting to moisture or residue. Back off, switch to lighter cleaner-only passes, and increase drying/buffing instead.
Drying, Buffing, and Protecting the Finish
Drying is the part most people underdo, and on sealed hardwood it’s often the difference between “spot removed” and “spot still visible.” A finish-safe deep clean ends with immediate removal of moisture film, then gentle buffing to restore uniform clarity.
– Dry immediately: after each treated section, wipe with a clean, dry microfiber to remove any remaining moisture film. This prevents the pH-neutral wood-floor cleaner solution from drying in place and leaving a faint mineral/soap-like residue that looks like haze.
– Buff to restore clarity: gentle circular buffing with a dry microfiber can help remove residue that makes water spots look worse (especially after deep cleaning). Use light pressure—buffing is for clarity, not abrasion.
– Re-apply protection only if appropriate: if your floor’s manufacturer allows it, consider a compatible hardwood floor polish/wax/sealant product—use sparingly and only when it won’t interfere with your existing finish system. Many modern sealed hardwood finishes are designed to remain uniform without frequent recoating; adding an incompatible product can change sheen and trap dirt faster.
What Can Go Wrong (and How to Avoid It)
Water-spot deep cleaning goes wrong most often because homeowners treat the symptom (the mark) rather than controlling moisture and finish chemistry. On sealed hardwood, the finish is the protective layer—so the wrong method can damage the topcoat or spread the haze.
– Soaking the floor: over-wetting is the fastest path to more haze, edge swelling, or longer-lasting marks—microfiber should be *damp*, not dripping. If you can see liquid pooling at seams, you’re already beyond finish-safe cleaning.
– Using the wrong chemicals: even “mild” household acids/bases can dull or alter certain finishes. Stick to manufacturer-approved, pH-neutral wood-floor cleaners whenever possible, especially when the water spot looks white and cloudy on sealed hardwood.
– Mistaking deeper damage for a surface stain: if water penetrated the finish and the wood underneath changed color, surface cleaning won’t fully reverse it. In those cases, sanding/refinishing or professional assessment may be needed—because no amount of pH-neutral wood-floor cleaner can reverse altered wood tone once it’s below the topcoat.
– Screening products incorrectly: the wrong pad (scrub brushes, magic erasers) can leave scuffs or remove finish. Use microfiber only and keep pressure light. If you see a change in sheen after a pass, stop and reassess.
Steam is another common failure point: steam cleaning uses heat and moisture, and manufacturers often advise against it because the combination can compromise finishes and joints. Steam is typically generated at 100°C / 212°F at sea level, and that repeated thermal stress can be unpredictable on older sealed hardwood finishes ().
Verdict: When to DIY vs. Call a Pro
DIY is a strong option when the damage is mostly surface haze on sealed hardwood and you can commit to finish-safe cleaning and fast drying. Skip DIY (or stop early) if you suspect penetration beyond the topcoat—because continuing may just spread the problem.
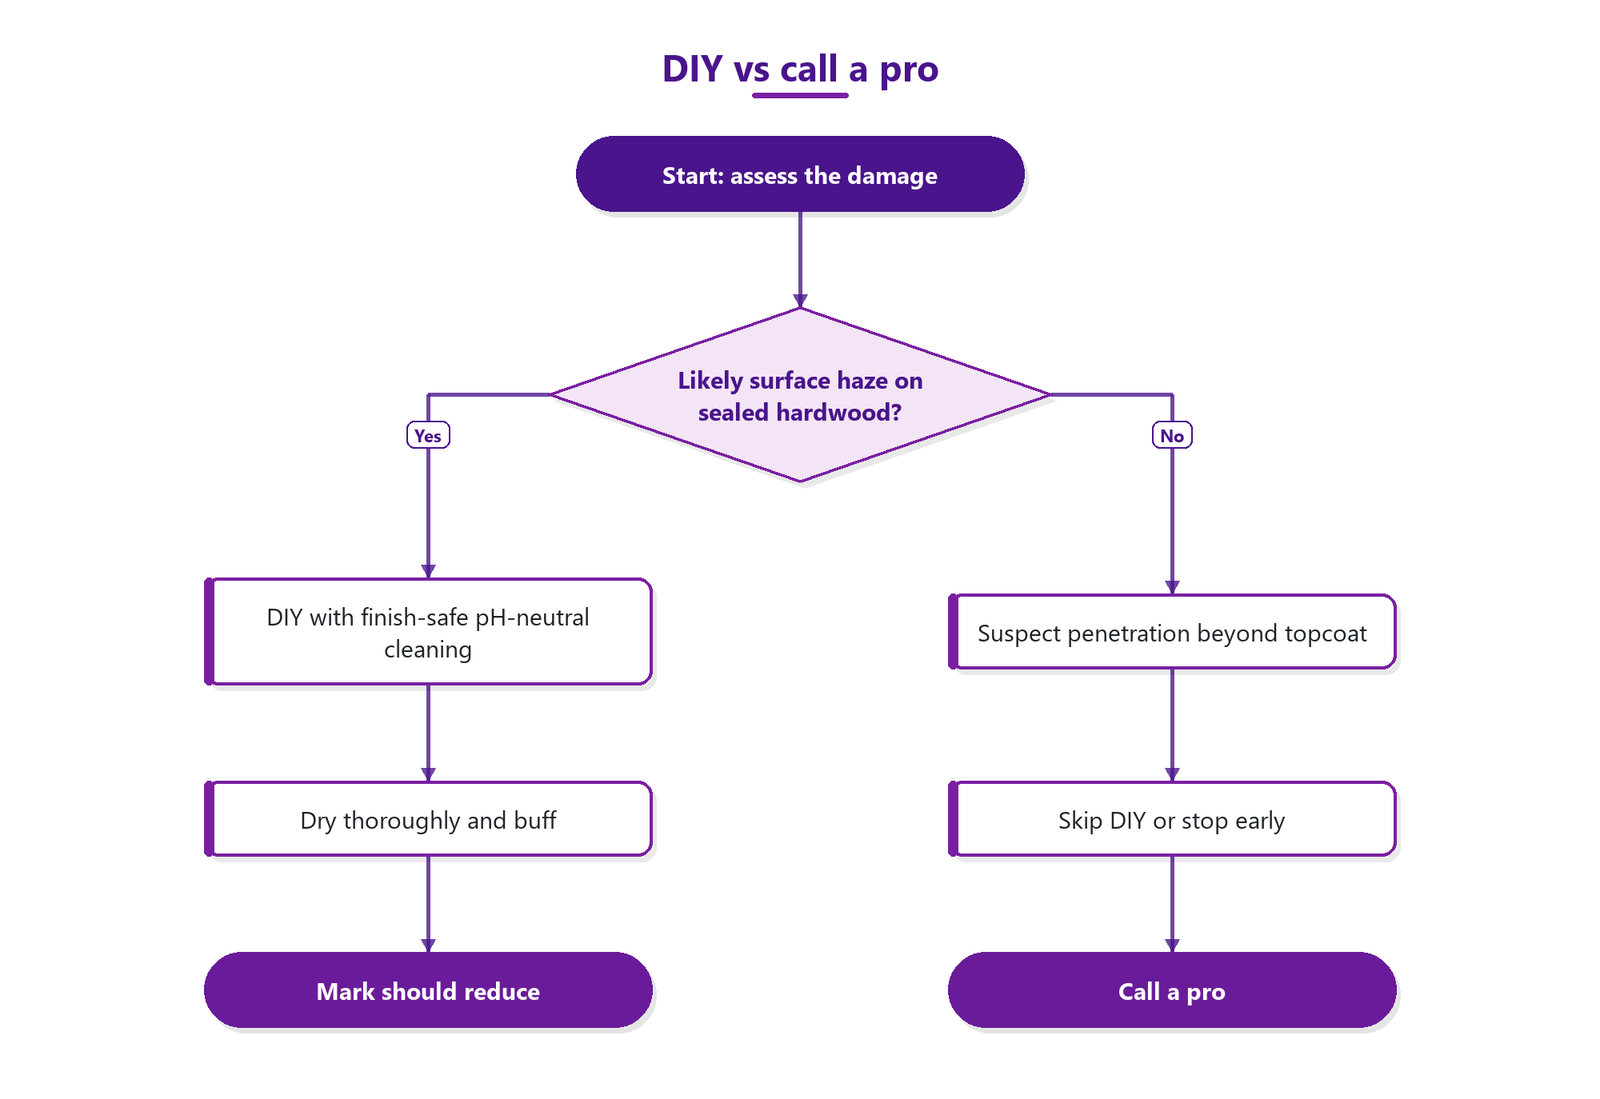
– DIY is a good fit when: spots are limited to mild haze after a spill, the floor is sealed, and careful pH-neutral cleaning plus thorough drying reduces the mark.
– Skip DIY (or stop early) if: you see warping, lifting, bubbling finish, widespread discoloration, or the spot remains unchanged after careful pH-neutral cleaning and drying.
– Call a pro when: the stain appears to have penetrated deeply, the floor is old/finicky, or you’re unsure of the finish type. Pros can evaluate whether refinishing or targeted repairs are the realistic route.
| Option | Pros (why it works for sealed hardwood) | Cons / risks |
|---|---|---|
| DIY with pH-neutral cleaner |
|
|
| Professional assessment/refinishing |
|
|
Water-Spot Deep Clean Checklist (Quick Scan)
| Task | What to do | Why it matters |
|---|---|---|
| Identify finish | Use pH-neutral hardwood cleaner guidance appropriate for sealed floors | Harsh products can worsen haze |
| Remove grit first | Dust mop or vacuum soft tool | Prevents scratching during cleaning |
| Clean without soaking | Microfiber damp, work in small sections | Stops new moisture spread |
| Spot-treat gently | Re-wipe lightly, then buff dry | Helps remove residue without stripping finish |
| Dry fast | Dry microfiber right after | Prevents lingering haze |
| Protect (only if allowed) | Use compatible polish/sealant sparingly | Reduces recurrence and improves uniform look |
– If you notice the spot spreading outward after a wipe, stop immediately and switch to a lighter, cleaner-only approach with faster drying.
Sources
– Bona (manufacturer guidance on hardwood floor cleaning): advice on using appropriate cleaners for sealed wood floors and avoiding steam/excess moisture.
– Minwax (manufacturer guidance on hardwood floor finishing/care): typically emphasizes following product instructions and using finish-appropriate cleaning methods.
– Bruce / Armstrong / other major hardwood floor manufacturers (care instructions): commonly warn against steam cleaning and recommend pH-neutral, finish-safe cleaners.
Water spots on sealed hardwood are usually fixable when you treat them as a finish-residue and moisture-control problem: clean gently with a pH-neutral wood-floor cleaner, remove grit first, work in small damp sections, and dry/buff immediately. If the spot is dark, widespread, or keeps returning due to lingering residue or deeper penetration, stop and consider professional evaluation.
Frequently Asked Questions
What’s the best way to deep clean hardwood floors to remove water spots?
Start by gently dry-cleaning the surface with a microfiber cloth to remove dust and grit, which can scratch wood during cleaning. Use a cleaner specifically labeled safe for hardwood to lift surface residue, then treat water spots with a targeted method like a damp cloth rest and minimal solution. Finish by drying thoroughly and buffing with a dry microfiber to prevent lingering moisture and new marks.
How do I remove stubborn white water spots from hardwood without damaging the finish?
White water spots usually come from moisture sitting on the finish, so avoid soaking the floor or using harsh chemicals. Place a slightly damp microfiber cloth over the spot, then apply controlled heat with a warm iron set to low and used briefly through the cloth, checking often. If the spot remains, repeat carefully or use a hardwood spot remover designed for finished wood, then wipe dry and condition if recommended.
How can I deep clean hardwood floors after a water spill to prevent discoloration?
Blot up any remaining water immediately, then dry the area quickly with a fan and dry towels to stop moisture from penetrating seams. For deep cleaning, use a pH-balanced hardwood floor cleaner on a lightly damp mop—never flood the surface—and work in small sections. After cleaning, dry the area again and monitor for a day or two; lingering discoloration may require spot treatment or refinishing depending on penetration.
Why do water spots keep coming back even after I clean hardwood floors?
Water spots often recur when residue from cleaners, hard water minerals, or trapped moisture remains on the finish. Using too much liquid or leaving the floor slightly damp can also reactivate spotting over time. To reduce recurrence, use a cleaner intended for hardwood, avoid excess water, and consider using filtered water for mopping and regularly drying the floor.
Which cleaning products and tools are safest for deep cleaning and water spot removal on hardwood?
Choose a hardwood floor cleaner labeled safe for your finish (polyurethane, varnish, or oil/wax) and avoid vinegar, bleach, and abrasive pads that can damage or haze the surface. Use microfiber cloths, a well-wrung microfiber mop, and soft sponges for water spot cleaning—never steam or scrub aggressively. For heat-assisted spot removal, use a warm iron on low through a cloth to minimize finish damage, then dry and buff to restore appearance.
📅 Last Updated: October 31, 2026 | Topic: How to deep clean hardwood floors to remove water spots? | Content verified for accuracy and freshness.
References
- Wood flooring
- https://en.wikipedia.org/wiki/Water_stain
- Wood finishing
- Wood stain
- Refinishing
- https://scholar.google.com/scholar?q=deep+clean+hardwood+floors+water+spots+remove+water+rings Google Scholar
- https://scholar.google.com/scholar?q=remove+white+water+rings+from+finished+hardwood+floors Google Scholar
- https://scholar.google.com/scholar?q=hardwood+floor+water+stain+removal+protocol+polyurethane+finish Google Scholar
- https://scholar.google.com/scholar?q=wood+floor+water+damage+stain+removal+refinishing+process Google Scholar
- https://scholar.google.com/scholar?q=care+and+maintenance+wood+floors+water+stains Google Scholar