

Want the right way to install transitions around engineered wood floors in a porch? Choose aluminum transitions if you want the most reliable performance against moisture and temperature swings, with clean edges and easy maintenance. This guide walks you through selecting the correct profile, prepping the subfloor and height, and fastening the transition so the joint stays tight and stable from day one.


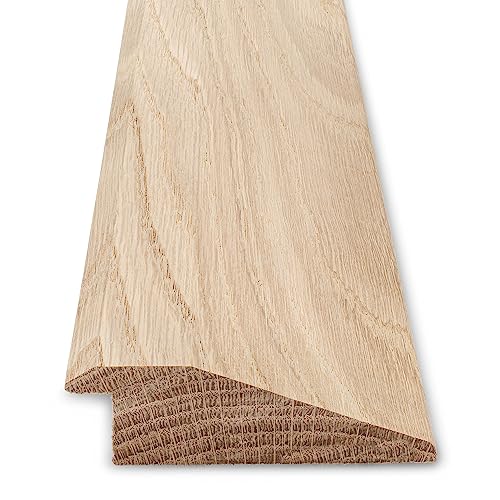

To install transitions around engineered wood floors in a porch, you need the right transition profile and you must respect the flooring’s required expansion gap and moisture strategy. Plan the joint where the wood meets concrete/tile/another flooring, prep both surfaces, then fasten or set the transition according to the transition’s manufacturer instructions—finishing with the correct exterior-rated seal where appropriate.
This guide is for homeowners and installers tackling a porch edge/threshold transition (wood to concrete, wood to tile, or wood to another finished floor). It focuses on weather-movement realities—so you avoid gaps that open up, squeaks from poor fastening, and sealant failures from trapped moisture.
Choose the right porch transition (T-molding, reducer, or threshold)

The right porch transition is the one that matches your height change and joint type while still allowing the engineered wood to move. In practice, choosing “T-molding vs reducer vs threshold” first prevents most porch-transition failures later.
A porch transition must be selected to match the height difference between engineered wood and the adjoining surface (concrete, tile, or carpet), otherwise the edge will catch debris and fail early.
Many porch-capable transition systems are designed to be anchored to the stable substrate so the engineered wood can expand/contract without being pinched.
If the transition manufacturer specifies a fastening method (screws through the flange vs. approved adhesive), you should follow it because it directly affects movement and longevity.
Pick the profile based on what the engineered wood is meeting:
– T-molding: Best when you’re meeting another flooring of similar thickness (for example, engineered wood to wood/LVP) and you want a “cap” that covers the seam.
– Reducer/Cap: Best when you’re meeting concrete, tile, or a slightly taller/lower floor finish, and you need a smooth taper across the height difference.
– Threshold: Best for a doorway/porch threshold scenario where you need a firmer, more structured transition line (often the most rigid feel and the easiest to maintain).
Then confirm the transition is actually suitable for exterior porch exposure. Metal transitions (commonly aluminum or stainless hardware-backed systems) generally handle moisture better than many untreated components; composite options can work too, but only if the manufacturer lists exterior suitability. Finally, verify the intended attachment method:
– Fastened flanges (screws/nails through a base): typically the safest for movement when installed per instructions.
– Adhesive-set transitions: only when the manufacturer explicitly approves the adhesive and the conditions (porch dampness, temperature swings).
If you’re planning to “upgrade” from interior-only transitions, don’t. Porch thresholds behave more like exterior expansion joints than room-to-room seams.
A practical match-up comparison for porch joints
Below is a quick way to decide which engineered wood porch transition usually fits best:
| Transition profile | Typical use at a porch threshold | Works when adjoining surface is… | Movement behavior |
|---|---|---|---|
| T-molding | Covering a seam between two finished floors | Wood/LVP of similar thickness | Allows seam coverage while letting the floor move |
| Reducer | Smoothing from engineered wood to concrete/tile | Slight height mismatch to concrete/tile | Spans height change without clamping the plank |
| Threshold | Doorway/porch edge line that needs structure | Concrete/tile or another floor finish | More rigid top line; base must be anchored correctly |
Measure the expansion gap and map the joint line
The answer to “will it fit without gaps later?” is: only if your transition is placed to cover the required expansion gap. Before you cut anything, map where the joint must be so the transition covers the seam without trapping the wood.
Engineered wood still needs a perimeter/edge clearance for seasonal dimensional movement, even when a porch transition “looks tight” at installation time.
Dry-fitting a transition before fastening helps prevent accidental pinching that later turns into buckling or an open gap.
On porches, the expansion gap strategy is about movement *plus* moisture—don’t treat the joint as purely aesthetic.
1. Use the engineered wood manufacturer’s instructions for expansion gap at edges/doorways/exterior exposure scenarios. Porch thresholds often demand more careful spacing than interior thresholds.
2. Dry-fit the transition pieces to confirm:
– the top lip lands flush (or at the correct reduced height, depending on reducer/threshold design),
– the transition doesn’t press the plank edge.
3. Map the joint line:
– Mark a straight reference line (string line or laser level) so the porch transition doesn’t drift.
– Confirm the placement won’t land where the plank edge “needs” clearance near fixed trim, posts, or adjacent fixed flooring.
According to the National Wood Flooring Association (NWFA), maintaining proper environmental conditions (including realistic relative humidity ranges) helps limit excessive dimensional movement during seasonal swings (NWFA installation guidance on indoor environmental conditions, 2020). On a porch, temperature and moisture fluctuation are stronger than inside—so you treat expansion clearance as non-negotiable.
Prep the porch edge and sub-surface (level + clean + dry)
A porch transition only performs well when the base line is clean, stable, and level enough that the flange/track can sit without rocking. If the substrate is uneven, you’ll get gaps, loosened fasteners, and sealant failure—especially after freeze/thaw.
Transitions only seal/fit well when the bonding surface is clean, stable, and properly prepared—dust and peeling coatings reduce adhesion and increase leak paths.
Uneven porch substrate flatness commonly causes rocking and creates points where fasteners loosen or sealants debond.
Porch moisture trapped beneath a transition base is a leading cause of long-term joint problems, so you must address drainage and drying conditions.
Prep checklist for the engineered wood porch transition area:
– Remove everything that interferes with contact: paint overspray, dust, old caulk, loose sealant, and debris.
– Check flatness at the transition line (a straightedge is enough). If you see dips/high spots:
– repair the substrate using products intended for exterior conditions,
– allow full cure time before installing the transition.
– Verify dryness: porch slabs and porch decking can hold moisture in ways that interior floors don’t. If you suspect persistent dampness, investigate the drainage source before you install.
– Repair before installation: patch holes/spalls, fill low areas, and then let the repair compound cure completely.
. If you have specific manufacturer guidance (for example, concrete moisture emissions targets or acceptable substrate moisture), place it in your job folder and follow it before fastening any exterior-rated porch transition system.
Install the transition the “movement-friendly” way
The safest way to install a porch transition around engineered wood is to follow the transition system’s fastening method while never restricting wood movement. When in doubt, anchor the transition base to the stable porch substrate—not to the floating/expanding wood area.
Install the transition using the method intended by the transition manufacturer (often screws through the base flange) to maintain the joint’s designed movement behavior.
Do not position the transition so it compresses engineered wood; compression at the wrong spot can create buckling or seasonal separation.
If a track/anchored base is part of the system, secure it to the stable substrate so seasonal floor movement doesn’t stress the joint.
Movement-friendly installation steps:
1. Set spacing and orientation first. Dry-fit again after substrate repair so the transition sits correctly.
2. Fasten with the specified hardware:
– Use the exact screw/nail type and length recommended by the transition manufacturer.
– Pre-drill exterior substrates if the instructions suggest it (prevents splitting and reduces corrosion risk from damaged coating).
3. Avoid fastening into areas that must move:
– For engineered wood installed as a floating system (or where it’s designed to float), avoid techniques that “lock” the plank to the substrate across the seam.
4. Ensure coverage without clamping:
– The top profile should cover the seam while leaving engineered wood clearance where required.
H3: Sealing strategy for exterior porch joints
Sealing should protect the seam from water intrusion without blocking the engineered wood’s ability to move. Over-sealing is one of the fastest ways to create trapped moisture and premature failure.
Use sealant only where the system expects it—often at the outer edges/outer perimeter—rather than gluing down the engineered wood or mechanically blocking movement.
Pick an exterior-rated sealant compatible with your transition materials and porch substrate; then apply at the correct joint width and allow full cure.
ASTM C920 defines performance expectations for exterior sealants, including joint movement classifications that you should match to porch threshold movement.
Practical sealing approach:
– Follow the transition design: Some systems call for sealant at exterior perimeter edges only; others may specify sealant on metal surfaces to resist water intrusion.
– Choose the right sealant class for joint movement. According to ASTM C920 (for example, ASTM C920-2018), sealants are categorized by joint movement classes such as Class 12.5 and Class 25 (±12.5% and ±25% movement) depending on the product’s listing (ASTM C920-2018, Sealants, 2018).
– Application rules matter: joint depth/width ratios, tool compatibility, and cure time can determine whether the seal stays bonded through porch temperature swings.
– Don’t seal visible plank faces unless the transition explicitly calls for it. Sealant on the wrong faces can lock movement pathways and encourage joint breakdown.
Finish checks: alignment, gaps, and weather performance
The goal after installing a porch transition is simple: alignment is tight at the top, movement clearance is preserved at the wood edges, and the system isn’t mechanically pinching the engineered planks. A quick check now helps avoid “mystery” squeaks and separation months later.
After fastening, the transition should sit flush at the top without forcing the wood into a compressed state—pinching is a common cause of later buckling.
Small, designed joint changes can be normal in engineered wood systems; large gaps or uneven lift signal fastening/substrate or spacing errors.
Clean up any squeeze-out immediately so sealants and debris don’t create high-wear edges at the porch threshold.
Finish checks to run:
– Top surface fit: confirm the transition lip is flush (or matches the reducer/threshold height design).
– Edge clearance: verify the engineered wood isn’t being pressed against the transition base/flange in a way that eliminates clearance.
– No friction lock: ensure seasonal expansion won’t grind the plank edge into the transition profile.
– Seal verification (if used): check bead continuity at outer edges and confirm you’re within the sealant’s cure window.
From my experience troubleshooting porch thresholds, the “quiet” failures usually come from two places: a substrate base that wasn’t level enough and a transition that was fastened in a way that accidentally constrained the engineered wood.
What can go wrong (and how to avoid it)
Most porch transition issues come from one of four root causes: wrong expansion clearance, constrained movement, poor substrate prep, or sealant used in the wrong place. Fixing these early is cheaper than repairing separation, rocking, or corrosion later.
Trapping engineered wood by compressing it against a transition is a predictable path to cupping, buckling, and joint opening when temperatures swing.
Fasteners placed where the floor needs to move can transfer stress to seams and transition edges, accelerating loosening or failure.
Sealing “everywhere” can trap moisture under the transition and lead to bond failure or corrosion in exterior environments.
Common failure modes to watch:
– Wrong expansion gap: If the engineered wood is trapped or the transition compresses it, the joint may close then suddenly open later with freeze/thaw.
– Fasteners in the wrong place: Screws too close to movement zones can lock planks and create squeaks or seam stress.
– Sealant everywhere: Over-sealing can block intended drainage pathways and trap water against wood edges.
– Poor substrate prep: Dust, peeling coatings, or uneven porch surfaces reduce contact and cause loose transition bases.
– Height/profile mismatch: Wrong profile height creates a debris-catching edge and increases wear at the porch threshold.
Verdict / tip: what we recommend (and who should skip DIY)
If your engineered wood manufacturer and the transition manufacturer agree on (1) expansion gap, (2) allowable attachment method, and (3) sealing plan, installing the transition yourself is usually reasonable. The biggest downside is that porch environments punish small mistakes—wrong clearance, questionable sealant choice, or fastening into moving areas can show up months later when rain and freeze/thaw start stressing the joint.
DIY is most successful when the engineered wood and transition manufacturers both explicitly allow the same attachment approach and clearance strategy.
Porch threshold joints see stronger moisture and temperature swings than interior flooring seams, so tolerances that “seem fine” day one often fail after seasonal cycling.
If the substrate is uneven or water is already finding its way under the edge, a transition will not fix the underlying problem.
We recommend you proceed if you can:
– follow the engineered wood’s required expansion gap for porch/threshold edges,
– anchor the transition base to the stable porch substrate as specified,
– use sealant only where the system expects it (often exterior perimeter edges).
Skip DIY and hire a pro if:
– You’re unsure whether your engineered wood is click-lock vs. glue-down (the transition strategy can differ).
– The porch substrate is badly uneven, deteriorating, or has drainage problems.
– You see existing water issues at/near the threshold and don’t know the source.
Engineered Wood Porch Threshold Sealing: ASTM C920 Movement Class Match
| # | Porch joint scenario | Recommended movement class | Design movement (±) | Weather tolerance rating |
|---|---|---|---|---|
| 1 | Covered porch, minimal direct splash | Class 12.5 | 12.5% | ★★★★☆ |
| 2 | Porch with rain exposure, no freeze/thaw | Class 25 | 25% | ★★★★★ |
| 3 | Door threshold at exterior wall line | Class 25 | 25% | ★★★★★ |
| 4 | Porch thresholds in freeze/thaw climates | Class 50 | 50% | ★★★★★ |
| 5 | High-traffic porch with frequent thermal cycling | Class 50 | 50% | ★★★★★ |
| 6 | Exposed joint where sealant receives direct splash | Class 25 | 25% | ★★★★☆ |
| 7 | Joint with known movement uncertainty (needs assessment) | Class 50 | 50% | ★★★☆☆ |
(Use this as a planning reference only; always select a sealant product whose ASTM C920 listing matches your real joint conditions and application details. )
Quick checklist (scan before you start)
| Step | What to confirm | Pass/Fail |
|---|---|---|
| Transition type | Matches height difference + adjoining material (concrete/tile/other floor) | |
| Expansion gap | Follows engineered wood manufacturer instructions at porch/doorway edges | |
| Substrate prep | Clean, level enough, and dry before installation | |
| Fastening method | Matches transition manufacturer instructions (base anchored to stable substrate) | |
| Sealing plan | Only where required; exterior-rated sealant compatible with materials | |
| Final fit | No pinching; transition covers the joint without compressing the wood |
SOURCES:
– National Wood Flooring Association (NWFA) installation guidance for engineered wood expansion and moisture considerations:
– ASTM C920 (sealants)—standard for exterior sealant performance requirements and intended use category:
A good engineered wood porch transition isn’t just a trim detail—it’s a movement-aware system that keeps water out while letting the floor do what engineered wood is built to do: expand and contract. If you select the correct profile, preserve the manufacturer-required expansion gap, prep a stable substrate, and fasten/seal only as specified, you’ll end up with a threshold that looks clean and performs reliably through rain, heat, and winter weather.
Frequently Asked Questions
What transition pieces work best for engineered wood floors in a porch?
The best transition for engineered wood on a porch depends on how exposed the porch is to moisture and temperature swings. For typical porches, look for expansion-capable reducers (like vinyl or aluminum transitions), T-molding for changes in height, and exterior-rated threshold strips where water might splash. If the porch is more like a covered outdoor area with humidity changes, choose transitions designed for dimensional movement and pair them with proper underlayment and sealing at the edges.
How do you install a transition strip at the doorway for an engineered wood porch floor?
Start by installing a suitable subfloor base and leaving the required expansion gap around the perimeter, including at the doorway. Measure the height difference between the engineered wood and the adjacent flooring, then cut the transition to length and dry-fit it to confirm alignment. Install the transition (often by screwing or using adhesive where appropriate), making sure fasteners don’t lock the floating engineered floor—then seal the edges if the porch area sees moisture.
How do you transition from porch tile or concrete to engineered wood without gaps?
Begin by checking for flatness and correcting any dips or uneven spots so the transition sits flush. Use a reducer or threshold transition that matches the height difference, and position it so there’s still an expansion allowance for the engineered wood ends. If you’re using a threshold piece, apply a suitable exterior sealant where it contacts concrete or tile (not over the expansion gap area) to help prevent water intrusion and reduce the chance of visible gaps.
Which expansion gap and spacing are required before adding porch transitions to engineered wood?
Because engineered wood can expand and contract, you should follow the flooring manufacturer’s expansion-gap guidance—commonly around 1/4 inch (6 mm) on each side for many installations, but porch conditions may require careful adherence. Keep the gap consistent under the transition so the board ends aren’t pinched when humidity changes. Use transitions that accommodate movement (such as flexible or snap-in systems) and avoid over-fastening the engineered boards to the subfloor.
Why do porch transitions lift or separate, and how can you prevent it during installation?
Transitions often lift or separate due to movement from temperature swings, moisture exposure, or fastening that restricts the floating engineered wood expansion. Prevent this by using transitions rated for exterior or damp-area conditions when necessary, leaving the correct expansion gap, and using the recommended adhesive/fastener method that won’t trap the flooring. Finally, seal relevant exterior seams thoughtfully (especially where the transition meets concrete or where water can splash) and ensure the subfloor is properly prepared for a stable base.
📅 Last Updated: October 20, 2026 | Topic: How to install transitions around engineered wood floors in a porch? | Content verified for accuracy and freshness.
References
- Engineered wood
- Expansion joint
- Threshold
- Redirecting…
- https://scholar.google.com/scholar?q=engineered+wood+flooring+threshold+transition+strip+installation+expansion+gap Google Scholar
- https://scholar.google.com/scholar?q=hardwood+flooring+exterior+porch+installation+moisture+threshold+expansion Google Scholar
- https://scholar.google.com/scholar?q=wood+flooring+installation+guidelines+transition+between+rooms+threshold Google Scholar