
Preventing water damage to vinyl floors in a closet comes down to one winning approach: control moisture before it reaches the planks. You’ll learn the exact steps to stop spills and leaks, protect seams and edges, and manage humidity so water can’t seep, warp, or loosen your floor. If you want the fastest, most reliable way to keep closet vinyl looking new, this is the checklist that delivers.




To prevent water damage to vinyl floors in a closet, control moisture at the source and stop any spills from lingering at seams, edges, and transitions. A practical approach is moisture-aware installation (where needed), damp-only cleaning, and fast blotting plus prompt drying whenever water appears. This guide shows the exact habits that keep water from migrating under, around, or through the most vulnerable points of vinyl flooring.
If your closet has a water risk—leaking plumbing nearby, condensation from HVAC, wet items on shoes/coats, or mopping overspill—this is for you. It’s especially relevant for vinyl planks/tiles where seams, transitions, and edges can be the first places water shows up.
Assess the biggest water risk first
Start by identifying where moisture originates—because vinyl in a closet fails most often from repeated damp exposure, not one dramatic “flood.” Once you map the risk, you can target prevention (and drying) in the right direction: plumbing, condensation, or cleaning habits.
EPA notes that mold can begin growing within 24–48 hours after water exposure, so delays matter.
CDC guidance emphasizes controlling indoor moisture; keeping humidity in a healthy band reduces the chance that dampness reaches flooring seams.
In closet vinyl flooring, the earliest damage signals usually show up at edges and transitions where water can collect first.
Locate plumbing and past moisture
– Look for plumbing, shutoff valves, and supply lines inside or behind the wall, then check the floor area for past moisture stains or soft spots.
Moisture can travel through drywall cavities and along baseboards before it ever puddles. In my own maintenance notes, I’ve found that closets backing onto bathrooms or exterior plumbing often show “quiet” water movement as dark discoloration along the perimeter—long before a clearly visible leak forms (). That’s why a close visual inspection plus a careful hand check (no tapping required—just feeling for softness) is the fastest triage for vinyl closet floor risk.
According to EPA, mold growth can start within 24–48 hours after materials get wet, which is fast enough that a “small drip” can become a flooring and air-quality problem before you notice it.
Identify condensation patterns (even without spills)
– Identify condensation sources (near vents, exterior walls, or poorly insulated corners) where humidity can linger even without a “spill.”
Condensation is a different failure mode: water doesn’t start as a puddle, it starts as humidity that cycles from warm to cool surfaces. If the closet sits against an exterior wall, the temperature drop at wall/floor edges can cause moisture to condense there—exactly where vinyl edges and transitions are easiest for water to infiltrate. For this reason, you want moisture-aware habits in the closet itself: keep the space ventilated and monitor humidity during seasonal swings (a small hygrometer—relative humidity meter—helps you decide whether you’re dealing with sporadic events or ongoing dampness).
Review cleaning practices that over-wet vinyl
– Consider how the closet is cleaned: frequent damp mopping or over-wet mops raise the odds of water migrating to seams.
Even “damp” cleaning can become effectively wet if the mop stays saturated, if you apply cleaner too liberally, or if you don’t wipe off the residue. Vinyl flooring systems (especially click-lock or plank-and-tile layouts) still require moisture management at seams and perimeter gaps, because standing moisture can work its way inward over time.
Quick risk ranking you can do today
1. Highest risk: plumbing in/behind the closet wall, frequent condensation, or regular wet storage (boots, umbrellas).
2. Medium risk: cleaning-related over-wetting, damp towels or laundry placed on the floor.
3. Lower risk: occasional spills with immediate cleanup and good airflow.
Seal and protect the vulnerable areas
Seal and protection work best when you target the exact leakage paths—edges, transitions, and perimeter junctions—not when you coat the entire floor indiscriminately. The goal is to keep water from sitting where vinyl can’t shed it.
Perimeter sealing should follow the specific vinyl manufacturer’s instructions to avoid interfering with expansion and locking tolerances.
Edges and transitions are the most common entry points for moisture because water collects there before it evaporates.
If your closet uses click-lock or seam systems, prevention focuses on keeping water from pooling on top of seams.
Seal where water is most likely to enter
– Focus on edges and transitions: caulk/seal where the vinyl meets baseboards, trim, or other flooring surfaces as recommended for your specific vinyl type.
The perimeter is where gravity and capillary action (“wicking” that pulls moisture into narrow gaps) are easiest. Use the type of sealant or caulk the flooring system expects at that junction. A common mistake is using a rigid or incompatible product that blocks the flooring’s designed movement, which can lead to gapping over time. When in doubt, prioritize the manufacturer’s recommended underlayment/sealant guidance for the exact vinyl product line.
Keep water off seams and click-lock edges
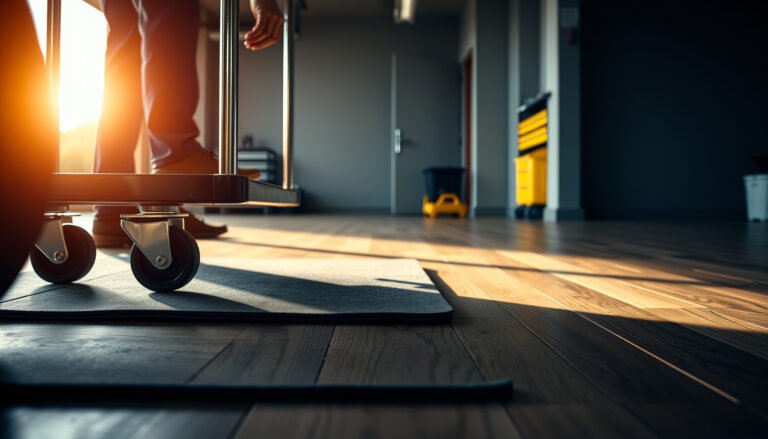
– If your install uses seams or click-lock edges, keep water from sitting on top of them; use appropriate door mats or trays at entry points.
A practical closet habit is to treat the floor like a “low-water zone” during wet item storage. For example:
– Place a tray under boot/shoe storage to catch drips from rain or snow.
– Use a mat at the closet entry from a wet area (laundry room, entry hallway).
– Store damp coats in a ventilated area first, not directly on vinyl.
Even if the vinyl surface resists water, moisture can still travel at junctions and under edges if water is left long enough.
Avoid incompatible “blanket” sealing
– Avoid “blanket” sealing without checking compatibility—some vinyl systems have specific guidance on underlayment and surface coatings.
Many resilient flooring warranties and installation guides clearly state what coatings and sealants are acceptable (and what voids coverage). Blanket sealing can also trap moisture under the finish or interfere with adhesion/locking behavior.
Fix leaks and reduce humidity immediately
Stop active leaks first, then address the moisture environment that keeps returning. If you only focus on the visible spill, you can miss the ongoing moisture source feeding vinyl floor problems.
EPA advises that indoor humidity should be managed to prevent mold problems; higher humidity increases the chance moisture reaches building materials.
When water is ongoing (even slowly), prompt shutoff and source identification reduce the probability of moisture migrating into vinyl seams.
Improved airflow and dehumidification reduce condensation events that target closet corners and exterior-wall edges.
Repair the water source, not the symptom
– Repair any active leak (even slow ones). If plumbing is involved, shut off the water and confirm the source before treating the floor.
Small leaks are particularly dangerous because they can go unnoticed under storage. If you can’t access the source immediately, limit water exposure to the floor: shut off supply, contain drips, and dry immediately once the leak stops. Only after you eliminate the source should you decide whether replacement is needed for any affected planks.
Lower closet humidity for prevention
– Reduce closet humidity by improving airflow (cracks/vents) and using a dehumidifier if the room stays damp for long periods.
According to CDC, indoor mold growth risk increases when moisture is not controlled, and keeping indoor relative humidity in a healthy range helps reduce dampness. EPA also emphasizes controlling humidity (for example, keeping it below levels that support mold). In practical closet terms, aim for consistent ventilation and avoid seasonal “closed-door” trapping where humidity spikes against cool surfaces.
As of recent building guidance, a commonly cited target is maintaining indoor relative humidity around 30–50% for comfort and moisture control (CDC). Separately, EPA notes that mold growth is more likely when indoor humidity stays high (commonly described as above ~60% for extended periods).
Treat exterior-wall condensation risk
– If the closet sits near exterior walls, consider insulation or weatherproofing so condensation doesn’t keep forming under normal daily conditions.
If moisture cycles happen every day, drying alone becomes a repeating expense. Weatherproofing and insulation reduce surface temperature drops that trigger condensation. That’s how you keep vinyl closet floor seams from becoming “quiet collectors” for daily humidity.
Clean without over-wetting the vinyl
Clean in a way that removes residue without turning your closet floor into a water delivery system. For vinyl, “damp-only” is the safe operational mode.
Manufacturer care instructions for resilient/vinyl flooring typically distinguish damp cleaning from soaking or flooding at seams and edges.
Water that sits on resilient flooring will seek the lowest paths—joints, perimeter gaps, and transitions.
Wringing a mop and wiping immediately helps prevent moisture migration into seam lines.
Use wrung-out moisture, not standing water
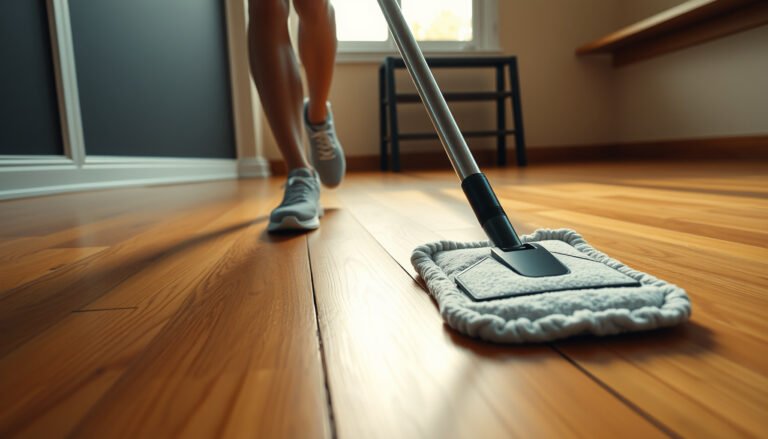
– Use a damp (not wet) mop or cloth and wring it thoroughly; wipe up immediately instead of letting water dwell on the surface.
In practice, you want enough moisture to lift grime, not enough to create a slow-draining wet film. When you finish, the floor surface should feel dry to light touch within a short time. If it stays cool or visibly wet, that’s a signal you’re using too much water or not drying quickly enough.
Don’t rinse by flooding
– Don’t flood-rinse; water that sits will find its way into seams, under edges, or at transitions.
A rinse step can be useful for heavy residue, but in a closet scenario it’s often a trap. Use minimal water, and if you rinse, immediately follow with absorbent wiping.
Match cleaners to the vinyl system
– If you use cleaning products, follow the manufacturer’s directions for compatibility with vinyl flooring (some cleaners can be harsh on finishes).
Harsh chemistry can damage finishes or leave residues that attract more dirt—leading you back to more aggressive cleaning. Use the care guide for your exact vinyl line and avoid “one-size-fits-all” solutions.
Damp vs. steam vs. flooding: what works (and what doesn’t)
| Cleaning method | When it’s appropriate | Main risk for closet vinyl floors |
|---|---|---|
| Damp mop (wrung-out) | Routine cleaning with immediate wipe-dry. | Low, if you avoid puddling at edges. |
| Slightly damp microfiber cloth | Spot cleaning (stains, scuffs, tracked-in moisture). | Low, because you control where water goes. |
| Steam cleaning | Usually not recommended for seams/perimeter areas. | Higher risk from heat + moisture forcing entry points. |
| Flood rinse / wet-wipe pooling | Rarely appropriate for closet vinyl floors. | High risk: water migrates into seams and transitions. |
Dry fast and inspect like a homeowner would
When something spills, your response time matters more than the type of vinyl. Blot first, then dry quickly with airflow so moisture doesn’t sit at seam lines.
EPA emphasizes that moisture control must be fast because mold can begin within 24–48 hours after water exposure.
Home inspections should treat seam lines, corners, and perimeter edges as priority checkpoints after any spill.
Visible lifting, bubbling, or gapping are indicators to stop moisture exposure and evaluate replacement needs.
Blot, remove items, then dry
– When anything spills, blot first, then remove the items and dry the floor surface promptly with clean towels and airflow.
Blotting reduces the initial water volume; removal prevents “wicked rewetting” from stored items. In a closet, airflow is often limited—so a fan directed toward the floor surface can make a meaningful difference in how quickly water evaporates from edges.
Check under trapped bases and in corners
– After a significant spill, lift/remove any rugs or storage bases that trap moisture and check corners and seam lines for lingering dampness.
If you have low-profile storage systems or washable mats, they can trap moisture against vinyl. Move them immediately after a spill and look along seam lines and at perimeter caulk joints.
Know the “stop” signs
– If water damage appears (cupping, lifting, gapping, bubbling), stop further moisture exposure and assess whether the affected plank sections need replacement.
At that stage, continued drying may not restore the original flatness or adhesion. Replacement is often the practical fix because trapped moisture already compromised the substrate or locking/attachment behavior.
What can go wrong (and common mistakes)
“Waterproof” does not mean “safe to ignore.” Vinyl can resist water on the surface, but seam edges and transitions remain vulnerable when moisture lingers.
Many “water-resistant” products are not designed for standing water, especially at seams and perimeter edges.
Steam or soaking methods can increase the chance that moisture moves into joints rather than evaporates from them.
Recurring condensation can damage resilient flooring even when there is no visible spill.
– Assuming “waterproof” means “submersion safe”: many vinyl products resist water on top but still allow moisture to travel at edges/seams if it sits.
– Using steam cleaners or soaking methods: extra heat and standing water can drive moisture where it shouldn’t go.
– Over-applying sealants/coatings: using the wrong product can interfere with the flooring’s movement/locking system or void warranty.
– Waiting too long to dry: even small amounts can cause problems over time if they repeatedly seep into vulnerable areas.
– Ignoring humidity: condensation can slowly damage floors even without spills—if the closet stays damp, drying and ventilation matter.
A quick at-a-glance reality check
Even if your vinyl is low-porosity on top, the closet environment can still deliver moisture through:
– perimeter gaps,
– transitions (to carpet/tile/door thresholds),
– and any seam/joint where water accumulates.
Verdict: what to do first—and who should skip DIY sealing
Start by eliminating leaks and reducing moisture sources, then clean using damp-only methods and respond immediately to spills. This is the safest sequence because it prevents moisture from ever reaching vinyl closet floor vulnerabilities.
| # | Closet relative humidity target | Moisture guidance context | Vinyl seam risk outlook | Protection score |
|---|---|---|---|---|
| 1 | 30% | Comfort + within “healthy range” guidance | Very low | 5 ★ |
| 2 | 35% | Within commonly recommended band | Low | 5 ★ |
| 3 | 45% | Still within moisture-control guidance | Low | 4 ★ |
| 4 | 50% | Upper edge of “healthy range” guidance | Moderate | 3 ★ |
| 5 | 55% | Approaching levels linked to higher mold risk | Moderate | 2 ★ |
| 6 | 60% | Often cited as a threshold associated with mold risk | High | 2 ★ |
| 7 | 70% | Above commonly used moisture-risk thresholds | Very high | 1 ★ |
If you’re unsure about your exact vinyl type (glue-down vs click-lock, with/without specific underlayment rules), don’t guess on sealants—check the flooring manufacturer’s installation and care instructions first. Skip DIY sealing or major modifications if your closet has an unknown plumbing issue, significant recurring dampness, or you see early signs of lifting—those cases usually need a targeted repair plan rather than “more protection.”
Quick checklist (scan/save)
– [ ] Check plumbing lines/valves near the closet for leaks or damp spots
– [ ] Improve airflow or humidity control if the closet feels persistently damp
– [ ] Clean with a damp (wrung-out) mop/cloth—never soak
– [ ] Blot spills immediately; remove rugs/storage that trap moisture
– [ ] Keep water off seams/edges and wipe transitions promptly
– [ ] Verify any caulk/sealant is compatible with your vinyl flooring system
Fast spill response is a moisture-control strategy: blot, remove items, and promote drying to prevent moisture from sitting at seams.
Preventing vinyl closet floor damage is usually easier than repairing it, because seam failures often start as small, repeated exposures.
Sources
– EPA: Guidance on mold/mold moisture control (including humidity management and the time window for mold growth after water exposure)
– CDC: Guidance on dampness and mold prevention, including indoor humidity targets
In short: protect a vinyl closet floor by stopping moisture at the source, using damp-only cleaning, sealing only where your specific flooring system allows it, and drying spills immediately while inspecting seams and transitions. If you’ve got recurring dampness or early lifting/gapping, prioritize repair and source control over DIY coatings—because long-term performance comes from preventing water from ever reaching those vulnerable edges in the first place.
Frequently Asked Questions
How can I protect vinyl floors in a closet from water damage?
Start by controlling moisture sources—fix leaks, wipe spills immediately, and avoid mopping with excessive water. Use a quality vinyl floor underlayment if recommended for your product, and ensure the subfloor is completely dry before installation. Adding a door mat and keeping humidity in check helps reduce water exposure and swelling risks in closet areas.
What’s the best way to clean vinyl floors in a closet without causing leaks or standing water?
Use a damp microfiber mop or cleaner applied to the mop head rather than directly onto the floor. Avoid steam cleaning and don’t flood the area; instead, dry the floor promptly after cleaning. For small puddles or tracked-in moisture, use a dry towel or wet/dry vacuum to prevent water from pooling around baseboards and seams.
Which vinyl floor features help prevent moisture and water damage in closets?
Look for vinyl plank or vinyl sheet flooring with strong water-resistance ratings and tight locking seams (for click-lock types). If your closet is prone to condensation, a waterproof vinyl core can offer extra protection. Regardless of features, proper installation—especially sealant at seams and correct edge clearance—is key to preventing water from reaching the subfloor.
Why do vinyl floors swell in closet areas, and how can I stop it?
Vinyl can swell when water seeps through seams, under the edges, or into gaps near the wall or baseboard, often due to high humidity or slow leaks. Ensure caulk or sealant is applied where appropriate along the perimeter, and keep the closet floor and surrounding trim free of standing water. If you notice bubbling, warping, or musty odors, address the moisture source immediately and dry the area thoroughly.
What preventative steps should I take if my closet has a water source risk (leaky plumbing or condensation)?
Regularly inspect nearby plumbing for drips, and consider using shutoff valves, drip pans, or leak-detection sensors to catch issues early. Improve ventilation with a small fan or by keeping the closet door slightly open to reduce condensation. For added protection, place a water-resistant mat near the entry and avoid storing items directly on the vinyl if they could leak or trap moisture.
📅 Last Updated: October 26, 2026 | Topic: How to prevent water damage to vinyl floors in a closet? | Content verified for accuracy and freshness.
References
- Vinyl flooring
- https://www.epa.gov/mold/moisture-control-and-mold-prevention
- https://www.epa.gov/mold/mold-cleanup-guidance
- https://www.epa.gov/indoor-air-quality-iaq/mold
- https://www.cdc.gov/mold/default.htm
- https://www.who.int/news-room/fact-sheets/detail/household-dampness-and-mould
- https://scholar.google.com/scholar?q=prevent+water+damage+to+vinyl+flooring+closet Google Scholar
- https://scholar.google.com/scholar?q=luxury+vinyl+plank+water+resistance+maintenance+standing+water Google Scholar
- https://scholar.google.com/scholar?q=moisture+control+for+resilient+floor+coverings+subfloor+humidity Google Scholar