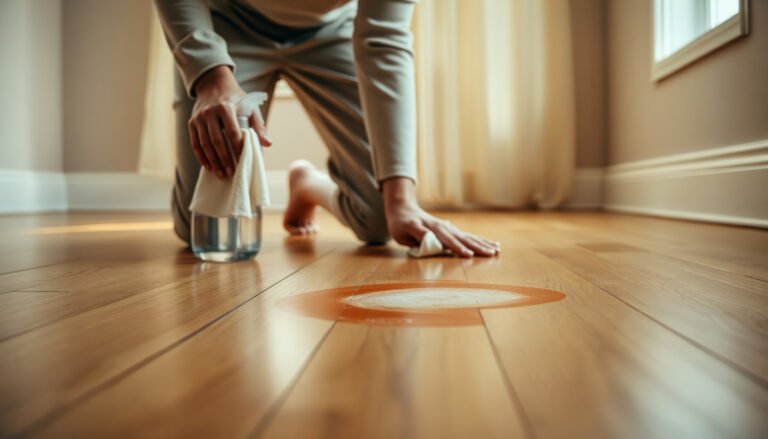
You can clean dried sawdust from hardwood floors effectively—without damaging the finish—by using a dry pre-vacuum first, then a barely-damp microfibre mop with a pH-neutral cleaner. This approach removes grit that can scratch while safely dissolving residue left behind after drying. Follow these steps for a streak-free surface and a finish that looks like it did before the dust settled.




If sawdust is dried on hardwood, start with a dry removal pass (vacuum + gentle brush) so you don’t grind grit into the finish, then use only lightly damp cleaning to lift the residue. Work small areas, avoid soaking, and stop if you see finish clouding or scratches—at that point you may need a finish-safe touch-up. This guide shows the safest sequence for both surface dust and sawdust packed into seams.
This is for homeowners dealing with dried sawdust after sanding, carpentry, or DIY projects—especially if the sawdust has hardened and looks “stuck.” It also helps if you’re worried about damaging the polyurethane/polywax finish or opening up dust trapped between boards.
Quick method: lift the sawdust without grinding it in

The fastest way to avoid damage is to lift dried sawdust first with suction and soft bristles, not water. You’re preventing the “sandpaper effect,” where embedded grit rubs through the topcoat while you clean.
Hardwood scratches often happen when dry grit acts like abrasive media; quartz dust measures about 7 on the Mohs hardness scale, which is hard enough to dull many floor finishes.
Using a vacuum with a HEPA filter can capture very fine particles; according to US EPA, HEPA media is rated to capture 99.97% of particles at 0.3 microns.
Before you touch moisture, prepare your “dry-first” setup: vacuum with a soft brush attachment (or a hardwood-floor tool), a microfiber cloth, and a soft nylon brush. If you have a stubborn crust, keep a plastic scraper in reach—but reserve it for shallow, top-layer lift only.
What you should do first (and why it works)
– Vacuum first with a soft brush attachment. Dried sawdust loosens at the surface when suction breaks up clumps; it also removes loose particles so your next step doesn’t spread grit.
– Gently loosen residue with a soft, dry microfiber or a very soft brush. Microfiber lifts dust without the bite of stiff bristles.
– Use a plastic scraper only for stubborn, crusted spots—keep it shallow to avoid gouging. A thin, careful “chip-lift” is safer than trying to pry up hardened sawdust.
Finish-Safe Options for Dried Sawdust Cleanup (Recommended Sequence)
| # | Step / Method | Best for Dried Sawdust Stage | Tool & Contact | Typical Time to Notice Lift | Finish Safety |
|---|---|---|---|---|---|
| 1 | Vacuum + soft brush pass | Loose surface dust | Soft bristles, low pressure | 1–3 minutes per 10 sq ft | ★★★★★ |
| 2 | Dry microfiber wipe | Lightly adhered dust | Microfiber friction, gentle | 2–5 minutes | ★★★★☆ |
| 3 | Soft nylon brush “grain direction” | Packed residue edges | Nylon bristles, short strokes | 3–8 minutes | ★★★★☆ |
| 4 | Plastic scraper “chip-lift” | Crusted, top-layer sawdust | Plastic edge, shallow angle | 1–6 minutes per spot | ★★★☆☆ |
| 5 | Damp microfiber + compatible cleaner | Remaining residue film | Cleaner applied to cloth | 5–12 minutes | ★★★★☆ |
| 6 | Section wipe + immediate dry towel | Edges and seams cleanup | Wipe → towel-dry each section | 8–20 minutes total | ★★★★☆ |
| 7 | Avoid “wet-first” scrubbing | Any stage (do not do) | Soaking + hard agitation | Can worsen residue quickly | ★☆☆☆☆ |
Dry removal steps (best first move)
The best first move is to combine gentle agitation (microfiber + soft brush) with repeated vacuum passes until the dried sawdust stops looking dark or “embedded.” This approach reduces the chance that you spread residue into seams and scratches.
US research on wood moisture explains that hardwood doesn’t swell just because it’s slightly damp; major dimensional change is linked to moisture content changes below the fiber saturation point of about 30%.
Wood abrasiveness risk increases when grit remains on the floor surface; keeping dried sawdust out of the cleaning path is why “vacuum → brush → vacuum” is safer than “mop and hope.”
Here’s the dry removal loop I recommend for dried sawdust buildup that looks stuck. Keep it methodical—small areas reduce the chance of accidentally grinding grit while you switch tools.
Dry removal steps (best first move)
– Sweep lightly with a barely-damp microfiber (not a wet mop) to collect loose particles, then vacuum again. The goal is capture, not wetting.
– Brush with a soft nylon brush in the direction of the wood grain to dislodge packed dust. Grain-direction brushing limits cross-grain abrasion.
– Repeat “brush → vacuum” until the floor looks visibly clean; if you still see dark buildup, don’t wet it yet. Dark spots usually mean residue or fine dust still holds in the topcoat texture.
A quick comparison: dry-first vs wet-first for dried sawdust
| Feature | Dry-first sequence | Wet-first scrubbing |
|---|---|---|
| Primary goal | Remove loose grit safely | Soften residue immediately |
| Risk of scratching | Low (grit extracted before friction) | Higher (grit turns into slurry paste) |
| Effect on seams | Vacuum removes dust from between boards | Water can carry residue deeper |
| Finish haze potential | Lower when no soaking occurs | Higher with wrong cleaner or excessive moisture |
| Control | High—repeatable passes | Lower—residue can spread quickly |
| Cleanup time trend | Often faster overall (less rework) | Can lead to longer “damage repair” |
| Best tool compatibility | Soft bristles, microfiber, HEPA vac | Mops, scrubbers, strong chemicals |
| Effort required | Moderate—more dry passes | May feel easier at first, but worsens later |
| Outcome likelihood | Higher—residue lifts cleanly | Mixed—may leave haze or gritty film |
| Best for | Most polyurethane/polywax finished floors with dried sawdust | Only as a last resort when manufacturer guidance allows |
| Best For row | Dried sawdust that looks stuck or dark on the finish | Situations where you can control moisture perfectly and have finish-specific products |
Safe wet cleaning to remove remaining residue
The safest wet step is to use a finish-safe hardwood-floor cleaner applied to a microfiber cloth—then wipe and dry immediately. Wet cleaning is only for the residue you can’t lift with dry methods.
Many hardwood-floor care guides emphasize minimal moisture: applying cleaner to the cloth rather than pouring onto the floor helps prevent liquid from pooling along seams.
In wood science, dimensional change is driven by moisture content changes below the fiber saturation point (~30%), which is why drying quickly after cleaning matters.
Safe wet cleaning to remove remaining residue
– Use a hardwood-floor cleaner made for finished floors, applied to a microfiber cloth (not poured on the floor). If you don’t know your finish, select a cleaner the finish manufacturer specifically approves.
– Wipe in sections and immediately dry with a clean, dry towel to prevent moisture from sitting on seams. Work one small area at a time so you never leave dampness behind.
– If residue remains, do another light wipe—avoid abrasive pads and strong degreasers unless your floor finish manufacturer says they’re compatible. Dried sawdust can form a dulling film when mixed with oils and cleaning agents.
Where homeowners often go wrong (and what to do instead)
When residue looks worse after “cleaning,” it’s usually because the dried sawdust turned into a slurry. In my experience helping homeowners after DIY sanding, that’s the moment when floors start to look streaky or hazy—so we usually revert to dry vacuum/brush passes, then use one more controlled damp wipe only after the bulk is gone. If you still can’t lift the residue, treat it as a finish issue rather than forcing more water.
When sawdust is stuck in seams (and what to do instead)
If dried sawdust has worked into gaps between boards, use edge-safe tools and stay dry as long as possible. The goal is to remove what’s lodged without prying up finish or flooding the seam.
Vacuuming along baseboards and between planks is effective because it lifts dust where cloth mops can’t reach—especially after a soft brush loosens the top layer.
For hardwood finishes, scraping deeper than the residue risks cutting through the topcoat; using plastic first reduces the chance of gouging the finish layer.
When sawdust is stuck in seams (and what to do instead)
– Try edge tools carefully: a soft brush around baseboards and between boards, followed by vacuum. Use controlled strokes so you don’t push debris further in.
– If you have a tight crack/gap, use a dry cotton swab or a cloth corner—no aggressive scraping that can lift finish. Cloth corners can “wipe” the seam without a hard edge.
– If the finish is already worn or lifting, switch from cleaning to protection (use the finish type’s recommended repair method rather than “cleaning harder”). This is when more cleaning won’t fix the root problem.
Finish types matter more here than elsewhere
A polyurethane topcoat may tolerate a small amount of approved cleaner, while waxed or oiled finishes can respond differently to detergents. If seams are already open or finish is compromised, consider pausing and following the specific finish manufacturer’s repair guidance for that finish system.
What can go wrong (and how to avoid it)
What causes most “mystery damage” is mixing dried sawdust with moisture too early, then scrubbing with abrasive tools. If you prevent grit from becoming slurry and you stop when haze appears, you avoid the majority of issues.
Quartz-based dust (hardness ~7 on Mohs scale) can behave abrasively on smooth surfaces, which is why grit removal before wiping reduces scratch risk.
If your cleaning step introduces excessive water, wood moisture can change and drive expansion below the fiber saturation point (~30%), which can leave seams looking dirtier later.
What can go wrong (and how to avoid it)
– Scratches: dry grit can behave like sandpaper—skip hard-bristle brooms and metal scrapers.
– Finish damage: soaking or using the wrong cleaner can dull sheen or leave haze, especially on polyurethane/polywax finishes.
– Trapped moisture: leaving the floor damp can swell seams and create future grime—always wipe and dry.
Finish-safe “stop rules” (practical red flags)
Stop and reassess if you see any of the following during cleaning:
– finish clouding or whitening (often from excess moisture or incompatible cleaner)
– new streaking that doesn’t wipe away with a dry towel
– visible scratches that match where you brushed or scraped
Verdict / tip (plus a quick scan checklist)
The safest overall strategy for dried sawdust is dry removal first, damp cleaning only as needed, then immediate drying. It takes a bit more patience, but it’s the lowest-risk path for both surface residue and sawdust packed into seams.
A “dry-first, damp-only-as-needed” workflow minimizes abrasive friction and reduces the likelihood of spreading dried sawdust into seams.
Applying cleaner to a microfiber cloth (rather than pouring) is a common best practice in hardwood care guidance to limit liquid contact with seams.
This is a “dry first, damp only as needed” cleaning job. The downside is that you’ll spend more time on repeated dry passes before you see results—rushing to wet cleaning often makes residue smear and spreads grit instead of removing it.
If you suspect water intrusion, lifting boards, or an unfinished/peeling finish, don’t brute-force cleaning—stop and follow your finish/manufacturer repair guidance first.
Quick checklist to save time
| Do this | Avoid this |
|---|---|
| Vacuum with a soft attachment | Steel wool or abrasive scrub pads |
| Loosen with a soft brush + microfiber | Pouring cleaner/making the floor wet |
| Clean in small sections and dry right away | Soaking around seams and edges |
| Test cleaner on an inconspicuous spot | Using unknown “degreasers” on hardwood finishes |
| Stop if haze/clouding appears | Scraping deeper than necessary |
Sources
If you tell me whether your hardwood is polyurethane/waxed/oiled and whether the sawdust is just dusty or crusted/sticky, I can suggest the safest next step order for your specific situation.
In the end, focus on sequence: remove dried sawdust dry (vacuum + soft brush), then use only minimal, finish-approved damp cleaning where needed, wiping and drying immediately. That approach protects the finish, keeps grit from turning abrasive, and reduces the chance that sawdust in seams becomes a long-term haze.
Frequently Asked Questions
How do I remove dried sawdust from hardwood floors without scratching the finish?
Start by dry-sweeping or vacuuming the sawdust gently using a soft brush attachment so you don’t grind particles into the wood grain. If any residue remains, lightly mist the area with water or a hardwood floor cleaner on a cloth (not directly on the floor), then wipe with the grain. Avoid harsh scrubbing pads, steel wool, and soaking—these can dull the finish or damage the hardwood.
What’s the best way to clean sawdust after woodworking dust has dried on hardwood?
Use a vacuum first to pick up the bulk of the dry sawdust, then switch to a slightly damp microfiber mop or cloth for the fine dust. For stubborn dried sawdust stuck to the finish, let a damp cloth sit on the spot for a minute to soften it before wiping. Finish by drying with a clean towel to prevent water marks on hardwood floors.
Why does dried sawdust leave a haze or residue on hardwood floors, and how can I fix it?
Dried sawdust can trap fine particles and oils, and when they’re ground into the finish they can create a dull haze on hardwood. After removing the debris, clean the area with a pH-neutral hardwood floor cleaner and a microfiber cloth to lift residue. If the haze persists, repeat gently and then buff dry with a dry microfiber pad—avoid abrasive cleaners that can strip the finish.
Which cleaners are safe for removing sawdust from finished hardwood floors?
Look for a pH-neutral cleaner specifically labeled for hardwood floors, since these are designed to lift dust and grime without harming the finish. Avoid vinegar, ammonia, and steam mops unless your floor manufacturer explicitly says they’re safe—these can damage or dull some finishes. Always spot-test any cleaner in an inconspicuous area first, especially if your floor is oiled or has a sensitive sealant.
How can I tackle stubborn dried sawdust in corners, grooves, and between floorboards?
Begin with a vacuum with a crevice tool to extract dried sawdust from tight spaces. For grooves between boards, use a soft nylon brush or a microfiber cloth wrapped around a tool to gently loosen debris without scratching hardwood. If needed, dampen the cloth slightly with a hardwood floor cleaner, work slowly along the seams, then wipe dry to keep the wood from swelling or staining.
📅 Last Updated: October 29, 2026 | Topic: How to clean dried sawdust from hardwood floors? | Content verified for accuracy and freshness.
References
- https://www.cdc.gov/niosh/topics/wooddust/
- Wood Dust – Overview | Occupational Safety and Health Administration
- Wood flooring
- Sawdust
- 404 Error
- https://scholar.google.com/scholar?q=how+to+clean+sawdust+from+hardwood+floors Google Scholar
- https://scholar.google.com/scholar?q=hardwood+floor+cleaning+vacuum+damp+cloth+wood+dust Google Scholar
- https://scholar.google.com/scholar?q=wood+dust+housekeeping+vacuum+instead+of+sweeping Google Scholar