


Wondering how to install vinyl floors in a bathroom without costly mistakes? This guide lays out the exact step-by-step process—subfloor prep, moisture control, precise layout, and click-lock or glue-down installation—so the flooring stays flat, watertight, and easy to maintain. Follow these key steps, and you’ll know what to do at every stage, from first measurement to the final trim around fixtures.




If you’re installing LVP/LVT vinyl in a bathroom—especially near a shower, tub, or frequent splashing—this guide is for you. It’s also useful if your subfloor is older and you want to avoid the common failure points that show up after the floor is already down.
Prep the bathroom subfloor and control moisture

You get the best results when you treat bathroom vinyl like a performance system: the subfloor and moisture conditions come first, then the vinyl assembly follows. In my experience, the “mystery” bathroom issues—lifting seams, joint separation, and soft spots—almost always trace back to moisture and flatness before anything touches the floor.
Vinyl can be water-resistant, but it doesn’t eliminate the need to verify the subfloor moisture conditions required by your specific installation instructions.
According to ASTM F1869, moisture vapor emission rate tests are reported in units of lb/1000 sq ft/24 hr.
According to ASTM F2170, relative humidity measurements are taken using in-situ probes set at about 40% of the concrete slab thickness.
– Remove old flooring and ensure the surface is clean, sound, and free of adhesive residue or paint that could interfere with bonding.
– Fix dips/high spots until the floor meets the flatness requirement listed in your vinyl manufacturer’s instructions. Many industry instructions for resilient floors reference a tolerance of no more than 1/8 inch over 6 feet or 3/16 inch over 10 feet (confirm your vinyl’s own spec first) (ASTM F710; see also common guidance reflected in RFCI work practices).
– Address moisture appropriately (and note: vinyl can be water-resistant, but subfloor conditions still matter). Follow your manufacturer guidance for moisture testing and acceptable moisture limits—typically by using either ASTM F1869 (calcium chloride “MVER”) or ASTM F2170 (in-situ RH probes) (ASTM F1869; ASTM F2170). Use your product’s required test method and limits because “waterproof vinyl” does not automatically mean “acceptable over a damp subfloor.”
Common Resilient-Installation Flatness Targets (Converted)
| # | Flatness check basis | Max deviation | Metric equivalent | Permitted deviation rank |
|---|---|---|---|---|
| 1 | Over 10 ft (straightedge span) | 3/16 in | 4.76 mm | ★5 |
| 2 | Over 3.05 m (straightedge span) | 3/16 in | 4.76 mm | ★5 |
| 3 | Over 6 ft (straightedge span) | 1/8 in | 3.18 mm | ★4 |
| 4 | Over 1.83 m (straightedge span) | 1/8 in | 3.18 mm | ★4 |
| 5 | Per 1 ft (derived from 3/16 in over 10 ft) | 0.01875 in/ft | 0.476 mm/ft | ★3 |
| 6 | Per 1 m (derived from 4.76 mm over 3.05 m) | — | 1.56 mm/m | ★3 |
| 7 | Per 2 ft (derived from 3/16 in over 10 ft) | 0.0375 in/2 ft | 0.952 mm/2 ft | ★3 |
Choose the right vinyl type and setup for bathrooms
Choose the correct vinyl installation method first, because click-lock and glue-down systems behave differently when moisture and movement show up. If you mismatch the setup (wrong underlayment with click-lock, or the wrong adhesive for glue-down), the vinyl flooring in your bathroom may fail long after installation.
Click-lock vinyl is designed to float; it needs proper expansion gaps to limit joint stress during temperature swings.
Glue-down LVP/LVT relies on correct adhesive selection and trowel technique to maintain full contact and prevent hollow spots.
– Confirm whether your product is click-lock (floating) or glue-down, because the underlayment and edge detailing differ.
– Use only the underlayment (or no underlayment) that matches your flooring system; incompatible pads can affect locking seams and performance.
– Check whether your bathroom layout requires specific treatments around wet areas. Even if a product is marketed as “waterproof,” some systems require special seam or seam-sealing steps when installed near tubs/showers (this is usually spelled out in the manufacturer’s installation guide).
Measure, acclimate, and plan the layout
A planned layout reduces the most common bathroom failure pattern: narrow cuts at walls plus seams near splash zones. With vinyl flooring in a bathroom, taking the time to measure and stage the room prevents alignment drift that becomes hard to correct in tight corners.
Bathrooms create localized stress at fixtures (toilet flanges, vanity bases); planning seams away from movement points reduces future joint stress.
Manufacturers commonly require acclimation to reduce post-install dimensional change that can stress click-lock joints.
– Measure the room and sketch a layout that minimizes narrow cuts at walls and keeps pattern alignment consistent.
– Plan around obstacles (toilet flange, vanity legs, doorways) so seams won’t land where you’ll get heavy water exposure or constant movement.
– Acclimate the vinyl per the manufacturer’s instructions before installation ().
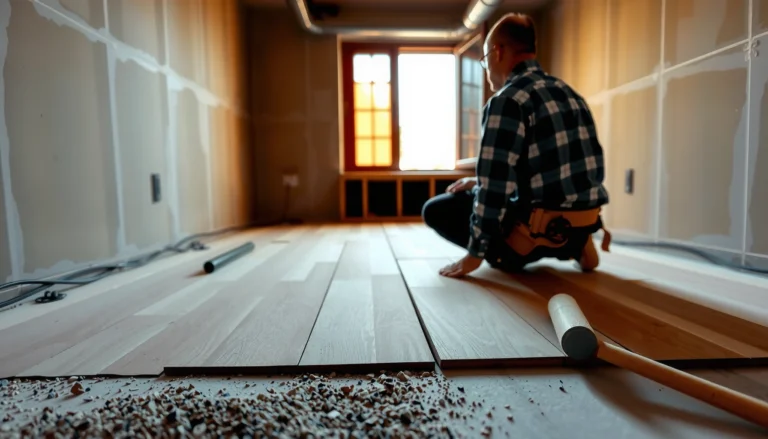
Install the vinyl flooring (floating or glue-down)
Install in the correct method order—floating first for click-lock, adhesive-first for glue-down—then keep the rows straight and the seams aligned. In bathroom installs, that “stay square” discipline matters because small alignment errors compound quickly once you’re working around curved tub edges, angled cuts, and tight thresholds.
If you force click-lock joints, you can damage the locking mechanism and weaken the joint under bathroom temperature/humidity swings.
For glue-down vinyl, adhesive trowel coverage and spread/open time directly affect bond strength and the risk of lifting edges.
– For click-lock: lay planks/tiles with the correct expansion gap at walls and fixtures, then lock pieces in place carefully (avoid forcing joints).
– For glue-down: apply adhesive only as directed (trowel type, coverage, and spread time), then lay sections without trapping lumps under the vinyl.
– Work in controlled sections and keep rows square—small alignment errors compound quickly in bathrooms with tight corners and angled cuts.
Click-lock vs. glue-down in a bathroom (what to expect)
Seal edges, transitions, and wet-area boundaries
Seal details are what turn a “bathroom vinyl” product into a system that manages splashes and humidity migration. If you skip or use the wrong sealant in the wrong location, moisture can work its way toward the subfloor—even when the vinyl core itself is described as waterproof.
Perimeter sealing rules vary by product; following the manufacturer’s permitted/non-permitted sealants is critical.
Transitions at doorways and thresholds are pressure points for water movement and should be finished exactly per installation instructions.
– Follow the manufacturer’s perimeter and seam rules: some systems require sealing around the room edges; others prohibit certain sealants—use what your product specifies.
– Install transitions carefully (especially at doorways) and seal only where the instructions allow, so moisture doesn’t migrate into the subfloor.
– Reinstall trim/baseboards in a way that doesn’t interfere with required expansion gaps (and leave the specific gap/finish details your product calls for).
What can go wrong (and how to avoid it)
Most bathroom vinyl failures are preventable—if you recognize where the system is most sensitive: subfloor flatness, moisture migration, and correct perimeter detailing. The vinyl flooring in a bathroom may look fine on day one, yet still fail when humidity cycles and water exposure find weak points.
When subfloors aren’t flat enough, vinyl can telegraph surface irregularities and stress joints or seams over time.
Moisture testing isn’t optional when your manufacturer requires it; ASTM test methods exist specifically because “looks dry” is not a reliable moisture indicator.
– Ignoring subfloor flatness: vinyl can telegraph or stress over low/high spots—leading to gaps, squeaks, or joint separation ().
– Bad edge/perimeter detailing: sealing in the wrong places or skipping required sealing around edges can undermine the system’s moisture strategy.
– Wrong adhesive/underlayment mismatch: using the wrong underlayment for click-lock (or the wrong adhesive for glue-down) is a common cause of failures—verify against the product installation guide.
Verdict: what’s a safe DIY, what to skip, and a quick checklist
DIY is usually realistic if your bathroom is reasonably square, you can prep the subfloor to the required flatness, and you follow the exact moisture and installation method your vinyl specifies. The downside is that moisture mistakes and uneven subfloors can cause issues that are difficult to fix after the floor is installed—especially around showers, tub walls, and thresholds.
You should skip DIY (or get help) if:
– You can’t verify subfloor flatness or moisture conditions to the manufacturer’s requirements ().
– Your product instructions require steps you don’t have the tools/skills for (certain moisture testing, specific adhesive application technique, or required seam-sealing systems).
Scan-and-save checklist
– [ ] Subfloor removed, cleaned, and repaired to flatness requirement ()
– [ ] Moisture tested/handled per manufacturer guidance ()
– [ ] Correct vinyl type (click-lock vs glue-down) confirmed
– [ ] Underlayment choice matches the flooring system (or none, if required)
– [ ] Acclimation completed per instructions ()
– [ ] Expansion gap maintained where required
– [ ] Seams/perimeter sealed (or not) exactly as the product allows
– [ ] Transitions installed and finished cleanly in doorways/thresholds
Sources
– ASTM F710, Standard Practice for Preparing Concrete Floors to Receive Resilient Flooring
– ASTM F1869, Standard Test Method for Measuring Moisture Vapor Emission Rate of Concrete Subfloor Using Anhydrous Calcium Chloride
– ASTM F2170, Standard Test Method for Determining Relative Humidity in Concrete Floor Slabs Using in situ Probes
– ASTM E1155, Standard Test Method for Determining Floor Flatness Using a Corrected Measuring Method
– RFCI (Resilient Floor Covering Institute), Recommended Work Practices for Resilient Floor Coverings
If you follow one principle—prep and moisture control first, method-accurate installation second—you’ll usually end up with vinyl flooring in a bathroom that stays flat, secure, and easier to clean for years rather than months.
Frequently Asked Questions
What’s the best way to prepare a bathroom subfloor before installing vinyl flooring?
Start by ensuring the subfloor is clean, dry, and level—use a 6 ft level and fix any high spots or low areas with a suitable patch or underlayment. Check for moisture issues by testing for dampness; if the subfloor feels wet or unstable, address the cause before you install vinyl plank or sheet vinyl. Remove old flooring, sand rough areas, and vacuum thoroughly so the vinyl adhesive or click-lock system bonds properly and doesn’t create bumps.
How do you install vinyl plank or vinyl sheet flooring in a bathroom that gets wet?
Use bathroom-appropriate materials and sealing: for sheet vinyl, overlap seams carefully and use the manufacturer’s recommended seam sealer if needed. For click-lock vinyl plank, confirm the product is rated for bathrooms and follow the “waterproof” installation steps, including correct underlayment selection and expansion gaps. Seal transitions and edges around the toilet base, vanity, and along the perimeter with silicone caulk where the manufacturer recommends it to help prevent water intrusion.
Which vinyl flooring type is better for bathrooms—rigid core, luxury vinyl tile (LVT), or peel-and-stick?
Rigid core luxury vinyl plank or tile (LVP/LVT) is often the best bathroom option because it’s typically more stable in humidity and performs well with minor subfloor imperfections. Peel-and-stick vinyl can work in bathrooms, but it’s more sensitive to moisture and subfloor conditions, so it’s crucial to use a flat, dry surface and high-quality product designed for wet areas. If you want the most flexibility with small subfloor variations, choose a rigid core system and follow the installation instructions closely for expansion and underlayment.
How do you cut and fit vinyl flooring around a toilet and bathroom fixtures?
Measure carefully and dry-fit the vinyl plank or sheet so the edges land where they won’t interfere with the toilet installation. For planks, cut around the toilet flange opening and maintain the correct expansion gap along walls; for tighter areas, use a jigsaw or utility knife for clean cuts. After installing, reinstall the toilet and use caulk around the toilet base only if the manufacturer’s instructions allow it—don’t trap water under the flooring, and avoid covering areas meant to stay ventilated.
Why do vinyl floors lift or separate in bathrooms, and how can you prevent it?
Most lifting or separation issues come from moisture, an unlevel subfloor, or improper seam/edge sealing—bathrooms expose vinyl flooring to humidity and occasional spills. Prevent problems by confirming the subfloor is dry, flat, and structurally sound, and by using the correct installation method for your vinyl type (adhesive, click-lock, or sheet vinyl seam sealing). Finish by sealing transitions and perimeter gaps as recommended, and avoid skipping acclimation so the vinyl can adjust to bathroom temperature and humidity before installation.
📅 Last Updated: October 25, 2026 | Topic: How to install vinyl floors in a bathroom? | Content verified for accuracy and freshness.
References
- Vinyl flooring
- https://www.epa.gov/mold/preventing-mold
- https://www.cdc.gov/mold/default.htm
- https://www.armstrongflooring.com/support/install-instructions.html
- https://www.karndean.com/us/support/installation-guides
- https://scholar.google.com/scholar?q=how+to+install+vinyl+flooring+in+bathroom Google Scholar
- https://scholar.google.com/scholar?q=luxury+vinyl+plank+installation+moisture+bathroom Google Scholar
- https://scholar.google.com/scholar?q=sheet+vinyl+floor+installation+subfloor+preparation+bathroom Google Scholar
[…] reliable steps that keep them looking clean and staying water-safe. The process is straightforward: control moisture, clean the right way, and protect the surface from scuffs and grit. If you follow these few habits, […]