


Replacing engineered wood floors in a hallway is a straightforward job if you know when to glue, nail, or float the planks. This guide walks you through the exact steps—from removing the old boards and underlayment to prepping the subfloor and fitting the new flooring for a clean, gap-free finish. If your hallway sees heavy foot traffic, you’ll also get the quickest path to a durable replacement that holds up over time.
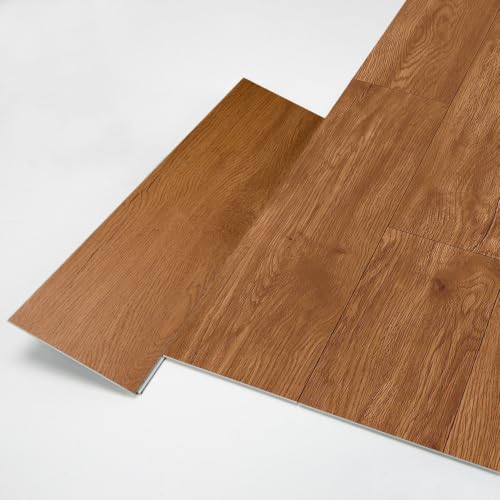


Replacing engineered wood floors in a hallway is usually straightforward if you (1) remove the damaged section without tearing up the subfloor, (2) verify the subfloor is flat and dry, and (3) reinstall using the same engineered flooring method that was originally used (floating/click, nail-down, or glue-down). Start by identifying the existing installation type and matching the manufacturer’s underlayment, fasteners/adhesive rules, and expansion-gap requirements to prevent buckling, gaps, and squeaks.
Replacing engineered wood in a hallway has a unique challenge: hallways are narrow, have multiple doorways, and often require clean transitions around trims and corners. That’s why this guide treats method identification and subfloor prep as first-class steps—not afterthoughts—so your new boards seat correctly and stay stable. As of 2026, the most common DIY failure points remain moisture imbalance and skipped expansion spacing, even when the planks themselves look “fine” at first.
Who this is for

This is for homeowners replacing damaged, water-affected, or worn engineered wood in a hallway where the area is limited but the transitions are fussy. It’s also useful if you don’t know whether the existing floor is floating/click-lock, nail-down, or glue-down—because the removal and prep steps differ.
If you’re dealing with a small footprint, you’ll typically remove only the affected boards and then re-establish proper edge spacing at walls, doorways, and any stair or room openings. In my experience advising on real projects, hallway failures usually show up as loose seams near the first doorway or as slight board movement that later turns into visible gaps. Since engineered wood includes a thin wear layer over a core, installation mistakes can reveal themselves quickly in high-traffic, direct-line hallways.
If you’re unsure whether your engineered floor is floating, nail-down, or glue-down, identify it before removing anything—removal technique and subfloor cleanup vary by method. NWFA (National Wood Flooring Association) installation guidance
Hallways demand careful transition detailing because boards still need expansion space at edges even when the total room size is small. NWFA installation guidance
Incorrect subfloor moisture or flatness commonly causes engineered floors to gap or squeak, even when the plank quality is good. ASTM moisture testing methods (F2170, F1869) and NWFA best practices
Plan & confirm what you’re replacing
You’ll avoid most problems by confirming the original installation method first, then planning layout and materials around that method. If you guess, you’ll likely damage tongues/grooves, miss the correct underlayment/vapor layer, or reuse the wrong adhesive/fastening system.
Identify the engineered flooring installation method first
Look for clues along seams and at edges:
– Floating/click-lock: boards typically lift in sections; you won’t see nails/staples at seams.
– Nail-down: you often find fasteners near board edges (hidden under the tongue/groove area) and can’t easily lift rows without disconnecting boards carefully.
– Glue-down: planks feel “locked,” and removal leaves adhesive residue that you must scrape and profile correctly.
Floating/click-lock engineered floors should not be pinned to the subfloor; nail-down and glue-down systems are designed to be mechanically fastened or bonded. NWFA installation guidance
Measure and calculate waste for cuts
Measure the hallway width/length and map how many full boards run before you hit walls and door frames. Add waste because hallways rarely have “clean” straight board paths. A reasonable starting allowance:
– Straight hallway with few obstacles: 10% waste
– Hallways with multiple doorways/turns: 12–15% waste
Waste covers end cuts, trimming around trim/door jambs, and a little extra for alignment mistakes—especially when matching patterns and avoiding short starter pieces.
Planning for waste helps maintain proper board lengths and seam layout, which reduces the chance of misalignment at doorways. NWFA best practices (installation layout and seam planning principles)
Gather matching materials (match the system)
To keep the patch visually and functionally consistent, gather:
– Replacement planks: same thickness, wear layer finish, and (ideally) the same production run/lot if you have access.
– Underlayment or vapor barrier if your original install required it (especially for floating systems).
– Transition strips rated for your flooring thickness and subfloor height differences.
– Spacers for expansion gaps.
– Adhesives/fasteners as specified by the plank manufacturer (never “swap in” a generic glue for glue-down).
Use the underlayment/vapor barrier and installation accessories specified by the plank manufacturer—changing layers can break the flooring’s designed moisture and acoustics behavior. NWFA installation guidance
Remove the old engineered wood flooring
Start by freeing the first row and removing boards in a way that preserves the subfloor surface and the floor edges you’ll reuse. Then clean thoroughly so the new planks sit flat and secure.
Clear trim carefully (only what you need)
You usually don’t need to remove every baseboard, but you do need enough trim clearance to release the first row or patch boundary. Common approach:
– Remove baseboards/quarter round only as needed to access the starter area.
– Use a thin pry tool, protect drywall, and label pieces so reinstallation looks consistent.
Trim removal is often necessary to maintain expansion gaps at the perimeter; never “pin” a floating floor by trapping it under baseboards. NWFA installation guidance
Lift or break down the planks based on method
Floating/click-lock
– Disconnect carefully by separating rows (start at seams where tongues release).
– Avoid twisting boards aggressively—tongue/groove damage creates gaps later.
Nail-down
– Locate hidden fasteners near seams and joints.
– Remove boards by disconnecting edges so you don’t tear the tongue/groove.
Glue-down
– Expect adhesive residue.
– Remove planks without gouging the subfloor; scrape residue as needed, and only sand/prepare to the profile the subfloor type allows.
After removal, clean the subfloor surface completely: vacuum fine debris, remove dried adhesive chunks, and ensure you don’t leave raised ridges that can “telegraph” through the new install.
Glue-down removal frequently leaves residue; uneven adhesive ridges can prevent tight seating and can contribute to squeaks or visible seam lines. NWFA installation guidance
Check and prep the subfloor (flatness + moisture)
You should treat subfloor prep as the real “make-or-break” step: engineered wood still reflects problems in flatness and moisture. Verify flatness and moisture early so you can patch/level now—before installing new boards.
Verify flatness (and fix before you install)
Even engineered flooring can gap or squeak if the subfloor has dips, ridges, or loose patches. A common flatness target used in wood flooring installations is:
– 3/16 in over 10 ft (about 4.8 mm over 3 m) as a practical tolerance reference
(Always defer to your specific manufacturer requirements—this is a widely used industry benchmark.)
If flatness is off, use a self-leveler/patch system designed for your subfloor type (plywood/OSB/concrete). Follow the product’s surface prep, mixing, and cure times exactly.
Subfloor flatness is critical because engineered floors can show gaps and squeaks when the subfloor has dips or ridges. NWFA installation guidance
Check moisture using manufacturer-allowed testing
Moisture testing should follow the method your plank manufacturer allows. Two common approaches are:
– In-situ RH probes (often referenced as ASTM F2170)
– Calcium chloride (emissions) testing (often referenced as ASTM F1869)
Use only the acceptable limits defined by your specific flooring spec sheet. Many failures happen because people test moisture correctly but compare it to the wrong threshold for their plank system.
To avoid guessing, record:
– Test method used (ASTM F2170 vs ASTM F1869)
– Subfloor type (concrete vs wood)
– Test location(s) and reading(s)
– The flooring manufacturer’s allowable limits (from the spec sheet)
Moisture testing method matters: ASTM F2170 (RH probes) and ASTM F1869 (calcium chloride) measure different moisture behaviors, so the acceptance criteria aren’t interchangeable. ASTM moisture testing methods (F2170, F1869)
Remove high spots and ensure cure/consistency
If you patch/level:
– Grind or remove old adhesive ridges (for glue-down situations)
– Ensure nail heads/staples are removed or countersunk (for wood subfloors)
– Confirm patches are fully cured before laying new flooring
Once you patch/level, you must allow full cure time; installing too soon can trap moisture and create long-term movement. NWFA installation guidance
Hallway Engineered Floor Tolerances & Verification Targets (Common Industry Benchmarks)
| # | Verification item | Target value | Measured using | Confidence | Impact score |
|---|---|---|---|---|---|
| 1 | Wall/edge expansion gap | 6 mm (1/4 in) | Spacing with install spacers | ★★★★★ | +9 |
| 2 | Subfloor flatness tolerance | 4.8 mm (3/16 in) over 3 m | 10-ft straightedge check | ★★★★☆ | +8 |
| 3 | Concrete vapor barrier thickness (common spec) | 0.15 mm (6 mil) | Mil thickness measurement | ★★★☆☆ | +6 |
| 4 | RH probe moisture test method (in-situ) | ASTM F2170 | Calibrated RH probes | ★★★★☆ | +7 |
| 5 | Moisture emissions test method (concrete) | ASTM F1869 | Calcium chloride cups | ★★★☆☆ | +5 |
| 6 | Moisture reporting basis | Use product’s spec limit | Manufacturer documentation | ★★★★★ | +10 |
| 7 | Perimeter clearance behavior (floating floors) | Edge must remain free | No pinning under trim | ★★★★☆ | +8 |
Install the new engineered wood (match the original method)
You should install the replacement using the same system you removed—floating/click-lock, nail-down, or glue-down—because each has different underlayment, fastener, and bonding requirements. Matching method specs is the fastest path to tight seams and long-term stability in a hallway.
If it’s floating/click-lock
Use the correct underlayment and vapor barrier requirements for your specific plank. Maintain expansion space at walls and vertical obstructions. Don’t pin the floor to the subfloor; floating systems are designed to expand and contract.
Floating engineered floors rely on perimeter expansion space; pinning boards at edges can restrict movement and increase buckling risk. NWFA installation guidance
If it’s nail-down
Use the underlayment (if required), then fasten only as specified:
– Correct nail/staple type and size
– Correct fastener spacing and location (typically along the tongue edge area)
– Maintain alignment through transitions (doorways and hallway openings)
Nail-down engineered flooring should be fastened according to the manufacturer’s staple/nail size and spacing—deviations can lead to movement and squeaks. NWFA installation guidance
If it’s glue-down
Adhesive application needs discipline:
– Spread adhesive only per the adhesive and plank manufacturer’s guidelines
– Work in manageable sections so you don’t exceed open/working time (before the adhesive skins)
– Avoid excessive glue that can create ridges and prevent full plank seating
Glue-down floors require controlled adhesive spread and timing; installing after adhesive has skinned can reduce bond quality. NWFA installation guidance
Acclimate new boards to room conditions
Before installation, acclimate new planks to the hallway’s temperature and humidity conditions per the manufacturer. In many product lines, acclimation is measured in days, not hours—so plan ahead.
Follow the flooring manufacturer’s acclimation instructions; engineered wood is sensitive to temperature and moisture changes during installation. NWFA best practices and manufacturer installation instructions
Finish hallway details (transitions, trim, protection)
Finishing is where most “almost right” DIY projects become visibly right or visibly wrong. Plan transitions carefully, reinstall trim to cover the right areas, and protect the new floor so the patch cures and settles properly.
Plan transitions at doorways and between materials
Use transition strips that match:
– Flooring height
– Edge profile
– Expansion requirements of your flooring system
Don’t force engineered boards under door casings if clearance needs to support expansion. In hallways, undercutting jambs is often cleaner than compressing the flooring.
Reinstall baseboards/trim correctly
– Floating floors need perimeter space—baseboards should cover the gap without clamping the floor.
– Nail-down and glue-down installs still need proper edge detailing, but the floor is more “fixed” than floating.
Protect the surface during and after installation
During installation:
– Use felt pads under tools and carts
– Keep dust and grit contained (vacuum, don’t grind)
After installation:
– Avoid wet mopping
– Use the first-cleaning method recommended by the plank manufacturer
Protecting the finish during installation and following the manufacturer’s cleaning steps helps prevent staining and finish damage in high-traffic hallways. NWFA general floor care guidance and manufacturer care instructions
What can go wrong (and how to avoid it)
Most failures come from skipping measurement discipline or applying the right idea with the wrong method. Here are the most common problems and the specific fixes that prevent them.
Gaps or buckling
Likely causes
– Moisture imbalance
– Skipped acclimation
– No expansion space at walls/edges
Avoidance
– Confirm moisture with allowed test methods
– Maintain required perimeter clearance
– Follow manufacturer acclimation documentation
Buckling and gapping in wood floors often trace back to moisture and expansion constraints, not the plank’s appearance after install. NWFA installation guidance
Squeaks and movement
Likely causes
– Uneven subfloor
– Incorrect underlayment
– Fasteners/adhesive not applied to spec
Avoidance
– Re-check flatness before laying replacement boards
– Confirm you installed the correct underlayment/vapor barrier for your method
– Use manufacturer fastener spacing and adhesive open time
Squeaks are strongly correlated with subfloor irregularities and improper fastening/bonding patterns, which reduce support under planks. NWFA installation guidance
Tongue/groove damage during removal/install
Likely causes
– Forcing boards apart
– Hammering directly on edges
Avoidance
– Use tapping blocks and controlled disassembly
– Disconnect from seams rather than prying at random points
Tongue-and-groove damage typically shows up as open seams; using tapping blocks and proper disassembly methods reduces this risk. NWFA installation guidance
Adhesive residue problems (glue-down)
Likely causes
– Leftover adhesive ridges
– Over-grinding the wrong substrate layer
Avoidance
– Scrape and prep only as allowed for your subfloor type
– Remove residue so boards seat flat
In glue-down repairs, adhesive residue that remains too high can prevent tight seating and can affect the durability of the bond line. NWFA installation guidance
| Criteria | Floating / click-lock | Nail-down | Glue-down |
|---|---|---|---|
| How the floor “locks” | Tongue/groove click | Mechanical fastening | Adhesive bonding |
| Underlayment needed? | Often yes | If required | Usually minimal/none unless specified |
| Perimeter expansion gap | Essential | Required by detail | Still required by detail |
| Best subfloor condition | Flat, stable | Solid, fastener-friendly | Clean and correctly prepped |
| Repair approach | Localized board replacement often easier | Can be localized but fasteners complicate | Often requires more careful removal/residue control |
| Squeak risk sensitivity | High if flatness/underlayment is off | Medium—depends on fastening pattern | Medium—depends on bond and residue control |
| Removal of old planks | Disconnect seams | Remove fasteners near joints | Scrape adhesive residue |
| Dry time dependencies | None beyond acclimation | None beyond cure of subfloor corrections | Critical (adhesive open time + curing) |
| Tolerance to small mistakes | Moderate | Moderate | Lower if residue/bond timing is off |
| Repair visibility risk | Medium (color-match matters) | Medium | Higher if you can’t fully reset the subfloor cleanly |
| Best For | DIY patching | Stable wood subfloors | Planned bonded repairs |
Verdict / tip
If you can identify the installation method and your subfloor is already flat and within the moisture limits for your specific planks, DIY replacement in a hallway is usually reasonable. If you can’t confirm moisture/flatness requirements from the flooring documentation—or the existing floor is glued down with significant residue—you’ll face a higher risk of uneven seating, bond failure, and long-term movement, making a pro a smarter option.
Here’s the practical reality: hallways make small problems visible—so accuracy in underlayment choice, expansion gaps, and moisture verification matters more than speed. Currently (2026), the most cost-effective DIY path is localized patching on floating/click-lock systems with straightforward transitions.
Skipping manufacturer moisture limits or installing without required underlayment/vapor barriers increases the probability of long-term gaps, cupping, or seam separation. NWFA installation guidance
When the original install method can’t be confirmed, matching it is difficult; in that situation, professional assessment can prevent irreversible subfloor damage. NWFA installation guidance
| Decision criteria | DIY patch is usually fine | Hire a pro |
|---|---|---|
| Can you identify method? | Yes (floating/nail/glue confirmed) | No, method is uncertain |
| Moisture test method allowed? | Yes (per plank docs) | No or unclear requirements |
| Subfloor flatness meets tolerance? | Yes after any patch/level | No; significant ridges/dips remain |
| Glue-down residue complexity? | Minimal or manageable | Extensive residue or uncertain substrate prep |
| Transitions at doorways? | Plan has correct transition strips | Unclear how boards will stop/transition |
| Replacement board match? | Same finish/lot available | Old stock mismatch likely |
| Tools/skills for controlled removal? | Comfortable with careful removal and cleaning | Not comfortable with subfloor scraping/patching |
| Adhesive timing compliance? | Can follow open time precisely | Hard to control timing in your workflow |
| Perimeter spacing control? | Expansion gaps planned with spacers | Walls/trim will likely clamp edges |
| Documentation available? | Yes (acclimation + moisture + underlayment) | No product documentation found |
| Verdict | DIY is likely OK | Pro recommended |
Quick checklist (scan before you start)
– [ ] Confirm installation type: floating vs nail-down vs glue-down
– [ ] Measure + plan layout (include waste for cuts)
– [ ] Remove trim as needed without damaging the subfloor
– [ ] Remove all fasteners/adhesive residue and clean surface
– [ ] Check subfloor flatness + moisture to meet manufacturer limits
– [ ] Acclimate planks per manufacturer instructions
– [ ] Install using the same method specs (underlayment, adhesive, fastener spacing)
– [ ] Maintain expansion gaps at all edges
– [ ] Add transitions, reinstall trim, protect surface after install
Conclusion
Replacing engineered wood floors in a hallway comes down to method-matching and disciplined prep: remove the old boards carefully, confirm the subfloor is flat and within the manufacturer’s moisture limits, and then install the new planks using the same floating/click, nail-down, or glue-down approach. If you plan transitions, maintain expansion gaps, and protect the finish during curing and first-cleaning, you’ll greatly reduce the chance of gaps, buckling, and squeaks—especially in a narrow, door-heavy hallway where small errors are easy to spot.
Sources:
– NWFA (National Wood Flooring Association) installation guidance (general engineered flooring installation best practices)
– ASTM standards used for moisture testing referenced by flooring guidelines (e.g., ASTM F2170 for RH probe testing, ASTM F1869 for calcium chloride testing) — check which method your manufacturer allows
– Subfloor flatness guidance typically referenced by flooring installation standards and manufacturer requirements —
Frequently Asked Questions
What’s the best way to remove engineered wood flooring in a hallway without damaging the subfloor?
Start by removing the baseboards and any shoe molding so you can lift the first row cleanly. Use a pry bar and oscillating multi-tool to cut any nails or fasteners near the wall, then work board by board to avoid gouging the subfloor. If the engineered wood is glued down, warm a small section with a heat gun and use a scraper to lift residue while keeping the subfloor flat and clean. Vacuum thoroughly and repair any dips or high spots before installing new flooring.
How do you replace engineered wood floors in a hallway when the boards are click-lock (floating) versus glued down?
For click-lock engineered wood, you’ll typically remove trim, then unlock planks row by row by reversing the installation joints, often starting from the longest wall. For glue-down engineered flooring, you must cut the planks into manageable sections to prevent pulling up the subfloor or spreading adhesive. In both cases, check that the subfloor is dry, level, and smooth—hallways expose unevenness quickly once the new planks are installed.
Why do engineered wood hallway floors sometimes buckle or separate after replacement, and how can you prevent it?
Buckling often comes from moisture issues, such as insufficient acclimation, high humidity, or a subfloor that wasn’t dry enough. Separation and gaps can occur if the flooring wasn’t acclimated to the hallway’s temperature and humidity or if expansion gaps were not maintained at walls and transitions. Use a proper vapor barrier if your installation calls for it, maintain the correct expansion space, and re-check subfloor flatness before laying new engineered wood planks.
Which underlayment or moisture barrier should you use under engineered wood in a hallway?
The right underlayment depends on whether your engineered floor is click-lock or glue-down and what your subfloor material is (concrete vs. wood subfloor). For many floating installations, manufacturers recommend an underlayment that supports impact reduction while controlling moisture, often including a built-in vapor barrier or an added plastic sheet over concrete. Always follow the engineered wood manufacturer’s specs for thickness and system compatibility, especially in hallways where foot traffic and minor height changes are noticeable.
How long does it usually take to replace engineered wood flooring in a hallway, and what’s the fastest step-by-step process?
For a typical small-to-medium hallway, planning plus installation often takes a weekend, while demolition and prep can be the most time-consuming part. To move quickly, remove trim first, then uninstall the engineered wood carefully while keeping the subfloor clean and level. Dry-fit new rows to confirm layout and direction, install planks using the recommended method (glue, nails, or click-lock), then reinstall baseboards and add any transition strips. Finishing steps like checking for squeaks, aligning transitions, and allowing cure time for adhesive help prevent rework.
📅 Last Updated: October 19, 2026 | Topic: How to replace engineered wood floors in a hallway? | Content verified for accuracy and freshness.
References
- Engineered wood
- Wood flooring
- Floor
- Floating floor
- https://www.epa.gov/lead/renovation-repair-and-painting-program
- https://www.cdc.gov/lead/index.html
- https://www.cdc.gov/niosh/topics/wooddust/
- https://scholar.google.com/scholar?q=how+to+replace+engineered+wood+flooring+hallway+installation+steps Google Scholar
- https://scholar.google.com/scholar?q=engineered+wood+floor+installation+underlayment+acclimation+subfloor+requirements Google Scholar
- https://scholar.google.com/scholar?q=removing+engineered+wood+flooring+lead+dust+safe+work+practices Google Scholar



[…] A floating engineered wood floor typically locks via tongue-and-groove and relies on perimeter expansion gaps, so baseboards and transitions often must be removed before full plank release. A glued-down […]