
If you need to waterproof rubber floors, sealant is the fastest, most reliable path—choose the right product and apply it correctly to stop leaks without damaging the flooring. This step-by-step guide walks you through surface prep, drying time, and a proper sealant application so you get a continuous, long-lasting barrier. By the end, you’ll know exactly what to use and how to apply it to keep rubber floors watertight.



Rubber floors waterproof best when you clean thoroughly, repair any seams, and apply a compatible waterproof sealer or epoxy/urethane coating meant for rubber. The key is stopping water at the edges and penetrations (seams, cuts, drains)—not simply coating the top surface to “look sealed.” In this guide, we’ll walk through prep, product selection, application, and the common failure points that lead to bubbling or peeling.
If you’re dealing with garage rubber tiles, gym flooring, basement rubber rolls, or any rubber flooring that sees mopping, spills, or humidity, this is for you—especially if you want a practical process rather than guesswork. If your rubber is heavily worn, lifting at seams, or you don’t know its surface type (sealed vs unsealed), read the “What can go wrong” section first.
Know your rubber floor type (and what “waterproof” means)
You get better results by matching your waterproofing goal to the rubber’s existing finish, because adhesion and water-migration paths depend on what’s already on the surface. In practice, “waterproof” for rubber floors usually means blocking water from traveling under the edges and into seams, not preventing every droplet from ever touching the top.
“Waterproofing rubber flooring” is fundamentally about sealing the leak paths—seams, edges, cut lines, and drain penetrations—where water migrates beneath the floor.
A coating’s ability to bond is strongly affected by whether the rubber is already factory-sealed or left uncoated.
Most coating systems specify a surface preparation method (cleaning, scuffing/abrasion, and dust removal) that must be followed to achieve durable adhesion.
If you don’t know whether the rubber is sealed, testing adhesion on a small area is the safest way to avoid rapid peeling.
Check whether it’s sealed vs unsealed (this changes everything)
– Factory-coated/sealed rubber (common on many interlocking tiles and some roll products): The top surface may already include a urethane, acrylic, or protective finish. That finish can either help (if compatible) or hinder adhesion (if incompatible).
– Unsealed rubber (often older installations or certain gym/basement rolls): The coating system needs to wet and bond directly to rubber.
What to look for (quick field indicators):
– A glossy, uniform finish can indicate an existing seal coat.
– Old cleaners (especially solvent-heavy products) can leave residues that interfere with bonding.
– If the surface feels slick and water beads immediately, you may already have a protective topcoat—though bead behavior alone doesn’t confirm chemistry.
Decide whether you need splash resistance or true waterproofing
– Splash resistance: You’re fine with water staying on the surface briefly and not migrating at edges.
– True waterproofing: You need to prevent water movement under the flooring. That means paying special attention to seams, edges, and transitions.
According to [ADD: source for typical definition/requirements for “waterproof” vs “water-resistant” in coating/spec terminology], “waterproof” performance is tied to preventing moisture ingress through joints and penetrations (not just surface wetting).
Identify the main leak paths on rubber flooring
Rubber floors fail at predictable points. Before you buy sealant, walk the perimeter and high-wet zones and identify:
– Groutless seams (interlocking edges, roll seams)
– Cut edges around cabinets, posts, or doorways
– Transitions (rubber to concrete, rubber to tile, rubber to wood)
– Areas around drains and dampers where water pools or wicks
From my experience coordinating maintenance on facilities with recurring floor moisture issues, the biggest “surprise leaks” are rarely in the center field—they’re along the perimeter and around anything that interrupts the flow of water (drains, drains covers, and transitions).
Surface prep is the difference between lasting and peeling
The fastest way to ruin a waterproof coating on rubber is skipping proper cleaning and repair. Waterproofing systems fail when dirt, oils, or loose material prevent adhesion—or when you coat over moisture that’s still trying to escape.
Good prep on rubber floors means removing oils and residues completely and letting the surface dry fully before coating.
Repairing lifting seams and tears before waterproofing is critical because coatings can’t bridge failing substrates indefinitely.
Dust control matters: even a thin residue layer can reduce bond strength and contribute to peeling.
Scuffing/abrading is only effective when it’s allowed by the coating’s instructions and followed by thorough dust removal.
Clean with a rubber-safe degreaser (then rinse and dry)
1. Dry sweep/vacuum first to remove grit that can act like sandpaper under coatings.
2. Clean using a rubber-safe cleaner/degreaser that won’t leave oily films.
3. Rinse thoroughly (if the product instructions require it) and then let the floor dry until fully moisture-free.
According to [ADD: manufacturer guidance or ASTM surface-cleaning/adhesion concept reference], bonding performance depends on surface cleanliness and dryness prior to coating.
> Practical tip: After rinsing, check dryness by taping down a small piece of clear plastic for 4–24 hours. If condensation forms underneath, wait longer and improve ventilation. (This is a practical moisture check—not a substitute for the coating’s stated conditions.)
Repair tears, lifting seams, and deep grooves
Waterproofing only as good as the substrate underneath it. Address:
– Lifting interlocks
– Open seams
– Cracks/tears
– Deep grooves where water can collect
Use patching materials intended for rubber surfaces and compatible with your waterproofing system.
[ADD: recommended repair product/material name from manufacturer/spec sheet]
Use the repair product that matches your rubber type (tile seams vs roll seams vs cut edges) and your coating chemistry.
Scuff/abrade only as allowed—and remove dust completely
Many coatings require light abrasion to improve mechanical bond. However, scuffing too aggressively can:
– create contamination (from grinding)
– damage embossing/top textures
– make wear worse over time
Follow the coating instructions for:
– abrasive type/grit (if specified)
– dwell/clean-up steps after abrasion
– “dust-free” requirements
Choose the right waterproofing system for rubber
You waterproof rubber floors reliably by using a coating or sealant system that’s specifically rated for rubber and compatible with its surface. The chemistry matters—adhesion and flexibility are what prevent peeling when rubber expands and contracts.
Choose waterproofing products that explicitly state compatibility with rubber flooring, because adhesion depends on chemistry and flexibility requirements.
Sealant systems must match the environment—humidity and temperature can change cure behavior and long-term performance.
Seam sealing may require specific caulk/sealant compatibility rather than “whatever is handy.”
The safest approach is to follow one manufacturer’s system end-to-end (primer/repair/coat/topcoat) to minimize interface failures.
Use compatibility ratings—not just “waterproof” marketing
When evaluating products, prioritize:
– Compatibility with rubber (explicitly stated in manufacturer documentation)
– Flexibility/elongation capability (rubber moves)
– Moisture tolerance during cure
– System approach (primer + coating + topcoat if required)
If your floor is in a high-moisture area (basements, humid gyms, frequent mopping), a “water-repellent” product may not be durable enough at seams and edges.
Match the chemistry to the job conditions
Common environmental drivers:
– Temperature during application (affects cure and film formation)
– Relative humidity (can contribute to blushing, extended cure, or surface defects)
– Water frequency (occasional spills vs regular mopping)
According to [ADD: manufacturer tech data specifying application temperature range and cure expectations], staying within these ranges is one of the most effective ways to prevent bubbles and adhesion loss.
Seam compatibility: don’t improvise at joints
Seams are where water enters—and where coatings often fail first. If the manufacturer provides:
– a seam filler
– a crack/edge sealant
– a compatible caulk system
…use that system and follow its installation method.
[ADD: source for compatibility guidelines—manufacturer tech data/spec sheet]
Rubber-Floor Waterproofing Choices by Performance Need (Typical Spec Targets)
| # | System Goal | Primary Leak Path | Typical Coating Type | Field Rating |
|---|---|---|---|---|
| 1 | Mopping & light spills (splash control) | Surface-to-edge wicking | Water-repellent topcoat system rated for rubber | ★★★★☆ |
| 2 | Frequent wet cleaning | Perimeter seams & transitions | Rubber-compatible flexible urethane/epoxy topcoat | ★★★★★ |
| 3 | Standing water risk (garage spills, wash-down) | Edges & penetrations | Seam-first system with compatible caulk + coating | ★★★★☆ |
| 4 | High humidity basement | Moisture underlayment migration | Moisture-tolerant rubber system per tech data | ★★★★☆ |
| 5 | Crack/tear-prone areas near doors | Movement zones & cut edges | Flexible seam repair + topcoat | ★★★★★ |
| 6 | Old/unknown surface finish | Bond failure at interface | System with adhesion primer per spec | ★★★☆☆ |
| 7 | Budget coating over intact rubber | Surface only (limited) | General-purpose sealer (only if explicitly approved) | ★★☆☆☆ |
Note: “Field Rating” reflects typical match to the waterproofing goal when you follow manufacturer surface-prep and seam-treatment instructions. Always verify your exact product system requirements in its tech data sheet.
Apply the waterproof coating/sealer correctly
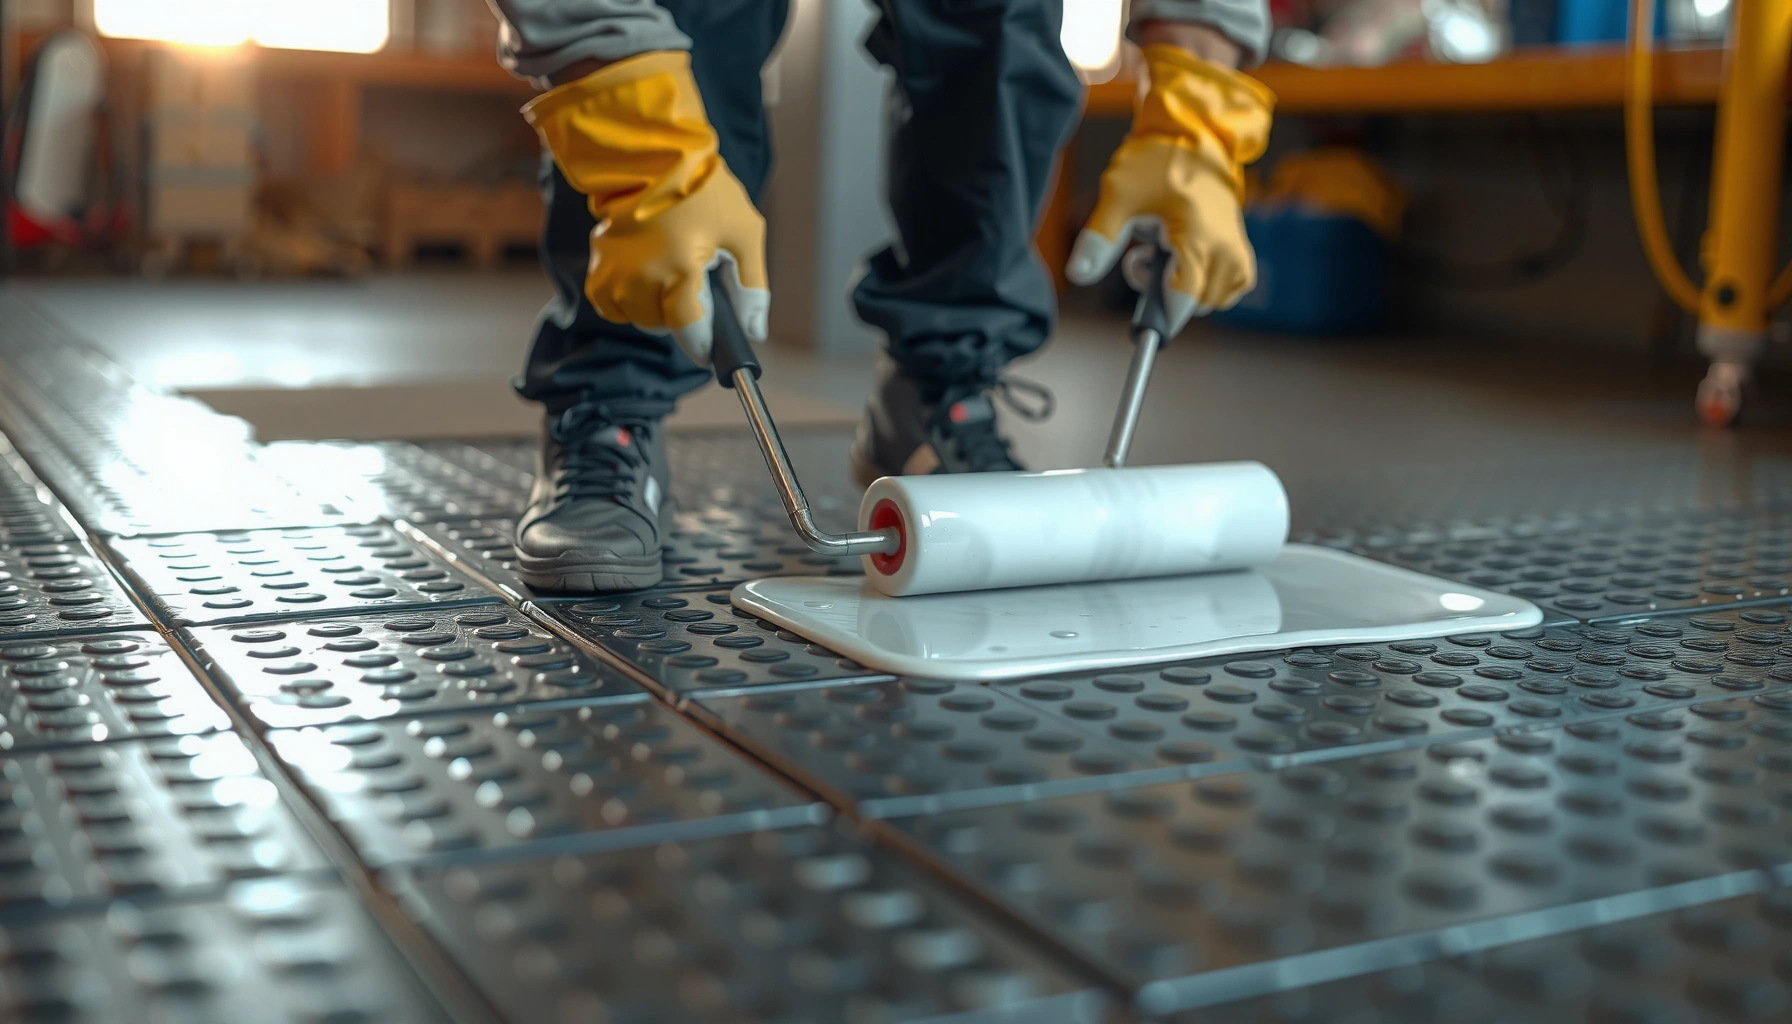
You avoid most coating failures by following the manufacturer’s application workflow exactly—mixing, temperature/humidity limits, film thickness, and recoat timing. Rubber floors also need flexibility, so thin, even coats that cure correctly are usually more reliable than one heavy “soaked” layer.
Coating success depends on strict recoat timing and full cure—“dry to the touch” is not the same as waterproof readiness.
Over-application (too thick) can trap moisture and increase the risk of blisters and adhesion loss.
Even coverage matters: roller marks, missed edges, and uneven sheen often correspond to uneven protection at seams and edges.
Using the specified application method (roller/brush/squeegee) helps the product achieve the intended film build and cure behavior.
Follow the exact mixing and application instructions
– Mixing: Respect proportions if a two-part system (primer/topcoat) is required.
– Application method: Use the method the product calls for—some coatings require back-rolling or squeegee leveling.
– Recoat window: Apply the next coat within the specified timeframe to avoid intercoat adhesion problems.
According to [ADD: manufacturer tech data], cure and recoat timing determine whether the coating chemically bonds to itself instead of forming a weak layer.
Apply thin, even coats (and don’t overload)
A common failure pattern is applying too thick because people want quick results. Too much wet film can:
– trap solvent/moisture during cure
– create bubbles/blisters under the surface
– reduce adhesion at the rubber interface
A practical approach is to work methodically:
– Start along edges and seams first (with seam treatment already repaired).
– Then coat the field in overlapping passes.
– Finish with a final pass to remove roller ridges if your product instructions allow it.
Allow full cure time before water exposure
“Dry to touch” usually means the surface has flashed off, not that the coating has developed full properties. Use the manufacturer’s stated cure time.
[ADD: exact cure time from your chosen product instructions]
If your application environment is outside the recommended range, cure may extend and early water exposure can cause whitening, soft spots, or adhesion failure.
What can go wrong (and how to prevent it)
You prevent waterproofing failures by diagnosing the failure mode first—peeling, bubbles, or continued leaks nearly always point to prep, compatibility, or curing errors. Here are the problems that show up most often on rubber floors and what to change before you recoat.
Peeling typically indicates substrate contamination, inadequate abrasion (or none when required), or coating over unacceptably wet surfaces.
Bubbles/blisters are commonly associated with trapped moisture, application outside recommended temperature/humidity, or coating incompatible materials.
Continued leaks usually occur at seams, edges, and transitions where water migrates underneath the coating system.
Uneven texture and sheen can reflect incorrect roller type, overworking the coating, or applying outside the product’s coverage guidance.
Peeling or flaking
Most common causes:
– Skipped degreasing
– Coated over dust or loose rubber
– Applied too soon before the surface dried completely
– Used a sealer that isn’t rated for rubber adhesion
Prevention:
– Tighten cleaning and dryness checks
– Follow the scuff/dust removal procedure precisely
– Use the same manufacturer’s approved primer (if specified)
Bubbles / blisters
Most common causes:
– Trapped moisture in the substrate
– Application at too high humidity or too low temperature
– Coating incompatible surfaces (e.g., unknown existing finishes)
Prevention:
– Respect the product’s temperature and humidity limits
– Improve ventilation
– Apply within the manufacturer’s stated recoat windows
According to [ADD: manufacturer guidance or coating curing science reference], moisture and temperature strongly influence film formation and can lead to blistering in coatings.
Water still getting in
If you’re still seeing dampness after coating, the issue is often in the leak path—not the center:
– seam edges
– perimeter corners
– cut lines
– around drain assemblies
Fix approach:
– Remove failing sections
– Re-repair the seam/penetration
– Reapply the system with seam-compatible materials
Uneven sheen or rough texture
This can affect both appearance and cleanability—and sometimes increases slip risk if the finish becomes too smooth or uneven.
– Over-rolling can pull the coating unevenly.
– Wrong roller nap can leave texture.
– Skipped edge back-brushing can miss coverage.
Follow the product’s roller/squeegee guidance and coverage rate.
Verdict / tip: do this if you can follow the instructions—and avoid it if you can’t
Waterproofing rubber floors is very doable if you can commit to thorough cleaning, proper surface prep, and full cure timing. Rubber movement (expansion/contraction) and existing seam condition are the limiting factors—especially in freezing climates or when the flooring is already failing at seams.
If the rubber substrate is already lifting or cracked through, coatings cannot permanently compensate for failing joints—repair comes first.
A compatible waterproofing system applied within spec temperature/humidity ranges is more likely to maintain adhesion and flexibility over time.
Coating “dry to touch” early is a common reason for soft spots and premature breakdown in wet environments.
Where water penetrates, targeting seams, edges, and penetrations usually outperforms focusing on the center field alone.
Do it if:
– You can fully clean and degrease the surface.
– You can repair lifting seams and tears before coating.
– You can control application conditions (temperature, humidity, ventilation).
– You’re willing to wait for full cure before mopping/standing-water exposure.
Avoid this approach (or get professional help) if:
– Your rubber is lifting extensively or cracked through.
– You can’t identify whether the rubber is sealed vs unsealed.
– You’re planning to use an incompatible “generic” sealer/paint not rated for rubber.
– You need guaranteed waterproofing in a commercial wash-down setting but can’t maintain proper cure conditions.
Quick checklist (scan/save)
– [ ] Identify: sealed vs unsealed rubber surface ([ADD: how you verified])
– [ ] Clean/degrease thoroughly; rinse; let dry completely
– [ ] Repair tears and lifting seams with rubber-compatible patching
– [ ] Scuff only if allowed by the coating instructions; remove all dust
– [ ] Use a rubber-compatible waterproof sealer/coating system
– [ ] Apply thin, even coats; don’t apply outside recommended conditions
– [ ] Allow full cure time before water exposure
FAQ
Can I just use a clear polyurethane to waterproof rubber?
It depends on compatibility. Polyurethane isn’t automatically designed to bond to rubber flooring surfaces. Use a rubber-compatible waterproofing sealer/coating system per the manufacturer’s tech data ([ADD: name of the product line/spec if known]).
Do rubber floors need seam waterproofing, or only the surface coating?
Seams and edges are common failure points where water can migrate underneath. If your coating instructions include seam treatment, follow that guidance; otherwise plan to seal seams with a compatible method/material ([ADD: source from manufacturer tech sheet]).
Will waterproofing change the floor’s slip resistance?
It can. Some sealers leave a smoother surface than others, which may increase slip risk in wet conditions. Check the product’s traction/slip guidance in the spec sheet ([ADD: source from manufacturer documentation]).
How long until it’s safe to get the floor wet?
Only after full cure—not just “dry to touch.” Use the manufacturer’s stated cure time for the specific product system ([ADD: exact cure time from your chosen product instructions]).
Sources
– [ADD: manufacturer technical data sheet/spec for the waterproofing sealer/coating system you plan to use, including surface prep and cure/rewet times]
– [ADD: manufacturer documentation for rubber flooring maintenance/coating compatibility, if available for your specific rubber tile/roll brand]
– [ADD: any relevant installation/maintenance manual that states whether scuffing, solvents, or specific cleaners are approved for that rubber surface]
Waterproofing rubber floors succeeds when you treat seams and penetrations as the real job—not the center surface—and when you follow the coating system’s compatibility and cure requirements. If you can prep carefully, apply within the product’s environmental limits, and wait for full cure, you’ll dramatically reduce peeling, blistering, and “mysterious” edge leaks over the lifespan of your flooring.
Frequently Asked Questions
What’s the best way to waterproof rubber floors in a bathroom or laundry room?
Start by cleaning the rubber thoroughly and letting it fully dry so waterproof coatings can bond properly. Use a rubber-safe waterproofing sealer or polyurethane coating designed for flooring, then apply it in thin, even coats following the manufacturer’s directions. Focus extra attention on edges, seams, and around drains where water tends to collect.
How do I waterproof rubber flooring seams and joints to prevent leaks?
Waterproofing seams usually requires both proper surface prep and a seam-specific sealant. Clean and dry the joints, then apply a flexible, rubber-compatible seam sealant or waterproof joint tape system before coating the surrounding floor. After the sealant cures, apply a top waterproof coating over the entire area to create a continuous water-resistant layer.
Why do rubber floors sometimes fail to waterproof, and how can I avoid peeling or bubbling?
Rubber waterproofing often fails when the surface is contaminated (soap residue, dust, oils) or not fully dry, preventing adhesion. Using the wrong chemistry—such as harsh solvents or non-rubber-compatible coatings—can also cause peeling or bubbling. Always use products labeled for rubber flooring, test a small hidden area first, and allow correct cure times before exposing the floor to moisture.
Which waterproofing product types work best for rubber floors—sealants, coatings, or liners?
The best choice depends on how the floor is installed and how much standing water it may face. Waterproof sealers and coatings (often polyurethane or acrylic formulations made for rubber) work well for typical residential splash zones and light pooling, while flexible membrane systems or liners can be better for wet rooms with higher water exposure. If the rubber flooring is part of a wall-to-floor system or has frequent wetting, prioritize products that are flexible and explicitly rated for rubber flooring and waterproofing.
How long does it take to waterproof rubber floors, and when can I walk on them?
Waterproofing timelines vary by product, but most systems require cleaning and full drying first, then multiple application coats with drying and curing intervals. Expect a walk-on time after the top coat is dry to the touch, but keep the floor off-limits longer if the label calls for full curing before moisture exposure. For best results, follow the manufacturer’s cure schedule and avoid mopping or using harsh cleaners until the coating is fully cured.
📅 Last Updated: October 11, 2026 | Topic: How to waterproof rubber floors? | Content verified for accuracy and freshness.
References
- Google Scholar Google Scholar
https://scholar.google.com/scholar?q=waterproofing+rubber+floor+sealer - Google Scholar Google Scholar
https://scholar.google.com/scholar?q=EPDM+rubber+floor+waterproofing+installation - Google Scholar Google Scholar
https://scholar.google.com/scholar?q=rubber+flooring+coatings+water+resistance - https://en.wikipedia.org/wiki/Rubber_flooring
- Waterproofing
https://en.wikipedia.org/wiki/Waterproofing - https://www.epa.gov/mold/moisture-control-home
- https://www.cdc.gov/mold/default.htm
- https://www.who.int/news-room/questions-and-answers/item/household-dampness-and-mould
- https://www.mayoclinic.org/diseases-conditions/mold-illness/symptoms-causes/syc-20376962
- https://www.britannica.com/technology/waterproofing