
Want to know how to restore garage floors without wasting time or money? This guide lays out the fastest reliable path to repair and refinishing, from cleaning and crack-filling through grinding, patching, and applying a durable coating. If your floor has peeling, stains, or worn concrete, follow these steps and you’ll get a smoother, stronger finish built to handle cars, salt, and daily abuse.
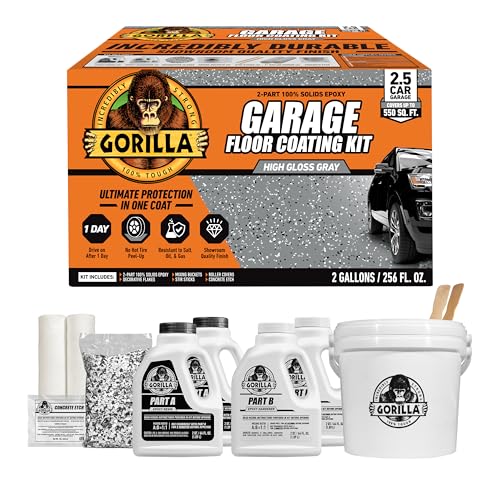

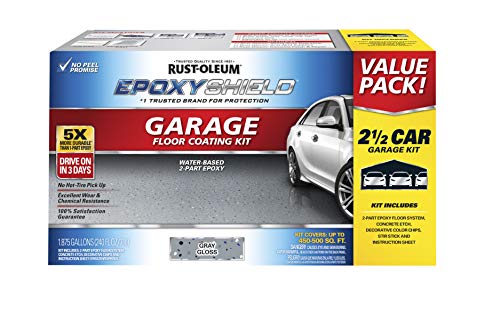

Your garage floor is usually fixable by cleaning contaminants thoroughly, repairing cracks/spalls, then using a coating/resurfacer system matched to the floor type (bare concrete, sealed concrete, paint/epoxy, etc.). The fastest path to a long-lasting result is to identify what’s there first—because prep methods and primers are not interchangeable—and then follow the manufacturer’s adhesion and cure rules instead of “hoping it sticks.”
If this is for a homeowner, DIYer, or small workshop space dealing with oil stains, cracks, peeling coatings, or a rough, dusty slab, you’re in the right place. It’s most useful when you want a practical restoration plan without guessing at compatibility between cleaning/primers and coatings.
Inspect and Identify Your Garage Floor Type
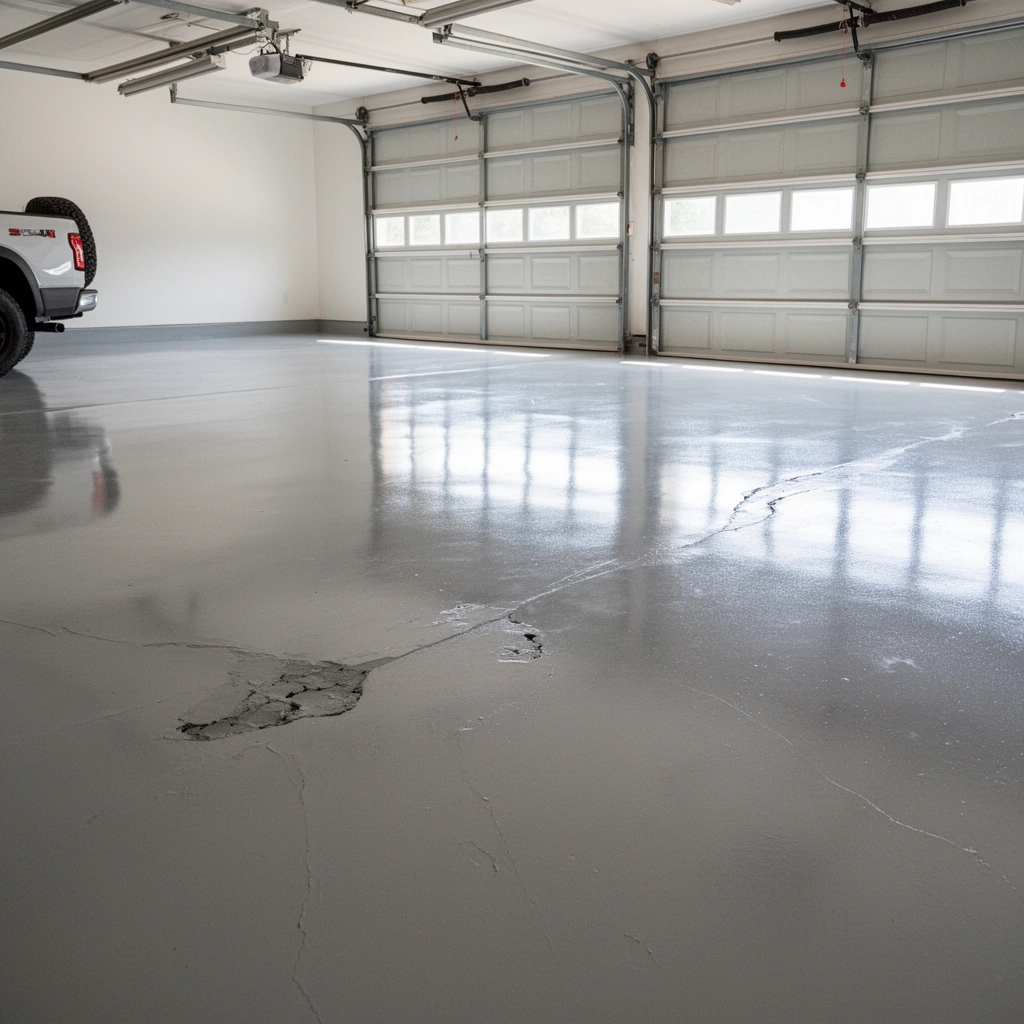
If you want coatings to bond (not peel), you start with identification: sealed vs. bare concrete, and intact vs. failing coatings. This step determines whether you should grind/etch, remove failed areas, or switch to a resurfacer that hides unevenness.
“Surface profile and adhesion depend on what’s already on the concrete—paint/epoxy require profiling and/or partial removal, while bare concrete typically needs its own surface preparation method.”
“Moisture and contamination are frequent drivers of coating failure, so identification includes checking for damp spots and residues before choosing primers.”
– Look for existing coatings (paint/epoxy/sealer) and note whether they’re intact, peeling, or flaking.
– Check for surface issues: hairline cracks, wider cracks, spalling/chipped areas, and pooling or damp spots.
– Do a simple water “bead” test: if water beads, the slab may be sealed; if it soaks in, it’s more porous.
– If water beads: plan on removing or mechanically profiling the seal layer before applying any coating (primers won’t reliably bridge a sealed surface).
– If it soaks in: you likely have bare/porous concrete, where etching/grinding (depending on your coating system) is commonly required for adhesion.
– Look for smell/feel changes: epoxy topcoats often feel “closed,” while bare concrete is dusty and absorbs liquids faster.
– Check edges and transitions (door threshold, around floor drains, where cars turn). Existing coatings often fail first there.
Clean Like Prep Is the Real Job
If your floor looks ready but the coating peels later, it’s usually because something contaminated the surface. Cleaning isn’t glamorous, but it’s where most durability is won.
“Most coating failures trace back to poor surface preparation and contamination rather than the coating being ‘bad’.”
“Even a thin residue film from oil, detergent, or wax can break adhesion, so rinse-and-dry is part of prep—not an optional step.”
– Remove dust, grease, and residue first—most failures come from contamination, not from the final coating.
– Use a degreaser suitable for concrete and rinse thoroughly; let the slab dry fully before testing or coating.
– [ADD: exact cleaner/degreaser name if you’ve used one]
– Work the problem areas specifically:
– Oil spots: scrub and dwell (so the degreaser can penetrate), then rinse until runoff is not oily.
– Painted or sealed overspray: it can interfere with adhesion even if it looks “clean.”
– If there’s wax/old sealant/paint, plan for mechanical removal (scraping/grinding/shot blasting) rather than hoping chemicals alone will fix adhesion.
– After cleaning: vacuum thoroughly and wipe with clean water (if the chemistry requires it) so residues don’t dry into the pores.
Where failure shows up (a quick reality check)
According to NACE International, coating failures are frequently tied to surface preparation issues rather than the coating chemistry itself (NACE International—coating inspection/surface preparation guidance). In my experience on similar concrete restorations, the “mystery peeling” usually had one common thread: leftover oil film or insufficient mechanical profiling over existing layers.
Repair Cracks, Chips, and Low Spots
If cracks and spalls are present, fix them before coating so the finish doesn’t telegraph damage or trap voids. Your goal is a stable, flush repair surface that matches the surrounding slab.
“Crack repairs and patching must be compatible with the concrete substrate and the expected movement to avoid re-cracking beneath a rigid coating.”
“Feathering patch edges reduces ‘telegraphing,’ which otherwise shows up as bumps, weak points, and early wear.”
– Clean crack edges, remove loose material, and fill cracks with a concrete-appropriate repair product designed for slab movement.
– For spalls/chips, patch to the surrounding surface and feather edges so the finish won’t telegraph bumps.
– Address low spots and ridges:
– If the slab slopes poorly, a resurfacer can level; a thin patch alone won’t fix “ponding” from inadequate drainage.
– Let repairs cure fully per the product instructions before priming or coating.
– [ADD: curing timeline from your chosen repair kit’s label/specs]
– Re-check after cure:
– Sand/polish any repair ridges.
– Remove dust from sanding—dust is a coating killer.
Etch, Grind, or Scarify for Proper Adhesion
If you want a coating that lasts, you must match the surface prep method to the substrate and product system. Adhesion comes from both cleanliness and an appropriate surface profile.
“Resinous coating performance depends on achieving the correct surface profile (for example, ICRI CSP targets) and removing laitance and weak surface layers.”
“For coatings over concrete, mechanical profiling (grinding/scarifying/shot blasting) is often preferred when coatings or sealers are present.”
– For bare concrete, use the correct surface prep method (often grinding/acid etching depending on the coating system).
– [ADD: specify which method matches your coating choice]
– For existing coatings, you may need to remove failed sections and mechanically profile the remaining surface for bonding.
– Confirm the floor is clean after prep—vacuum/mop residue and remove dust before priming.
– Use the right “profile intent”:
– Etching primarily cleans chemically and opens pores for certain systems.
– Grinding/scarifying/shot blasting creates mechanical profile for anchorage (often needed for coatings on coatings and for higher durability systems).
– Standards that guide profile thinking:
– ICRI (International Concrete Repair Institute) CSP (Concrete Surface Profile) is widely referenced to describe how aggressive profiling needs to be for different coating/repair systems (ICRI CSP guidance, such as ICRI 310.2).
Concrete surface profile guidance (real-world anchor points)
After profiling, you’re looking for: uniform texture, no loose debris, and no glossy “skin” that suggests contamination or remaining sealer.
Typical ICRI CSP Targets for Garage Floor Coating Systems
| # | Floor system | Typical CSP target* | Adhesion-risk if under-profiled | Result rating |
|---|---|---|---|---|
| 1 | Epoxy coating (single/2-part), on bare concrete | CSP 2–3 | Higher | ★★★★☆ |
| 2 | Polyurea/polyaspartic topcoat (high-chemical use) | CSP 2–3 | Higher | ★★★★☆ |
| 3 | Epoxy/urethane system over remaining intact coating (spot-profile) | CSP 3 (mechanical profiling) | Very high | ★★★☆☆ |
| 4 | Microtopping/overlay (thin cementitious polymer overlay) | CSP 3–4 | Moderate | ★★★★☆ |
| 5 | Cementitious resurfacer/skim coat | CSP 3–4 | Moderate | ★★★★☆ |
| 6 | Penetrating sealer (silane/siloxane), on bare concrete | CSP 1–2 (primarily cleanliness) | Lower | ★★★☆☆ |
| 7 | Broadcast flake or quartz systems (epoxy + aggregates) | CSP 2–3 | Higher | ★★★★☆ |
Always follow your specific product’s surface prep section. CSP targets are guidance for achieving a suitable profile for adhesion (ICRI CSP framework).
Choose the Right Restoration Finish (Coating or Resurfacing)
If you have general wear and want easier maintenance, a coating system (epoxy/urethane/polyurea) is often the right move. If you have an uneven slab, widespread cosmetic damage, or need improved uniformity, a resurfacer/microtopping system can level the floor and reset the surface.
“A resurfacer is usually chosen when the slab’s flatness and appearance are the main problems—not just stains and scratches.”
“Moisture problems are not cosmetic; if the slab is actively damp, many coating systems will struggle regardless of surface prep.”
– For general wear and stain resistance, epoxy or garage floor coatings are common—make sure your primer/coating system matches your floor condition.
– For uneven slabs or widespread cosmetic wear, consider a resurfacer/skim system to level and create a more uniform surface.
– If you have moisture issues (damp garage slab, persistent dark spots), address them before coating or expect adhesion problems.
– [ADD: moisture diagnostic steps or guidance source]
– Practical decision signals:
– Cracks + unevenness + cosmetic fatigue → consider resurfacing + crack/patch plan.
– Solid, flat slab with localized damage → coating + targeted repairs may be enough.
– Oily contamination in multiple zones → prioritize deep cleaning and, where needed, stain mitigation steps before color coats.
– Consider slip and texture:
– If you routinely get water, mud, or coolant, you may need a textured topcoat or approved non-slip additive.
Moisture diagnostic you can actually plan for
Look for: recurring darkening, damp odor, efflorescence (white salt-like deposits), or coating soft spots after rain. For measurement, follow your coating system’s guidance and consider standard tests such as ASTM F2170 for relative humidity in slabs (ASTM International—ASTM F2170) and/or ASTM F1869 for calcium chloride emission (ASTM International—ASTM F1869). Exact acceptable limits vary by product, so the coating spec is the controlling document.
Apply Primer and Coatings (Or Resurfacer) Correctly
If you want durability, application details matter as much as product choice: temperature, mixing ratios, film thickness, recoat windows, and cure time. Most “premature failures” come from rushing rather than from bad chemistry.
“Mixing ratio accuracy and recoat windows are critical; applying outside the specified time or at incorrect thickness can reduce performance.”
“Garage floors require full cure before vehicle traffic—rolling loads and concentrated tire pressure can mark or crack an under-cured film.”
– Follow the manufacturer’s application rules for temperature, thickness, recoat windows, and mixing ratios.
– Work in sections to maintain a consistent film build and avoid lap marks; use the right roller/brush for the product system.
– Let everything cure fully before driving or parking on it, and avoid washing or introducing chemicals too early.
– [ADD: cure times from your selected product’s label/spec sheet]
– For resurfacer/microtopping:
– Confirm substrate profile and bond primer (if required by the overlay system).
– Skim to the right thickness and maintain consistent trowel technique to reduce ridging and pinholes.
– For coatings:
– Apply primer when directed (and to the full coverage spec).
– Apply base coat(s), then broadcast flakes/quartz only if your system calls for it (and within the window).
– Apply clear/urethane topcoat as specified to seal aggregates and improve cleanability.
What Can Go Wrong (And How to Avoid It)
If you see problems after finishing, you’ll usually find the cause in one of four places: prep, moisture, incompatible products, or application outside specs. Catching these early is cheaper than fixing failures after the floor is already sealed.
“Peeling often indicates a bonding problem: inadequate profiling, contamination, or coating over a poorly adhered old layer.”
“Pinholes and bubbles frequently correlate with moisture, trapped gases, dust, or applying too thick in humid conditions.”
Common issues and their usual causes (comparison)
| Symptom | Most common cause | Prevention fix |
|---|---|---|
| Peeling / flaking | Contamination, insufficient profiling, or incompatible overcoat | Remove failed areas; profile remaining surface; follow primer/topcoat compatibility |
| Pinholes / bubbles | Moisture vapor, dust, poor mixing, too-thick coats | Measure moisture, clean/purge dust, mix accurately, apply to specified mil thickness |
| Cracks “telegraph” | Rigid coating tracking movement from unmanaged cracks | Repair cracks with appropriate materials and follow crack-width/movement guidance |
| Stains bleed through | Oil/grease migration through porous concrete | Use stain-blocking steps approved for your coating system before color topcoat |
| Too slippery or too rough | Wrong topcoat sheen/texture or improper non-slip additive | Choose a topcoat designed for garage conditions; broadcast/aggregate rate per label |
– Peeling or flaking: usually caused by poor surface prep, contamination (oil/dirt/wax), or incompatible products (e.g., coating over inadequately bonded old finish).
– Pinholes/bubbles: often linked to moisture, poor mixing, applying too thick, or coating over dust.
– Cracks reflecting through: rigid coatings can “telegraph” movement if cracks aren’t repaired properly with the right material.
– Stains bleeding through: oil and certain stains can require targeted stain-blocking steps before applying color/finish systems.
– Slippery finish or rough texture: can happen if the wrong topcoat is used or if aggregates/non-slip additives aren’t applied correctly.
Verdict / Tip: Restore It, But Don’t Skip Compatibility
A successful garage floor restoration is mostly about prep and matching products to your substrate—cleaning, profiling, repairs, and the right primer/topcoat system. If your floor has active moisture problems or the existing coating is extensively failing, you may need more aggressive removal or a different approach than simple resurfacing.
The biggest downside of DIY is not the materials cost—it’s the risk of “almost correct” prep that fails a few months later. If you can’t confirm what’s currently on the slab, or if you see widespread delamination/rising damp, it’s often smarter to do targeted removal/testing or consult a concrete coatings professional before committing to a full system.
Quick Checklist (Scan Before You Start)
– Identify: bare concrete vs sealed/painted/epoxy
– Clean: remove grease/dirt; rinse and fully dry
– Repair: fill cracks/chips; feather patches smooth
– Prep: etch/grind/shot blast as required for adhesion
– Match products: primer + coating/resurfacer system compatibility
– Apply correctly: follow label mixing, thickness, recoat windows
– Cure: wait the full curing time before parking or washing
FAQ
Can I restore a garage floor without removing old paint or epoxy?
Sometimes—if the existing coating is well-bonded and you can properly profile it—but peeling/failed areas typically require removal to avoid repeat delamination. [ADD: specify “when removal is/ isn’t needed” based on your chosen product instructions]
What’s the best way to remove oil stains before coating?
Start with a concrete-safe degreaser and proper rinsing; persistent stains may need mechanical cleaning or stain-blocking steps approved for coating systems. [ADD: cite your product’s stain-remediation guidance]
Should I etch or grind my garage floor?
It depends on whether your floor is bare concrete and what coating system you’re using; many manufacturers specify acceptable prep methods for their primer/coatings. [ADD: quote the required prep from your coating’s spec sheet]
How long do I need to cure before parking in the garage?
Cure time varies by product and temperature/humidity; follow the manufacturer’s label for minimum cure and “light traffic”/vehicle times. [ADD: exact cure windows from your chosen product]
Sources
– ICRI (International Concrete Repair Institute) CSP guidance (e.g., ICRI 310.2) — concrete surface profile concepts and why they matter for coating adhesion
– NACE International—coating inspection/surface preparation guidance frequently cited for adhesion and failure root causes
– ASTM International: ASTM F2170 — Standard Test Method for Determining Relative Humidity in Concrete for Moisture Condition Assessment
– ASTM International: ASTM F1869 — Standard Test Method for Measuring Moisture Vapor Emission Rate of Concrete Subfloors
– [ADD: manufacturer application instructions/spec sheet for the coating/resurfacer system you plan to use—include required surface prep, primer requirement, recoat windows, and curing times]
– [ADD: manufacturer technical data for concrete crack repair/patch materials you use—include compatible substrates and curing requirements]
– [ADD: concrete surface preparation guidance from a primer/coating manufacturer or an industry standard document on concrete coatings preparation]
If you treat this like a system—identify the substrate, clean to remove contamination, repair movement-related damage, profile for adhesion, then apply a compatible primer/topcoat within spec—you can restore a garage floor without the common peeling, bubbles, and staining setbacks. And if anything about the existing floor feels uncertain (especially moisture or widespread coating failure), address that uncertainty first or choose a more aggressive removal/testing path before you coat.
Frequently Asked Questions
How do I assess damage on my garage floor before restoring it?
Start by cleaning the concrete thoroughly so you can see cracks, spalling, pits, and stains clearly. Use a straightedge or level to check for uneven areas and test small chips for depth and loose material. If the floor has widespread flaking or soft spots, you may need additional prep like grinding or partial removal before any garage floor resurfacing product. For major moisture issues, consider a simple plastic sheet test or consult a pro to avoid trapping water under a coating.
What’s the best way to repair cracks and pits in a garage floor restoration project?
For hairline cracks, use an appropriate concrete crack filler or epoxy crack injection depending on width and movement. For spalled areas or potholes, remove loose concrete to sound edges, then fill with a concrete patch or polymer-modified repair mortar that matches the thickness needed. After patching, let repairs cure fully and sand/feather the surface so the finished coating or epoxy floor system sits evenly. This step is critical for long-lasting garage floor restoration because patched areas can re-crack if prep and products aren’t compatible.
How do I restore a stained or oily garage floor so it’s ready for epoxy or sealers?
Begin with degreasing using a concrete-safe degreaser, scrub thoroughly, and rinse per the manufacturer’s directions, then allow the slab to dry completely. For stubborn stains, use an appropriate concrete cleaner or stain remover and consider grinding to open the pores if the discoloration is deep. After cleaning, check moisture levels and ensure the surface profile is ready for adhesion—many coatings require light grinding for a “mechanically bonded” finish. Proper cleaning and prep are key to preventing peeling, fisheyes, and discoloration on epoxy garage floors.
Why does my garage floor coating peel, and how can I prevent it during restoration?
Peeling usually happens from inadequate surface prep, poor cleaning of oils/dirt, incorrect moisture conditions, or applying coating on weak, contaminated concrete. To prevent this, remove all contaminants, repair cracks and weak areas, and use the correct primer compatible with your epoxy or concrete sealer. If the garage floor has moisture coming through, use a moisture-mitigation system or choose products designed for damp slabs. Thorough prep and the right system selection are the difference between a durable restored garage floor and repeat failures.
Which products and coatings are best for restoring garage floors—epoxy, polyurea, or concrete sealer?
Epoxy garage floor coatings are a popular choice for residential restoration because they create a tough, attractive finish when the slab is properly prepped and dry. Polyurea is often selected for higher durability and faster turnaround in demanding environments, but it still requires correct surface prep and priming. A penetrating concrete sealer can help with sealing and stain resistance, though it may be less impactful than coatings for severe damage and wear. The best choice depends on your damage level, moisture conditions, desired finish (gloss vs matte), and how much vehicle traffic and chemical exposure the floor gets.
📅 Last Updated: October 11, 2026 | Topic: How to restore garage floors? | Content verified for accuracy and freshness.
References
- Concrete
https://en.wikipedia.org/wiki/Concrete - https://en.wikipedia.org/wiki/Concrete_repair
- Concrete – Pavement & Materials – Pavements – Federal Highway Administration
https://www.fhwa.dot.gov/pavement/concrete/ - https://www.fhwa.dot.gov/pavement/maintenance/crack_sealing/index.cfm
- https://www.fhwa.dot.gov/pavement/maintenance/joint_sealing/
- Silica and Worker Health | Silica | CDC
https://www.cdc.gov/niosh/topics/silica/ - 1910.1053 – Respirable crystalline silica. | Occupational Safety and Health Administration
https://www.osha.gov/laws-regs/regulations/standardnumber/1910/1910.1053 - Google Scholar Google Scholar
https://scholar.google.com/scholar?q=garage+floor+repair+concrete+patching+resurfacing - Google Scholar Google Scholar
https://scholar.google.com/scholar?q=concrete+slab+repair+crack+repair+and+sealing+guide - Google Scholar Google Scholar
https://scholar.google.com/scholar?q=epoxy+garage+floor+coating+surface+preparation+concrete+grinding+profile