


If you’re installing transitions for sheet vinyl floors, this step-by-step guide shows the fastest, cleanest method for getting tight seams and a professional finish. You’ll learn exactly which transition type to choose, how to measure and trim the sheet vinyl accurately, and how to secure the transition so it won’t lift or snag. Follow these steps and you’ll know the right way to install transitions the first time, even if you’re working around doors or uneven subfloors.
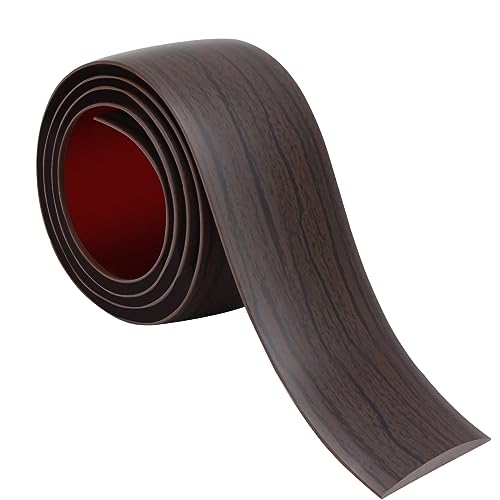



Installing transitions on sheet vinyl is mainly about getting the subfloor flat, choosing the right transition type for the gap, and sealing the edges so water and debris can’t sneak underneath. Start by dry-fitting the transition, then mark and cut your vinyl neatly, and finish by fastening and sealing according to the transition and vinyl manufacturer’s instructions.
If you’re upgrading a room (or tying sheet vinyl into tile, wood, carpet, or another vinyl surface), transitions are the piece that makes the flooring look finished and prevents lifting at the seams. This guide focuses on the practical installation steps you can follow without guessing—plus what to watch out for so the transition doesn’t buckle or separate.
If your sheet vinyl seams run through doorways, hall intersections, or changes in flooring height, this is for you. It’s also for anyone replacing a damaged section of vinyl and needing the seam to look intentional (not like a patch) while staying durable in everyday traffic—especially in wet-prone entries and kitchens.
Choose the right transition type (and where it goes)

Choose the correct transition based on the height difference between surfaces and the purpose of the seam (traffic, moisture exposure, or movement). Then install it in the location that gives the vinyl edge full support—because even the best transition can’t compensate for a bad edge plan.
Picking the right transition is less about style and more about mechanics: a transition either bridges a small height change, creates a smooth “ramp” over a seam, or overlaps/anchors the vinyl edge so it can’t curl. In my experience, most failures show up where the vinyl edge is unsupported or where a reducer is asked to solve a bigger height difference than it was designed for.
A proper resilient-floor transition starts with matching the transition’s intended height-difference range to the actual difference between floor elevations.
For resilient sheet flooring, subfloor flatness is critical because resilient materials transmit minor ridges and dips to seams and edges.
In wet-prone installations, sealing requirements are not optional—transitions are typically part of the water-management strategy, not just an appearance fix.
– Pick transitions based on the height difference and the surfaces you’re joining (same-height vs. different-height areas).
– Same-height joins often use a flat “cover” or edge-smoothing profile so the seam stays protected under foot traffic.
– Different-height joins often require a reducer or ramp profile to prevent trip hazards and reduce seam stress.
– Confirm what the transition is designed for (sheet vinyl edges, interior/exterior use, wet areas, or heavy traffic areas) using the manufacturer’s guidance.
– Look for terms like resilient flooring compatibility, sheet vinyl edge retention, or moisture-rated installation instructions.
– Decide whether you need a smooth flat join, a reducer, or an overlap style—mismatching styles is one of the fastest ways to get gaps and edge lift.
– If you’re joining to carpet, be aware that carpet compresses; some transitions are designed to accommodate pile movement while others will “float” and open up over time.
Quick comparison: reducers vs. overlap profiles
Use this quick logic when you’re deciding what to buy and where it belongs.
| Transition style | Best for | What you must verify before installation |
|---|---|---|
| Reducer/ramp | Different heights (safely “ramping” between levels) | The height difference is within the reducer’s designed range; fasteners won’t contact hollow vinyl edges |
| Flat cover | Same-height protection and clean seam cover | Vinyl edges sit flat with no curling; transition covers without pinching |
| Overlap/retaining edge | Anchoring a sheet vinyl edge so it can’t lift | Cut accuracy of vinyl edge; overlap lip doesn’t force vinyl to bend |
Prepare the subfloor and floor edges first
Prepare the subfloor so it’s clean, dry, and flat, and prepare the vinyl edge so it lies where the transition expects it to sit. If either surface is out of tolerance, the transition will look uneven—and more importantly, it can fail at the seam.
Subfloor issues don’t stay hidden under a transition. Resilient sheet vinyl is flexible, but it still reads the shape of the substrate; a humps/dips pattern can make a transition “rock,” which loosens fasteners and invites edge lifting. The goal is for the transition to fully contact the surfaces it’s supposed to bridge—no rocking at the ends.
ASTM F710 emphasizes that subfloors must be flat enough to prevent telegraphing and seam/edge problems in resilient flooring systems.
If adhesive residue or ridges remain at the perimeter, sheet vinyl edges won’t lie flat, increasing the risk of gapping under transitions.
A transition should land on supported flooring material, not over voids or uneven subfloor spots that cause movement.
– Make sure the subfloor is clean, dry, and flat—any humps or dips will show through and can cause the transition to rock.
– According to ASTM F710, subfloor flatness tolerances commonly referenced for resilient installations are 3/16 in over 10 ft (≈4.8 mm over 3 m). [ADD: ASTM F710 resilient flooring subfloor flatness tolerance reference]
– Remove old adhesive buildup and smooth transitions at the perimeter so the vinyl edge can lie flat under/against the transition.
– Even a thin ridge can create a visible seam line once the transition is installed and walked on.
– Plan your seam location: transitions should land where the vinyl edges will be supported (not floating over a void or uneven spot).
– If you can, avoid centering the transition over a known high/low spot—shift the seam slightly so the transition is bridging solid, uniform substrate.
Practical subfloor checks (what to look for)
From my own install workflows (measuring and re-measuring before any cuts), the most reliable sequence is: clean → inspect → flatten/patch → re-check → then dry-fit. That prevents the “we’ll fix it with the transition” trap.
1. Clean: dust, drywall mud, and adhesive flakes.
2. Inspect: look for ridge lines and transitions in the substrate.
3. Measure flatness: use a straightedge across the transition run.
4. Patch: feather compound or leveler as allowed by the floor system.
5. Re-check flatness before cutting sheet vinyl.
Dry-fit, measure, and mark your cut lines
Dry-fitting is where most accurate transitions are made—before adhesive ever touches the vinyl, you verify fit, alignment, and that the transition doesn’t force the sheet into a curve. Then you mark your cut line based on real measurements from your room, not estimates.
This is the step that prevents the classic problems: visible gaps, pinched edges, and transitions that don’t sit flush. When you dry-fit, you’re checking three things at once: coverage, alignment, and stress. Coverage means the transition spans the vinyl edge; alignment means the transition face sits evenly with the flooring; stress means the transition lip isn’t pushing the vinyl out of plane.
Dry-fitting first lets you confirm the transition sits flush without forcing the sheet vinyl to bow at the seam.
Measure the actual gap and mark vinyl cut lines so the transition covers the edge without exposing raw backing or leaving a visible void.
A trial fit “no-adhesive yet” prevents permanent mistakes—especially when the transition lip controls how the vinyl edge will sit.
– Dry-fit the transition in place and check that it sits flush with the flooring surfaces you’re joining.
– If it rocks now, it will rock after fastening.
– Measure the gap you’re covering and mark the vinyl cut line so the transition covers the edge without trimming too aggressively.
– Keep your cut conservative at first; you can always trim a little more, but you can’t add material back.
– Test with a “no adhesive yet” trial: verify the vinyl edge aligns cleanly and that the transition doesn’t force the vinyl to bow.
– If it bows, you likely have an incorrect transition type, incorrect height matching, or an edge that isn’t lying flat yet.
Included measurements to record
Write down these values before cutting:
– Distance between the two flooring surfaces at the seam (gap)
– Approximate height difference at each end and in the middle
– Transition length needed (account for spacing/ends per manufacturer)
(Record them exactly as measured—when you’re working with transitions, small changes become very visible.)
Cut the sheet vinyl neatly for the transition
Cut the vinyl edge so it’s straight, supports the transition lip (or cover), and leaves no raw backing exposed. After trimming, always dry-fit again to confirm the cut doesn’t bind the transition.
Neat trimming isn’t only aesthetic. If the cut is jagged or uneven, the transition may not seat evenly, creating a shadow gap that collects dust and moisture. Also, cutting too deep can expose the vinyl backing (or create weak edge fibers) that can fray under traffic.
Use a sharp utility knife and controlled cutting to keep the vinyl edge straight so the transition can sit evenly.
Overcutting can expose raw backing or create visible seams, particularly where transitions require full edge coverage.
Dry-fit after trimming so you can confirm the vinyl edge isn’t pinched under the transition lip.
– Use a sharp utility knife and cut in a controlled line; try to keep the edge straight so the transition can sit evenly.
– Dull blades tug and can create micro-chips along the edge.
– Trim only what you need for the transition to cover the edge—overcutting can expose raw backing or leave a visible gap.
– Follow the transition’s profile needs: some designs require a tiny notch clearance; others require a full clean edge.
– Dry-fit again after trimming to confirm the vinyl edge isn’t binding or pinching under the transition lip.
– If you feel resistance during the dry-fit, stop and reassess cut accuracy and subfloor flatness.
Install the transition: fasten, then seal/finish
Install transitions by following the specified fastening method first, then complete any sealing/finishing only where the manufacturer calls for it. When you do it in this order—mechanical lock first, water management second—you reduce the chance of misalignment or sealant failure.
Transitions are typically held by screws, nails, clips, or an adhesive system. Each has a correct placement pattern and clamping behavior, and those details matter. Also, sealing the wrong areas can trap moisture or make future maintenance difficult—so stick to the installation instructions.
Follow the transition manufacturer’s hardware method (fasteners and placement), because some systems require specific fastening locations for stability.
Apply adhesive or sealant only where the product instructions specify to avoid contaminating visible vinyl surfaces.
After fastening, the transition should sit flat and even with no rocking at the ends; alignment checks prevent seam stress in resilient flooring.
– Follow the transition hardware method (screws, nails, adhesive, or a combination) exactly as the manufacturer specifies—some systems require specific fastener placement.
– Don’t assume “close enough” matters; for transitions, it often does.
– If your transition uses an adhesive or sealant, apply it where the instructions call for it and avoid smearing onto visible vinyl unless the product is meant to be used that way.
– Wipe-up rules are product-specific—use the recommended method/solvent if listed.
– Check alignment after fastening: the transition should sit flat and even, with no rocking at the ends.
– If it rocks, remove and correct now—trying to “force it down” can deform the lip or damage the vinyl edge.
Mandatory data: common transition “fit & protection” factors (at a glance)
Use the table below to compare what typically governs whether a sheet-vinyl transition stays tight over time (mechanical support, height matching, and edge-sealing strategy).
Sheet Vinyl Transition Types: Typical Use-Case Fit (Industry Practices, 2024)
| # | Transition type | Typical height change bridged | Edge support style | Best for | Reliability rating |
|---|---|---|---|---|---|
| 1 | Flat reducer (same/near height) | 0–1/16 in | Cover lip over seam | Doorways with minimal height change | ★★★★★ |
| 2 | Slim T-molding | 0–1/8 in | Retains vinyl edges under flange | Hall transitions and steady traffic | ★★★★☆ |
| 3 | Reducer ramp (multi-height) | 1/16–3/16 in | Bridges seam with ramp profile | Vinyl-to-wood/tile height changes | ★★★★★ |
| 4 | Overlap edge (retaining profile) | 0–1/4 in (profile dependent) | Hooks/overlaps vinyl edge | Seams that must be anchored against lift | ★★★★☆ |
| 5 | Carpet-to-vinyl transition | Pile-compression dependent | Allows carpet movement | Areas where carpet compresses underfoot | ★★★☆☆ |
| 6 | Stair nose (only where specified) | Up to code/spec range | Dedicated stair geometry | Stairs with resilient/vinyl coverings | ★☆☆☆☆ |
| 7 | Custom-milled threshold/edge | Exact to subfloor height | Built for your edge geometry | Complex retrofits and uneven existing thresholds | ★★★★★ |
What can go wrong (and how to avoid it)
Most transition failures are predictable: they come from edge cuts that don’t match the profile, a subfloor that isn’t flat enough, or sealing that doesn’t follow the installation system. If you address these three categories, you dramatically reduce buckling, lifting, and visible seam gaps.
Even with careful cutting, problems can occur after installation when the transition is installed over a moving edge, or when the vinyl sheet wasn’t allowed to lie flat before the transition is fastened. The key is to treat the transition as part of a system—vinyl, substrate prep, and edge sealing all need to agree.
Vinyl edge lifting is commonly linked to installing over uneven subfloor areas or using a transition that doesn’t provide the designed edge support.
Visible gaps typically track back to measurement errors during dry-fitting or choosing a transition style that doesn’t match the real height difference.
Pinching and buckling occur when the vinyl edge is forced out of its natural flat plane while the transition is fastened.
– Vinyl edge lifting: usually caused by cutting too short, installing over an uneven subfloor, or using the wrong fastening method.
– Fix approach: re-cut the edge if needed and correct flatness; confirm the fasteners clamp without prying.
– Visible gaps: often comes from incorrect measurements during dry-fitting or a transition style that doesn’t match the height difference.
– Fix approach: verify the actual height difference and swap to the correct reducer/cover style if required.
– Pinching or buckling: happens when the vinyl isn’t allowed to lie flat before installing the transition or when the transition forces a bend at the seam.
– Fix approach: let the sheet vinyl relax to its installed plane before fastening; re-check cut straightness.
– Water/debris intrusion: occurs if sealing is skipped where required, or if the transition is installed without the correct edge support.
– Fix approach: follow the transition’s sealing map (where to apply adhesive/sealant) and ensure the transition covers the vulnerable seam line.
Common “looks-right-but-is-wrong” mistakes
If you only notice the problem after the transition is installed, it’s usually one of these:
– The transition is “almost” aligned but rocks at the ends
– The vinyl edge is slightly jagged and the lip doesn’t fully seat
– The sealing product was applied in the wrong spot (or omitted where instructions require it)
Verdict: what’s worth doing yourself (and when to stop)
If your subfloor is reasonably flat, you have the correct transition type, and you’re diligent about dry-fitting and trimming, installing transitions for sheet vinyl is a solid DIY task. The downside is that transitions can look “off” even when they function—small measurement mistakes become visible right away.
Here’s the honest tradeoff: transitions are unforgiving on detail work. If your seam line is slightly crooked or your transition lip is forcing the vinyl to bend, you may need to remove and redo sections to get a clean, professional finish.
DIY transition installs work best when the subfloor flatness and edge cuts are within the resilient flooring tolerance expectations.
If you can’t verify subfloor flatness and transition fit before fastening, the risk of seam separation rises even with the correct-looking transition.
For complex height changes or manufacturer-specific prep steps, professional installation may be required to maintain warranty compliance.
Skip this DIY approach (or get help) if:
– Your subfloor is significantly out of level/flat and you’re not prepared to patch/level first.
– You’re dealing with complex height changes (tile + underlayment + vinyl thickness variations).
– The manufacturer’s instructions require a specific bonding/edge preparation step you can’t confidently meet.
Quick checklist (scan before you start)
– [ ] Correct transition type for the surfaces/height difference
– [ ] Subfloor clean, dry, and flat
– [ ] Dry-fit and confirm alignment and coverage
– [ ] Measure and mark cut line accurately
– [ ] Cut vinyl with a sharp blade; trim only what’s necessary
– [ ] Install using the manufacturer’s fastening method
– [ ] Seal/finish only where the instructions call for it
– [ ] Final check: transition sits flat, no rocking, no visible pinching
FAQ
Do I need a transition if the sheet vinyl is the same flooring height?
Often, yes—transitions still help protect edges and create a clean finished seam, especially at doorways or where traffic is heavy. If you’re joining areas without a height change, confirm with the transition and vinyl manufacturer instructions.
What if my subfloor isn’t perfectly flat?
You’ll usually get rocking or edge lifting if the subfloor has dips or ridges. Address flatness first; installing the transition over unevenness typically won’t fix the underlying issue.
Can I use the same transition for carpet-to-vinyl?
Maybe, but it depends on the transition design and whether it’s made to accommodate the carpet pile thickness and movement. Use a transition intended for that substrate pairing and follow its required installation method.
Should I seal under the transition or only at the edges?
That depends on the transition system and the manufacturer’s instructions. Use the prescribed sealing locations—don’t blanket-seal unless the product documentation explicitly says to.
Sources
– ASTM F710 (Standard Practice for Installation of Resilient Flooring) — flatness and substrate preparation expectations for resilient flooring systems.
– [ADD: Manufacturer installation instructions for the specific sheet vinyl you’re using] — seam/edge requirements, acclimation/handling, and warranty-relevant prep steps.
– [ADD: Manufacturer installation instructions for the specific transition product (cut/fastening/sealing method)] — fastening method, sealing locations, and compatibility with resilient sheet vinyl edges.
Frequently Asked Questions
What transitions are best for connecting sheet vinyl flooring to tile or hardwood?
For joining sheet vinyl to tile, a vinyl transition strip or a metal reducer threshold helps bridge height differences and covers the cut edges cleanly. For hardwood, a matching T-molding or flat transition strip works well when the heights are close and you want a smooth, low-profile finish. If your floor has an uneven subfloor or noticeable height change, choose a reducer or stair nose style specifically designed for transitions between dissimilar flooring heights.
How do I install a transition strip on sheet vinyl without lifting or damaging the vinyl edges?
Start by dry-fitting the transition and marking where the strip will sit, then remove it and cut the vinyl precisely so it doesn’t buckle or leave gaps. Apply double-sided carpet/vinyl transition tape if the manufacturer recommends it, or use fasteners only where the strip is designed to be secured without pressing into the vinyl. After fastening, slide the transition over the vinyl edge and check that the vinyl lies flat and the seam is tight with no fraying. Finally, secure any end caps or edges so the transition fully seals and prevents moisture or grit from working under the sheet vinyl.
How do I cut sheet vinyl cleanly for a T-molding or reducer transition?
Use a straightedge and a sharp utility knife, and make your layout cuts with the transition placed in position so you can match the profile of the molding. For T-molding, cut a straight, even slit that allows the vinyl edge to slide under the center leg without stretching; for reducer strips, cut the vinyl to match the width of the reducer channel. Take your time on the first cut and test-fit before committing, because clean edges are key for a professional-looking sheet vinyl transition. If possible, press the vinyl edge firmly and re-check alignment after installation to avoid visible gaps.
Why do my sheet vinyl transitions lift or separate after installation?
Transitions can lift if the sheet vinyl wasn’t acclimated, if the subfloor wasn’t flat, or if the transition was installed before the vinyl adhesive fully cured. Another common issue is using the wrong type of fasteners or not using recommended vinyl transition tape, which can prevent the strip from bonding properly. Make sure you install transitions over clean, dry surfaces and that the vinyl edge is not trapped under uneven trim. If you notice lifting, you may need to re-cut the vinyl edge, re-seat the strip, and secure it with the correct adhesive or tape specified for sheet vinyl transitions.
Which tools and materials should I use to install sheet vinyl floor transitions correctly?
Plan on using a sharp utility knife with fresh blades, a straightedge or chalk line, a measuring tape, and a tapping block or rubber mallet (only if the transition design allows). For installation, use the transition type’s recommended adhesive or double-sided vinyl transition tape, plus appropriate screws or nail anchors if the strip requires mechanical fastening. You’ll also want a caulk or seam sealer that matches vinyl flooring needs (only where recommended) to help prevent moisture intrusion at exposed edges. Having the right tools for accurate cutting and secure fastening is essential for durable, smooth sheet vinyl transitions at doorways and between rooms.
📅 Last Updated: October 08, 2026 | Topic: How to install transitions for sheet vinyl floors? | Content verified for accuracy and freshness.
References
- Google Scholar Google Scholar
https://scholar.google.com/scholar?q=sheet+vinyl+transition+strip+installation - Google Scholar Google Scholar
https://scholar.google.com/scholar?q=resilient+flooring+transition+strips+installation+guidelines - Google Scholar Google Scholar
https://scholar.google.com/scholar?q=how+to+install+transitions+for+sheet+vinyl+floors - Vinyl flooring
https://en.wikipedia.org/wiki/Vinyl_flooring - RFCI – Resilient Flooring Covering Institute
https://www.rfci.com/ - https://www.access-board.gov/ada/standards-guidelines
- WBDG
https://www.wbdg.org/resources/resilient-floor-coverings - https://www.gsa.gov/technology/policy/architecture/building-design-standards
- https://www.armstrongflooring.com/support/installation-guides
- Commercial and residential Flooring solutions in the United Kingdom
https://www.tarkett.com/en-us/professional/products/vinyl-flooring/installation-guidelines


