
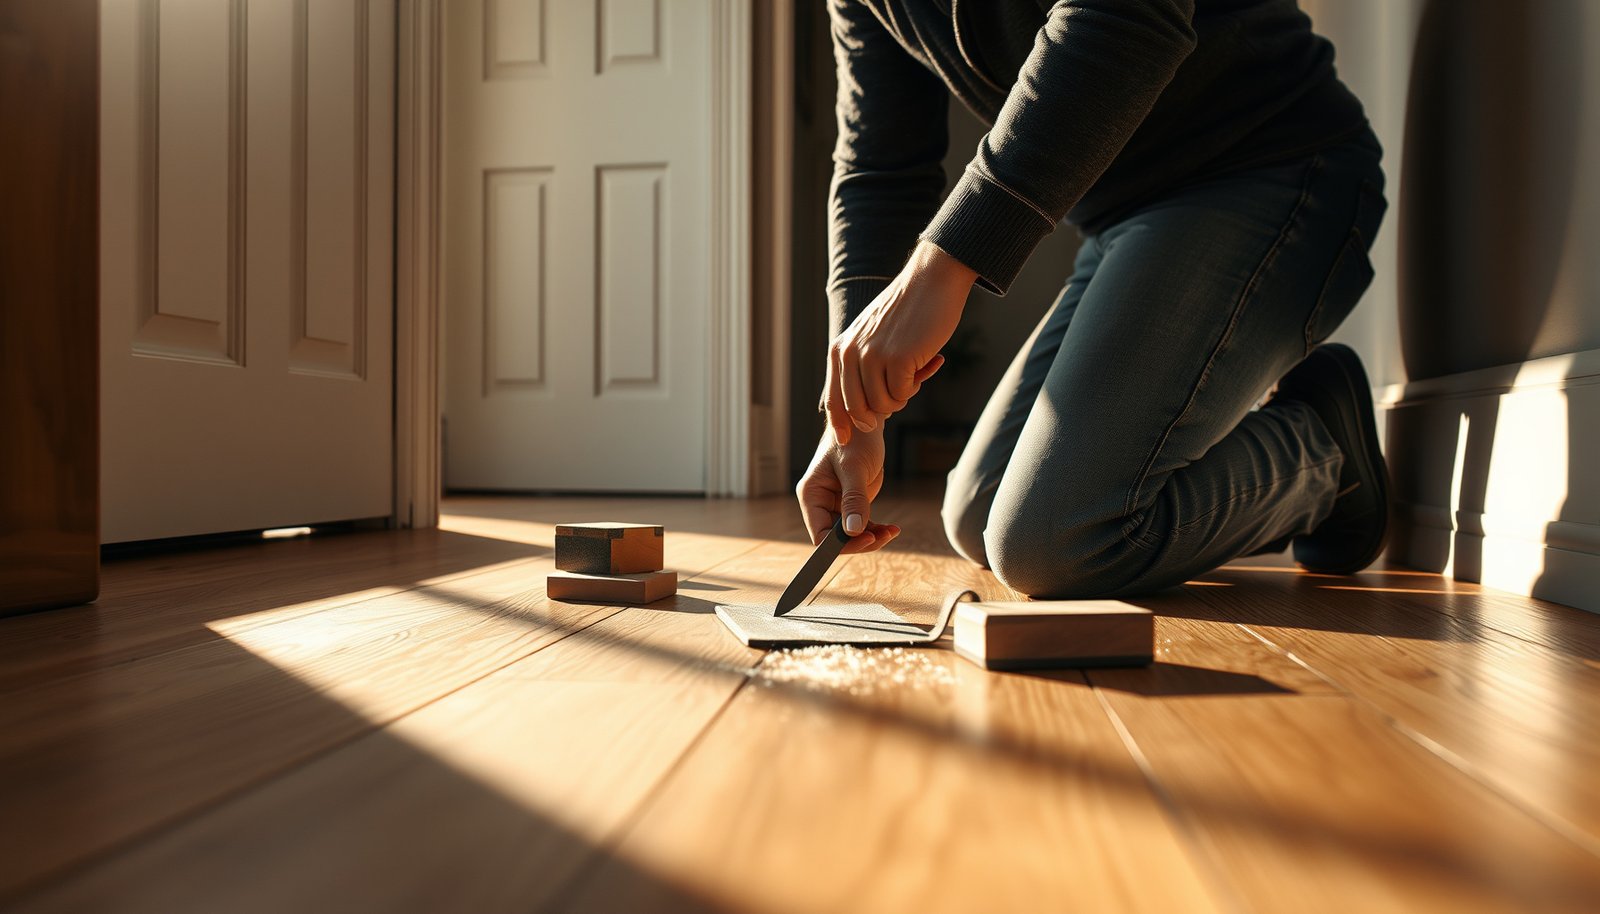

Repairing engineered wood floors in a hallway is straightforward when you know the exact fix for the damage you’re seeing. This guide tells you how to patch chips, repair gaps, and address lifting or water damage so the floor looks seamless again and holds up under foot traffic. Follow the right steps for your specific problem—drying, sanding, bonding, and finishing—so you don’t waste time or replace the whole floor.




In most hallway cases, you can repair engineered wood floors by matching the fix to the failure type—surface damage, seam separation, or moisture-driven delamination. Clean thoroughly, confirm how deep the problem goes (finish-only vs. wear-layer separation), then sand/fill/glue only if the underlying cause—especially moisture—is addressed.
If you’re dealing with high-traffic wear, small dents near entryways, or seams that have separated along the hallway’s length, this is for you. It’s especially useful when you’re trying to avoid full-floor replacement and want a practical plan based on what’s actually going on with your boards.
Quick diagnosis: what’s actually wrong?
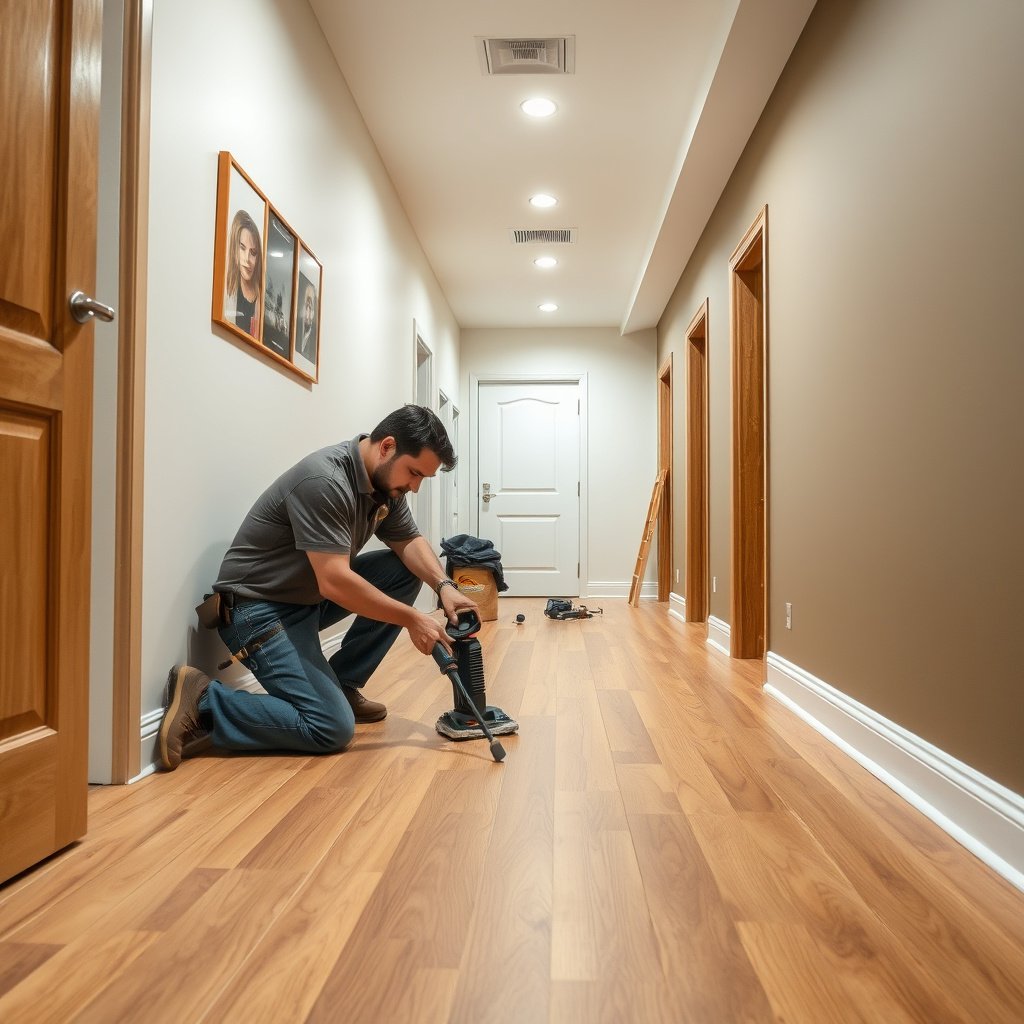
If you start with the correct diagnosis, the repair is usually straightforward—engineered wood floors can often be spot-fixed when the failure is limited. Here’s the fastest way to tell whether you’re dealing with finish wear, joint movement, or moisture-related delamination in your hallway engineered wood floors.
According to the National Wood Flooring Association (NWFA), maintaining stable indoor humidity is key because wood floors move with relative humidity changes.
According to ASTM D4442, wood moisture content can be evaluated using standardized moisture-testing methods so moisture problems aren’t guessed.
According to industry maintenance guidance for engineered wood, repairs fail if water or elevated moisture is still present under or around the flooring.
– Scratch/dent only: If the damage is mostly on the top wear layer and you can’t feel a raised edge with your fingernail, you’re likely looking at finish wear rather than a structural problem.
– Gaps or lifting seams: If you see lines between boards, edges that “click,” or sections that are raised, the issue may be adhesive failure, movement from humidity, or a subfloor problem.
– Bubbling/peeling or soft spots: If the surface looks swollen or the wear layer is separating, stop and address moisture first—repairs won’t hold if water is still present.
Why hallways fail differently than other rooms
Hallways concentrate traffic and often receive repeated HVAC airflow from registers and ductwork. In 2026, most manufacturer repair guidance still assumes the room’s temperature and relative humidity stay within a stable operating range—if your hallway engineered wood floors experience seasonal swings, seams can open even if the rest of the house looks “fine.”
From a practical standpoint, I recommend inspecting engineered wood floors in the hallway at three times: right after morning HVAC stabilization, mid-day, and in the evening after foot traffic peaks. This helps you spot whether movement correlates with humidity cycles, not just impact damage. .
Tools and materials you’ll likely need
The right tools matter because engineered wood floors require the right product chemistry—especially for seams. For hallway repairs, you’ll typically use cleaning materials, a filler/repair kit matched to your finish, and—if needed—an approved floor repair adhesive with controlled clamping.
NWFA installation/maintenance guidance emphasizes using adhesives and repair products intended for wood flooring rather than generic construction adhesives.
ASTM D4442 provides a standardized approach to testing wood moisture content, which helps determine whether delamination risk exists before repairs.
– Cleaning + protection: A vacuum, a microfiber cloth, and painter’s tape (to protect surrounding boards) are the foundation for most repairs.
– For surface repairs: Wood filler/paste or a color-matching repair kit made for engineered wood finishes (choose a product rated for your floor’s finish type).
– For seam/lifting fixes: A manufacturer-recommended wood floor repair adhesive (or a glue type approved for engineered flooring), plus weights/clamps and a straightedge for alignment.
Surface vs. seam materials (quick decision aid)
In hallway engineered wood floors, the “material decision” should track the failure mode: finish wear is largely finish chemistry; seam separation is adhesive + alignment + moisture control. If you mix those approaches, you’ll often get a repair that looks fine at first and then reopens.
| Repair type | Primary materials | Main risk if done wrong |
|---|---|---|
| Surface scratch/dent repair | Wood filler/finish kit matched to wear layer | Visible patch line from poor sheen/color match |
| Gap/loose seam repair | Approved engineered-floor adhesive + clamping | Seam reopens if moisture source or subfloor movement persists |
Moisture & risk checkpoints that affect hallway engineered wood floor repairs (U.S. standards & industry targets)
| # | Checkpoint (what you verify) | Typical target/range used in guidance | Common repair impact | Practical priority |
|---|---|---|---|---|
| 1 | Indoor relative humidity stability | 35–55% RH | Seams open/close with RH swings | ★★★★★ |
| 2 | Wood equilibrium moisture content (EMC) | ~9% at 70°F & 50% RH | Predicts movement/delamination risk | ★★★★☆ |
| 3 | Concrete slab moisture test method | ASTM F2170 RH probe (in-situ) | Excess moisture triggers adhesive/wear failure | ★★★★☆ |
| 4 | Wood moisture test method (for subfloor/strips) | ASTM D4442 oven-dry basis | Confirms whether moisture is the root cause | ★★★☆☆ |
| 5 | Temperature stability (HVAC operation) | ~60–80°F typical occupied range | Affects EMC and expansion/contraction | ★★★☆☆ |
| 6 | Acclimation concept (pre-repair stabilization) | Stabilize conditions before repairs | Reduces immediate re-gapping after glue cures | ★★★☆☆ |
| 7 | Moisture-driven failure warning sign | Swelling/peeling indicates delamination risk | Stop repairs until moisture source is fixed | ★☆☆☆☆ |
Repairing scratches, scuffs, and small dents
If the hallway damage is finish-only, you can usually repair it without taking boards up. The safest approach is: clean, smooth just enough to remove sharp edges, fill with a compatible engineered-wood filler, then re-finish the patch to blend sheen.
When a scratch hasn’t raised the wear layer, many repair kits can fill and blend without removing planks, because only the finish system is affected.
ASTM D4442 describes standardized moisture content testing, reinforcing why repairs should only proceed after the floor is dry and stable.
– Clean first: Remove grit with vacuuming and a gentle cleaner appropriate for wood floors—any debris will cause uneven filler or visible patch edges.
– Level the surface: If the scratch has a rough ridge, lightly sand only as needed to smooth the area (avoid sanding through the wear layer).
– Fill and blend: Apply filler sparingly, let it cure per the product directions, then lightly sand and re-finish only the patched spot if your floor system supports spot refinishing.
– Seal for consistency: Match the sheen/finish as closely as possible to the surrounding boards; hallway lighting often makes mismatch obvious.
How much sanding is “too much” on engineered wood floors?
Engineered wood floors have a laminated wear layer (the part you can wear down). If you sand aggressively, you can cut through the wear layer and expose a different material texture underneath—turning a simple hallway scratch into a permanent repair line.
In 2026, the most reliable method is to follow your specific floor’s finish system notes: some floors can accept spot touch-ups; others need full-room refinishing for uniformity. If you’re uncertain, do a conservative “feather sanding” pass and stop as soon as the scratch stops catching a fingernail.
A practical blending workflow (finish-only problems)
1. Vacuum and wipe with a barely damp microfiber cloth; dry immediately.
2. Use painter’s tape to protect adjacent boards from dust.
3. If the scratch edge is raised, sand lightly until it’s flush—stop short of flattening the entire board face.
4. Apply filler with a putty knife/credit-card tool; remove excess before it cures.
5. After cure, sand the patch just enough to remove ridges.
6. Apply matching finish or topcoat only if your product system supports it.
Fixing gaps or loose seams between engineered boards
If the seam has opened in your hallway, the fix is usually adhesive + alignment—but only after you stop moisture or movement. Start by confirming the gap isn’t actively changing, then close the seam evenly, apply an approved adhesive, and clamp/weight while the adhesive cures.
NWFA guidance repeatedly stresses that flooring movement often tracks indoor humidity; gluing an unstable floor can cause repeat failure.
Delamination-related issues typically worsen if moisture sources continue, so moisture identification is a prerequisite step.
– Confirm it’s movement, not ongoing moisture: If the gap appeared after a leak, steam exposure, or seasonal humidity swings, fix the source and let the subfloor stabilize before gluing.
– Re-align before adhesive sets: Dry-fit and align the plank edges, using tape or gentle pressure to close the seam evenly.
– Apply approved adhesive and clamp/weight: Use floor-appropriate adhesive in the seam, then apply weights/clamps with protective pads to avoid dents.
– Clean squeeze-out immediately: Remove excess glue right away so it doesn’t stain or leave a hard ridge.
How to tell “seasonal gaps” from “subfloor failure”
For hallway engineered wood floors, seasonal gaps often appear and worsen in predictable periods (for example, when HVAC runs longer or during colder/drier months). Subfloor failure tends to be localized and persistent—like a ridge that “clicks” in one stretch.
Here’s a quick pros/cons comparison you can use while deciding how aggressive to be:
| Approach | Pros | Cons / limits |
|---|---|---|
| Spot seam gluing | Keeps existing boards intact; fastest path to usability | Can fail if moisture is still active or subfloor is moving |
| Partial board replacement | Eliminates severely compromised planks/locking edges | Requires matching boards and dealing with click/lock vs glue-down profiles |
Alignment details that make or break hallway repairs
When the seam is slightly open, engineered wood floors can still align by pressing and letting adhesive “hold the geometry.” Use painter’s tape to keep the seam closed evenly along the length, and place protective pads under clamps/weights to avoid secondary dents in the hallway finish.
Also: remove squeeze-out right away. Dried adhesive can create a raised ridge that turns into a new snag point for socks, rolling office chairs, or vacuum heads.
When boards are damaged beyond spot repair (replace sections)
If engineered boards are broken, delaminated, or deeply gouged, replacement is usually the cleanest solution. In hallway engineered wood floors, partial replacement is often more realistic than replacing the entire room—but you must plan around the floor’s construction and locking system.
Most engineered wood repairs can’t restore structural integrity if the wear layer has separated from the core (a delamination problem).
Click/lock engineered flooring profiles are designed for installation/disassembly; repair feasibility depends on whether boards can be removed intact.
– Remove only what’s necessary: If there’s a broken edge, deep gouges, or delamination, partial replacement is often better than trying to build up the damage.
– Match the planks: Use identical thickness and wear-layer specs if possible—hallways expose color and texture differences faster than other rooms.
– Plan around locking systems: Many engineered floors use click/lock profiles, which affects whether you can remove boards intact or must cut out sections.
Replacement planning for hallway engineered wood floors
Before removing boards, confirm three things:
1) Whether your engineered wood floors are click/lock (floating) or glue-down; 2) whether the replacement boards are in the same finish batch (color variation is real); and 3) whether the subfloor is stable and flat where the seams separated.
If you have only a few matching boards, replacement still may be possible by swapping the most visible runs near the hallway focal points. If you don’t have matching planks, you may need to source from leftover stock or order a compatible replacement run—always from the same product line, thickness, and wear-layer type.
What can go wrong (and how to avoid it)
Even well-executed repairs can fail if you skip prep, ignore moisture, or use incompatible products. The safest mindset is that hallway engineered wood floor repairs are “cause → cure,” not “patch → hope.”
Moisture-driven failures (swelling, peeling, soft spots) are not finish problems; they require addressing moisture sources before any adhesive or filler repair.
Using sandpaper aggressively can remove too much wear layer on engineered wood floors, creating permanent patch lines that can’t be sanded out later.
– Sanding too far: Engineered floors have a limited wear layer—over-sanding can expose a lower layer and create a permanent patch line. If you’re unsure, stop early and test a tiny area.
– Gluing without fixing moisture: If gaps or lifting are caused by humidity imbalance, a leak, or inadequate acclimation, adhesive repairs may fail again soon.
– Wrong filler or finish mismatch: Using an all-purpose wood filler or an incompatible finish can make the repair darker, rougher, or too shiny under hallway light.
– Over-tight clamping: Too much pressure can squeeze out adhesive excessively or cause plank distortion—protect the surface and use moderate pressure.
Moisture red flags you should never “repair over”
If you see bubbling, peeling, soft spots, or recurring gaps after the HVAC has stabilized, stop and investigate. The failure is usually upstream (underlayment/subfloor moisture, a roof/plumbing issue, or HVAC imbalance). According to moisture guidance from wood flooring industry organizations, repairing without correcting moisture causes re-failure.
Also consider measuring indoor conditions. For example, NWFA-style targets typically keep indoor relative humidity in a moderate band; swings outside that band are a common driver of engineered wood floor movement. National Wood Flooring Association (NWFA), Wood Flooring Installation/Inspection guidance (current edition).
Verdict: best next step (and who should skip DIY)
If your hallway engineered wood floor has surface scratches/scuffs only, DIY spot repair is usually reasonable because you’re working within the finish system. If you see lifting seams, wide gaps, or moisture/delamination signs, the safer move is to follow manufacturer repair steps closely—or hire a pro—because adhesive choice, moisture protocol, and subfloor checks vary by installation method and floor construction.
DIY spot repairs work best when the wear layer and core are intact; once delamination starts, replacing affected sections is usually more reliable.
When a seam gap is linked to humidity-driven movement, re-gluing without stabilizing humidity often leads to repeat failures.
If you’re choosing DIY versus pro, focus on these decision points:
– DIY-friendly: finish scuffs, shallow dents, small scratch lines, stable seams that only need cosmetic-level correction.
– Pro or replacement likely: clicking seams that keep re-opening, signs of swelling/peeling, uneven subfloor ridges, or any indication water intruded.
Skip DIY entirely if you suspect active water intrusion, extensive subfloor movement, or if the floor warranty specifies professional servicing for adhesive repair. Also skip if you can’t verify whether the floor is click/lock or glue-down—repair steps and adhesives can differ.
Scan-fast checklist
– [ ] Identify the problem: scratch vs seam gap vs lifting/delamination
– [ ] Check for moisture source (especially after spills/leaks)
– [ ] Clean and remove debris before any repair
– [ ] Use floor-approved filler/adhesive/finish products
– [ ] Protect surrounding planks with tape and pads
– [ ] Allow full cure time per product instructions
– [ ] Re-check alignment after curing (especially for hallway seams)
Sources
– National Wood Flooring Association (NWFA). Wood Flooring Installation and Inspection/Guidelines (latest edition available at time of writing).
– ASTM D4442, Standard Test Methods for Direct Moisture Content Measurement of Wood and Wood-Based Materials.
– ASTM F2170, Standard Test Method for Determining Relative Humidity in Concrete Floor Slabs Using In-Situ Probes.
– USDA Forest Service / Forest Products Laboratory. Wood Handbook—Wood as an Engineering Material (moisture relations / EMC concepts).
A successful hallway repair comes down to one principle: engineer wood floors fail for specific reasons, and your repair must match that reason. Clean and address surface damage with compatible filler and careful blending; close seams only after you confirm moisture stability and use floor-approved adhesive and controlled clamping; and replace when delamination or structural board damage is present.
Frequently Asked Questions
How do I fix a chipped or gouged spot in engineered wood flooring in a hallway?
Clean the damaged area and remove any loose splinters so the surface is sound. If the chip exposes a different layer, fill it with an engineered wood filler or matching wood putty, then level it flush with a putty knife. Let it cure, sand lightly to blend with the surrounding floor, and clean off dust before applying a compatible finish or touch-up stain to match the hallway sheen.
What should I do if my engineered wood hallway floor has gaps between planks?
Small seasonal gaps can be normal, but widening gaps often indicate moisture imbalance or improper acclimation. Check for recent humidity changes, leaks, or wet mopping, then allow the floor to dry and stabilize before making repairs. If the flooring is click-lock or floating, address humidity first and consider re-nailing or re-securing sections only if the manufacturer recommends it; for long-term fixes, contact a pro if you suspect subfloor movement or failure of the underlayment.
How can I repair engineered wood floors after water damage or a hallway leak?
Stop the source of moisture immediately and remove baseboards or trim if needed to access the affected planks. Dry the area using fans/dehumidification and monitor with moisture meters to ensure the subfloor returns to normal—surface drying alone can leave hidden damage. Replace warped or cupped planks if they don’t flatten after drying, and inspect for mold; reinstallation should use flooring that matches the original construction and finish for best results.
Which tools and materials are best for DIY repairs on engineered wood in a hallway?
For most spot repairs, use a quality wood filler/epoxy repair compound designed for engineered wood, sandpaper (or a small orbital sander), painter’s tape, a putty knife, and a matching stain or topcoat for blend-in. If you need to replace planks, plan for matching replacement boards, a tapping block, spacers, and the manufacturer’s recommended adhesive or locking system tools. Always wear proper PPE, work in controlled humidity, and keep a small amount of extra flooring to ensure color and grain match.
Why do my engineered wood hallway boards squeak, and what’s the best way to fix it?
Squeaks usually come from the planks moving slightly over an uneven subfloor or loose underlayment, which is common in hallways where traffic is heavy. Locate the noise spots by walking and tapping, then check for loose transitions or baseboard pressure. If the planks are directly installed over a compatible subfloor, securing the area by adding fasteners at the subfloor (per the installation method) or using appropriate underlayment correction can help; for click-lock floors, stabilizing humidity and addressing underlayment gaps is often the most effective route.
📅 Last Updated: October 19, 2026 | Topic: How to repair engineered wood floors in a hallway? | Content verified for accuracy and freshness.
References
- https://en.wikipedia.org/wiki/Engineered_wood_flooring
- Wood flooring
- Floor sanding
- Wood-decay fungus
- Water content
- Floor
- Engineered wood
- https://scholar.google.com/scholar?q=engineered+wood+floor+repair+patching+sanding Google Scholar
- https://scholar.google.com/scholar?q=engineered+hardwood+floor+water+damage+repair Google Scholar
- https://scholar.google.com/scholar?q=engineered+wood+floor+lifted+planks+repair Google Scholar

[…] identify it before removing anything—removal technique and subfloor cleanup vary by method. NWFA (National Wood Flooring Association) installation guidance Hallways demand careful transition detailing because boards still need […]