
If you want a polished, glossy finish from mosaic tile floors, this step-by-step guide shows you exactly how to do it. You’ll get the right surface prep, cleaning method, and polishing sequence that removes dullness and brings out tile and grout clarity without damaging the mosaic. Follow these instructions and you’ll know what to do at every stage—from first pass to final buff—for a showroom-ready result.




Polish mosaic tile floors by cleaning thoroughly, repairing any loose or damaged tiles/grout, and using the right sequence of diamond polishing pads (or powder) with plenty of water. Finish by sealing if your tile/grout type benefits from it and keep the floor protected from abrasive dirt. This guide walks you through prep, polishing, and finishing so you get an even shine without haze or etched spots—especially when stone mosaics (marble/travertine) or mixed ceramic/porcelain surfaces make uneven results more obvious.
If your mosaic floor looks dull, has light scratches, or shows uneven shine between tiles, the steps below will help. It’s especially relevant for floors made from natural stone mosaics (like marble or travertine) or ceramic/porcelain mosaics where cleaning and surface prep matter—but you’ll need to verify your tile type before choosing abrasives.
Prep: Clean, protect edges, and assess tile type
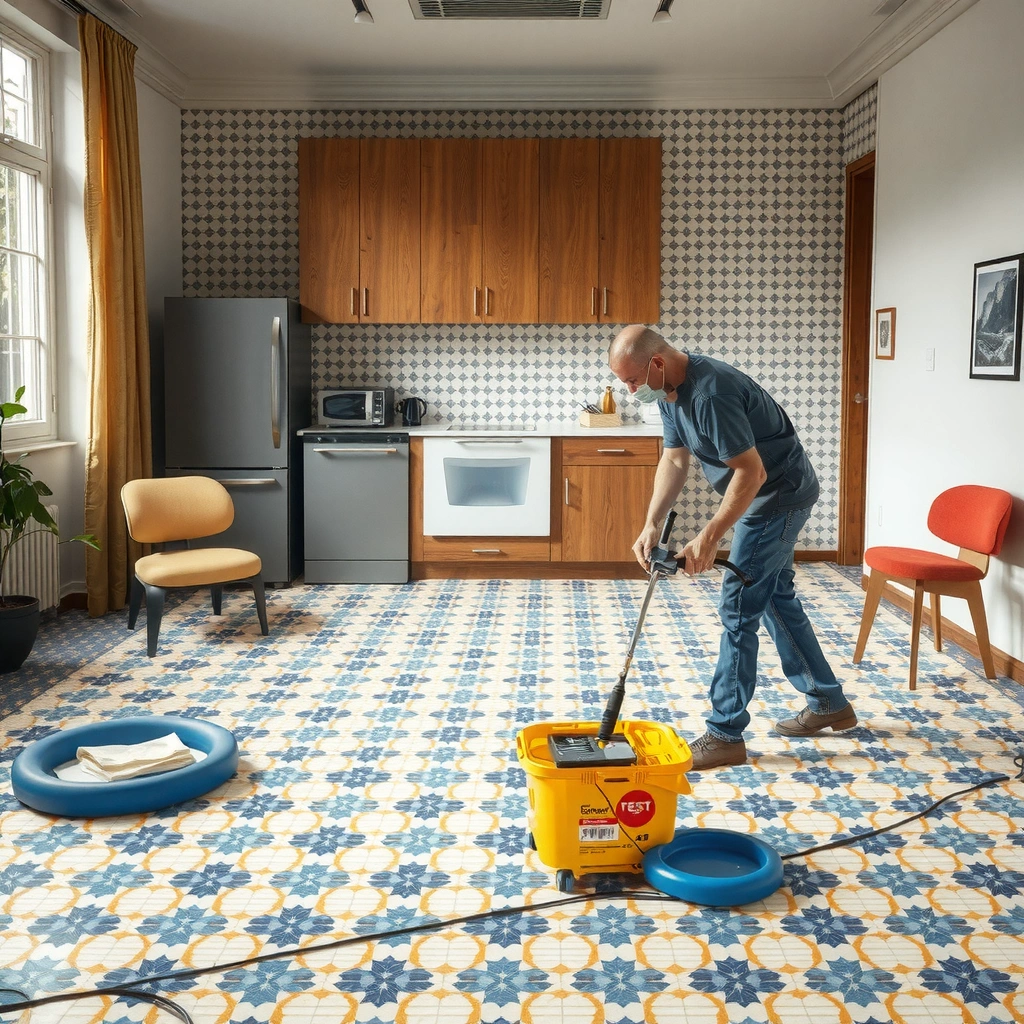
Clean, protect, then verify what you have—polishing performs best when the floor is already free of grit and the chemistry/pads match the tile. In practice, mosaic floors reveal every leftover contaminant (thin grout haze, dust in pores, or embedded sand), and those issues can survive into the final shine.
A pH-neutral cleaner reduces the risk of dulling or etching stone mosaics compared with acidic cleaners.
Masking baseboards and protecting adjacent surfaces prevents polish slurry from staining walls, caulking, or trim during wet grinding.
Tile type (natural stone vs. ceramic/porcelain) determines whether you should use a diamond system for grinding/honing or a lighter refinement approach.
What to do (and why it prevents haze)
– Remove all grit and residue with a pH-neutral cleaner: Use warm water and a neutral cleaner labeled safe for the specific stone/tile. Acidic products can etch calcitic stones, while some alkaline cleaners can dull certain surfaces over time.
– Scrub grout haze gently before polishing: If there’s dried grout film from installation or prior cleaning, polishing can lock that film into a cloudy look. Thorough pre-cleaning is the fastest way to improve final clarity.
– Mask edges and protect transitions: Mosaic slurry is difficult to rinse out of baseboard corners and wall edges. We recommend taping along baseboards, sealing around any exposed drywall edges, and covering adjacent flooring.
– Identify the exact tile surface:
– Natural stone mosaics (e.g., marble, travertine) typically respond to polishing differently than ceramics.
– Ceramic/porcelain mosaics typically accept diamond polishing but may need different pad aggressiveness depending on whether the glazed surface is present or honed/matte.
Three practical “numbers” to keep your plan realistic
– Many diamond systems move through grits in a progression roughly spanning ~100 → 400 → 800 → 1500 → 3000+ (exact steps vary by brand).
– Mosaic grout joints are often in the neighborhood of ~1.5–3 mm (commonly ~1/16–1/8 in.), so uneven grout surface height can cause visible shine differences after honing. [ADD: source for typical mosaic grout joint width ranges]
– pH-neutral products are typically around pH 7; “neutral” doesn’t mean “safe for every surface,” but it’s a strong baseline for stone care. [ADD: source for definition/typical pH range of neutral cleaners]
Repair before you polish (loose tiles and grout matter)
Repair first—then polish. Polishing can’t “hide” loose tiles, failing grout, or significant lippage; it will often make them more noticeable because high spots and voids catch light.
Loose tiles should be re-set and fully cured before polishing so you don’t create vibration-related edge chipping or uneven abrasion.
Damaged or missing grout must be patched before honing because exposed voids can cause local depressions and dull bands.
Polishing cannot correct major lippage (tiles sitting higher/lower); it can only refine the surface that’s already mechanically flat enough.
Repair checklist (in the right order)
– Fix loose tiles: Re-set and ensure the tile plane is stable. Even a small lift changes how a diamond pad loads the surface.
– Re-grout or patch grout lines: Choose a grout compatible with your existing grout type (cementitious vs. epoxy systems vary widely).
– Address lippage if it’s significant: If tiles are meaningfully uneven, polishing will create “shine mapping”—bright zones where stone contacts the pad more evenly and dull zones where it doesn’t.
– Let everything cure fully: Repair materials require curing time for strength and moisture stability. Start polishing only after cure guidance from the patch/replacement system is satisfied.
> From my experience working around polished surfaces, the single most frustrating “mystery haze” cases come from skipping this repair/cure phase—because the final steps polish cleanly, but light still reflects off defects underneath.
Choose the right polishing method and pad progression
Choose a diamond polishing approach that matches your tile finish, and follow a coarse → fine progression to avoid haze. Polishing is essentially controlled abrasion: when you jump straight to fine pads, you can leave microscopic scratches that scatter light and look cloudy.
A diamond pad progression from coarser to finer grits is the standard way to reduce micro-scratches and prevent a hazy finish.
Wet polishing typically reduces heat buildup and helps slurry carry away loosened particles during the grind-to-polish cycle.
Using the exact manufacturer instructions for polishing powder application (including dwell time and dilution) reduces the risk of uneven etching-like dull spots.
Step-by-step pad or powder logic
– Use the correct system:
– For many mosaic floors, diamond polishing pads or diamond polishing discs sized for your machine work best.
– For powder polishing, the “sequence” is often built into the product instructions (stage-by-stage), so don’t improvise.
– Plan a progression (example logic, not a universal schedule):
– Start where the surface needs refinement: light dullness may begin at a moderate grit; deeper scratches require a coarser start.
– Progress in smaller steps as you get closer to final gloss—this reduces the chance of leaving visible haze.
– Keep the floor wet if your method is wet polishing:
– Adequate water prevents the pad from glazing over with slurry and helps create even pad contact.
– If the slurry dries, it can embed particles and create streaks or “ghost bands.”
Typical Diamond Polishing Stages for Mosaic Floors (Wet Process)
| # | Polishing Stage | Common Diamond Grit (Range) | Primary Goal | Expected Outcome | Overall Helpfulness |
|---|---|---|---|---|---|
| 1 | Pre-grind / Scratch Removal | 50–100 | Flatten dullness & minor surface micro-scratches | Reduced matte look; improved uniformity | ★★★☆☆ |
| 2 | Honing | 200–400 | Remove deeper abrasion trails from stage 1 | More consistent gloss across tiles | ★★★★☆ |
| 3 | Refinement | 800–1000 | Reduce remaining haze-inducing micro-scratches | Noticeable shine boost; fewer streaks | ★★★★☆ |
| 4 | High-Gloss Polish | 1500–3000 | Create uniform reflections between tiles | Crisp, even sheen; reduced graininess | ★★★★★ |
| 5 | Final Burnish / Clarity Pass | 3000–8000 | Maximize gloss and clarity while avoiding swirl artifacts | Bright, even finish under changing angles | ★★★★☆ |
| 6 | Edge & Groove Refinement | 400–1500 | Blend pad contact into grout line detail | Less “edge dullness” around the grid | ★★★☆☆ |
| 7 | Post-Polish Cleaning | N/A | Remove slurry residue that causes haze | Prevents cloudiness after the final step | ★★★★★ |
Note: These grit ranges reflect common industry progression patterns; always follow the specific manufacturer’s diamond pad system and tile compatibility guidance. [ADD: source for diamond pad grit progression ranges]
Quick comparison: pads vs. polishing powder
If you’re deciding between pad systems and powder, the trade-offs are practical: pads are more controllable; powders can be powerful but easier to apply unevenly if you’re not following instructions.
| Option | Best for | Key risk | What to control |
|---|---|---|---|
| Diamond polishing pads | Even mechanical refinement across larger areas | Wrong grit for the tile finish can leave swirl marks | Pad cleanliness + consistent overlap |
| Polishing powder systems | Products engineered for specific stone enhancement steps | Uneven dwell time or slurry mix can create blotchy dull spots | Dwell, dilution, and thorough rinsing |
Polish evenly: technique for consistent results
Polish evenly by working small sections, maintaining wet contact (if wet polishing), and cleaning residue between grit stages. Mosaic floors can show patchiness quickly because grout joints and tile edges behave like natural “contrast lines.”
Overlapping polishing passes reduce streaking and dull bands by improving mechanical coverage consistency.
Consistent, moderate pressure helps avoid swirl artifacts that can appear when the pad skates or digs in.
Between-stage wet-vac or rinse removal prevents coarser particles from contaminating finer steps and causing haze.
Technique that produces a uniform shine
– Work in small sections: Divide the floor into manageable grids so you can keep technique consistent. Larger areas often lead to uneven dwell time.
– Overlap every pass: Use a repeatable pattern (side-to-side or crosshatch) so no band gets “under-polished.”
– Use controlled pressure: Pressing harder doesn’t generally “speed up” polishing; it often increases swirl patterns and reduces uniform contact.
– Rinse/wet-vac between stages: Don’t just “feel clean.” Leftover slurry from coarse stages contaminates fine stages and creates a cloudy top layer.
If your mosaic has mixed materials
Mixed mosaics (stone tile plus different grout colors, trimmed edges, or glazed inserts) commonly polish at different rates. Treat the slowest-refining element as your baseline, and consider a separate edge refinement pass for grout lines.
Seal and maintain for long-term shine
Seal only when your tile/grout type benefits from it—and always test before full application. The right sealer can reduce staining and make routine cleaning easier; the wrong one can alter slip resistance or change appearance.
Most sealers require the floor to be fully clean and dry before application to prevent trapping moisture or residue.
Testing sealer in a hidden area is critical because mosaic grout porosity and tile finish can create visible sheen differences.
Entry mats and non-abrasive cleaners prevent embedded grit from grinding the surface back toward a dull state.
Sealing steps (safely)
– Confirm whether your tile/grout is sealable: Some installations may already have treatments; some tile finishes are designed to remain unsealed.
– Test first:
– Pick a hidden corner.
– Apply per product guidance.
– Check appearance after drying (and after light cleaning).
– Maintain with a grit-aware routine:
– Use mats at doors and high-traffic thresholds.
– Sweep/vacuum frequently (especially before damp mopping).
– Avoid sand-laden mops that reintroduce abrasive particles.
Maintenance schedule that works in real buildings
For busy residential and commercial spaces, a practical routine is:
– Vacuum/sweep daily or as traffic demands.
– Damp clean weekly using pH-neutral chemistry appropriate for your tile type.
– Reassess shine every few months—if haze returns quickly, it’s usually abrasive dirt or inadequate post-polish rinsing rather than “need to polish again.”
What can go wrong (and how to avoid it)
Several predictable mistakes lead to haze, uneven shine, or permanent dull spots. Most of these issues come from mismatched abrasives, skipping residue removal between steps, or trying to polish over defects that should be repaired or leveled first.
Haze after polishing is commonly tied to skipped finer stages or failure to remove slurry residue between grit transitions.
Uneven shine across mosaic grids often reflects lippage, variable grout texture, or inconsistent pad contact—not just “poor polishing quality.”
Etching-like dull areas can result from using cleaners with acids/alkalis on natural stone, or from applying an abrasive sequence intended for a different surface.
Common problems and fixes
– Hazy or cloudy finish
– Likely causes: incorrect grit progression, insufficient rinsing/wet-vac between stages, or too-aggressive pad contact that creates swirl micro-scratches.
– Fix: return to the last good grit stage, clean thoroughly, and re-polish with a properly staged sequence.
– Uneven shine between tiles
– Likely causes: lippage, different tile batch hardness/finish, grout/pore variation, or inconsistent pad pressure around edges.
– Fix: refine grout lines and edges separately; if lippage is high, polishing alone won’t level it.
– Etching or permanent dull spots
– Likely causes: acidic/alkaline cleaners on calcitic stones (marble/travertine) or abrasives/polish intended for glazed ceramic.
– Fix: stop and identify tile type; further polishing may worsen the damage if you’re attacking an already etched surface.
Pros and cons (what to expect)
| Approach | Pros | Cons |
|---|---|---|
| DIY diamond polishing | Cost-effective for light dullness and surface scratches; good control over staged refinement | Can look uneven if pad contact, grout texture, or tile type isn’t accounted for |
| Professional restoration | Specialized equipment and surface-leveling options for stubborn lippage/etching; faster troubleshooting | Higher cost; scope depends on tile condition and whether replacement/leveling is required |
Verdict / tip: best approach, downsides, and who should skip this
If your mosaic floor is only dull or lightly scratched, a careful grit/pad progression plus thorough cleaning between steps is typically the safest DIY route. Downsides: mosaic grout and mixed surfaces can polish unevenly, and heavy damage (deep scratches, badly worn grout, significant lippage) may need professional leveling, refinishing, or specialized restoration.
DIY polishing is most reliable when tile type is known, repairs are complete, and you follow a staged diamond sequence with residue removal between steps.
Polishing typically refines the surface you already have; it cannot fully resolve major lippage or structural tile failure.
Who should skip DIY polishing
Skip DIY (or pause and consult a pro) if:
– Your mosaic is natural stone with widespread etching or visible powdery dull patches.
– Tiles are loose, moving, or failing—repairs and possibly substrate attention come first.
– You can’t confidently identify tile type/finish (especially polished vs. honed vs. glazed).
– You see broad unevenness that suggests significant lippage or uneven subfloor.
Scan-and-save checklist
– [ ] Confirm tile type (stone vs ceramic/porcelain) and finish
– [ ] Deep clean; remove all grit
– [ ] Repair loose tiles and damaged grout; cure fully
– [ ] Start with correct diamond pad/polish progression (coarse → fine)
– [ ] Polish small sections with even pressure and overlapping passes
– [ ] Rinse/wet-vac residue between stages
– [ ] Seal only if your tile/grout is meant to be sealed; test first
– [ ] Maintain with non-abrasive cleaner and mats to prevent grit buildup
FAQ
Can I polish mosaic tile floors with a regular floor buffer?
Yes, if you use the correct attachment (diamond pads/polishing system) for your tile type and keep control over pressure and contact. The risk comes from using the wrong pad/product or polishing over defects that should be repaired first.
Should I seal mosaic tile floors after polishing?
Often, yes for many natural stones and more porous grout—but it depends on the specific tile and grout. Check the sealer and manufacturer guidance for your surface.
Why does my mosaic floor look hazy after polishing?
Common causes include skipping finer polishing steps, not cleaning slurry/residue between stages, or using an abrasive sequence that’s not appropriate for the surface finish.
Can polishing remove scratches?
Light surface scratches can improve, but deep scratches, chips, or lippage may not disappear fully. In those cases you may need refinishing beyond polishing, and grout repairs may be necessary too.
Sources:
– [ADD: manufacturer/spec documentation for the specific diamond polishing system or pads you plan to use]
– [ADD: manufacturer/spec documentation for the specific tile/grout type (e.g., marble/travertine, porcelain/ceramic mosaic) and any recommended cleaning/sealing chemistry]
– [ADD: official maintenance or care guide from the tile manufacturer regarding polishing, cleaning, and sealing]
When you treat mosaic polishing like a process—cleaning first, repairing defects second, then polishing with a staged diamond sequence and careful residue removal—you get the most consistent shine without haze or surprise dull patches. Keep your workflow controlled, verify tile type before choosing abrasives, and seal only when your tile/grout system recommends it; that combination is what turns “spotty reflections” into a uniform, professional-looking finish.
Frequently Asked Questions
What’s the best way to polish mosaic tile floors without damaging the grout?
Start by protecting grout lines with a penetrating, pH-neutral sealant if they’re porous, and avoid heavy acid cleaners that can etch surfaces. Clean thoroughly, then use progressively finer diamond polishing pads to reduce haze without blasting grout. Keep the grinder or polisher wet and don’t linger in one spot, especially on small mosaic pieces, to prevent uneven wear and grout dishing.
How do you polish mosaic tile floors if the tiles are glass versus ceramic or stone?
Glass mosaic tile floors typically polish best with fine diamond pads and a gentle, non-abrasive approach to avoid dulling or streaking. Ceramic mosaics respond well to wet polishing with resin pads, while natural stone mosaics (like marble or travertine) may require a honed-to-polish sequence and the right stone-safe polish. Always test a small hidden area first to confirm the pad grit and polish compound won’t leave residues or scratches.
Which diamond polishing pads and compounds should you use for mosaic tile floors?
For most mosaic floors, use diamond polishing pads in a step-down grit progression (for example, medium → 800/1500 → 3000 → 4000+), keeping the process wet to control heat. If you’re removing light etching or micro-scratches, follow with a fine polishing compound suited to your tile type (glass-safe for glass). Avoid going straight to high grits—skipping stages often leaves persistent dullness or visible swirl marks.
How can you remove haze, scratches, or dull spots before polishing mosaic floors?
Begin with a thorough degreasing cleaning to remove wax, soap scum, and embedded grit that cause streaking during polishing. For dull haze, lightly abrade with an appropriate diamond pad (often a medium grit) to level the surface, then progress to finer pads. For stubborn scratches, use a targeted sequence and continue polishing until the surface is uniformly clear; never jump directly to a high-finish pad over deep damage.
Why is sealing important after polishing mosaic tile floors, and which sealant works best?
Polishing leaves the surface more reflective but can also increase how quickly grout and tile absorb stains and water, especially on porous mosaics. Use a sealant appropriate for your specific tile material—typically a penetrating sealer for natural stone grout/tile and a compatible product for grout lines to reduce discoloration. After polishing, ensure the floor is fully dry and clean before sealing, and apply according to the manufacturer’s coverage and cure times.
📅 Last Updated: October 10, 2026 | Topic: How to polish mosaic tile floors? | Content verified for accuracy and freshness.
References
- Google Scholar Google Scholar
https://scholar.google.com/scholar?q=mosaic+tile+floor+polishing+grout+care - Google Scholar Google Scholar
https://scholar.google.com/scholar?q=polishing+ceramic+tile+surface+procedures+abrasives - Google Scholar Google Scholar
https://scholar.google.com/scholar?q=terrazzo+and+ceramic+tile+floor+restoration+grinding+honing+polishing - Technical Preservation Services (U.S. National Park Service)
https://www.nps.gov/tps/how-to-preserve/briefs/1-assessing-cleaning-and-water-repellent-treatments.htm - https://en.wikipedia.org/wiki/Polishing
- https://en.wikipedia.org/wiki/Ceramic_tile
- Grout
https://en.wikipedia.org/wiki/Grout - https://www.britannica.com/technology/tile
- Silica, Crystalline – Overview | Occupational Safety and Health Administration
https://www.osha.gov/silica/silica-faqs - Silica and Worker Health | Silica | CDC
https://www.cdc.gov/niosh/topics/silica/