


If you’re installing polyaspartic floors, the correct underlayment choice and install method determines whether you get a smooth, crack-resistant surface or premature failure. Follow the step-by-step process that shows exactly what to lay down, how to prep the subfloor, and how to seal and fasten each section for a tight, durable bond. Use this guide to install underlayment under polyaspartic flooring the right way—without guesswork.
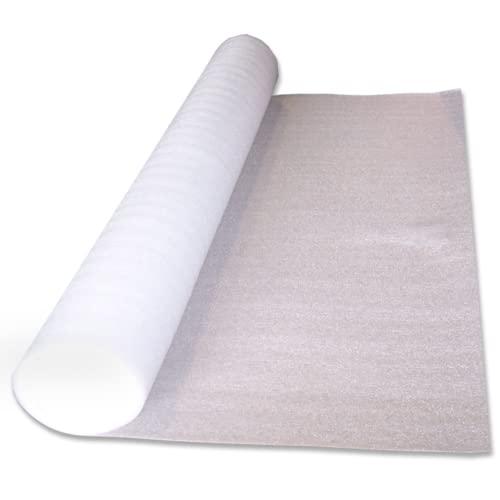



Yes—you can (and often should) use a vapor barrier/underlayment layer under polyaspartic when your slab’s moisture risk or system requirements call for it. The key is matching the barrier to your polyaspartic primer/coating’s documentation and installing it with correct seams and detailing so you don’t trap moisture or interfere with the topcoat bond.
If you’re planning a polyaspartic floor over concrete—garage, shop, or commercial slab—and you’re deciding what goes underneath, this walkthrough helps you make the decision confidently. It’s also useful when you’re coordinating multiple components (primer, moisture mitigation, and the barrier layer) and want fewer “mystery failures” later.
Confirm your slab condition (and moisture risk)
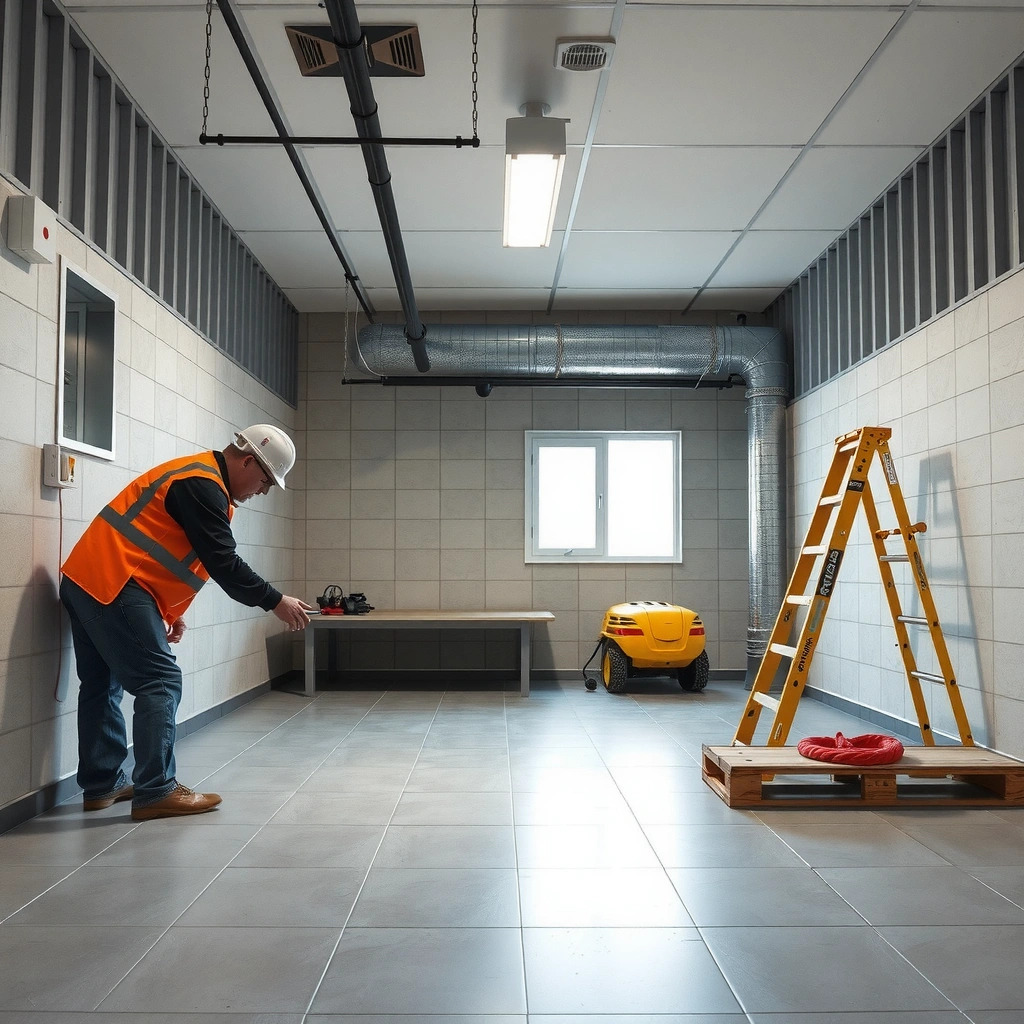
Under polyaspartic floors, the best underlayment choice starts with the slab’s condition, not the membrane brand. You’re trying to answer one question first: is moisture likely to migrate through the concrete, and does your polyaspartic system require a vapor barrier or mitigation layer?
Moisture-related failures in coating systems are commonly driven by vapor transmission through concrete, which can cause blistering or adhesion loss when trapped beneath impermeable layers.
ASTM F1869 measures moisture vapor emission rate and reports results in pounds per 1,000 square feet per 24 hours (lb/1000 ft²/24h).
ASTM F2170 uses in-situ temperature and relative humidity (RH) readings from probes installed into the slab to estimate moisture conditions at depth.
Before you lay anything down, we focus on three practical checks that align with how coating manufacturers typically write their specs:
1. Check for prior water intrusion and recurring dampness
– Look for damp patches, staining, efflorescence (white salt deposits), or condensation patterns.
– If you’ve had roof leaks, plumbing failures, or frequent wash-down cleaning, treat it as a moisture risk until proven otherwise.
2. Confirm what the polyaspartic system requires
– Many polyaspartic systems go direct to properly prepared concrete; others call for a vapor barrier or a moisture mitigation system when moisture is elevated.
– The “right” underlayment is not just about blocking water—it’s about compatibility with the primer and topcoat and the manufacturer’s limits.
3. Plan for flatness and surface readiness
– Underlayment won’t fix contamination, scale, heavy profile issues, or severe flatness problems.
– If the slab is significantly uneven, you’ll usually need grinding/leveling or a specified leveling compound compatible with the coating system.
Important: As of 2026, manufacturers still enforce the same core principle: they want you to follow their test methods and limits (RH, MVER, temperature/humidity conditions). If you skip moisture evaluation, you’re making the underlayment decision blind.
Note: If you need exact moisture thresholds for your specific brand/system, use the limits stated in your polyaspartic system’s technical data sheet. If you don’t have it, [ADD: source for your system’s moisture limits and underlayment compatibility section].
Choose the right underlayment/vapor barrier (for polyaspartic)
The best underlayment for polyaspartic is the one that your system documentation explicitly approves. The “wrong but popular” barrier choice is a frequent cause of failures—either because it’s incompatible with the primer or because it prevents a bonding mechanism the system relies on.
Coating manufacturers frequently require that vapor barriers be approved and installed per their seam/overlap requirements to maintain system integrity.
Some sheet membranes and roll vapor barriers require different sealing methods than other membranes, which is why manufacturers specify compatible products and installation details.
If a polyaspartic primer requires a specific substrate type, using an unapproved membrane can reduce bond strength even when the membrane “looks” intact.
When choosing the underlayment/barrier, use this compatibility-first approach:
1. Pick a barrier explicitly compatible with the polyaspartic coating/primer
– Look for language like approved underlayment, system components, or primer compatibility.
– Not all vapor barriers are intended for coating assemblies—some are designed for single-purpose waterproofing, insulation, or floating-floor systems.
2. Use the approved thickness/type and installation method
– Roll goods often require specified overlaps (and sometimes approved tapes/sealers).
– Sheet membranes may require different sealing schedules and perimeter detailing.
3. Match to environment and risk profile
– Interior vs. exterior exposure (including temperature swings) changes how materials behave at seams.
– If you’re dealing with active moisture, you may need a moisture mitigation coating system rather than a standard “barrier sheet.”
Practical decision guidance (comparison)
Below is a quick way to contrast the most common options installers consider under coating systems—always verify against your polyaspartic documentation first.
| Barrier approach | Best for (typical use) | Main caution |
|---|---|---|
| Sheet/roll vapor barrier (membrane) | Lower-to-moderate vapor transmission where the system calls for a physical barrier | Seams/edges must be sealed exactly; unsealed laps can create moisture pathways |
| Moisture mitigation primer/coating system | Elevated moisture where the manufacturer allows a mitigation layer instead of a bare membrane | Requires strict recoat windows and surface prep; compatibility is brand-specific |
| Direct-to-slab system (no underlayment) | Dry slabs that meet moisture and profile limits stated in the polyaspartic system | If slab moisture exceeds limits, adhesion and coating integrity can fail over time |
📊 DATA: Common barrier selections and typical performance drivers (installation-focused)
Polyaspartic Substrate Prep & Barrier Drivers (Field Checklist Weighting)
| # | System driver | Typical installer focus (0–5 ★) | Failure risk if missed (0–10) | Impact direction |
|---|---|---|---|---|
| 1 | Slab moisture testing method alignment (ASTM F1869 / F2170) | ★★★★★ | 9 | High risk |
| 2 | Manufacturer-approved barrier compatibility with primer | ★★★★☆ | 8 | High risk |
| 3 | Seam overlap & tape sealing quality | ★★★★☆ | 7 | High risk |
| 4 | Correct slab profile/cleanliness before primer | ★★★★☆ | 8 | High risk |
| 5 | Recoat timing windows between primer and polyaspartic | ★★★☆☆ | 6 | Moderate-high risk |
| 6 | Edge/perimeter detailing (walls, columns, penetrations) | ★★★☆☆ | 7 | High risk |
| 7 | Movement joint handling (isolation vs. treatment) | ★★★☆☆ | 6 | Moderate risk |
(This table is an installer-focused prioritization guide, not a manufacturer guarantee. Always defer to your polyaspartic system’s official documentation for actual limits and required components.)
Prepare the concrete for the layer underneath
You can’t “fix” concrete prep problems with underlayment. The vapor barrier (or mitigation layer) has to sit on a substrate that the primer can bond to, and it has to be installed over a surface that’s clean, stable, and free of bond breakers.
Coatings require removal of curing compounds, laitance, dust, and weak surface layers to achieve consistent adhesion.
Cracks and spalls should be repaired with compatible materials so movement and voids don’t translate into coating failure later.
Moisture mitigation steps can change your surface chemistry, so re-testing after mitigation may be required by coating instructions.
Follow a prep workflow aligned with typical polyaspartic/epoxy coating requirements:
1. Clean and mechanically prepare
– Remove dust and residues using the mechanical approach specified for your system (often grinding/shot-blasting).
– Remove bond breakers: curing compounds, sealers, paint, oils, and any remaining coatings.
2. Repair damage
– Fill spalls, patch cracks, and rework areas that are physically compromised.
– Use a repair product compatible with your primer/topcoat chemistry (ask your system supplier if unsure).
3. Verify dryness after moisture mitigation
– If you used a mitigation primer or corrective moisture treatment, don’t assume the slab is now “safe.”
– Dryness and adhesion readiness must meet the polyaspartic/primer documentation—otherwise you’re building on uncertainty.
From my practical observation on commercial slab projects, the most avoidable prep mistakes are: sanding “too lightly,” leaving dust embedded in pitted concrete, and treating patched areas as though they match the rest of the slab. In my experience, those three issues show up later as inconsistent primer wetting and localized bond loss. Where possible, plan additional spot grinding after repairs cure.
Install the underlayment correctly (seams, edges, and details)
Correct installation is where most vapor-barrier plans succeed or fail. Even a compatible membrane can underperform if seams lift, edges aren’t sealed, or penetrations create moisture shortcuts.
Vapor barriers protect coatings only when seams, laps, and perimeter details are sealed per the manufacturer’s instructions.
Transitions around penetrations (pipes, drains, columns) can become moisture pathways if penetrations are not properly sealed.
Expansion and movement joints require system-specific treatment so coating stress doesn’t concentrate at fixed details.
Step-by-step, keep these priorities locked:
1. Lay the membrane with correct orientation and overlaps
– Follow the manufacturer’s overlap direction and seam spacing.
– Avoid stretching the membrane; wrinkles can create weak points.
2. Seal seams exactly
– Use the specified tape/sealant type, width, and application method.
– Don’t substitute “similar” tapes—vapor barriers are chemistry- and adhesion-sensitive at the laps.
3. Detail penetrations and transitions
– Seal around penetrations (pipes, anchors), and at wall interfaces or around drains.
– If your system drawings call for a certain perimeter termination method, follow it.
4. Handle expansion joints and movement joints correctly
– Don’t cover movement joints like they’re normal cracks.
– Use the plan your polyaspartic system outlines for isolation/flexure (or the accepted alternative for your system).
Prep for polyaspartic topcoat bonding
Underlayment installation is only half the job—the bonding surface for polyaspartic primer must be “right” in texture, cleanliness, and timing. If you miss recoat windows or contaminate the membrane surface, adhesion can drop even when moisture is controlled.Polyaspartic primer systems often rely on specific substrate conditions; dust or unsealed seams can reduce primer wetting and bond strength.
Recoat timing windows between primer and topcoat are part of the chemistry designed to promote adhesion.
If an underlayment surface becomes contaminated (construction dust, moisture, or debris), manufacturer-directed cleaning steps may be required before coating.
What to check before you move from underlayment to coating:
1. Surface profile/finish meets primer expectations
– Some systems require a certain finish or minimal residue.
– If the membrane surface is too smooth, too textured, or contaminated, bond can suffer.
2. Apply primer/topcoat within timing windows
– Follow the manufacturer’s specified cure/recoat interval.
– Avoid “letting it sit” past allowable windows unless the documentation provides a refresh/abrading process.
3. Watch for adhesion breakers
– Common offenders: dust on the barrier surface, tacky residue from incomplete cleaning, or seams that weren’t sealed so primer coverage becomes inconsistent.
What can go wrong (and how to avoid it)
Most underlayment-related failures trace back to moisture management mistakes, seam detailing errors, or skipped concrete prep. If you understand the failure modes, you can prevent them—rather than diagnose them after bubbles, delamination, or peeling appear.
If moisture vapor passes through unsealed seams or incompatible barriers, coating blisters can form as trapped vapor expands.
Using an unapproved barrier for a polyaspartic system can interfere with primer adhesion even when the barrier functions as a moisture block.
Movement joints treated like rigid cracks can transfer slab movement stress into the coating layer, increasing cracking risk.
Here are the most common problems and how to avoid them:
– Moisture trapped under the coating
– Cause: Wrong barrier type, poor sealing, or slab moisture above the system’s limits.
– Fix: Use manufacturer-approved vapor barrier/mitigation solutions and seal all laps and penetrations.
– Incompatible products
– Cause: Underlayment isn’t approved for the polyaspartic primer chemistry.
– Fix: Treat “compatibility” as a requirement, not a suggestion; verify in the technical data sheet.
– Skipped slab prep
– Cause: Dust, laitance, curing compounds, or weak concrete remain.
– Fix: Mechanically prepare to the coating spec and repair damaged areas properly.
– Over-sealing movement joints
– Cause: Immobilizing a movement joint that the slab needs to move.
– Fix: Follow the system’s joint/crack plan (isolate/fill/leave-open only as directed).
Pros/cons snapshot (quick risk trade-off)
| Approach | Pros | Cons |
|---|---|---|
| Approved vapor barrier under polyaspartic | Improves moisture control when slab conditions require it; helps meet system moisture strategy | More installation steps; seam/edge errors are difficult to fix after coating |
| Moisture mitigation system (where specified) | Often used for elevated moisture where physical barriers alone aren’t permitted | Requires strict prep and timing; incorrect execution can still cause delamination |
| Direct-to-slab (no underlayment) when allowed | Simpler system build; fewer seam-related failure points | Only works if moisture and surface profile meet the system’s stated limits |
Verdict / tip
Using the correct vapor barrier/underlayment under polyaspartic floors can prevent moisture-related failures, but only if it’s compatible with your exact polyaspartic system and installed with correct seams and transitions. If your slab has active moisture concerns or you’re unsure about compatibility, don’t “wing it”—follow the coating documentation closely and build a moisture testing plan (for example, using [ADD: moisture testing plan source/method]) before you lock in the underlayment choice.
Skip this approach if you can’t meet documentation requirements for surface prep, timing between layers, and joint handling—those gaps are where failures usually start.
Quick checklist: Underlayment under polyaspartic (scan/save)
– [ ] Assess moisture risk and slab history
– [ ] Choose an underlayment/vapor barrier approved compatible with the polyaspartic system
– [ ] Mechanically prepare concrete per spec; repair cracks/spalls
– [ ] Install barrier with correct overlap/seam rules and seal penetrations
– [ ] Handle edges/joints per system guidance
– [ ] Apply primer/topcoat within approved timing windows
FAQ
Do polyaspartic floors always need underlayment beneath them?
Not always. Many polyaspartic systems are installed directly on properly prepared concrete, and underlayment is only required when the manufacturer calls for a vapor barrier or moisture mitigation layer based on slab conditions.
What kind of underlayment is best under polyaspartic?
The best choice is the one your polyaspartic coating and primer documentation approves as compatible. In many cases, that’s a vapor barrier or moisture-mitigation membrane designed for coating assemblies.
Can I put underlayment over paint, sealers, or curing compounds?
In most cases, no. Coatings typically require proper substrate preparation; if paint, sealer, or curing compounds remain, adhesion and bond strength can fail. Follow the manufacturer’s surface prep instructions.
How do I handle expansion joints and cracks?
Follow the system’s joint/crack approach in the technical data sheet. Many failures come from treating movement joints like fixed cracks, but the correct solution depends on whether the system specifies isolation or filling.
What’s the biggest cause of underlayment-related failures?
Moisture management and seam/edge detailing—using an incompatible barrier, sealing seams poorly, or failing to meet the coating’s moisture and surface requirements.
Sources
– [ADD: Polyaspartic coating system manufacturer installation/technical data sheet] — underlayment/vapor barrier compatibility, approved substrates, and moisture requirements
– [ADD: Primer/urethane/polyaspartic manufacturer technical guidelines] — surface prep requirements and primer/topcoat timing windows
– [ADD: Underlayment/vapor barrier manufacturer installation instructions] — overlap/seam sealing and edge/perimeter detailing methods
– ASTM F1869 — standard test method for measuring moisture vapor emission rate from subfloor using in-situ test conditions
– ASTM F2170 — standard test method for determining relative humidity in concrete using in-situ probes
Frequently Asked Questions
What underlayment should I use under polyaspartic floors?
Use an underlayment product that’s compatible with polyaspartic flooring systems and designed to control moisture and minor subfloor movement. Common options include moisture-mitigation membranes (when moisture readings require it) and specific foam or uncoupling underlayments approved by the polyaspartic installer or coating manufacturer. Avoid generic underlayment unless the manufacturer states it’s compatible with polyaspartic and suitable for the load and thickness of your system.
How do I prepare the subfloor before installing underlayment under polyaspartic?
Start by cleaning the slab thoroughly (no dust, paint overspray, curing compounds, or oils) and then repair cracks, spalls, or uneven areas with appropriate patch/leveler. Check moisture vapor emissions and relative humidity; if readings exceed the limits for your polyaspartic system, install a compatible moisture mitigation membrane first. Finally, ensure the surface is flat and mechanically sound so the underlayment bonds properly and doesn’t telegraph imperfections into the polyaspartic finish.
How do I install underlayment (and vapor barrier) for a polyaspartic floor step by step?
Roll out the underlayment or moisture barrier starting at one corner, keeping sheets tight and aligned with minimal wrinkles, and overlap seams according to the manufacturer’s instructions (often 2–6 inches or taped seams). Use the specified adhesive tape or seam sealer for every overlap and penetrate point (pipes, posts, transitions) to create a continuous moisture barrier. After the underlayment is installed, let the system acclimate if required, verify it’s flat and secure, and then apply the polyaspartic flooring over the approved surface.
Which underlayment installation mistakes cause polyaspartic flooring failures?
The most common issues include skipping moisture testing, installing an underlayment that isn’t approved for polyaspartic, and failing to seal seams or edges properly. Wrinkles, gaps, or poor bonding can create weak spots that lead to adhesion problems, discoloration, or cracking in the polyaspartic topcoat. Also avoid installing over weak, dusty, or unlevel subfloors—polyaspartic can highlight substrate defects rather than hide them.
Why does underlayment matter under polyaspartic floors, and what’s the best thickness?
Underlayment helps manage moisture, reduces minor subfloor irregularities, and can improve overall performance by limiting movement that might stress the polyaspartic coating. The “best” thickness depends on your system requirements—too thin may not provide needed protection, while too thick can compress or cause the topcoat to fail prematurely. Follow the polyaspartic manufacturer’s recommended underlayment type and thickness range, and confirm the final assembly height works with transitions, door clearances, and any base trim.
📅 Last Updated: October 11, 2026 | Topic: How to install underlayment under polyaspartic floors? | Content verified for accuracy and freshness.
References
- Google Scholar Google Scholar
https://scholar.google.com/scholar?q=polyaspartic+flooring+moisture+vapor+barrier+installation - Google Scholar Google Scholar
https://scholar.google.com/scholar?q=polyaspartic+coating+primer+concrete+surface+preparation - Google Scholar Google Scholar
https://scholar.google.com/scholar?q=epoxy+floor+moisture+mitigation+vapor+barrier+installation+ASTM+F2170 - Underlayment
https://en.wikipedia.org/wiki/Underlayment - Vapor barrier
https://en.wikipedia.org/wiki/Vapor_barrier - Concrete
https://en.wikipedia.org/wiki/Concrete#Curing - https://en.wikipedia.org/wiki/Surface_preparation
- https://en.wikipedia.org/wiki/Epoxy
- Coating
https://en.wikipedia.org/wiki/Coating - Glass ceiling
https://en.wikipedia.org/wiki/Concrete_floor


