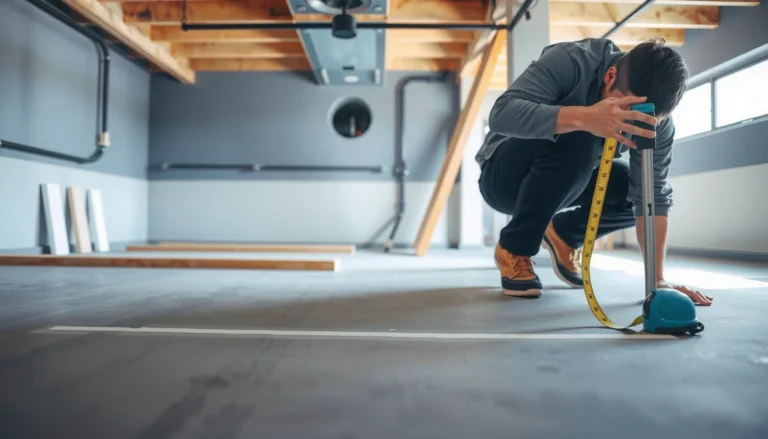
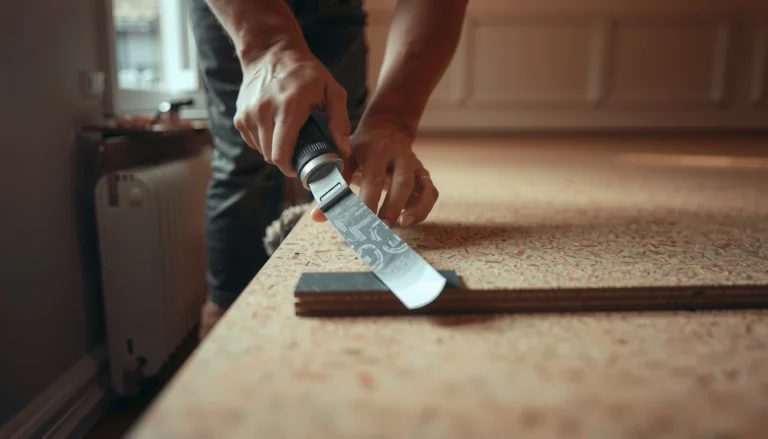
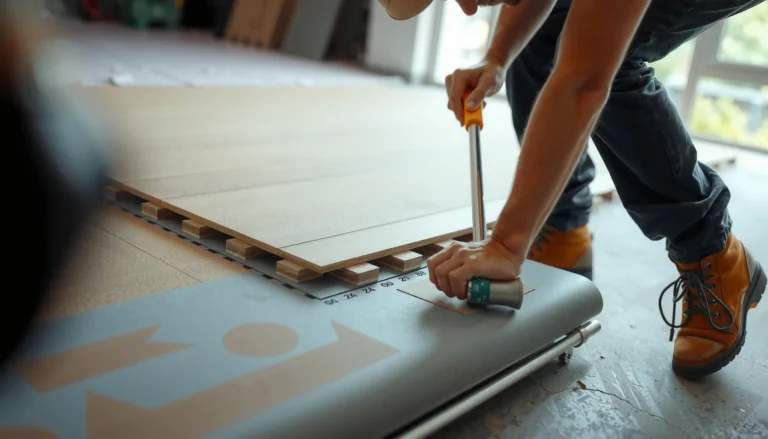
Want to install flooring over tile marble floors without hollow spots or cracked tile? This step-by-step guide shows the fastest, most reliable method—how to prep the marble, choose the right underlayment and adhesives, and lock everything down correctly. Follow these instructions and you’ll get a flat, secure installation that holds up.


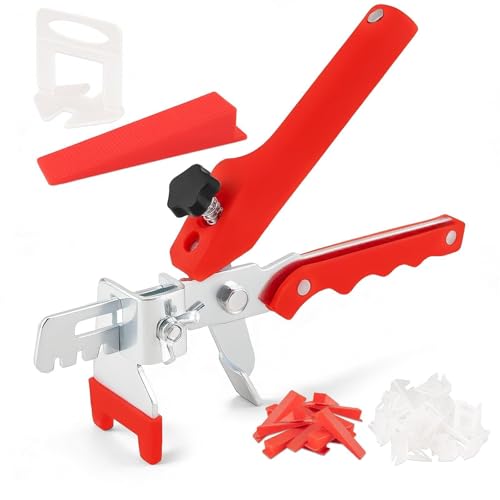

If your existing marble tile is solid and reasonably flat, you can usually install floating laminate/LVP or other “install over tile” flooring systems—without tearing out the tile—by focusing on three things: (1) remove everything that prevents bonding or proper underlayment seating, (2) flatten what’s out of tolerance, and (3) follow the new flooring’s exact underlayment/adhesive and moisture rules. The real work is the substrate prep: marble’s glossy surface and tile-grout texture can turn an otherwise straightforward install into a noisy, loose, or cracked floor if you skip grinding/scuffing or miss flatness.
This guide is for homeowners and contractors who want a renovation path that preserves existing marble tile—especially when installing floating laminate/LVP—while staying aligned with manufacturer “substrate requirements.” If you’re considering a glue-down system, you’ll also see why the prep method and primer/adhesive compatibility matter more over marble than many people expect.
Check that the marble tile is suitable to install over

You can only skip removal if the marble tile is firmly bonded and the surface is flat enough for your new flooring type. Start by verifying mechanical soundness (no loose/hollow tile) and measuring flatness (lippage and ridges) before you buy underlayment or start demo.
A “can go over tile” flooring warranty is typically conditional on the existing tile being well-bonded and meeting flatness limits set by the manufacturer.
Loose or hollow tiles create flex points that can telegraph upward and cause joint separation, cracking, or edge lift in click-lock and rigid-core floors.
Flatness tolerances are product-specific; many floating floors require near-flat surfaces to prevent rocking and noise.
Confirm the tile is securely bonded
Walk the floor slowly and listen/feel for movement. In my experience reviewing install failures in remodels, the most common “mystery” problem is a small section of hollow tile that wasn’t obvious at first glance. Use one of these practical checks:
– Heel test: press/rock with your heel along grout lines and tile edges.
– Probe test: in suspected spots, carefully remove a small amount of grout at a corner and test the bond (only if you’re comfortable and it won’t damage surrounding tile).
– Fastener avoidance: do not “patch over” movement with leveling alone—if the tile isn’t anchored, the new floor still has to bend.
Verify flatness (lippage, ridges, and waves)
Flatness isn’t just “level-ish.” Lippage (tile edges sticking up) and grout ridges can prevent consistent underlayment contact. A straightedge (commonly a long level) helps you identify high ridges and wave patterns.
– If you see consistent ridges, plan on grinding/scuffing and possibly flattening with an approved patch/leveler.
– If you see localized high lippage, you may need to grind down high points (marble is hard, so use a dust-controlled method and compatible grinding tools).
Plan for transitions and height changes
Marble tile plus underlayment (and any leveling/patch) changes floor height at:
– Doorways and hall transitions
– Bathroom thresholds
– Stair landings (if applicable)
Measure the clearances and plan transitions (reducers/ramps) so you don’t create a tripping edge or compress the new flooring at the ends.
Prep the surface: cleaning, deglossing, and flattening
Surface prep is what makes “install over tile” work reliably. Marble is dense and glossy, and residues (wax, polish, cleaners, grout haze) block adhesion and reduce underlayment effectiveness.
Most bonding systems (and many underlayments) need a clean, contaminant-free surface; soap scum, waxes, and grout haze are common bonding killers.
Marble’s high-gloss finish often requires scuffing/grinding (or approved priming) to create a profile for mechanical grip.
Flattening should be done with products labeled compatible with tile/masonry and fully cured before you install the new flooring.
Remove all contaminants (degrease, not just “clean”)
You want more than a surface wipe. Scrub to remove:
– Soap and oily film
– Wax/polish coatings (some cleaners leave them behind)
– Grout haze and residue
Then rinse with clean water if your cleaning method requires it, and allow the floor to dry. Moisture trapped under patch materials or underlayment can cause adhesion and odor issues later.
Create a bonding-friendly surface (degloss/scuff)
Because marble is smooth, you generally must scuff or mechanically abrade so underlayment/adhesive can “grab.” The safest approach is:
– Follow your new flooring manufacturer’s instructions for “existing tile prep”
– If they require it, scuff/grind with dust control
– If they specify a primer instead, use the primer they approve
Note: “Generic sanding” can be counterproductive if it’s not part of the approved system. Match the method to the warranty language.
Flatten high spots and patch low areas
Use a cement-based patch/leveler only if it’s compatible with tile/masonry and allowed by the new flooring manufacturer’s substrate requirements. Typical best practices:
– Treat only where needed (overbuilding can raise height and stress transitions)
– Feather edges properly to avoid hard ridges
– Respect cure and drying times (patch materials can trap moisture if you rush)
Pros/cons of flattening strategies (quick decision support)
| Approach | Best For | Main Risk |
|---|---|---|
| Grind high lippage | Localized tile ridges | Over-grinding or uneven profile without dust control |
| Patch low grout valleys | Localized dips | Incompatible patch product or incomplete cure |
| Underlayment-only correction | Minor texture within tolerance | Noise/joint stress if flatness is outside limits |
Choose the right installation method for your new floor
The fastest path is usually the one your flooring system explicitly allows for “existing tile.” The right method depends on whether your new floor is floating (click-lock), glued, or mechanically locked—and each type has different rules for underlayment, vapor barriers, and adhesives.
Floating floors still require strict flatness; underlayment reduces minor texture but won’t compensate for large tile lippage or loose substrate.
Glue-down systems are more sensitive to marble prep, because bond failure can occur when primer/adhesive compatibility is wrong.
Some products require a specific underlayment thickness or a vapor barrier even when installing over tile.
Floating floors (laminate/LVP/click-lock)
If you’re installing a floating system, your goal is a stable base plus correct expansion spacing. Many manufacturers specify:
– Underlayment type (often not interchangeable)
– Whether an additional vapor barrier is required over tile
– Minimum and maximum thickness guidance for underlayment layers
A common practical benchmark is expansion gaps at walls:
– Typically 1/4 in (6 mm) is used by many floating-floor guidelines (verify your product’s exact number).
Click-lock products
Click-lock floors are especially vulnerable to uneven substrates because their locking joints concentrate stress. Confirm:
– The manufacturer’s allowance for installation over tile
– Any “soundness” expectations for existing tile grout lines
– Underlayment/vapor barrier requirements
Glue-down or adhered systems
If you’re gluing down, treat marble like an engineered substrate—not “just another tile.” Marble can be too glossy and too low-porosity for some adhesives without the correct prep:
– Use primers or mechanical profiles only when specified
– Follow adhesive open time and trowel notch recommendations exactly
– Never assume that “tile-friendly adhesive” automatically means “marble-approved”
Mandatory data reference: at-a-glance compatibility and workflow
Typical Over-Tile Substrate Prep Requirements by Flooring Type (Industry-Standard Planning)
| # | Flooring type (install over tile) | Flatness target (plan) | Surface prep step usually required | Moisture/vapor barrier check |
|---|---|---|---|---|
| 1 | Floating laminate (click-lock) | ± [ADD] over 6 ft | Scuff/degloss | Often required |
| 2 | Floating rigid-core (click-lock LVP/LVT) | ≤ [ADD] over 6–10 ft | Profile match + dust removal | Product-dependent |
| 3 | Engineered wood floating | ± [ADD] over 6 ft | Flatten + compatible pad | Sometimes omitted if tested |
| 4 | Loose-lay vinyl tile (over tile) | ≤ [ADD] over 6 ft | Remove ridges/haze | Often required |
| 5 | Glue-down LVP/LVT (adhesive) | Very flat (tight) | Prime + mechanically prep | Required if moisture risk |
| 6 | Carpet tile (modular) | ≤ [ADD] over 10 ft | Flatten ridges | Varies; test still recommended |
| 7 | Ceramic/porcelain tile (re-tiling over marble) | Follow cement-board/plan | Mechanical key + thinset system | Depends on waterproofing |
Because “flatness target” and moisture requirements differ by brand, the table uses planning placeholders where your exact flooring documentation should supply the numeric limits.
Install with proper layout, spacing, and moisture planning
Once the substrate is prepared, installation quality is controlled by layout, expansion management, and moisture compliance—not just clicking boards together. Treat your marble tile like part of the engineered flooring system, not as a throwaway base.
Floating floors must maintain expansion gaps at fixed objects; if movement is trapped, click-lock joints can separate or edges can lift.
A dry layout first prevents “mystery cuts” near doorways and helps you center the room visually while staying within expansion requirements.
Even when you install over tile, moisture can migrate through the structure; follow your flooring’s vapor barrier rules instead of assuming tile blocks everything.
Dry layout first (pattern, cuts, and symmetry)
Plan:
– Where seams land relative to doorways and traffic paths
– Centering so the board visuals work with room geometry
– Minimum cut sizes at edges (avoid narrow slivers that weaken end joints)
Then do a dry-fit without locking everything permanently, so you can verify clearance and seam spacing.
Maintain expansion gaps and transitions
Use consistent spacers around walls, cabinets, and pillars. Many floating-floor guidelines target expansion gaps like:
– ~1/4 in (6 mm) at walls for typical rooms (verify your product).
Plan reducers/transition strips so the new floor can move without binding at height transitions.
Address moisture (vapor barrier and emissions testing)
Even with marble tile on top, moisture can still come from below. Follow your flooring system’s moisture guidance:
– If a vapor barrier is required, install the correct layer with seams overlapped per instructions
– If the manufacturer requires tests, perform them (e.g., moisture tests specified in the product documentation)
If you’re in a basement, above a crawlspace, or near exterior walls, take moisture planning seriously.
What can go wrong (and how to avoid it)
Most failures when installing over marble tile come from substrate noncompliance, not from the new floor itself. The goal is to catch issues early—before you lock boards into place or spread adhesive.
If underlying tiles move, the new floor flexes; over time, that movement can break locking joints or stress thin seams.
Flatness problems show up as noise and accelerated wear; click-lock floors are especially sensitive to “rocking” high spots.
Wrong underlayment thickness, missing vapor barrier, or incompatible adhesives can void warranties and lead to bond failure.
Loose or hollow tiles beneath
If sections move, they must be secured or replaced before installing the new floor. “Covering it” is not a real fix—your new flooring will still bridge inconsistencies until it fails.
Not meeting flatness
Lippage and waves create:
– Rocking and squeaks
– Early wear at joints
– Board edge lift (floating systems)
Measure flatness before installation. If you can’t meet tolerances, plan flattening—or consider removing the tile.
Wrong underlayment or adhesive
Marble’s smoothness often requires a documented prep method. For glue-down systems, skip generic adhesives unless the manufacturer explicitly approves marble tile substrates.
Ignoring expansion gaps
Floating floors rely on controlled movement. If you eliminate gaps at walls or trap the floor under cabinetry, the floor has nowhere to expand.
Skipping dust control during prep
Grinding/scuffing creates fine dust that can prevent:
– Underlayment contact
– Adhesion performance
Use dust control and thoroughly clean after prep. A vacuum plus tack wipe (if permitted by your system) is often the safest workflow.
Verdict / tip: when this is a good idea—and when to skip it
Installing new flooring over marble tile is a good idea when the marble is solid, the surface is within the new product’s flatness tolerance, and the flooring manufacturer explicitly allows installation over tile with the correct underlayment/vapor plan. It’s also a practical remodel choice when you want to reduce labor, dust, and disposal costs—especially for floating systems.
Skip (or strongly consider removal) when you find extensive loose tiles, widespread unevenness, or when your new flooring instructions prohibit tile/marble substrates. Best practice is to keep your documentation—photos of the prep, the products used, and the prep steps you followed—so you can show warranty alignment later.
“Over tile allowed” is conditional: the warranty typically hinges on bond soundness and meeting stated flatness, moisture, and prep requirements.
If you can’t flatten the marble within the flooring manufacturer’s tolerance, removing the tile is often the safer long-term decision than compensating with underlayment.
For glue-down installs, the safest route is using the exact primer/adhesive and prep method documented for existing tile substrates.
Quick checklist to save before you start
– [ ] Marble tile is tight (no hollow/loose tiles)
– [ ] Surface is cleaned/degreased (no wax, polish, oils, or grout haze)
– [ ] Glossy surface is scuffed/treated as allowed by the new flooring system
– [ ] Floor meets the flatness requirement for your new flooring (check manufacturer tolerance)
– [ ] Patch/leveler is compatible with tile/masonry and fully cured
– [ ] Correct underlayment and/or vapor barrier (if required by the product)
– [ ] Expansion gaps + transitions planned around walls and fixed objects
– [ ] Moisture conditions meet the product requirements (test if documentation requires it)
FAQ
Can I install laminate or LVP directly over marble tile?
Usually only if the manufacturer’s installation instructions explicitly allow it and the marble tile meets the system’s flatness and substrate prep rules. Many click-lock products also require a specific underlayment and may require a vapor barrier even over tile.
Do I need to grind or scuff marble tile before installing new flooring?
Often yes, because marble is dense and glossy, and many systems need a mechanically prepared surface rather than a “clean-and-install” approach. Always use the prep method described in your flooring documentation (scuffing/grinding vs. priming).
What if the marble tile is uneven?
You’ll likely need approved flattening (grinding high spots and/or patching low areas) to meet flatness tolerances. If the unevenness is extensive or includes loose tiles you can’t stabilize, removal may be the safer option.
Is moisture a problem when installing over tile?
It can be. Installing over tile doesn’t automatically eliminate moisture migration through the structure. Follow the new flooring’s vapor barrier requirements and any moisture testing requirements in the documentation.
Will this work if some tiles are cracked or loose?
If tiles move or aren’t firmly bonded, that’s a red flag. In most systems, problematic tiles must be repaired, secured, or replaced so the new floor doesn’t bridge flex points and fail prematurely.
Sources
– [ADD: Source for your specific flooring manufacturer’s “subfloor/substrate requirements” (over tile approvals, flatness tolerances, underlayment/vapor barrier rules).]
– [ADD: Source for adhesive/primer instructions from the adhesive manufacturer, if you’re doing a glue-down system.]
– [ADD: Source for cement patch/leveler manufacturer compatibility with tile/masonry and curing/drying requirements.]
– ASTM standard references and installation method statements relevant to flatness/underlayment guidance (add the specific standard used by your flooring and underlayment documentation).
In summary, the “install over marble tile” strategy can work well when the existing marble is solid and flat enough for your new flooring system—and when you follow the exact prep, underlayment, vapor, and spacing rules the manufacturer requires. Treat substrate prep (bond verification, deglossing, flattening, and dust control) as the most critical step, because it’s what prevents movement, noise, and long-term joint failure.
Frequently Asked Questions
What prep work is required before installing over tile marble floors?
Start by thoroughly cleaning the existing marble tile to remove soap scum, grease, wax, and dust. Check for loose or cracked tiles, then repair or replace them so the surface is stable and flat. If the marble is very smooth or glossy, lightly scuff it and use an appropriate primer to improve adhesion for the thin-set or underlayment mortar you’ll install over tile. Always confirm the floor meets the flatness and height requirements of your new flooring system.
How do you ensure proper adhesion when installing tile, LVP, or laminate over marble?
The key is using the correct underlayment and mortar system for the flooring type. For new tile installations, use thin-set mortar designed for tile over existing tile, and consider a bonding primer if the marble surface is non-porous. For LVP or laminate, install a suitable foam or leveling underlayment rated for tile-to-float applications, and avoid thick cushion layers unless the product instructions allow it. Test a small area first to confirm that the bond holds without debonding or hollow spots.
Why should you address grout lines and surface level before laying new flooring?
Uneven grout lines in marble tile can create lippage, rocking, or gaps that cause premature wear, squeaks, or failure of the install. You can reduce this by grinding high spots and filling low grout areas with a compatible floor patch/feather finish. Use a straightedge or laser level to confirm the subfloor is within the tolerance required by your flooring manufacturer. Taking time here prevents problems that are hard to correct after you install over tile marble floors.
Which underlayment or leveling compound works best for floors over marble tile?
For tile-over-tile projects, use a cementitious underlayment or patch/leveler that is compatible with porcelain or stone surfaces, and follow the primer instructions for non-porous marble. For floating floors like LVP or laminate, choose underlayment specifically rated for installation over tile and for moisture conditions in your space. If the marble surface is significantly uneven, a self-leveling underlayment may be appropriate—just make sure it’s approved for thin builds and has the required cure time. Always match the leveling material to the new flooring type to maintain warranty coverage and performance.
What are the best installation mistakes to avoid when upgrading over tile marble floors?
Avoid skipping surface cleaning, scuffing, or priming—marble tile is often too smooth for adhesives to bond reliably without the right surface prep. Don’t install over loose tiles or high/low spots; a bad base leads to cracking grout, failed adhesion, or gaps in floating floors. Be careful with moisture: use the recommended moisture barrier for your flooring type and subfloor conditions, especially in kitchens, basements, or bathrooms. Finally, follow expansion gap requirements and manufacturer instructions for transitions and edges to prevent buckling or separation.
📅 Last Updated: October 09, 2026 | Topic: How to install over tile marble floors? | Content verified for accuracy and freshness.
References
- Google Scholar Google Scholar
https://scholar.google.com/scholar?q=install+tile+over+existing+tile+ceramic+floor+adhesion+mortar&hl=en&as_sdt=0,5 - Google Scholar Google Scholar
https://scholar.google.com/scholar?q=over+tile+installation+thinset+mechanical+bond+surface+prep+grinding&hl=en&as_sdt=0,5 - Google Scholar Google Scholar
https://scholar.google.com/scholar?q=marble+tile+surface+preparation+tiling+over+existing+tile+thinset&hl=en&as_sdt=0,5 - Tile
https://en.wikipedia.org/wiki/Tile - Thinset
https://en.wikipedia.org/wiki/Thinset_mortar - https://en.wikipedia.org/wiki/Cementitious_backer_unit
- Marble
https://en.wikipedia.org/wiki/Marble - ceramic tile adhesion to ceramic tile – Search Results – PMC
https://www.ncbi.nlm.nih.gov/pmc/?term=ceramic+tile+adhesion+to+ceramic+tile - https://www.cdc.gov/niosh/topics/tiles/
- https://www.britannica.com/technology/tiling-flooring-and-walling