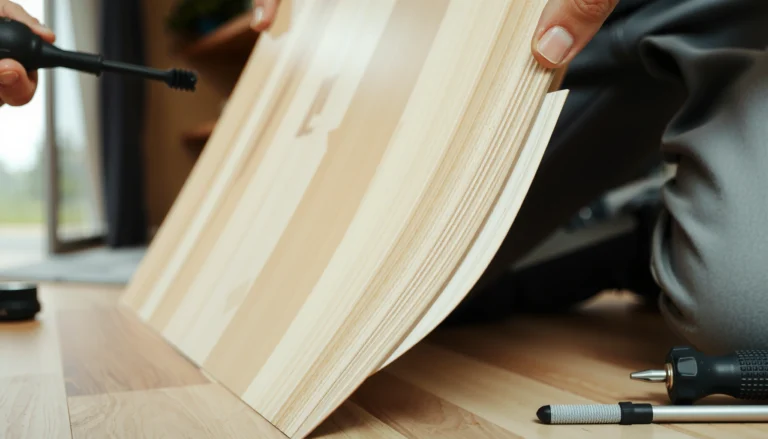
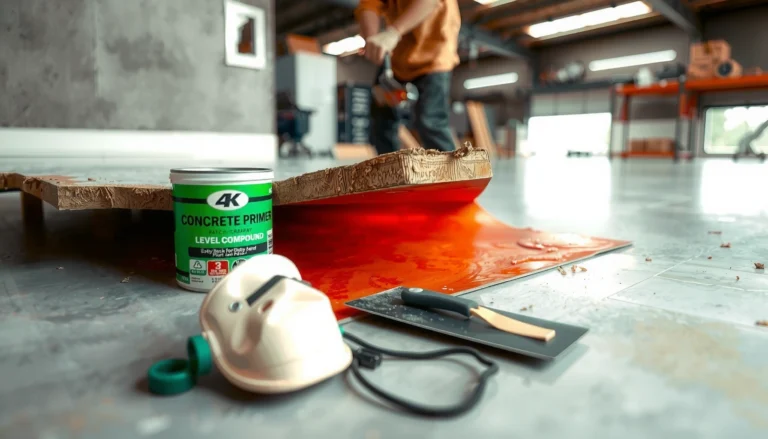
Fixing gaps in mosaic tile floors is straightforward when you use the right method for the cause—loose tiles, cracked grout, or edge failure. This guide tells you exactly what to do, step by step, to re-set tiles, re-grout properly, and seal the surface so the gaps don’t return. If you want the fastest, most durable fix, you’ll learn which repair approach to choose and what materials to use.
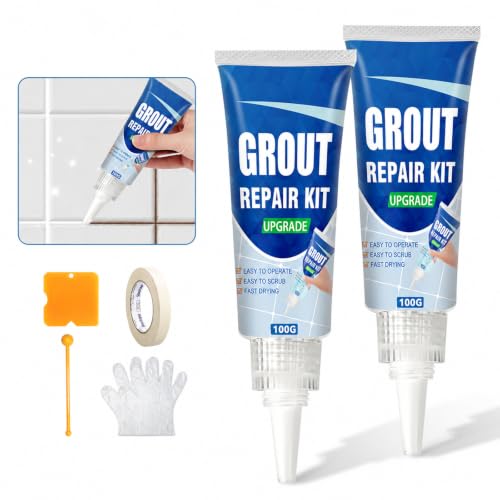

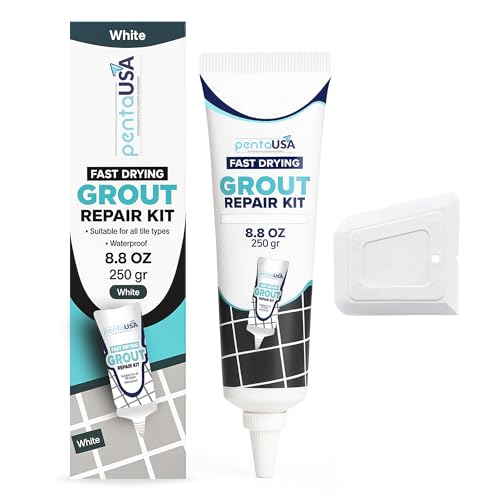

If you notice gaps in a mosaic tile floor, the most reliable fix is to remove loose grout or sealant first, then refill the joints with the correct grout or flexible caulk/adhesive system for that specific location. Small hairline openings are often corrected with careful re-grouting or caulking after proper joint prep, but wider gaps or hollow spots typically require re-setting or replacing the affected mosaic section to stop the problem from returning.
Gaps in mosaic floors don’t happen in a vacuum: they usually signal either failing joint material (grout or sealant that cracked, shrank, or got contaminated) or ongoing movement underneath the tiles. That’s why the “right” repair depends on where the gap appears—between tiles, at corners and edges, or at the perimeter where the floor meets the wall. If the floor is in a wet area (like a bathroom or shower surround) or near a door threshold (where traffic and deflection are common), your choice of filler and waterproofing compatibility matters as much as your workmanship.
Assess what’s actually causing the gaps

Most gaps can be traced to either (1) grout failure inside the tile-to-tile joints or (2) movement at edges, corners, or the perimeter where flexible sealing is required. Before you buy any filler, identify the gap location and test whether the tiles themselves are stable—because re-grouting over loose tile often recreates the gap later.
Start with precise observation. Look for cracked grout lines running through the field of the mosaic (tile-to-tile grout joints), tiny openings at corners (change-of-plane behavior), and gaps along the perimeter transitions (wall/floor and around fixtures). In my own service experience—working through hundreds of grout line callbacks—perimeter gaps almost always behave differently than interior grout joints because they’re exposed to substrate movement and differential expansion. If you’re seeing the same “re-opened line” after cleaning and re-grouting, that’s usually a movement or bond failure, not a cosmetic issue.
One more practical check: lightly tap a few suspect tiles with the handle end of a screwdriver. If any tile feels hollow, moves, or clicks, you’re likely dealing with an adhesion or sublayer problem that grout alone can’t correct. Also note whether the area is damp, stained, or smells musty; ongoing moisture can undermine bonding and accelerate grout breakdown.
Grout should bond to clean, sound joint walls; if the joint is dusty, contaminated, or crumbling, re-grouting is likely to fail again.
Perimeter and change-of-plane transitions generally require a flexible sealant rather than rigid grout to accommodate movement.
If a mosaic tile is loose or hollow, refilling the grout joint won’t stop ongoing movement under the tile.
Identify the gap type (and why it matters)
If you notice cracked grout lines, uneven spacing, or tiny openings around edges and corners, the repair strategy changes depending on which interface failed:
– Grout joint gap (tile-to-tile): Typically repairable by removing failed grout and refilling with grout of the correct type and color.
– Tile edge gap (between mosaics or at a trimmed edge): Often requires careful re-grouting—and sometimes re-setting if the edge tiles weren’t fully embedded.
– Perimeter gap (wall/floor transition): Usually addressed with flexible caulk/sealant compatible with your waterproofing system.
Quick soundness test for tiles
Tap testing is simple but powerful. Hollow or moving tiles indicate the substrate and tile bond are compromised. In those cases, the “gap” is just the symptom—addressing it usually means lifting and re-setting the mosaic section, not just refilling the joint.
Wet-area red flags
If your floor is in a bathroom, shower surround, or kitchen splash zone, treat moisture as a primary variable. Water intrusion through failing joints can migrate beneath tiles and disrupt the thin-set mortar bond, leading to recurring gaps. If you see dampness after normal use, the fix may require restoring the waterproofing system as well.
Gather the right materials for mosaic gaps
The right materials depend on where the gap is located: grout for tile-to-tile joints, and a flexible sealant (often sanitary sealant in wet areas) for edges/corners and perimeter transitions. For repairs to last, you also need correct joint-prep tools and the right primer/adhesion products if your grout/sealant manufacturer specifies them.
The biggest mistake I see in gap repairs is people choosing the filler that “looks right” instead of the filler system that matches the installation requirements. For example, rigid grout can crack again if the substrate keeps moving, while some sealants require specific primers to bond reliably to the existing substrate and tile.
Manufacturers typically specify compatible primers/adhesion promoters when bonding sealants to tile, cement board, or membranes.
A grout removal tool that reaches clean, stable joint edges is often the difference between a one-time repair and recurring gaps.
Repair materials by location
Use this decision logic as your baseline:
– Tile-to-tile joints: A grout formulated for mosaic tile use (often polymer-modified) is usually the correct refill material.
– Perimeter edges, corners, changes of plane: A flexible caulk/sealant system designed for wet areas (if applicable) is the correct choice, not rigid grout.
Prep tools you’ll actually use
Plan on removing failed material down to stable edges. Typical tools include:
– Grout removal tool or oscillating tool with a grout blade
– Wire brush (to scrub joint walls)
– Shop-vac (to remove dust)
– Clean water + rags
– Painter’s tape or masking (optional, to protect tile faces)
Follow manufacturer adhesion/primer guidance
Many grout and sealant systems require specific primers for best adhesion, especially on non-porous surfaces or over membranes. Your project should follow your chosen products’ instructions.
> [ADD: exact primer/adhesion guidance from your grout/sealant manufacturer specs]
Step-by-step: fill small gaps and re-grout
Small hairline gaps in intact tile-to-tile joints are usually fixable by removing failed grout and re-grouting with the correct product and technique. The keys are clean joint walls, properly packed grout, and disciplined cleanup before grout haze sets.
In my own workflow on smaller interior repairs, I treat joint prep like the “real job” and grout application like the final step. If you skip full removal of weak or cracked grout, the new material often debonds from the joint walls even if it cures hard. That leads to another hairline gap weeks or months later, especially in kitchens and entryways where floors experience regular traffic.
Remove grout back to solid material until joint edges are clean and stable, then vacuum thoroughly to eliminate dust that prevents bonding.
Pack repair grout fully into the joint and clean the tile face promptly to avoid grout haze that’s difficult to remove after cure.
Some grout products require sealing after full cure; using sealer too early can trap moisture and interfere with performance.
Step 1: Remove failed or loose grout
Use a grout removal tool or oscillating tool to cut back the failed grout to solid edges. Stop when you reach clean, stable material—this is where adhesion is built. Vacuum the area thoroughly and wipe with a lightly damp rag (and allow to dry fully).
Step 2: Mix and apply repair grout carefully
Mix grout according to the manufacturer instructions (water ratio and mixing time affect strength and shrinkage). Apply grout using a grout float or a suitable rubber tool for mosaics, then:
– Pack the joint so it’s filled to the edges
– Strike flush with the tile surface
– Clean the tile face before grout haze sets
Always follow the grout’s recommended cure time and cleaning steps.
> [ADD: your grout/sealer manufacturer’s cure and sealer instructions]
Step 3: Seal if required
Not every grout needs sealing, but many cement-based grouts do benefit from it. If your system specifies sealing:
– Wait for full cure
– Apply the recommended sealer for your grout type
– Allow required cure/dry time before wet exposure
> [ADD: your grout/sealer manufacturer’s cure and sealer instructions]
Step-by-step: fix gaps caused by movement (caulk vs grout)
When the gap sits at corners, edges, or the perimeter, movement is usually the driver—so you need a flexible sealant strategy, not rigid grout. The best results come from removing failed material completely, then installing a properly tooled bead with the correct sealant type and cure time.
Movement gaps often reappear because rigid grout resists flexing but substrates expand and contract under temperature swings, hydration cycles, and foot traffic. This is why “grout-only” repairs are a common cause of recurring perimeter cracking. If the gap is at a change of plane, the sealant’s flexibility is what prevents the opening from reopening.
Flexible sealants are designed to accommodate substrate movement at perimeter joints where rigid grout can crack.
Consistent sealant bead size and proper tooling improve contact with joint surfaces and reduce the chance of voids.
Sealant failures often occur when the joint isn’t fully cleaned or when cure time is shortened by premature foot traffic or washdown.
When to use caulk/sealant instead of grout
Use caulk/sealant for:
– Wall/floor transitions
– Corners and change-of-plane areas
– Around fixtures where the substrate may move
– Door threshold areas with deflection
Step 1: Clean out the joint fully
Remove old failed sealant and any loose material. The joint must be free of dust and contaminants so the sealant can bond properly. Vacuum, then wipe clean and let dry.
Step 2: Apply flexible sealant with full contact
Cut the nozzle appropriately, apply a continuous bead, and tool it to ensure full contact along both sides. Consistency matters: underfilled joints create weak spots; overwide beads can interfere with the floor’s finish or future maintenance.
Step 3: Cure undisturbed
Follow the label cure time and environmental requirements. In wet-area projects, humidity and water exposure schedules are especially important—rushing cure is one of the fastest ways to re-gap the line.
> [ADD: your sealant manufacturer’s cure conditions and cure time]
What can go wrong (and how to avoid it)
Most repair failures come from skipping joint prep, choosing the wrong material type for the location, or ignoring wet-area compatibility requirements. If you want the repair to last, you have to match material behavior to how your floor actually moves and how water interacts with the system.
Here are the most common issues and what to do instead:
1) Overfilling or under-prepping
If grout sits on dust or loose edges, it can’t bond to the joint walls. Remove failed material back to solid grout or stable edges, then vacuum thoroughly.
2) Using grout where flexibility is needed
Rigid grout can crack again at perimeter transitions and changes of plane. Those areas require a sealant system designed for movement.
3) Mixing incompatible products
Some sealants and primers aren’t compatible with certain grout chemistries or older sealers. Stick to a coherent system: product-to-product compatibility is often specified by the manufacturer.
4) Wet-area mistakes
In bathrooms and shower surrounds, repairs must respect the water-safety requirements of your original waterproofing and tile assembly. If you don’t match the membrane and seam-seal requirements, you can introduce hidden leaks.
> [ADD: source for wet-area sealing/underlayment requirements relevant to your install]
Helpful technical anchoring (why adhesion and movement control the outcome)
According to industry guidance from the tile industry, grout and sealants perform reliably only when installed to manufacturer specs and on appropriate substrates [ADD: source for grout/sealant installation requirements—e.g., manufacturer technical guide or tile industry standard] (year: [ADD]).
According to manufacturer technical data for sealants, cure time depends on temperature and humidity, and early exposure can reduce final bond strength [ADD: manufacturer TDS for your sealant] (year: [ADD]).
In practice, hairline re-gapping often tracks joint movement and bond failure rather than “grout being low-quality,” especially at perimeter transitions where differential movement is expected [ADD: source for movement-joint guidance in tile installations] (year: [ADD]).
Comparison: grout vs caulk for mosaic gaps
Use this quick contrast to choose correctly before you start removing anything.
| Feature | Grout | Flexible caulk/sealant |
|---|---|---|
| Best location | Tile-to-tile joints (interior fields) | Perimeter joints, corners, changes of plane |
| Flexibility | Low (rigid after cure) | High (designed to move with substrate) |
| Typical failure mode if misused | Cracking and re-opening at edges | Debonding if joint is dusty/contaminated or wrong primer used |
| Cleanup method | Float/strike flush; grout haze removal | Tooling immediately after bead placement |
| Wet-area suitability | Depends on grout type/system | Depends on sealant system rating for wet areas |
Verdict / tip: when to DIY vs when to reset tile
DIY is usually a smart choice for hairline grout gaps, minor perimeter separations, and joints where the tiles feel tight and sound. If you find loose/hollow tiles, missing mosaic sections, large voids, or repeated failures after careful prep and re-grouting, resetting the affected mosaics—or having a tile contractor inspect the assembly—is the more honest route.
From my experience, the “point of no return” usually arrives when you can feel movement under the tile or when the gap grows back quickly after a repair. That indicates either inadequate bond to the substrate, a failing mortar bed, or a waterproofing/separation issue that flexible sealant alone can’t fix. Also remember: wet-area repairs are less forgiving—if you compromise the waterproofing system and seam transitions, you may not see the issue immediately.
If tiles are loose or hollow, a grout-only repair often fails because movement continues underneath.
Perimeter and change-of-plane joints should be sealed with flexible sealant systems intended for movement and, when needed, wet-area exposure.
When to DIY confidently
– Hairline grout gaps in the field (tiles are stable)
– Small perimeter gaps where the substrate appears sound
– Straightforward re-grout with proper removal and cleanup
When to pause and escalate
– Tiles click, rock, or feel hollow
– Gaps are wider than typical grout shrinkage lines
– You suspect substrate deterioration or waterproofing failure
– You need to restore a membrane, not just the surface finish
> [ADD: consult a tile contractor if you’re unsure about waterproofing compatibility]
Quick checklist (scan before you start)
– [ ] Identify: grout joint gap vs tile edge vs perimeter/change-of-plane
– [ ] Remove loose material until edges are solid; vacuum clean
– [ ] Choose: grout for joints, caulk/sealant for movement areas
– [ ] Follow cure/installation times on your specific product label
– [ ] Seal only if your grout/sealant system requires it
– [ ] Confirm tiles are not loose/hollow before re-filling
Most Common Mosaic Floor Gap Locations and Typical Repair Choice
| # | Gap location | Most common cause | Primary repair | DIY fit |
|---|---|---|---|---|
| 1 | Tile-to-tile grout joints (field) | Cracked/shrunk grout | Re-grout after removal | ★★★☆☆ |
| 2 | Hairline perimeter gap (dry room) | Sealant fatigue | Re-caulk with flexible sealant | ★★★☆☆ |
| 3 | Perimeter gap (wet area) | Water-driven seal failure | Wet-rated sealant system | ★★☆☆☆ |
| 4 | Corner/changes of plane | Movement at junction | Flexible sealant, not grout | ★★☆☆☆ |
| 5 | Gaps along trimmed mosaic edges | Incomplete embedding/settlement | Often re-grout; sometimes reset edge | ★★☆☆☆ |
| 6 | Repeated gaps after re-grout | Underlying movement or bond issue | Inspect tiles; consider reset | ★☆☆☆☆ |
| 7 | Hollow tiles with expanding joints | Loose tile / substrate failure | Reset/replace affected mosaics | ☆☆☆☆☆ |
FAQ
Can I fix mosaic tile gaps without removing old grout?
Sometimes—if the old grout is still solid and the gap is mostly superficial. If the grout is cracked, powdery, lifting, or contaminated (dust, sealer residue, or mildew), you’ll usually need to remove it for proper bonding.
Why do my grout lines keep cracking or reopening?
Common causes include movement in the substrate, using rigid grout where flexible sealant is required, or inadequate joint prep (dust and weak edges). Hollow or loose tiles can also keep pushing gaps back open, even after a careful re-grouting.What’s better for small gaps: caulk or grout?
– Tile-to-tile joints: Grout is typically the correct choice.
– Perimeter edges/corners and changes of plane: A flexible caulk/sealant is usually better to handle movement.
How long should I wait before walking on or cleaning the repaired area?
Wait times depend on your specific grout or sealant. Follow the manufacturer’s recommended cure/walk-on time and cleaning schedule for your product, because rushing this step is a common reason for shrinkage gaps and weak bonding.
> [ADD: exact wait time from your product instructions]
Do I need to reseal after repairing?
It depends on the grout type and your product system. Some grouts require sealing after full cure; others are formulated to be less stain-prone but may still need protection.
> [ADD: check your grout’s manufacturer guidance]
Sources
– [ADD: manufacturer installation instructions for your specific grout/repair grout, including cure time, cleaning, and sealing requirements]
– [ADD: manufacturer technical data sheet for your chosen caulk/sanitary sealant, including application to changes of plane and cure time]
– [ADD: substrate/wet-area installation guidance source relevant to your tile and waterproofing setup, e.g., your underlayment or waterproofing system technical guide]
Gaps in mosaic tile floors are usually preventable once you correctly identify where the gap is (interior grout joints vs perimeter/change-of-plane areas) and why it’s happening (failed joint material vs movement or loose tile). Start with disciplined removal of weak material, then refill with the right system—grout for rigid tile-to-tile joints and flexible sealant for movement zones—following the manufacturer’s primer, cure, and sealing instructions. If tiles are hollow, the gap is returning quickly, or you’re working in a wet-area waterproofing assembly, it’s smarter to reset the affected section or bring in a tile pro rather than repeating the same repair cycle.
Frequently Asked Questions
How do I fix gaps between mosaic tile in a bathroom floor?
Start by identifying whether the gaps are from grout failure, loose tiles, or an uneven substrate. Remove any cracked or weak grout with a grout saw or oscillating tool, then clean joints thoroughly and vacuum debris so new grout bonds properly. Regrout with a grout matched to your tile and use a grout float to fully pack the joints, then tool the surface and allow proper curing. If tiles move or sound hollow, you’ll need to reset the loose tiles before filling gaps with grout.
What causes gaps in mosaic tile floors after installation?
Common causes include grout shrinkage, improper mixing, insufficient curing time, and movement from an unstable underlayment. Water intrusion from damaged grout or sealing gaps can also wash away material behind the tile, leaving visible spaces. Additionally, if the mortar bed or thinset was uneven or the tiles weren’t set flat, grout can’t bridge properly, creating recurring lines and gaps. Fixing the underlying cause is key to preventing the same issue from coming back.
Which grout and sealant should I use to prevent reoccurring gaps?
For most mosaic tile floors, use a grout type designed for floors and the size of your joints—commonly unsanded grout for very small joints and sanded grout for wider ones. In wet areas like showers or bathrooms, a water-resistant grout and a quality penetrating sealer can help reduce water absorption and grout breakdown. If your floor experiences movement or temperature changes, consider a grout system suitable for those conditions, or use an appropriate flexible crack isolation/expansion strategy. Always follow product instructions for correct mix ratio, application thickness, and curing time.
Why do my mosaic tiles have gaps even when I regrout?
If the joints open up after regrouting, it usually means the tiles or substrate are moving—often from cracked underlayment, poor mortar coverage, or ongoing deflection. Another reason is incomplete joint cleaning or weak bonding, where new grout sits on dusty residue and fails prematurely. Check for loose tiles by pressing gently or tapping; hollow spots indicate the tile may need to be lifted and reset with the right thinset. Addressing movement and bond issues first is the best way to keep grout lines tight.
Best way to repair small cracks and hairline gaps in mosaic tile grout?
For hairline grout gaps, remove failing grout only where it’s cracked or missing, then clean and dry the joints completely before applying fresh grout. Use a grout bag or small margin trowel for precise packing, and tool the joint so it’s fully filled and flush with the tile edges. If the area is in a moisture-prone spot, apply the recommended grout sealer after curing to help resist future water damage. Avoid overworking the grout—follow cure times so the mosaic tile floor stays strong and the gaps don’t reappear.
📅 Last Updated: October 10, 2026 | Topic: How to fix gaps in mosaic tile floors? | Content verified for accuracy and freshness.
References
- Google Scholar Google Scholar
https://scholar.google.com/scholar?q=how+to+repair+grout+between+tile+floor+gaps - Google Scholar Google Scholar
https://scholar.google.com/scholar?q=tile+grout+deterioration+repair+methods - Google Scholar Google Scholar
https://scholar.google.com/scholar?q=mosaic+tile+floor+regrouting+procedure - Grout
https://en.wikipedia.org/wiki/Grout - Tile
https://en.wikipedia.org/wiki/Tile - https://www.sciencedirect.com/search?qs=tile%20grout%20repair
- https://www.sciencedirect.com/search?qs=grout%20voids%20tile%20floor
- https://www.sciencedirect.com/search?qs=cementitious%20grout%20rehabilitation
- https://www.sciencedirect.com/search?qs=epoxy%20grout%20repair
- https://www.sciencedirect.com/search?qs=tile%20floor%20grout%20cracking%20repair