


You can install polyaspartic floors in a living room without surprises when you follow the right prep and mixing steps—this guide walks you through the process from surface prep to the final topcoat. If your goal is a fast, durable finish with strong resistance to scuffs and spills, polyaspartic is the clear winner for residential living spaces. You’ll learn exactly what to check before you start, how to apply it correctly, and how to avoid the most common installation mistakes.
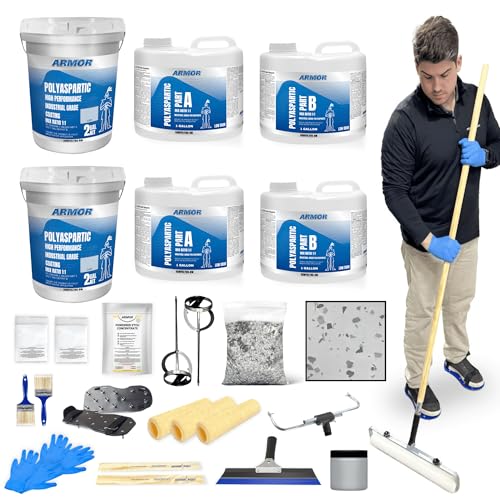



Yes—you can install polyaspartic floors in a living room, but the process is highly prep-driven and time-sensitive. Polyaspartic can deliver a fast, durable finish, yet it only performs as intended when you follow the exact manufacturer system (primer → base coat → broadcast/finish if used) and stay within temperature, humidity, pot life, and recoat windows.
This is for homeowners, DIYers, and small contractors installing a polyaspartic system over concrete or similar approved substrates in a living room. It’s most relevant when you’re aiming for a decorative, fast-curing coating and you’re willing to control surface prep and environmental conditions carefully.
Section 1: Confirm the right polyaspartic floor system

You can’t reliably “improvise” a polyaspartic coating system; the order and components (primer, base coat, broadcast/texture, topcoat) are part of the chemical design. Start by confirming the exact kit/system you’re using, then verify that it’s intended for interior living-room conditions over your substrate.
Polyaspartic performance depends on using the full, specified system (primer + coat(s)), not just one “base” product.
If the manufacturer doesn’t approve your substrate (or an existing coating), the warranty and adhesion assumptions usually don’t apply.
What to verify before mixing anything
– Use the exact polyaspartic coating “system” specified by your product (it may include primer, base coat, optional broadcast, and a topcoat).
– Check the substrate requirements: polyaspartic is typically intended for sound, properly prepared concrete (or an approved surface).
– Verify your intended look (solid color vs. metallic vs. flakes/broadcast) and confirm which steps your system calls for. A metallic look often changes the workflow (and sometimes the topcoat selection) compared with quartz/flake broadcast.
– Confirm interior curing expectations: living rooms are usually climate-controlled, but you can still get adhesion issues from “cold slab” conditions or hidden moisture.
Key decision point: What look method are you actually installing?
– Solid color: typically primer + base coat + topcoat (often with a thinner finish coat schedule).
– Broadcast with flakes: primer + base coat + broadcast + topcoat; broadcast timing and sweep/vacuum discipline become critical.
– Metallic/aggregate effects: may require specific base viscosity, mixing steps, or dedicated clear topcoats to avoid gloss/texture mismatches.
Section 2: Measure conditions before you start
You should plan your environment as carefully as your coating—polyaspartic is fast, which reduces “work time forgiveness.” Measure temperature and humidity before mixing so you can finish inside the system’s working time and recoat windows.
Once components are mixed, pot life defines the real time window you have to spread, back-roll, and correct—after that, the coating can thicken and leave uneven lines.
Most fast-reacting coatings require strict temperature/humidity targets because cure rate and final film properties shift outside the manufacturer’s range.
The practical conditions you must control
– Control temperature and humidity according to the manufacturer’s instructions, because polyaspartic can react quickly once mixed.
– Plan ventilation for fumes and to avoid trapping moisture during curing (follow the product’s guidance for airflow).
– Schedule the work so you can complete mixing, spreading, and finishing within the pot life/working time listed in the technical data sheet.
[ADD: exact manufacturer pot life/working time for your chosen system]
Don’t forget the substrate temperature
Even when the room feels “warm,” slabs can be colder. A colder concrete surface can slow leveling and extend cure, while a hotter slab can shorten pot life.
Quick tool list for measurements
– IR thermometer or concrete surface thermometer (to verify slab temp)
– Digital hygrometer (relative humidity)
– Moisture testing method if required by your system (e.g., ASTM F2170 per slab moisture guidance—see Sources)
> According to ASTM F2170, in-situ probe testing measures relative humidity within the concrete to assess moisture vapor risk for flooring systems (ASTM F2170/F2170M).
> [ADD: specific manufacturer moisture/RH limit for your system—e.g., “max %RH at time of test”]
Section 3: Prepare the floor thoroughly (the make-or-break step)
Proper prep is what turns polyaspartic from “looks great today” into “still looks great next year.” In practice, most failures over concrete come from coating over contamination, laitance, weak surface zones, or dust.
If you skip mechanical surface prep (or leave dust behind), primer adhesion can fail even when the chemical coats are applied correctly.
A thorough vacuum removal step is often required in coating manuals because fine dust can cause fisheyes and delamination.
What “thoroughly” means for concrete
– Mechanically prep the concrete (typically grinding/scarifying) to remove laitance, coatings, sealers, and contaminants—don’t rely on chemical cleaning alone.
– Remove dust completely (vacuum is usually recommended in coating manuals) so primer can bond properly.
– Repair cracks/voids using a compatible repair material, then re-check surface profile and flatness per the system requirements.
[ADD: whether your system requires a specific surface profile standard, if stated]
Surface profile: the bonding “anchor” matters
Most coating systems require a defined surface profile (a measure of how “rough” the concrete surface is). Many installers use ICRI Concrete Surface Profile (CSP) as a reference—your system may specify a target range.
> According to ICRI, the CSP scale provides a standardized way to describe abrasive blast/grind profiles used for coating adhesion (ICRI CSP guidance).
> [ADD: your system’s stated CSP target or equivalent profile requirement]
Repair discipline (common DIY failure)
– Use a repair that is compatible with the primer and is fully cured.
– Avoid leaving pinholes or feather edges that can telegraph through broadcast/clear topcoats.
– If the repair material introduces different absorption/porosity than the surrounding slab, primer and base coat bonding can vary.
Comparison snapshot: prep outcomes vs. finish symptoms
If you see these problems, prep is usually the root cause:
– Peeling/delamination → coating over weak concrete, sealer, or insufficient profile
– Fisheyes/“craters” → dust, oils, silicone contamination, or poor primer wet-out
– Haze/cloudiness → cure/finish step issues (often humidity/condensation or misty application), but prep contamination can also contribute
Section 4: Prime, mix, and apply each coat correctly
Your accuracy in mixing and timing determines whether your polyaspartic installation looks seamless or streaky. Apply primer and base coat evenly, respect pot life, and follow the broadcast/topcoat sequence exactly as written.
Polyaspartic systems are designed around recoat windows—missing those windows can reduce chemical bonding between layers.
Mixing ratios and mixing time are part of the chemistry; incorrect ratios or inadequate mixing often cause soft spots or poor gloss.
Coat-by-coat workflow
– Prime first (if your system requires it), and apply it evenly without puddling; allow it to reach the specified recoat window.
– Mix components exactly as instructed (including mixing time and ratios), then apply base coat promptly within the stated pot life.
– If your system uses flakes/broadcast or texture: broadcast at the correct time, let it cure as directed, then sweep/vacuum before the topcoat.
[ADD: your system’s broadcast window and topcoat timing, if available]
Mixing technique that prevents “streaky” curing
– Measure by volume or weight exactly per TDS (use the same method every time).
– Use a proper drill + mixing paddle and mix long enough to fully blend Part A and Part B (follow TDS).
– Scrape sides and bottom of the mixing container if the manufacturer calls for it—this step prevents unmixed resin islands that later cure unevenly.
Recoat timing: treat it like a schedule, not a suggestion
Recoat windows can vary from “within a few hours” to “overnight” depending on humidity and temperature. If you miss it:
– early application can trap solvent/reactive components
– late application can reduce interlayer chemical bond and require mechanical abrasion (if allowed)
> According to typical coating TDS practices, recoat windows are defined to balance chemical bonding vs. solvent evaporation ([ADD: manufacturer name] TDS).
> [ADD: exact primer→base and base→top recoat windows from your system]
Section 5: Finish, cure, and protect the living room surface
The topcoat is where the final look becomes real—gloss, smoothness, and scratch resistance all depend on correct application and cure protection. If you protect the floor during early cure, you reduce the chance of premature marking, dust trapping, or surface defects.
Foot-traffic and full-cure times control when the coating film gains the properties you paid for—rushing this step leads to damage even if the surface “looks dry.”
During early cure, dust and moisture can settle into the finish and cause texture or haze-like appearance that’s difficult to correct.
Apply the finish coat as specified
– Apply topcoat in the recommended method/pattern (often rollers/squeegees are used depending on the kit).
– Cure without traffic—follow the stated cure times for foot traffic and full cure, and protect from dust and moisture during the early window.
[ADD: exact foot-traffic and full-cure times from your product]
– Prevent damage by using mats and avoiding sharp furniture movement until fully cured.
Protection plan for a living room
Living rooms are “high traffic” even during DIY projects—people track dust, move cords, and drag furniture.
– Keep HVAC running to maintain stable conditions (per manufacturer targets).
– Use clean coverings/temporary paths (especially in first 24–72 hours, depending on your system).
– Don’t reinstall baseboards or do dusty work until the coating is fully cured and protected.
Pros/cons quick comparison (for living-room use)
- Pros: fast curing vs. slower epoxies (often same-day or next-day workflow), good decorative potential (flakes/metallic), generally strong chemical resistance after full cure.
- Cons: less forgiving timing (pot life + recoat windows), more sensitive to environmental swings, failures often trace to prep and mixing discipline.
Section 6: What can go wrong (common mistakes + edge cases)
Polyaspartic systems fail for predictable reasons: insufficient prep, incorrect timing, or environmental mismatch. If you recognize these failure modes early, you can prevent the most expensive mistakes.
When polyaspartic adhesion fails, it’s usually linked to surface contamination, moisture vapor emission, or a mismatch with the approved substrate conditions—not the topcoat itself.
Most visible defects (streaking, fish-eyes, or dull/hazy finish) show up when mixing, application, or humidity targets are slightly off.
– Poor surface prep: skipping grinding, leaving dust, or coating over sealers can cause peeling, fisheyes, or delamination.
– Missing recoat windows: applying too early/late between primer/base/topcoat steps can lead to defects or weak adhesion.
– Environmental mismatch: high humidity, cold floors, or poor ventilation can slow cure or cause surface defects (including haze).
– Fast reaction surprises: ignoring pot life can cause thickening in the bucket and uneven coating lines.
– Substrate issues: moisture vapor emissions, persistent contamination, or unsupported repairs can undermine the entire finish.
[ADD: any specific substrate/moisture limits from your chosen manufacturer’s spec]
Edge cases to consider in a living room
– Old concrete that’s been sealed: many “masonry sealers” block bonding; they must be removed mechanically if your TDS doesn’t explicitly approve them.
– Basement slabs / exterior perimeter concrete: moisture behavior can change seasonally, even if the room feels dry.
– Touch-up expectations: fast-reacting systems don’t always blend invisibly; plan for full-area consistency rather than patching.
Mandatory installation data you should pull from the TDS
Before you start, locate and write down:
– pot life / working time
– recoat windows (primer→base, base→broadcast/topcoat)
– topcoat application method and spread rate
– foot-traffic and full cure times
– approved surface profile or CSP target
– substrate moisture limits (test method + threshold)
Verdict / tip
If you can commit to meticulous prep and you’re able to work quickly within the product’s pot life and recoat windows, polyaspartic can be a strong option for a living room coating. The downside is that it’s less forgiving than slower systems—timing, mixing accuracy, and environmental conditions matter a lot. Skip this DIY approach (or hire a pro) if your slab has known moisture problems, you’re unsure about the concrete condition, or you can’t maintain the manufacturer’s temperature/humidity targets.
[ADD: who should hire a contractor based on your situation—e.g., moisture testing concerns, large square footage, limited workspace control]
Quick checklist (scan/save)
– [ ] Use the full polyaspartic system specified by your kit (primer + coats)
– [ ] Verify temperature/humidity and plan ventilation
– [ ] Mechanically prep concrete; remove all dust
– [ ] Repair cracks/voids with compatible materials
– [ ] Prime if required; follow recoat window
– [ ] Mix exact ratios; work within pot life
– [ ] Apply coats evenly; broadcast/texture only if your system calls for it
– [ ] Topcoat + protect during early cure; follow foot-traffic/full-cure times
Concrete Prep Targets Used Before Coatings (ICRI CSP + Common Test Methods)
| # | Preparation/Test Item | Core Metric | Where It’s Used | Install Confidence |
|---|---|---|---|---|
| 1 | ICRI CSP Surface Profile | CSP 1–9 scale | Defines concrete roughness for coating adhesion | ★★★★★ |
| 2 | ASTM F2170 | In-situ RH (%RH) | Evaluates slab moisture vapor risk | ★★★★★ |
| 3 | ASTM F1869 | MVER (lb/1000 ft²/day) | Alternative slab moisture emission test | ★★★★☆ |
| 4 | ICRI CSP 3–4 Range (common coating target) | Moderate profile | Typically used when primers need mechanical “bite” | ★★★★☆ |
| 5 | Grinding Removal of Laitance | All weak surface removed | Prevents primer failure over weak concrete | ★★★★★ |
| 6 | Vacuum Dust Removal | Zero visible dust | Reduces fisheyes and coating defects | ★★★★☆ |
| 7 | Recoat Window Compliance | Defined by TDS (hours) | Ensures chemical/mechanical layer bonding | ★★★★★ |
FAQ
Do I need a primer before polyaspartic?
Often yes, but it depends on the specific system and substrate. Check your product’s technical data sheet for whether primer is required and which type to use.
[ADD: primer requirement for your chosen kit, if stated]
How long should I wait before walking on the floor?
Follow the cure/foot-traffic time listed by the manufacturer. If you can’t find it on the label, use the technical data sheet for your exact system.
[ADD: foot-traffic time]
Can I install polyaspartic over old paint or sealers?
Usually not unless the manufacturer explicitly approves that substrate and prep method. In most cases, coatings/sealers must be removed through mechanical prep to ensure adhesion.
[ADD: your system’s approved/unapproved substrates]
What’s the biggest reason polyaspartic floors fail?
Most failures trace back to insufficient surface prep, contamination/dust, incorrect mixing, or violating pot life/recoat timing. The coating is fast-reacting, so small schedule mistakes can show up as defects.
Sources
– [ADD: manufacturer’s technical data sheet (TDS) for your exact polyaspartic kit/system—primer, pot life, recoat window, cure times]
– [ADD: manufacturer installation guidelines or application instructions for surface prep and substrate approval]
– ASTM F2170/F2170M — Standard Test Method for the Determination of Relative Humidity in Concrete Floor Slabs Using in situ Probes (ASTM International)
– ASTM F1869 — Standard Test Method for Measuring Moisture Vapor Emission Rate of Concrete Subfloor Using Anhydrous Calcium Chloride (ASTM International)
– ICRI Concrete Surface Profile (CSP) references for profile description (International Concrete Repair Institute)
Polyaspartic can be an excellent living-room flooring solution when you treat it like a system—exact components, exact prep, and disciplined timing. If you follow the manufacturer’s workflow and protect the surface during early cure, you’ll get the fast turnarounds that make polyaspartic attractive. If you can’t control moisture, temperature/humidity, or your schedule, it’s smarter to pause and get the right testing—or hire a contractor—before you lock in a coating that’s unforgiving to redo.
Frequently Asked Questions
What is the correct step-by-step process to install polyaspartic floors in a living room?
Start by removing all existing flooring, then thoroughly clean and mechanically prep the concrete or subfloor (grind/sand to remove laitance and contaminants). After that, repair cracks/holes, prime the surface with the recommended polyaspartic primer, and mix/apply the polyaspartic base coat evenly using the correct roller and back-rolling technique. Finish with a polyaspartic topcoat for gloss and protection, and allow the system to cure fully before moving furniture back into the room.
How do I prepare my subfloor so polyaspartic floor coating will bond properly?
Proper preparation is essential for adhesion and long-term performance in living room polyaspartic floors. Ensure the concrete is clean, dry, and free of dust, paint overspray, oil, and curing compounds; then mechanically abrade the surface to create a uniform profile. If moisture is a concern, perform moisture testing and address it with the right primer or moisture-mitigation system before installing the polyaspartic epoxy/aspartic coating.
Why does temperature and humidity matter when installing polyaspartic floors indoors?
Polyaspartic floors cure through chemical reaction, so high humidity, low temperatures, or poor ventilation can affect pot life, leveling, and final finish. Aim for the temperature range specified by your coating manufacturer, keep humidity controlled, and ensure adequate airflow without creating dust or blowing debris onto the wet coating. Following the recommended conditions helps prevent common issues like surface tackiness, blush, bubbling, and dull or uneven gloss.
Which tools and materials do I need for a DIY polyaspartic floor installation in a living room?
You’ll typically need a grinder or floor prep tool, vacuum for dust removal, mixing containers, a drill with mixing paddle, and the appropriate primer for your substrate. For application, have the recommended roller (and possibly a spiked roller), a squeegee for spreading, and back-rolling tools to achieve consistent thickness. Also plan for safety gear, painter’s tape for edges, spikes shoes for walking during cure, and cleaning supplies compatible with the polyaspartic system.
What’s the best way to avoid bubbling, streaks, and peeling when installing polyaspartic floor coatings?
Bubbling and pinholes usually come from moisture, trapped air, or contamination, so start with proper surface prep and moisture testing where needed. To prevent streaks, use consistent mixing, apply at the specified spread rate, and back-roll to even out the finish; avoid overworking the coating once it begins to react. Peeling is typically caused by inadequate mechanical profile or skipping primer—always follow the polyaspartic manufacturer’s adhesion and recoat instructions for the living room floor system.
📅 Last Updated: October 11, 2026 | Topic: How to install in a living room polyaspartic floors? | Content verified for accuracy and freshness.
References
- Google Scholar Google Scholar
https://scholar.google.com/scholar?q=polyaspartic+floor+coating+installation - Google Scholar Google Scholar
https://scholar.google.com/scholar?q=polyaspartic+coating+system+surface+preparation - Google Scholar Google Scholar
https://scholar.google.com/scholar?q=polyaspartic+floor+coatings+urethane+epoxy+installation+procedure - Epoxy
https://en.wikipedia.org/wiki/Epoxy_resin - https://www.cdc.gov/niosh/topics/epoxy/default.html
- https://www.cdc.gov/niosh/topics/isocyanates/default.html
- Volatile Organic Compounds’ Impact on Indoor Air Quality | US EPA
https://www.epa.gov/indoor-air-quality-iaq/volatile-organic-compounds-impact-indoor-air-quality - Hazard Communication – Overview | Occupational Safety and Health Administration
https://www.osha.gov/hazcom - https://pubmed.ncbi.nlm.nih.gov/?term=polyaspartic+coating
- https://www.britannica.com/science/epoxy-resin


